
User`s guide


6-56
Calibrating for Increased Measurement Accuracy
LRM Error Correction
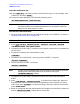
Label the Calibration Kit
18.Press and create a label up to 8 characters long. For this example, enter
"LRM KIT1" and press .
19.To save the newly defined kit into nonvolatile memory, press:
NOTE Refer to "Saving Modified Calibration Kits to a Disk" on page 7-65 for
information about saving modified calibration kits, along with calibration
data and instrument states, to a disk.
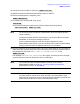
Perform the LRM Calibration
1. You must have a LRM calibration kit defined and saved in the USER KIT, as shown in
"Modifying Calibration Kits" on page 7-56.
NOTE This must be done before performing the following sequence.
2. Press
.
3. To measure the "LRM THRU," connect the "zero length" transmission line between the
two test ports.
4. To make the necessary four measurements, press:
5. To measure the "LRM SHORT," connect the short to PORT 1, and press:
6. Connect the short to PORT 2, and press:
NOTE If loads can be connected to both port 1 and port 2 simultaneously, then the
following LRM load measurement can be performed using the
softkey.
7. To measure the "LRM LOAD," disconnect the short and connect the LRM load to
PORT1.
8. Press to access the No Loads menu. When the
displayed trace settles, press the softkey corresponding to the load used. If a sliding
load is used, press to access the Sliding Load menu. Position the slide and
press .
9. When all the appropriate load measurements are complete, the load data is measured
and the softkey label is underlined.
LABEL KIT
DONE
KIT DONE (MODIFIED)
SAVE USER KIT
Cal
CAL KIT
SELECT CAL KIT
USER KIT
RETURN
RETURN
CALIBRATE MENU
TRL*/LRM* 2-PORT
LRMTHRU
S11 REFL LRMSHORT
S22 REFL LRMSHORT
DO BOTH FWD+REV
LINE/MATCH
LN/MATCH1 LOAD
SLIDING
SLIDE IS SET
LN/MATCH1 LOAD