
User`s guide


5 Sample Sessions: Instrument Configuration How to Set up the Printer Configuration
142 E6000C Mini-OTDR User’s Guide, E0302
Select printer 4 Cursor U
P to the box headed Printer. If the printer
listed there is not the one you want, press S
ELECT.
Choose a printer from the available ones listed.
NOTE Most HP printers (but not the Thinkjet) will work in the
HP LaserJet, 100dpi setting. For non-HP printers, set
emulation mode on your printer, and select an
appropriate print option.
So, select the HP LaserJet/HP DeskJet for HP
emulation, PCL for PCL emulation, or Epson 8-pin for
Epson emulation.
Choose a 150 dpi option if you want a compact printout.
Select logo 5 If you want to change the printed logo, cursor D
OWN to
Printout Logo and press S
ELECT. Choose a logo from
the available .PCX files. Select Default for the default
Logo, or Select for the one that is currently
highlighted.
If you want to create a new logo, follow the steps in
How to Add a Logo, below.
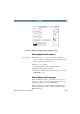
Specify what is printed 6 Look at the options on the right of the Printer Setup
window. There is a tick next to the features that will
appear on the printout. If you wish to add or delete any
of these features, move to that item and press S
ELECT.
7 When you have the printer configuration you want,
select
Save
then
OK
to return to the main trace window
or Applications Screen.
How to Add a Logo
To add a specified logo to the screen and printout, you
should do the following: