
Installation guide

Setting up a LAN Instrument Network 12
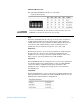
The initial installation requires that you connect the software
keypad directly to the GC using this address. During installation
this IP address can change or be set to use DHCP.
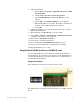
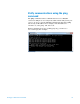
1. Start the software keyboard. From the Windows® Start program
menu, Agilent > All Programs > Agilent Technologies > 7820A GC
Remote Controller.
2. Connect to the GC. Go to Connection > Connect…. In the Target
field, enter the current GC IP address
3. Click [Options]. Scroll to Communications and click [Enter].
4. Verify DHCP is off. Scroll to Enable DHCP. If Enable DHCP is Off,
skip to the next step.
If Enable DHCP is On, turn it off by clicking [Off/No]. Scroll to
Reboot GC. Click [On/Yes] and [On/Yes]. After reboot, click
[Options]. Scroll to Communications and click [Enter].
5. Scroll to IP. Use the numeric keypad to enter the numbers of the
GC IP address, separated by dots, and click [Enter]. A message
tells you to power cycle the instrument. Do not power cycle yet.
Click [Clear].
6. Scroll to GW. Enter the Gateway number and click [Enter]. A
message tells you to power cycle the instrument. Do not power
cycle yet. Click [Clear].
7. Scroll to SM and click [Mode/Type]. Scroll to the appropriate
subnet mask from the list given and click [Enter]. A message tells
you to power cycle the instrument. Do not power cycle yet. Click
[Clear].
8. Scroll to Reboot GC. Click [On/Yes] and [On/Yes] to power cycle
the instrument and apply the LAN setpoints.
9. Ping the GC using the IP address entered above. See the
Troubleshooting manual for details or if the GC does not
respond.