
Troubleshooting guide


Lab Exercise: Advanced Reporting
Adding a Report Header
125
Adding a Report Header
You may add an individualized header to many of the report styles including:
Detail, Header + Short, GLP + Short, GLP + Detail, and Full. The directions
presented below will guide you through this process.
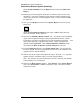
1) Go to the Data Analysis view. Load the method, Advrep.M. Try using the
Load Method tool.
2) From the Start button, select All Programs, then Accessories.
3) Open Notepad.
4) After Notepad loads, type in information to test the header. Try your name
and company address or similar information.
5) Under the File menu, select Save As…. The header must be saved as
rpthead.txt to the specific method you will use. For example:
C:\Chem32\1\methods\advrep.m\rpthead.txt
Save the file as a text document. Make certain the entire path is correct.
6) Exit Notepad (File, Exit).
7) Make certain that you are in the Data Analysis view. Load the data file
Lab4m.d by double clicking on the file in the Navigation Table or by
selecting File, Load Signal..…
8) From the Report menu, find Specify Report. You may also access this panel
from the Select Integration Task tool followed by the Specify Report
Calculation and Print Style tool.
9) Select the Printer destination, ESTD by Area with a GLP + Detail report
style. You may also add a chromatogram output. OK the dialog box.
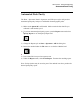
10) Now from the Report menu, select Print Report or use the Print Report tool.
11) Find your personalized header information on the printed report. The GLP
report style was utilized in this example. Note that this report style includes a
printout of the run logbook.