
Technical data


82 Chapter 6
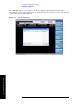
Front Panel Sequence Setup
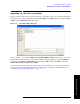
Front Panel List Sequencer Setup
Front Panel Sequence Setup
Step 3. To make choices for a particular acquisition, you must make sure it is selected as the “current”
acquisition. See the
Current Acquisition softkey; if it shows “1”, then any settings you make,
in the steps described below, will apply only to the first acquisition. To set up a different
acquisition, enter a different number.
Step 4. Use the
Avg Number softkey to specify the number of averages for the acquisition. This
setting applies to all analysis steps in the acquisition, but does not apply to other acquisitions
in the sequence.
Step 5. Select
Radio Setup, Radio Standard. Select a radio standard from among these choices:
•
None
•GSM
•EDGE
•W-CDMA
•cdma2000
•1xEV-DO
•LTE
•LTE TDD
•TDSCDMA
Step 6. Having selected a radio standard, select one of the radio bands for that standard, using the
softkeys which are then displayed.
Step 7. Return to the
Radio Setup menu, and select the Device Type. (However, only the MS type is
currently supported.)
Step 8. Return to the
Acq Setup menu, and set the channel or frequency.
If you have set the radio standard and radio band to values other than “None”, use the
Channel Softkey to select an appropriate channel number (the test set uses the radio standard,
radio band, and channel settings to determine frequency).
Or, if you have set the radio standard or radio band as “None”, use the
Frequency softkey to
set the frequency directly.
Step 9. In the
Acq Setup menu, set the Peak Power in dBm.
Step 10. In the
Acq Setup menu, set the Transition Time (a period at the beginning of the acquisition,
required for frequency or power changes) the acquisition, in ms or other time units.
Step 11. In the
Acq Setup menu, set the Acquisition Duration, in ms or other time units.
Step 12. In the
Acq Setup menu, select the Input Trigger Type for the acquisition. The choices are:
•
Free Run
•Video (IF Envelope)
•Internal
•External 1
•External 2
Step 13. In the Acq Setup menu, set the Video Trigger Level, in dBm or -dBm.