
Technical data


Chapter 6 85
Front Panel Sequence Setup
Front panel source sequence setup
Front Panel Sequence Setup
Front panel source sequence setup
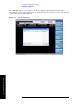
The source list sequencer can be set up using the front panel to generate an output either separately or
simultaneously with the analyzer list sequencer. To access the full flexibility of the list sequencer it is
recommended that you use the spreadsheet to set up the sequence (see Chapter 7 , “List Sequencer
Spreadsheet Data Entry,” on page 91).
This chapter as well as showing you how to create a sequence from the front panel is useful information
if you have already loaded a sequence file into the list sequencer and you are using the front panel to
modify parameters. You can subsequently save the changes you make to a new sequence file using the
Save menu.
To set up a sequence proceed as follows:
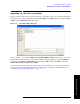
Step 1. Press
Source, List Sequencer, List Sequencer Setup.
Step 2. Use the
Number of Steps softkey to set the total number of source steps in the sequence.
Alternatively, add or remove steps using the
Insert Step Before, Delete Step, or Clear List
softkeys.
Step 3. To make choices for a particular step, you must make sure it is selected as the “current” step.
See the
Current Step softkey; if it shows “1”, then any settings you make, in the procedure
described below, will apply only to the first step. To set up a different step, enter a different
number.
Step 4. In the
List Sequencer Setup menu, select Step Trigger for the source step. The choices are:
•
Free Run
•Internal
•Manual (Trigger Key)
•Bus
•External 2
Step 5. In the List Sequencer Setup menu, set the Transition Time for the source step.
Step 6. In the
List Sequencer Setup menu, select Radio Setup, Radio Standard. Select a radio
standard for the source step from among these choices:
•
None
•GSM
•EDGE
•W-CDMA
•cdma2000
•1xEV-DO
•LTE
•LTE TDD
•TDSCDMA
Step 7. Having selected a radio standard, select one of the radio bands for that standard, using the
softkeys which are then displayed.