
Technical data

284 Chapter 10
Distance to Fault
Measuring Distance to Fault
Distance to Fault
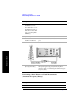
13 Enter the start distance
using the numeric
keypad.
The start distance you can enter cannot be greater
than the distance displayed in the Measured
Distance window at the top right. If you need a
larger distance, reduce the start and stop frequency
span.
If your Start Distance is 0 m (0 ft), you will see a
peak corresponding to 0 m (0 ft). This is caused by
reflection from the junction between your analyzer
and the cable under test. This does not necessarily
indicate a problem, but be sure that this connection
is tight and clean.
14 [Stop Distance]
15 Enter the stop distance
using the numeric
keypad.
The stop distance you can enter cannot be greater
than the distance displayed in the Measured
Distance window at the top right, but must be
greater than the start distance previously entered. If
you need a larger distance, reduce the start and stop
frequency span.
16 [Cable Type]
17 On [Cable Type] on the
right, select
RG, BTS,
or
Cust.
Each time you press this softkey, the selected
option changes. If you select
RG or BTS, you will
be asked to select from a list of common cable
types, the specific type of cable you are measuring
[Select Cable].
If the type of cable you are measuring is not listed,
you need to select
Cust (Custom Cable). Proceed to
Step 20 for custom cable selection.
18 Press [Select Cable] to
display a predefined list
of RG and BTS cables.
Use the knob, or the up and down arrow keys, to
scroll through the list and to highlight your chosen
cable.
19 [Select] The type of cable you selected will be displayed at
the upper left of the screen. Now proceed to Step
21.
Step Notes