
Technical data


Chapter 2 47
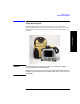
One Port Insertion Loss
Measuring One Port Insertion Loss
One Port Insertion Loss
Return Loss measurement, and Distance to Fault measurements using a frequency
range that you will set manually, you can perform one calibration for all three
measurements as long as you calibrate over a frequency range that incorporates all
three of your measurements, and as long as your cables do not change. For this
reason, if you are doing Distance to Fault measurements (using a frequency range
that you have set manually) as well as any type of Insertion Loss measurement,
Agilent recommends that you select your cable type before performing calibrations.
Press [Mode], [Antenna/Cable], [Distance to Fault], [Cable Type] to set the cable
type.
The calibration remains valid until you do any one of the following:
• set the Distance to Fault frequency range to
Auto. Note that the calibration will
become valid again as soon as you switch from
Auto back to Manual Frequency
Range.
• power off the test set
• change the start frequency to a new value that lies below the start frequency of
your previous calibration
• change the stop frequency to a new value that lies above the stop frequency of
your previous calibration
• change any of the jumper leads that you used for the calibration
• change any of the attenuators that you used for the calibration
• change the type of cable specified under the [Cable Type] menu key.
Performing (and Calibrating) a Basic One Port Insertion Loss
measurement
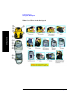
Select the desired frequency range and calibrate the test set for a One Port Insertion
Loss measurement. To calibrate your test set, you will need the following pieces of
equipment:
• Cable, N (male) to N (male), part number 8120-8862 or 8121-1315
• Calibrated 50 ohm Open connector, part number 1250-3421
• Calibrated 50 ohm Short connector, part number 1250-3424
• Calibrated 50 ohm Load connector, part number 1250-3423
NOTE All four of these required accessories are supplied as standard with your Agilent
E7495A/B test set.