
Specifications

From the PNA network analyzer:
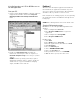
1) Double click on the My Computer desktop icon to
determine if the C drive is “shared”.
2) Single right click the C drive. Select Sharing.
3) Under the Sharing tab, select the Share as…
radio button.
4) Type a share name (or use the default C$). Record
the share name here_______________.
5) Close the dialog box.
From your PC:
1) Map the network analyzer’s drive to the PC.
Launch Windows Explorer to begin this
procedure.
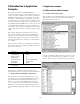
2) On the main menu bar, click Tools. From the
menu, click Map Network Drive. Your PC will
choose the next available drive letter. It is also
possible to assign other available drives. Record
this drive letter:_______________.
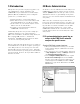
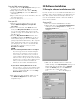
3) From the Map Network Drive window, click
the Path box (this is the Folder box on the net
work analyzer). Type (or select if available) the
path (\\computername\sharename). The computer
name and the share name were recorded in the
preceding steps. To connect to the shared drive
automatically each time you log on, check
Reconnect at Logon.
NOTE:
For PC’s running Windows NT 4.0 or higher:
If you are logged onto the analyzer using the
same logon as your PC, it is not necessary to
enter “Connect As”. However, if you want to
connect under a different user name, type the
name in Connect As (to do this on the network
analyzer, select “Connect using a different user
name”). If the user name is in a different
domain, use the format: domain\username.
If your PC is running Windows 95 or 98:
It is necessary to connect to the analyzer using
the same login and password as those used to
log on to your PC.Click OK to close the Map
Network Drive window.
4) The analyzer’s C drive should be visible on your
PC’s Windows Explorer as the drive letter
assigned in step 3.
3.0 Software Installation
3.1 Set-up for software installation over LAN
If you do not have access to a USB external CD drive, it is
possible to map your PC’s CD drive to the PNA Series ana-
lyzer. Both your PC and network analyzer must be con-
nected to the LAN. The software can then be installed
from your PC’s CD drive.
From your PC:
1) Place the software CD-ROM in the CD drive.
2) Single right click on the Network Neighborhood
desktop icon. Select Properties. Record the
Computer Name here:______________. Close the
dialog box.
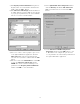
3) Make sure the CD drive has been “shared” by
double clicking on the My Computer desktop icon.
Single right click the CD drive. Select Sharing.
Under the Sharing tab, select the Share as…
radio button. Record the share name
here:_______________. Close this dialog box.
5