
User`s guide


382 Chapter 15
W-CDMA Uplink Digital Modulation for Receiver Test
Setting Up a Multiple PRACH Signal
2. Highlight the item under the Signal column that corresponds to Event1 under the Rear
Panel Ports column.
3. Press More (1 of 3) > More (2 of 3) > PRACH Pulse (RPS23).
This will enable an output trigger that corresponds to the beginning of each PRACH.
4. Press
Mode Setup to return to the top-level W-CDMA menu.
Generating the Baseband Signal
Return to the first-level W-CDMA menu and turn the W-CDMA format on.
This step can be performed at anytime during the setup. The advantage of turning the format
on before setting up the signal, if you have a spectrum analyzer or some other measuring
equipment connected, is you can see the changes as they are made.
Configuring the PRACH Code Setup
In this procedure you will learn how to set the parameters for controlling the transmission for
the various components that make up the PRACH. In addition, you will set the parameters
that control the PRACH transmission as a whole. It is divided up into four tasks:
• “Accessing the Code Setup Table” on page 382
• “Controlling the PRACH Transmission” on page 383
• “Setting the Control Part Parameters” on page 386
• “Setting the Data Part Parameters” on page 387
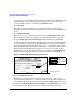
Accessing the Code Setup Table
Press
Link Control > PhyCH Setup > PRACH Code Setup.
This takes you into the table editor where you can set the parameters for the message part
and preamble. You can also set the number of transmissions for the PRACH configuration.
The parameters set within this table apply to all eight UEs.