
Specifications


$JLOHQW0$996HULHV6HUYLFH*XLGH
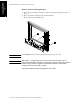
)URQW+RXVLQJ$VVHPEO\9&9&9&79&7
Front Housing Assembly
V24C/V26C & V24CT/
V26CT
Front Housing Replacement Procedures
If your monitor has the new type (Version 2 to 4) of flatscreen display some of the
reassembly procedures may be slightly different from the following sections. Refer back to
the disassembly procedures for the detailed differences. You can check which display you
have by looking at the option number and Prefix Date Code of the serial number located on
the right-hand side of the monitor.
Use the following table to check which procedure applies for your display type.
The procedures described in this section begin with the instrument’s power turned off and the
instrument disassembled.
+LJK9ROWDJH9ROWDJHVGDQJHURXVWROLIHDUHSUHVHQWLQWKHLQVWUXPHQW'RQRWSHUIRUP
DQ\DVVHPEO\SURFHGXUHVRWKHUWKDQSDUDPHWHUPRGXOHLQVWDOODWLRQZLWKSRZHU
DSSOLHGWRWKHLQVWUXPHQW)DLOXUHWRDGKHUHWRWKLVZDUQLQJFRXOGFDXVHVHULRXVLQMXU\
RUGHDWK
The replacement procedures are listed in the order they would occur should the front housing
require complete reassembly.
Should complete reassembly not be necessary, follow the procedures below only to the point
required.
Reassembly of the front housing assembly consists of the following procedures:
Verify power to the monitor is OFF and that the AC power cord is disconnected.
If it is a CT model, verify that the Lead-Acid batteries have been removed.
Replace Front Housing Keypad.
Replace Flat Panel.
Replace Backlight Fluorescent Tube.
Replace the 3-Board Assembly.
Replace Front Housing Assembly.
Replace Parameter Module Rack
Replace Lead Acid Batteries
2SWLRQ 3UHIL['DWH&RGH 9HUVLRQ
021 to 025
J90
—
3931 or greater
026 to 029 Less than 3927
027 and 028 3927 or greater
027 and 028 3931 or greater
:$51,1*