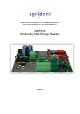
Agrident GmbH, Steinklippenstr.
ASR550 Operational Manual © Copyright 2013 by Agrident GmbH Torsten Bade, Technical Support All rights reserved. No part of this publication may be reproduced, stored in a retrieval system, or transmitted, in any form or by any means, electronic, mechanical, photocopying, recording or otherwise, without prior written permission of Agrident GmbH. Agrident GmbH reserves the right to make changes to any and all parts of this documentation without obligation to notify any person or entity of such changes.
ASR550 Operational Manual Content 1 2 Introduction ..................................................................................................................................... 5 1.1 Definition of terms .................................................................................................................... 5 1.2 How RFID works ...................................................................................................................... 6 1.3 Supported transponder types ...
ASR550 Operational Manual 4.4.4 4.5 The “Info” area ............................................................................................................... 28 General Settings .................................................................................................................... 28 4.5.1 Serial Number and Firmware Version ........................................................................... 28 4.5.2 Transponder Types ..........................................................
ASR550 Operational Manual 1 Introduction This manual is primarily written for OEM customers, distributors and advanced users. It is not intended to be a document for end customers since there are lots of details explained which are much too technical for most end users. There are separate manuals for the ASR565 and ASR566, which do not contain that much technical information. Please read this manual carefully before using this product for the first time.
ASR550 Operational Manual 1.2 How RFID works The items (here animals) to be identified are equipped with passive transponders, which contain an identification code. For energizing the transponders and for reading out the ID code, an RFID reader plus antenna is required. The reader generates a high frequency field using an antenna. This high frequency field activates each transponder, which is inside the reading range.
ASR550 Operational Manual 2 The Antenna Agrident provides a range of different antennas options for the ASR550. The antenna is one of the most important parts of an RFID system. It supplies the transponder with energy and receives the data transmitted from the transponder. There are several electrical values which are important in order to guarantee the best possible reader performance. Depending on quantities, customized antenna designs are possible.
ASR550 Operational Manual 2.1.3 Installing the antenna The following drawing shows the APA003 panel antenna. To fasten the antenna on site, use flat head screws with a thread diameter not larger than 5 mm and suitable washers. Do not use countersunk screws for this purpose as this could lead to a damage of the plastic frame. Please avoid exposing the antenna to direct sunlight permanently. Installing the antenna in an area sheltered from ultraviolet light will extend its durability.
ASR550 Operational Manual 2.1.4 Connecting the antenna to the reader board The antenna has to be connected to ST6 of the reader board. The following table shows the correct wiring of the antenna for each type of antenna cable. Pin Number 1 2 3 Function Antenna 1 Antenna 2 Antenna Shield Twinax Cable (black) silver copper black Chainflex cable (purple) white brown black Agrident is only using these two types of antenna cable.
ASR550 Operational Manual It is important to prevent animals / tags from entering the back zone of the antenna. Animal ISO 11784/11785 does not support Anti-Collision like used in HF- or UHF readers. That means, if two or more transponders of the same time – either FDX-B or HDX – are in the antenna field at the same time, they cannot be read since they are transmitting at the same time. It is not possible to direct the magnetic field into one direction only, so mechanical means may be required.
ASR550 Operational Manual 2. Double Antenna The ASR550 offers the possibility to connect two single panels to one reader. In order to make this possible, you require a double antenna adapter (ASB200). The panels are normally arranged in parallel orientation and face each other in order to build one common field. Comparable to magnets, the single fields of the antennas can attract or repel each other, depending on their phasing.
ASR550 Operational Manual Antennas out of phase Phasing Phasing In this setup the antennas are “out of phase”. This is also called anti-parallel- or Anti-Helmholtz antenna. The optimum tag orientation is 90 degrees rotated compared to those of the single antenna and “double antenna - in phase” setup. As you can see in the left drawing, the direction of the field lines varies at different positions.
ASR550 Operational Manual 3 The Reader Electronics ESD precautions must be taken while touching the reader board after it has been removed from its antistatic bag. Ignoring this warning will lead to the loss of warranty. The ASR550 is a stationary reader designed for reading both ISO relevant transponder technologies: FDX-B and HDX. It is operating on 134.2 KHz and can read passive tags as defined in ISO11784/11785 at a very good reading range.
ASR550 Operational Manual 3.2 Installing and Connecting the ASR550 The following picture shows the ASR550 circuit board: ST6 1 ST1 2 3 ST2 ST4 ST5 1 Connector ST1 ST2 ST4 ST5 ST6 2 3 4 1 5 6 8 7 Function Socket for Add-On Module (Bluetooth, Wi-Fi, Ethernet or Multiplexer Adapter) Socket for Wired Sync.
ASR550 Operational Manual 3.2.3 ST4 – Connector for external LED Board The ASR550 provides an RJ45 plug for connecting an external LED board. You can also purchase an external LED board from Agrident, which contains an additional buzzer for audible indication of a successful tag read.
ASR550 Operational Manual 3.4 Power Supply Requirements You might use power supplies between 12 and 24 Volts DC for the ASR550. It is very important that these power supplies have low ripple and noise (50mVPeakPeak or less). Agrident highly recommends using linear regulated power supplies (stabilized). Switch-Mode power supplies can decrease the reader performance significantly if their switching frequency is too close to the readers operating frequency.
ASR550 Operational Manual 3.5 The RS232 Interface One of the several possible interfaces of the ASR550 reader is the RS232. Although it might be a little bit old-fashioned in the consumer-electronic market meanwhile (lots of laptops do not even have such an interface anymore), it is still used in agricultural applications very often. One of the major advantages compared to USB is that the RS232 does not require drivers to be installed manually.
ASR550 Operational Manual 3.6 The RS485 Interface EIA-485, also known as RS-485, is a standard defining the electrical characteristics of drivers and receivers for use in balanced digital multipoint systems. Digital communications networks implementing the EIA-485 standard can be used over long distances of up to 1200 meters. It should also be used in electrically noisy environments because the symmetrical signal transmission suppresses interference.
ASR550 Operational Manual The two ends of the cable should have a termination resistor connected across the two wires. Without termination resistors, reflections of fast driver edges can cause multiple data edges that can cause data corruption. The value of each termination resistor should be equal to the cable impedance (typically 120 ohms for twisted pairs).
ASR550 Operational Manual 4.2 Starting the PC-Demo Software After starting the ASR550 PC-Demo Software, the following main screen appears. 4.3 The File Menu The file menu is located in the upper left corner of the main window. It consists of the menu items “File”, “Settings”, “Tools” and “?”. 4.3.1 File The Menu “File” contains only one menu item, “Quit”. This item closes the PC-Demo Software.
ASR550 Operational Manual 4.3.2 Settings The file menu “Settings” contains the menu items “Connection”, “Device” and Log File”. 4.3.2.1 Connection If you press “Connection” an additional window opens. Here you have to select the interface type and the corresponding settings. In case of using the readers RS232 or RS485 interface, or the optional Bluetooth Module, the connection type to be used is “Serial”. This also applies to all kind of USB-Serial-Converters like an USB-RS232 Converter.
ASR550 Operational Manual 4.3.2.2 Device This submenu allows choosing the stationary reader product you are using. The default setting is the ASR550, but “older” reader models are supported as well. If the Demo Software was connected to an Agrident Stationary Reader successfully, the reader type should be detected automatically. It makes sense to select the device manually if you want to evaluate diagnosis data “Offline”, i.e. with no reader connected.
ASR550 Operational Manual 4.3.3.1 Monitor The Monitor window shows the complete serial communication between the reader and the PC. This is very useful for software developers in order to verify their own software with the commands the Agrident PC-Demo Software is sending and receiving. The communication might also be watched in ASCII format.
ASR550 Operational Manual If you press “Cancel”, the Animal Counter is started anyway but no file will be saved. This information is also displayed in the Animal Counter window. If you decided to save a file, the path will be displayed. When you are reading transponders now, the counter is increased as soon as a new, unknown, tag has been read. In addition they will be written into the corresponding text file. You may also insert a “new Group” separator.
ASR550 Operational Manual 4.3.3.2.1 Auto Diagnosis There are generally two possible reasons for a decreased reading performance: 1. Wrong antenna tuning, maybe even in combination with too much metal close to the antenna. 2. Electromagnetical interference – often referred as “noise”. The ASR550 provides powerful diagnosis features for evaluating both, antenna status and noise levels.
ASR550 Operational Manual 4.3.3.3 Diagnosis The “Diagnosis” menu item is the manual way of the above described Auto Diagnosis. It is intended to be used by more ‘advanced’ users only since it requires a little bit of background knowledge. It can be used for watching, recording and replaying the signals from the ASR550 receivers. It can be a very powerful tool for troubleshooting on site. Nevertheless it is a quite complex issue and thus it will not be described here any further, but in a separate manual.
ASR550 Operational Manual 4.4.1 Received Tag This section is used for displaying the IDs which have been sent by the reader. Each time a tag number is received, the background color of the text fields turns into green for a short time.
ASR550 Operational Manual 4.4.4 The “Info” area This section is used for displaying status messages. In addition there is a status bar indicating progress of the current operation. In this example the request for all reader settings (“Read all”) was answered by the reader successfully. As we can see here, the command could not be sent to the reader successfully, i.e. there was no response received from the reader. This works similar for all other “Set” or “Get” operations. 4.
ASR550 Operational Manual 4.5.2 Transponder Types Since the ASR550 is a reader according to the ISO11784/11785 regulations, it can read FDX-B and HDX transponders. Anyway, if you do not want to read either of both technologies, you might deactivate it here. 4.5.3 Operating Modes The ASR550 has three different operating modes. They allow to adapt the behaviour of the reader for several applications and have to do with field activation and different ways of the ID transmission to the interface in general.
ASR550 Operational Manual 2. Requested ID output In this operation mode the RF-field is activated permanently as well, but the reader will not transmit any ID until there is a request from an external controller (Last_ID request). If the ASR550 detects a transponder, the ID will be written into an internal buffer. The buffer can contain five IDs maximum. The ID which is written into the buffer first is also the ID which is read from the buffer if a Last_ID request was received (FIFO).
ASR550 Operational Manual 3. Trigger Mode Using the Trigger Mode will force the ASR550 not to activate the RF-field until the reader receives a “Single_ID” request. In this case the ASR will activate the field until the configured “Timeout” has elapsed OR a transponder was read. If the Timeout has elapsed and no transponder was read, the reader will return an “Empty ID” message. The Timeout determines the maximum time in which the ASR550 tries to read a transponder before deactivating the field again.
ASR550 Operational Manual 4.5.4 Device Address In case of using several readers on an RS485 bus, each reader has to have an individual network address. The addresses have to be assigned using a point-to-point connection first. For details about the allowed addresses, please refer to the ASR550 protocol description. 4.5.5 Timing In order to allow the ASR550 to read both transponder technologies – FDX-B and HDX – the reader has to switch on and off the field for certain periods. This is called timing.
ASR550 Operational Manual 4.5.6 RF-Activation For certain applications it might be necessary to switch the RF-field on and off manually. Setting the reader into the Trigger Mode and then back into one of the other operating modes would also switch off and on the field, but this should not be used too often since the new operating mode will always be written into the readers’ non-volatile memory, which has a limited amount of guaranteed write-cycles (EEPROM).
ASR550 Operational Manual 4.5.8 Device Check The “Device check” requests 3 voltages from the reader, which are important for the operation. 1. V in: Shows the DC supply voltage for the reader. The ASR will disable the transmitter, if the voltage is 10.8 volts or lower (measured on the reader board, not at the power supply). 2. V rf: The transmitter voltage, should be about 8000mV. 3. V antenna: The antenna voltage depends on the antenna impedance (which can also be affected by the presence of metal).
ASR550 Operational Manual 4.6.3 Tuning Data As already mentioned in this manual earlier, the correct tuning of the antenna significantly decides about the reading performance. The section “Tuning Data” gives an overview about important values concerning the antenna status. The antenna voltage “V antenna” should be within a range of 50 to 65 volts. The Phase is only used for internal purposes, so please don’t care about this value.
ASR550 Operational Manual If you move the mouse within the graph area you will automatically move a marker. Depending on the Capacitor pattern, the voltage value will change accordingly. Pressing the “Request Curve” button will force the PC-Demo software to request the tuning curve again. The “find” button in the “Marker” box will set a permanent marker on the Capacitor Pattern which is currently used by the reader. You might change the scaling of the amplitude as well.
ASR550 Operational Manual “Tuning + Show LEDs” will first do the same like “Fast Tuning” but after the tuning procedure is finished, the ASR will show an LED sequence fairly slow in order to indicate the approximate position of the voltage maximum. The reader will perform this kind of tuning if the button on the external LED board is pressed. The LEDs have the following meaning during the indication sequence: Yellow means, the voltage is rising.
ASR550 Operational Manual In the next example curve we put the antenna close to metal. Metal decreases the antenna inductance and thus the reader has to set more Autotuning capacitors for compensating the reduced inductance. Due to the presence of metal the ASR550 has decided for a Capacitor Pattern of 20. In this case, the yellow LED will be activated longer. What you can also see is that the amplitude has decreased from 56.7V to 39.
ASR550 Operational Manual 4.7 Output Format 4.7.1 Introduction The ASR550 offers a lot of different output formats. Some formats use a transmission frame according to the ASR protocol. In order to get the desired information, e.g. the transponder number, the telegram has to be evaluated by software on the other side, which is a computer in most applications but it may also be a customized controller.
ASR550 Operational Manual 4.7.3 Output Formats description This chapter deals with the different output formats and explains the ones without transmission frame in detail. Formats using frame according to the ASRs’ protocol will not be described in this manual since the evaluation of those formats requires knowledge about software development. For this reason they are described in the ASR550 protocol description detailed. 4.7.3.1 ASCII The “ASCII” format is using the transmission frame.
ASR550 Operational Manual 4.7.3.4 Custom format The custom format is like a construction kit, the user can put together the output string according to the requirements of his application. It does not use the transmission frame. In order to gain access to the “Custom Format” panel, you have to choose “Custom Format” as the output format first. For any other output format, the “Custom Format” selection panel is greyed out.
ASR550 Operational Manual Initial Character The Initial Character is a single ID code string identifier character, sent as the first identification code character.
ASR550 Operational Manual Data Block Flag does not send the data block flag does send the data block flag Don´t send Send Extended Code Extended Code is the country or manufacturer code. It consists of 4 digits. Manufacturer codes have decimal values larger or equal to 900, country codes have decimal values lower than 900.
ASR550 Operational Manual 4.7.3.5 ISO 24631 The ISO 24631 format contains additional information, like animal flag, retagging counter, species code and so on. The last characters of the telegram will be (0x0D) (0x0A). Transmission of information by a communication link, excluding the time stamp option, as defined per ISO 24631. The ISO 24631 format allows defining the start character of the telegram.
ASR550 Operational Manual 4.7.3.8 Short ASCII 15 If Short ASCII is activated, 15 digits (3 digits country code + 12 digits ID) will be transmitted in ASCII notation without frame. The leading zero is not transmitted. The last characters of the telegram are (0x0D) (0x0A). ID0 ‘9’ ID10 ‘1’ ID0...ID14 CR LF ID1 ‘8’ ID11 ‘6’ ID2 ‘4’ ID12 ‘3’ ID3 ‘0’ ID13 ‘5’ ID4 ‘1’ ID14 ‘8’ ID5 ‘0’ CR 0x0D ID6 ‘9’ LF 0x0A ID7 ‘0’ ID8 ‘0’ ID9 '3' ‘0984010900316358’ 0x0D 0x0A 4.7.3.
ASR550 Operational Manual In this example the ASRs are synchronized. The field on / off cycles are synchronous. There is always one Sync. Master, all other ASRs are Sync. Slaves. Since all readers have the HDXlistening period at the same time, there is no more interference and the transponder signal can be picked up. Please open the “Synchronization” tab in order to set up the ASR550 for synchronization. Per default, synchronization is disabled. If “Wireless Sync.” is not activated in the “Sync.
ASR550 Operational Manual 1. No Sync. Mode Using this setting, which is also the factory default value, the ASR550 will not ‘listen’ to any other readers but will independently decide when to activate and deactivate the RF-field. As long as there are no other stationary readers in close proximity, this setting can be used without any problems. All Agrident portable readers support “Wireless Synchronization”. This is necessary because you cannot use Sync. cables for portable readers.
ASR550 Operational Manual At this time the own RF-field is switched off. This is the start of the HDX listening period. In a “noise-free” environment, the RSSI should be 1 Volt or lower like in the screenshot above. The following sample shows the rising edge in the RSSI, caused by another stationary reader which just activated its field. Sync. Level needs to be set What the ASR550 requires in order to make the correct decision is a particular Sync. Level.
ASR550 Operational Manual In the next example the ‘other’ reader seems to be further apart because the signal rise in the RSSI is smaller. If you would select a Sync. Level of 1.5 Volts or even higher in this case, Wireless Sync. would never work because the signal, caused by the other reader, never reaches 1.5 Volts. Fortunately the ASR550 also offers an automatic Sync. Level detection which works really reliable.
ASR550 Operational Manual Wireless Sync. can only work with a fixed timing. The ASR550 can either use 50:20ms, 70:20ms or 100:20ms. The Sync. timing is set via “Timing” in the “General” tab as well. Since the “variable timing” is not allowed in case of using Wireless Sync., the ASR550 will use a fixed timing of 50:20ms if variable timing is set in combination with Wireless Sync. So if Wireless Sync.
ASR550 Operational Manual 4.9 Module The ASR550 offers a wide range of optional add-on modules such as: Bluetooth (Class 1, up to 100 meter range, Master capable) Wi-Fi (up to 100 meter range) Ethernet Antenna Multiplexer (4-channel or 8-channel) The Bluetooth, Wi-Fi or Ethernet modules can be configured in the tab “Module”. Since those additional modules for communication are not part of the ASR550 board but optional hardware, the configuration of the modules is explained in the corresponding manuals.
ASR550 Operational Manual 5 Safety and care The manufacturer accepts no liability for damage resulting from improper use or use not consistent with that described in these operating instructions. The ASR550 Reader contains no parts that can be repaired by the user. For this reason the Reader Electronic may only be repaired by authorized customer service personnel. In both operation and storage of the reader please secure to comply with the environment conditions specified in the technical data.
ASR550 Operational Manual 7 CE MARKING Hereby, Agrident BV declares that this equipment, if used according to the instructions, is in compliance with the essential requirements and other relevant provisions of the RTTE Directive 1999/5/EC. For use in all countries of the EU. To obtain a copy, contact Agrident BV and request the “Declaration of Conformity” document for Multitechnology readers. Agrident BV mail@agrident.