Digital Camcorder
Welcome: Dear user, thanks for purchasing this product. Much investment in time and effort has gone into its development, and it is our hope that it will give you many years of trouble-free service. Safety Notice: 1. Do not drop, puncture or disassemble the camcorder; otherwise the warranty will be voided. 2. Avoid all contact with water, and dry hands before using. 3. Do not expose the camcorder to high temperature or leave it in direct sunlight. Doing so may damage the camcorder. 4.
Getting Started Parts of the camcorder 1 1 Microphone 2 Record button ( 3 4 5 6 7 8 9 10 11 12 13 14 15 16 17 18 ) Up & Down / Zoom buttons ( ) Menu/OK button Mode/Return button HDMI port USB port TV-out connector Power button (under LCD panel) LCD panel Focus switch Shutter button ( ) Lens Flash strobe Tripod socket Battery compartment / SD/MMC card slot Speaker LED indicator 11 2 3 4 5 6 10 7 8 9 18 12 17 13 14 16 15 1
Loading the battery Note 8SRQ XVLQJ WKH EDWWHU\ IRU WKH ¿UVW WLPH \RX DUH recommended to fully discharge and then charge the battery for 8 hours to ensure its lifecycle. open 1. Slide open the battery compartment cover as indicated. close 2. Place the accessory Li-Ion battery into the compartment. Note that the metallic contacts must be aligned with the contacts in the compartment. 3. Replace the cover. Charging battery 1. Connect one end of the cable to the USB port of the camcorder. 2.
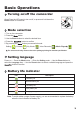
Basic Operations Turning on/off the camcorder Open/Close the LCD panel to turn on/off; or press and hold down the Power button for 3 seconds. Mode selection 1. Turn on the camcorder. 2. Press the button. 3. Use the Zoom buttons to select the desired item. EXWWRQ WR FRQ¿UP 4. Press the 5. By pressing the button you can switch mode: Setting ( ); Camera ( ); My Works ( ); Voice Recorder ( ); Music Player ( ).
Reading LCD indicators Camera mode: Flash mode Photo resolution Mode icon Self-timer Video resolution Stabilizer Night shot Battery life Memory; : Card inserted White balance Zoom meter Number of recordings My Works mode: File protect Mode icon File type Memory; : Card inserted Battery life Highlight bar &XUUHQW 7RWDO ¿OHV Thumbnails of 5HFRUGHG ¿OHV Button tips Voice Recorder mode: &XUUHQW 7RWDO ¿OHV Mode icon Memory; : Card inserted Battery life Highlight bar Voice clip Button tips 4
Recording a video clip 1. Set the focus to an appropriate setting. Normally, you may set the focus to ( ) only for close-ups. ¿OPLQJ FRQGLWLRQV 6HOHFW ) for most 2. Press the Record button to start recording. 3. Use the Zoom buttons to zoom in or zoom out the screen. 4. Press the Record button again to stop recording. Taking a still picture 1. Set the focus to an appropriate setting. Normally, you may set the focus to ( IRU PRVW ¿OPLQJ FRQGLWLRQV ) only for close-ups. Select ( 2.
Playing back your recordings on PC Please notice that the video clips are recorded in MP4 format. To view these videos on your 3& \RX PD\ QHHG WR LQVWDOO VRPH VSHFLDO SURJUDPV )RU ¿UVW WLPH XVH SOHDVH LQVWDOO WKH software on the bundled CD. Connecting the camcorder to HDTV Connect your camcorder and TV via the accessory AV cable for real-time display. You can display your video clips, still pictures, and audio recordings directly on your TV, sharing them with your friends and family.
Connecting the camcorder to standard TV TV : Traditional CRT TV The TV system is different across areas. If you need to adjust the TV-out setting, please refer to the “Advanced Operations” section for more information. (Taiwan: NTSC; America: NTSC; Europe: PAL; China: PAL) TV AV-Mode Video Audio TV OUT 1. Turn on your TV and switch the TV to AV mode. 2. Connect the audio and video ends of the AV cable to the TV. 3. Turn on the camcorder. 4. Connect the other end of the AV cable to your camcorder.
Playing MP3 music For select model only. Please refer to the package printing for GHWDLOHG VSHFL¿FDWLRQ &RS\ 03 ¿OHV WR WKH FDPFRUGHU Note %HIRUH \RX FDQ SOD\ 03 PXVLF \RX QHHG WR FRS\ 03 ¿OHV WR WKH FDPFRUGHU ¿UVW 1. Turn on the camcorder, and connect the camcorder to a PC using the USB cable. 2. After the camcorder is connected to the PC, double-click on My Computer DQG \RX ZLOO ¿QG D UHPRYDEOH GLVN &UHDWH D ³086,&³ IROGHU LQ WKH GLVN DQG WKHQ FRS\ 03 ¿OHV LQWR WKH ³086,&³ folder for playing.
Advanced Operations Using menu 7KH PHQX LWHPV SURYLGH VHYHUDO RSWLRQV IRU \RX WR ¿QH WXQH \RXU FDPFRUGHU IXQFWLRQV 7KH following table gives details on menu operations: How to... Action Bring up the menu in each mode button. Note that this step is not Press the necessary in the Setting mode. Move the highlight bar Use the Zoom buttons to move up or down. &RQ¿UP DQ LWHP Press the Exit menu/Go back to upper menu Press the Mode/ button. button (when in sub-menu).
Menu items in Camcorder mode (2) Item Option Auto White Balance This setting is suitable for outdoor recording in sunny weather. Cloudy This setting is suitable for recording in cloudy weather or shady environments. Tungsten Normal Black&White Classic Photo Frame The camcorder automatically adjusts white balance. Sunny Fluorescent Effect Description 0 - 10 7KLV VHWWLQJ LV VXLWDEOH IRU LQGRRU UHFRUGLQJ ZLWK ÀXRUHVFHQW ODPS lighting, or environments with high color temperature.
Menu items in My Works mode 3RZHU RQ ĺ 3UHVV WKH Mode EXWWRQ ĺ (QWHU My Works PRGH ĺ 3UHVV WKH Shutter button. Item Option Description Delete One Yes/No 'HOHWH FXUUHQW ¿OH Delete All Yes/No 'HOHWH DOO ¿OHV RI WKH VDPH W\SH VWRUHG LQ WKH PHPRU\ Lock On/Off (QDEOH 'LVDEOH SURWHFWLRQ RI WKH VHOHFWHG ¿OH * Repeat all - ** Background Music On/Off Enable/Disable playing MP3 music while viewing pictures.
Menu items in Setting mode (2) Item Option Description NTSC Set TV system compatibility to NTSC. This option is suitable for America, Taiwan, Japan, and Korea areas. PAL Set TV system compatibility to PAL. This option is suitable for Germany, England, Italy, Netherlands, China, Japan, and Hong Kong. TV System Flicker 50Hz/60Hz 6HW ÀLFNHU IUHTXHQF\ WR +] RU +] )RU PRUH LQIRUPDWLRQ please refer to the “Flicker Settings” table.
Advanced Instructions English
Connecting to PC Connecting the camcorder to your PC 1. Turn on the camcorder. 2. Connect the USB cable to your computer. Turn on your computer, and then connect the accessory USB cable to the USB port of your computer. Make sure the cable and the port are correctly aligned. 3. Connect the USB cable to your camcorder. Connect the other end of the USB cable to your camcorder.
File location After connecting the camcorder to your computer, a removable disk will appear in your computer. The removable disk actually represents the storage medium of \RXU FDPFRUGHU ,Q WKH GLVN \RX FDQ ¿QG DOO RI \RXU UHFRUGLQJV 5HIHU WR WKH ¿JXUH EHORZ WR VHH ZKHUH WKH ¿OHV DUH VWRUHG )RU PXOWLPHGLD ¿OHV )RU 03 ¿OHV For select model only.
Using PC Camera Installing the software The PC camera driver is included in the accessory CD, and therefore you should install the driver before using the PC camera function. Starting the application 1. Connect the camcorder to your computer. Turn on your computer, and then connect the accessory USB cable to the USB port of your computer. Make sure the connector and the port are correctly aligned. 2. Switch to the Camera mode. Connect the other end of the USB cable to your camcorder.
Appendix Troubleshooting When using the camcorder: Problem The camcorder can not be powered on normally. Can not take pictures or video clips when pressing the 6KXWWHU RU 5HFRUG EXWWRQ The LCD screen displays ³0(025< (5525´ RU ³&$5' (5525´ PHVVDJH Or the camcorder cannot read the memory card. I did not delete the pictures and video clips, but can not ¿QG WKHP LQ WKH PHPRU\ FDUG 4 Cause Solution The battery is out of power. 5HSODFH WKH EDWWHU\ The battery is incorrectly installed.
Appendix When using the camcorder: Problem Cause Solution &DQQRW XVH WKH ÀDVK VWUREH If the battery icon indicates ORZ EDWWHU\ WKH ÀDVK VWUREH may be disabled due to LQVXI¿FLHQW YROWDJH 5HSODFH WKH EDWWHU\ The camcorder does not respond to any action during operation. The camcorder encounters software failure. 5HPRYH WKH EDWWHU\ SDFN and replace it into the compartment. Then power on the camcorder. The recorded pictures appear too blurred. The focus is not correctly set.
Appendix When connecting the camcorder to the computer or TV: Problem Cause Solution Driver or software is not installed on the computer. Install Direct X 9.0c or above and Windows Media 9.0 Codecs to solve this problem. Install the software and driver in the bundled CD, or go to http://www.microsoft.com to GRZQORDG WKH UHTXLUHG ¿OHV The installation is terminated abnormally. 5HPRYH WKH GULYHU DQG RWKHU related programs. Follow the installation steps in the manual to re-install the driver.
Appendix Battery Life Still picture Video clip Number of shots 5HFRUGLQJ WLPH PLQXWH 240 100 * shoot every 30 seconds ÀDVK LV RQ *** resolution is set to 5M * resolution is set to VGA (640x480 pixels) Note: This table is for your reference only. The actual battery life depends on your battery type and recharge level. Storage Capacity 3OHDVH UHIHU WR WKH SDFNDJH SULQWLQJ IRU WKH VSHFL¿FDWLRQ RI \RXU PRGHO Video (min.) Audio (min.
Appendix System Requirements Windows XP Service Pack 2 or Vista 512MB of system memory, 1GB is recommended Nvidia Geforece 7600 / ATI X1600 or above with 256MB of RAM 2.