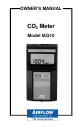
OWNER’S MANUAL CO2 Meter Model IAQ10
LIMITATION OF WARRANTY AND LIABILITY Seller warrants the goods sold hereunder, under normal use and service as described in the operator's manual, shall be free from defects in workmanship and material for twenty-four (24) months, or the length of time specified in the operator's manual, from the date of shipment to the customer. This warranty period is inclusive of any statutory warranty. This limited warranty is subject to the following exclusions: a.
Table of Contents LIMITATION OF WARRANTY AND LIABILITY ...... ii SECTION 1 General Description .....................................2 SECTION 2 Theory of Operation: NDIR Sensor ...........2 SECTION 3 Safety ..............................................................3 SECTION 4 Setting-Up the Model IAQ10 ......................4 Supplying Power ...........................................................4 Installing the Batteries...................................................
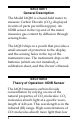
SECTION 1 General Description The Model IAQ10 is a hand-held meter to measure Carbon Dioxide (CO2), displayed in units of parts per million (ppm). An NDIR sensor in the top end of the meter measures gas content by diffusion through sensing holes. The IAQ10 ships in a pouch that provides a small amount of protection to the display and the sensing holes in the top of the instrument case. The instrument ships with batteries (which are not installed), a calibration sheet, and this Owner’s Manual.
concentrations. This technique is called non-dispersive infrared (NDIR) detection. SECTION 3 Safety When using the IAQ10 to check for CO2 values, make certain that you can safely raise and hold the instrument while making measurements. Be especially careful when working on a ladder. Observe all necessary precautions so that the unit does not become caught in moving machinery or touch any exposed electrical wiring. DANGER! Use with corrosive or other dangerous or explosive gas mixtures is not recommended.
SECTION 4 Setting-Up the Model IAQ10 Supplying Power The IAQ10 can be powered in one of two ways: four AA-size batteries or the optional AC adapter. Installing the Batteries Insert four AA batteries as indicated by the diagram located on the inside of the battery compartment. The Model IAQ10 is designed to operate only with alkaline batteries. When 15% battery life is remaining, the battery indicator will blink, indicating the batteries need to be changed.
SECTION 5 Operation of the Model IAQ10 Note: Do not hold the instrument close to your face. Humans exhale CO2 and this will affect the accuracy of the readings. When pressing the keys on the keypad, the Model IAQ10 will beep to confirm the function. If you press a key and the Model IAQ10 does not beep, the Model IAQ10 does not allow that function during the selected mode. (See Section 9 for information on disabling this feature through an internal DIP switch.
calibration. When the Model IAQ10 completes the internal self-check, it will display the approximate percentage of battery life remaining. Note: The sensor needs up to 10 minutes to stabilize in still air before displayed readings can be considered accurate. Moving the instrument may decrease this stabilization time. READ Key Carbon dioxide concentrations will be displayed in parts per million (ppm).
The display updates every second and each reading is the average of five samples. (5) Key The instrument only displays CO2. RECALL (6) Key Press the RECALL key repeatedly to display: minimum value (MIN), maximum value (MAX), average value (AVG), and number of seconds sampled (COUNT). Press the READ key to return to normal measuring mode. The instrument does not store readings. The information viewed in the recall mode is for the sample reading just taken.
SECTION 6 Maintenance of the Model IAQ10 The Model IAQ10 requires very little maintenance to keep it performing well. Case If the instrument case or storage case needs cleaning, wipe it off with a soft, damp cloth. Never submerge the IAQ10 in any liquid or allow any liquid to enter the sensing holes. Storage When storing the Model IAQ10 for more than a month, TSI recommends removing the batteries. This prevents possible damage due to battery leakage.
Before sending your instrument for calibration or repair, you should call Customer Service. The service department will provide you with the cost of service or calibration, Return Material Authorization (RMA) number, and shipping instructions.
you with a NIST (US National Institute of Standards and Technology) traceable certificate. This “annual checkup” assures you of consistently accurate readings; it is especially important in applications where strict calibration records must be maintained. Send the instrument to TSI Instruments Ltd. prepaid. Securely package your instrument in a strong container surrounded by at least 5 cm of suitable shockabsorbing material.
1. Turn the instrument off. Under the batteries, move DIP switch # 7 to ON. Turn the instrument back on. 2. Press and hold the READ key to begin the calibration procedure. The display will begin a countdown from 5 to 0. Release the key when the display reads 0. If the key is released too soon or too late, the instrument will go back to sampling in real-time. “ZerO” will appear on the display if the instrument is in calibration mode. 3.
indicates “SPAN” and the span concentration. 6. Install the regulator on the span calibration cylinder and connect tubing from the regulator to the inlet fitting on the top of the Model IAQ10. 7. Use 5 and 6 to adjust the concentration displayed on the Model IAQ10 to match the concentration on the span gas cylinder. 8. Press and release the READ key to take a span gas reading. The Model IAQ10 starts a 60-second countdown.
SECTION 8 Troubleshooting of the Model IAQ10 This table lists the symptoms, possible causes, and recommended solutions for the Model IAQ10.
Symptom Display reads “LO” Possible Causes Batteries are low Corrective Action(s) Replace the batteries Note: If your symptoms are not remedied by the suggested corrective action, call TSI Instruments Ltd. SECTION 9 Internal DIP Switch Settings To access the DIP switches, remove the batteries from the battery compartment. On the inside of the battery compartment, there is a window with eight DIP switches. The table below shows the functions for each switch.
DIP Switch 1-3 4 5 6 OFF Must be OFF not assigned not assigned Beep is turned OFF Normal mode ON ----not assigned not assigned Beep is turned ON 7 Field Verification mode 8 not assigned not assigned The ON position is away from the batteries and OFF is towards the batteries. - Switch 1 is towards the top of the case and Switch 8 is nearest the bottom.
Specifications (subject to change without notice) CO2 Sensor type: Dual wavelength detector with nondispersive infrared (NDIR) sensor Range: 0 to 5000 ppm Accuracy ±3% of reading or ±50 ppm, whichever is greater1, 2 Resolution 1 ppm Response time <10 minutes in still air Operating Temperature Range: 5 to 70°C External Meter Dimensions: 89 mm × 168 mm × 41 mm Display: LCD, 4 digits, 10-mm high Power requirements: Four (4) AA-size alkaline batteries Battery Life: 1 2 Minimum 10 hours using alkalin
TSI Instruments Ltd. Lancaster Road Cressex Business Park High Wycombe Buckinghamshire HP12 3QP England E-mail: info@airflowinstruments.co.uk Web: www.airflowinstruments.co.uk October 2005 Printed in USA Part No. 1980532, Rev.