Operation/Repair/Parts LP 400/500/600/700 Mustang 5100/8100 Airless Paint Sprayer 3A1185F EN For application of architectural paints and coatings. For professional use only. Not approved for use in European explosive atmosphere locations. 3000 psi (20.7 MPa, 207 bar) Maximum Working Pressure Important Safety Instructions Read all warnings and instructions in this manual. Save these instructions.
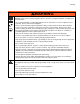
Warnings Warnings The following warnings are for the setup, use, grounding, maintenance, and repair of this equipment. The exclamation point symbol alerts you to a general warning and the hazard symbols refer to procedure-specific risks. When these symbols appear in the body of this manual, refer back to these Warnings. Product-specific hazard symbols and warnings not covered in this section may appear throughout the body of this manual where applicable.
Warnings WARNING WARNING FIRE AND EXPLOSION HAZARD Flammable fumes, such as solvent and paint fumes, in work area can ignite or explode. To help prevent fire and explosion: • Do not spray flammable or combustible materials near an open flame or sources of ignition such as cigarettes, motors, and electrical equipment. • Paint or solvent flowing through the equipment is able to result in static electricity. Static electricity creates a risk of fire or explosion in the presence of paint or solvent fumes.
Warnings WARNING WARNING SKIN INJECTION HAZARD High-pressure spray is able to inject toxins into the body and cause serious bodily injury. In the event that injection occurs, get immediate surgical treatment. • Do not aim the gun at, or spray any person or animal. • Keep hands and other body parts away from the discharge. For example, do not try to stop leaks with any part of the body. • Always use the nozzle tip guard. Do not spray without nozzle tip guard in place. • Use Airlessco nozzle tips.
Warnings WARNING WARNING MOVING PARTS HAZARD Moving parts can pinch, cut or amputate fingers and other body parts. • Keep clear of moving parts. • Do not operate equipment with protective guards or covers removed. • Pressurized equipment can start without warning. Before checking, moving, or servicing equipment, follow the Pressure Relief Procedure, page 7 and disconnect all power sources.
Component Identification Component Identification B E D ti17301a A C A Power switch Turns sprayer ON and OFF B Pressure Control Knob Adjusts pressure. Turn clockwise to increase pressure and counterclockwise to decrease pressure. C Prime/Pressure Relief Valve Primes pump and relieves pressure from gun, hose and tip. D Prime/Pressure Relief Valve Open Position Relieves pressure from gun, hose and tip and primes the unit when in the open position.
Operation Operation Pressure Relief Procedure To reduce risk of injury, follow this pressure relief procedure whenever you see this symbol throughout this manual, Also, perform this procedure whenever you: If the spray tip or hose is clogged, follow Steps 1 through 4 above. Expect paint to splash into the bucket while relieving pressure during Step 3.
Operation 2. Fill the Packing Nut/Wet Cup with 5 drops of Airlessco Throat Seal Oil (TSO). ti16049a Flushing • To reduce the risk of static sparking, which can cause fire or explosion, always hold a metal part of the gun firmly against the metal pail when flushing. This also reduces splashing. • Always remove the spray tip before flushing. Flush the Sprayer 1. Flush the sprayer. See Flushing Procedure on page 8. 1. Make sure the gun trigger lock is engaged and there is no spray tip in the gun.
Operation 7. Point the gun into the metal pail and hold a metal part of the gun firmly against the pail. Maintain firm metal to metal contact between gun and container. ti15989a 8. Disengage the gun trigger lock and squeeze the trigger. At the same time, slowly turn the pressure control knob clockwise, just enough to move liquid at low pressure. c. Turn the engine ON/OFF switch to the “ON” position. d. Turn the Pressure Control Knob clockwise to prime the pump. e.
Maintenance Shutdown 1. Relieve Pressure, page 7. 2. Clean the tip and gun as recommended in the separate Gun Manual supplied with the gun. 3. If spraying water-based material or a material that could harden in the sprayer overnight, flush the sprayer after use. See Flushing, page 8. Storage Short Term 1. Flush sprayer with compatible solvent before storing, then fill the pump and hoses with an oil based solvent such as mineral spirits.
Maintenance Servicing the Fluid Pump Fluid Pump Disconnect 1. Relieve Pressure, page 7. 2. Flush the material you are spraying out of the machine. 3. Remove the connecting rod shield(12). 4. Move the piston rod (10) to its lowest position by cycling pump slowly. 5. Turn off the motor and disconnect power from unit. 6. Disconnect fluid tube (16) from pump body. 6. Start the machine and operate slowly to check the piston rod (10) for binding.
Maintenance Servicing the Inlet Valve 1. Un-thread and remove suction nut from the fluid pump body (8). 2. Remove suction seat (12), O-ring (11), suction ball (10), and ball guide (9). 3. Clean all parts and inspect them for wear or damage, replacing parts as needed. 4. Clean inside of the fluid pump body (8). 5. Reassemble lower suction valve assembly by placing the suction seat (12), O-ring (11), suction ball (10) and suction ball guide (9) in the suction nut (13) and screw onto fluid pump body (8).
Maintenance 13. Take the packing holder (20) and replace the white O-ring (24) and the black O-ring (25) with new ones from the packing kit. 14. Slide the packing holder (20) over the top fo the upper packings so they fit inside. Gear and Pump Assembly Servicing Gear box Assembly 1. Remove fluid pump. See Fluid Pump Disconnect, page 11. 15. Lubricate inside of the fluid pump body (4) and the outside of the packings with a light weight oil. 2.
Maintenance Replacement of Electrical Components 5. Pull entire potentiometer assembly out of the terminal box. 6. Replace in reverse order. NOTICE Always unplug the electrical cord before servicing the machine. NOTE: Anytime the pressure control assembly, sensor, or both are replaced, perform the calibrations. Pressure Control Assembly (Electrical Control Board) 1. Unplug machine’s power cord. 2. Remove six screws heatsink housing. Unit will not operate if wires are disconnected or pinched.
Troubleshooting Troubleshooting Problem Unit doesn’t prime Cause Solution Airleak due to loose suction nut Tighten suction nut. Airleak due to worn o-rings Replace o-ring (108526) on suction seat and o-ring (867370) below suction seat. Airleak due to hole in suction hose Replace suction hose. Stuck or fouled balls Service inlet and outlet valves. Pressure set too low Turn up pressure. Filter(s) are clogged Clean or replace gun filter, inlet filter, and/or manifold filter.
Troubleshooting Problem Cause Motor Solution Remove the motor brush covers and turn the machine ON. Set the potentiometer (POT) at maximum pressure and check for DC voltage across both brush terminals. It should read greater than 80 volts DC. If you have DC voltage, turn the machine off and unplug it from the wall. Check to make sure the brushes are making good contact with the armature. Replace the brushes if they are less than 1/2” long. If the brushes are good, replace the motor.
Troubleshooting Pressure Control Repair Motor Control Board Diagnostics 1. For sprayers with digital display, see Digital Display Messages, page 18 2. Remove four screws and cover. Relieve pressure and unplug sprayer before servicing control board. See Pressure Relief Procedure, page 7. 3. Turn ON/OFF switch ON. 4. Observe LED operation and reference following table: NOTE: Keep a new transducer on hand to use for test. NOTICE Do not allow sprayer to develop fluid pressure without transducer installed.
Troubleshooting Digital Display Messages No display does not mean that sprayer is not pressurized. Relieve pressure before repair. See Pressure Relief Procedure, page 7 DISPLAY SPRAYER OPERATION No Display Sprayer stops. Power is not applied. Sprayer may be pressurized. Loss of power Check power source. Relieve pressure before repair or disassembly. Sprayer is pressurized. Power is applied. (Pressure varies with tip size and pressure control setting.
Parts Parts Manifold Filter (866480) Mustang 5100/8100, LP500/600/700 HiBoy, LP600 LoBoy, LP500 Stand 110/120V 1 2 3 4 5 6 Ref. Part Description 1 2 3 4 5 6 7 9 10 867145 301356 867377 867214 867647 867077 867420 867309 557391 COVER SPRING O-RING FILTER 60 MESH SUPPORT BASE PLUG NIPPLE 3/8”M x 1/4”M PLUG 1/4” Qty. 1 1 1 1 1 1 2 1 1 9 7 10 ti16052a Inlet Valve 8 Ref.
Parts Stand Frame Parts Diagram 100 199 102 107 197 101 106 188 105 ti17479a Ref. Part Description 100 16F551 101 289316 289283 24E514 102 140040 105 331048 106 331143 107 331342 FASTENER,THREAD,EXTERNAL GUN 500,2 FINGER,ASM, LP500 (120V) MODEL MUSTANG 5100 SPRAY, 009, (230/240V & 110V) WASHER .392X.198X.045 .ZN RUBBER BOOT FRAME WELD LP CARRY SCREW,10-24 X.50 PH PN HD 20 Qty. 4 1 1 1 2 2 1 2 Ref. Part Description Qty.
Parts LoBoy Frame Parts Diagram 101 189 105 110 100 102 184 108 199 104 103 111 109 187 ti17480a Ref. Part Description 100 101 102 103 SCREW #6X.25 SLFTAP PH HD SCREW 6-32X1.25 PH PN HD NUT 6-32 X .109 TOP LOCK GUN 500,2 FINGER,ASM, (120V) SPRAY, 009 (230/240V & 110V) COLLAR,SCREW,SET (SPECIAL ID) CUP,SUCTION/DRAIN SPACER,3/4 ID .50 LG PVC RUBBER BOOT WASHER .562 .250 .060 .
Parts Hi-Boy Parts Diagram 2 3 1 78 77 4 5 7 6 ti17483a Ref.Part Description MOTOR 331490 .5HP, 110V: LP500 HIBOY/STAND, LP400 STAND 331491 1HP, 110V: LP600/700 HIBOY, 120V: LP500/600 & MUSTANG 5100/8100 331492 .5HP, 230V: LP500 LOBOY, 240V: LP500 HIBOY, 230/240V: LP400/500 STAND 331493 1HP, 230V:LP600 LOBOY, 230/240V: LP600/700 HIBOY 2 331273 FRAME,LP540 HD 3 16F551 FASTENER,THREAD,EXTERNAL 4 866356 SPACER,SPACER .75 LG PVC 5 867736 WHEEL,10” X 3.
Parts Control Parts Diagram 20 30 110 9 26 19 22 23 25 27 21 76 96 92 96 98 92 33 97 103 100 95 101 94 ti17482a 102 34 Ref. Part 9 19+ 20* 21* 22*+ Description 867800 BOX,TERMINAL BOX WELDMENT 117281 SPACER,#6 X .312 867816 SCREW,MACH,PHILLIPS FLAT HD DISPLAY,LCD 867731 WASHER,PLAIN-1/8IN.IDX5/16IN.
Parts Motor and Drive Parts Diagram 71 35a 35e 121 35b 120 35c 48 35d ti17841a 1 36 37 39 35 47 66 70 48 32 47 18 8 9 13 72 56 14 40 55 31 13 112 43 17 44 42 12 49 10 16 16 11 69 15 51 46 41 213 57 58 62 34 45 68 60 63 59 68 64 156 61 ti17840a 24 3A1185F
Parts Drive Parts Ref. Part 1 1a 1b 1c 8 9 10 11 12 13 14 15 16 17 18 31 32 34 35 35a 35b 35c 35d 35e 36 37 Description MOTOR 331490 0.5HP, 110V: LP500 HIBOY/STAND, LP400 STAND 331491 1HP, 110V: LP600/700 HIBOY, 120V; LP500/600 & MUSTANG 5100/8100 331492 0.
Parts Packing Replacement 20 18* 14 19* 21 25* 26 22* 4 24* 17* 16* 1* 15* 2* 13* 11 12* 3* 27 6* 23* 5 1* 7* ti16057a 26 3A1185F
Parts Packing Replacement Ref.
Parts Gearbox Sleeve Bearing Replacement Ref. Part Description 1 2 3 331061 SLEEVE BEARING 331103 WASHER 331197 SCREW Qty. 1 2 2 NOTE: When replacing item (1), cover outside of sleeve with 6 drops of Loctite 246 prior to inserting into cover assembly. 1 2 3 ti16059a Suction Assemblies Lo-Boy and Carry Chassis (865717) Hi-Boy Chassis (331284) 2 1 3 7 1 4 3 2 6 5 4 ti16061a 5 ti16062a Ref.
Parts Electrical System 7 3 ON/OFF Switch Black Black 6 Power Plug Black White Green Black (+) 1 5 Black (-) from Motor ti2471b 2 x Red Ref. 1 Part 331163 867427 301101 118046 Description POWER CORD (120V) (230V) (240V) (110V) Qty. 1 1 1 1 1 Ref. Part 3 301083 5 6 24B599 7 256219 Description Qty. TOGGLE SWITCH 1 PRESSURE CONTROL ASSEMBLY 110V 1 SENSOR 1 POTENTIOMETER 1 Electrical Components 1 2 4 6 3 7 5 ti16066a Ref. 1 2+ 3+ 4+ 3A1185F Part 867816 867804 867798 117281 Description Qty.
Technical Data Technical Data Power requirements . . . . . . . . . . . . . . . . . . . . . . . . . . . . . . . . . . . . . . 120V AC, 60 hz, 11A, 1 phase 230V AC, 50/60 hz, 7.5A, 1 phase Generator required. . . . . . . . . . . . . . . . . . . . . . . . . . . . . . . . . . . . . . . 3000 w minimum Maximum working pressure . . . . . . . . . . . . . . . . . . . . . . . . . . . . . . . . 3000 psi (21 MPa, 207 bar) Maximum delivery gpm (lpm) . . . . . . . . . . . . . . . . . . . . . . . . . . . . . . .
Notes Notes 3A1185F 31
Airlessco Standard Warranty Airlessco warrants all equipment referenced in this document which is manufactured by Airlessco and bearing its name to be free from defects in material and workmanship on the date of sale to the original purchaser for use. With the exception of any special, extended, or limited warranty published by Airlessco, Airlessco will, for a period of twelve months from the date of sale, repair or replace any part of the equipment determined by Airlessco to be defective.