WHA-5500CPE-NT 108Mbps 802.11a/b/g Multi-Function Outdoor AP Firmware Version V.
Copyright and Disclaimer Copyright & Disclaimer No part of this publication may be reproduced in any form or by any means, whether electronic, mechanical, photocopying, or recording without the written consent of OvisLink Corp. OvisLink Corp. has made the best effort to ensure the accuracy of the information in this user’s guide. However, we are not liable for the inaccuracies or errors in this guide. Please use with caution.
Table of Contents Table of Contents 1. Introduction ................................................................................................1 1.1 Overview ..............................................................................................1 1.2 How to Use This Guide ........................................................................1 1.3 Firmware Upgrade and Tech Support ..................................................3 1.4 Features..................................................
Table of Contents 3.5.5 Change System Management................................................................................... 27 3.5.6 Change Password ..................................................................................................... 28 4. Web Management: Wireless and WAN Settings ...................................29 4.1 About WHA-5500CPE-NT’s Menu Structure......................................29 4.2 Operation Modes (Wireless and WAN Settings) ................................
Table of Contents 5.1.7 Configuration Save and Restore .............................................................................. 73 5.1.8 Factory Default ........................................................................................................ 74 5.2 Tools...................................................................................................75 5.2.5 Network Ping ........................................................................................................... 75 5.
Table of Contents 9.2 WHA-5500CPE-NT in WISP Router Mode ......................................123 9.2.1 WISP Router: Wireless Settings............................................................................. 123 9.2.2 WISP Router: WAN Port and Virtual Server ......................................................... 125 9.3 WHA-5500CPE-NT in Repeater Mode ............................................128 9.3.1 Repeater Router: Wireless Settings............................................................
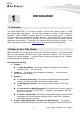
1. Introduction 1. Introduction 1 1.1 Overview The WHA-5500CPE-NT is a wireless outdoor multi-function device based on IEEE 802.11a/b/g radio technologies. You can choose between 2.4GHz or 5GHz frequency spectrum. When installed in upright position, it is rain and splash proof. It features N-Type connector for attachment to outdoor antenna. This device does not have built-in antenna. The firmware of the AP provides up to 8 operations modes* to satisfy different application environments.
1. Introduction If time permitted, you should read through the entire chapter. 4.2 Operation Mode (wireless): Operation mode is the page where all the wireless settings and router mode settings are. Therefore, it is advised that you must read through the entire section. z 4.2.3 Site Survey: Site Survey is the connection wizard that will search for available networks and let you connect with the select network by simply clicking. It also includes RSSI signal survey for antenna alignment. z 4.2.
1. Introduction Chapter 8: Application Example 2: WDS Bridge This chapter tells you the basic knowledge about building a long distance connection. Then it will describe the differences between WDS bridge and Bridge Infrastructure mode, and how to make a choice between them. At last, a step-by-step instruction on how to build a multipoint WDS network is provided.
1. Introduction 1.4 Features Atheros AR-2313 + AR-5112 108mbps 802.11a/b/g chipset 4MB Flash and 32MB SDRAM 8 wireless multi-function modes: Access Point, Repeater, WDS Bridge, Bridge Infrastructure, Client Infrastructure, Client Ad Hoc, WISP Router, AP Router. N-Type antenna connector Super Channel Support* *Super Channel is NOT available in EU countries 5/10/20/40MHz Channel Width Built from High Temperature resistant ABS material with Anti-UV protection 802.
1. Introduction 1.5.2 Repeater Mode In Repeater mode, the WHA-5500CPE-NT functions as a repeater that extends the range of remote wireless LAN. The WHA-5500CPE-NT’s repeater mode is a universal repeater, not WDS repeater. Because the radio is divided into client + AP mode, the Repeater mode will have less performance and distance. We recommended using a dual radio product like Airlive WLA-9000AP or AirMax DUO if you require full performance in this application.
1. Introduction Chapter 9 for step-by-step application example of this operation mode. 1.5.4 Bridge Infrastructure Mode This mode is also known as "WDS Station" or "Client mode with MAC address transparency". The Bridge Infrastructure mode can only connect with “Access Point” mode. 2 Bridge Infrastructure can not connect with each other. It works like client mode with MAC address transparency function. In another word, the MAC addresses of the PCs will be passed instead of the AP's wireless MAC address.
1. Introduction 1.5.5 Client Infrastructure Mode This mode is also known as “Client” mode. In Client Infrastructure mode, the WHA-5500CPE-NT acts as if it is a wireless adapter to connect with a remote Access Point. Users can attach a computer or a router to the LAN port of WHA-5500CPE-NT to get network access. This mode is often used by WISP on the subscriber’s side. Please see Chapter 8 for step-by-step application example of this operation mode.
1. Introduction 1.5.7 WISP Router Mode In WISP Router Mode, WHA-5500CPE-NT connects to the remote Access Point as in Client Infrastructure Mode. On the LAN side, it acts like a wired router for IP sharing function. This mode is best used for IP sharing application for WISP subscribers. In this mode, the WAN is the wireless client side, the LAN is the wired side. Please see Chapter 10 for step-by-step application example of this operation mode. 1.5.
1.
2. Install the WHA-5500CPE-NT 2 2. Installing the WHA-5500CPE-NT This section describes the hardware features and the hardware installation procedure for the WHA-5500CPE-NT. For software configuration, please go to chapter 3 for more details. 2.1 Before You Start It is important to read through this section before you install the WHA-5500CPE-NT The WHA-5500CPE-NT comes with everything you need to start installation with exception of the PoE Ethernet Cable.
2. Install the WHA-5500CPE-NT 2.2 Package Content The WHA-5500CPE-NT package contains the following items: One WHA-5500CPE-NT main unit One 48V 0.4A DC power adapter with a splitter Wall Mounting kit One CD of the WHA-5500CPE-NT Quick Star Guide WHA-5500CPE-NT Mounting Kits PoE Kits Regarding to the specification of each application, the PoE Ethernet cable is not included in the package. You may choose outdoor specification Ethernet cable according to the length you need. 2.
2. Install the WHA-5500CPE-NT 3. Turn the WHA-5500CPE-NT to another side, the RJ-45 jack is at the middle of LEFT side of main board. 4. Plug one side of RJ-45 cable into the Ethernet port. 5. Put the Ethernet cable along the module, 6. Make sure that the other side of Ethernet till the exit (at the bottom of Housing). AirLive WHA-5500CPE-NT User’s Manual cable is out of housing. Close the housing.
2. Install the WHA-5500CPE-NT 7. Scroll up 4 screws well. Be careful, this is very important; it could protect your device against the water. 8. Plug the Ethernet to the PoE “P + DATA OUT” jack of injector. 9. Plug the power cord of adaptor into the injector “POWER IN” port. 10. Plug the Data Ethernet cable to the port “DATA IN” of injector.
2. Install the WHA-5500CPE-NT 2.3.1 Mounting Configuration Your WHA-5500CPE-NT comes standard with 2 plastic straps for pole mounting.
2. Install the WHA-5500CPE-NT 2.3.2 Antenna polarization Pease install the CPE in the UP RIGHT position only. Do not put the CPE into water.
3. Configuring the WHA-5500CPE-NT 3 3. Configuring the WHA-5500CPE-NT The WHA-5500CPE-NT offers many different types of management interface. You can configure through standard web browser (http), secured web (https), command line (telnet). In this chapter, we will explain WHA-5500CPE-NT’s available management interfaces and how to get into them. Then, we will provide the introduction on Web Management and recommended initial settings.
3. Configuring the WHA-5500CPE-NT 3.2 Prepare your PC The WHA-5500CPE-NT can be managed remotely by a PC through either the wired or wireless network. The default IP address of the WHA-5500CPE-NT is 192.168.1.1 with a subnet mask of 255.255.255.0. This means the IP address of the PC should be in the range of 192.168.1.2 to 192.168.1.254. To prepare your PC for management with the WHA-5500CPE-NT, please do the following: 1. Connect your PC directly to the LAN port on the DC Injector of WHA-5500CPE-NT 2.
3. Configuring the WHA-5500CPE-NT Secured Web Management (HTTPS): HTTPS is also using web browser for configuration. But all the data transactions are securely encrypted using SSL encryption. Therefore, it is a safe and easy way to manage your WHA-5500CPE-NT. We highly recommend WISP and service provider to use HTTPS for management. To begin, simply enter https://192.168.1.1 on your web browser. A security alert screen from your browser will pop up.
3. Configuring the WHA-5500CPE-NT Command Line Interface (Telnet): WHA-5500CPE-NT can be managed through the command line interface (CLI). It is possible to write a text script file, and then paste it into the CLI to execute several commands at once. However, Telnet does not encrypt its message. Therefore, it is not secure. The default Telnet management port is TCP port 23. To use the CLI, please open the command line window. 192.168.1.1” to start.
3. Configuring the WHA-5500CPE-NT This procedure is not necessary in most cases unless there is a router/firewall between your PC and WHA-5500CPE-NT. 3.4.1 Getting into Web Management Normal Web Management (HTTP) To get into the Normal Web Management, simply type in the WHA-5500CPE-NT’s IP address (default IP is 192.168.1.1) into the web browser’s address field. Secured Web Management (HTTPS) To get into the Secured Web Management, just type “https://192.168.1.1 ” into the web browser’s address field.
3. Configuring the WHA-5500CPE-NT Firefox: 1. Select “or you can add an exception” 1 2. Click on “Add Exception” 2 3. Click on “Get Certificate”. Then, please enter WHA-5500CPE-NT’s IP address. Finally, please click on “Confirm Security Exception.
3. Configuring the WHA-5500CPE-NT 3 4 3.4.2 Welcome Screen and Login After the procedure above, the Welcome Screen will appear. Welcome Screen gives a brief introduction of the WHA-5500CPE-NT’s main function category. By click on the function category, it will direct you to the corresponding web management menu. Wireless Settings: Click on this part will bring you to the wireless operation mode menu. The WHA-5500CPE-NT’s wireless settings are different between wireless modes.
3. Configuring the WHA-5500CPE-NT firmware, backup configuration, settings PING watchdog, and setting management interface. The default management timeout is 10 minutes; we recommend you should change password and management timeout during the first time login. Tools: Discover network states using ping, traceroute and other tools. Device Status: This section for monitoring the status of WHA-5500CPE-NT.
3. Configuring the WHA-5500CPE-NT Language Menu: You can select the language from the right side of main menu bar. 3.5 Initial Configurations We recommend users to browse through WHA-5500CPE-NT’s web management interface to get an overall picture of the functions and interface. Below are the recommended initial configurations for first time login: 3.5.1 Choose the wireless Operation Modes The wireless settings of WHA-5500CPE-NT are dependant on the wireless operation mode you choose.
3. Configuring the WHA-5500CPE-NT Follow the example below to change to “Client Infrastructure” mode 1. Select “Client Infrastructure” mode. 2. Click on “change mode” button 3. The AP will reboot, wait for about one minute 3.5.2 Change the Device’s IP Address The default IP address is at 192.168.1.1. You should change it to the same subnet as your network. Also, if you want to manage WHA-5500CPE-NT remotely, you have to set the Gateway and DNS server information.
3. Configuring the WHA-5500CPE-NT 3.5.3 Change the Country Code The legal frequency and channels in 5GHz spectrum varies between countries. The default country code is United Kingdom which should require no changes If you are living in Europe. If you are living outside EU, you should change the country code accordingly. In the example below, we will change the country code to United States which enables the use of 5.8GHz spectrum.
3. Configuring the WHA-5500CPE-NT 3.5.4 Set the Time and Date It is important that you set the date and time for your WHA-5500CPE-NT so that the system log will record the correct date and time information. Please go to “System Configuration” ->Time Settings. We recommend you choose “Enable NTP” so the time will be keep even after reboot. If your WHA-5500CPE-NT is not connected to Internet, please enter the time manually. Please remember to select your local time zone and click “Apply” to finish.
3. Configuring the WHA-5500CPE-NT 3.5.6 Change Password You should change the password for WHA-5500CPE-NT at the first login. To change password, please go to “System Configuration” -> “Password Settings” menu.
4. Web Management-Wireless and WAN Settings 4 4. Web Management: Wireless and WAN Settings In this chapter, we will explain about the wireless settings and router mode settings in web management interface. Please be sure to read through Chapter 3’s “Introduction to Web Management” and “Initial Configurations” first. For system configurations, device status, and other non-wireless related settings; please go to Chapter 5. 4.
4. Web Management-Wireless and WAN Settings Device Status: This section for monitoring the status of WHA-5500CPE-NT. It provides information on device status, Ethernet status, wireless status, wireless client table, and system log. Logout: Please make sure to Logout after you finish all settings. Language Bar: You can change the web interface to some other languages by the pull down menu. 4.
4. Web Management-Wireless and WAN Settings Once you click on the “Setup” page, the wireless settings will appear. 4.2.1 Regulatory Domain Operation Mode -> Setup -> Regulatory Domain The legal frequency and channels in 5GHz spectrum varies between countries. Please select your country from here. There is a special domain called “All Channels” which will show all the channels. It is for compatibility testing only.
4. Web Management-Wireless and WAN Settings Disable SSID Broadcast: If you check this box, the SSID will be hidden; only users who know the SSID can associate with this network. 4.2.3 Site Survey Operation Mode -> Setup -> Site Survey The Site Survey function in WHA-5500CPE-NT provides 4 important functions In Client and Bridge Infrastructure mode, site survey will scan for available AP network. Then allow user to select and connect to the AP.
4. Web Management-Wireless and WAN Settings RSSI value, the smaller the absolute value is, the stronger the signal. For example, “-50db” has stronger signal than “-80dB”. For outdoor connection, signal stronger than -60dB is considered as a good connection. 4.2.4 Signal Survey Operation Mode -> Setup -> Site Survey -> Signal Survey The Signal Survey will continuously display the RSSI value of the selected SSID for antenna alignment purpose.
4. Web Management-Wireless and WAN Settings • SuperA: Super-A add Bursting, Compression, and Fast Frames to increase the speed over 11a mode. If you live in countries that prohibit the channel binding technology (i.e. Europe), you should choose “Super-A” If you need more speed than 11a mode. However, this mode is not as stable as 11a mode. • Super-A with Static Turbo: Turbo mode uses channel binding technology to increase the speed further over Super-A mode.
4. Web Management-Wireless and WAN Settings Bursting: Allow more data frame to be sent over given period of time by overhead reduction. Compression: Increasing throughput by compressing data frame in real time Fast Frame: Utilizing frame aggregation and removing interframe pauses to increase the throughput. It is recommended to select all 3 options except for compatibility reasons with remote AP. 4.2.8 Channel Operation Mode -> Setup -> Channel The channel is the frequency range used by radio.
4. Web Management-Wireless and WAN Settings U-NII Upper ISM 140 5700 149 5745 153 5765 157 5785 161 5805 165 5825 Show All Channels(5GHz only): When you set the “Regulatory Domain” to “All Channles”, it will display all the channel numbers regardless of what channel width is elected. For example, when you select “20MHz” for channel width, check this option will display channels “36,37,38, 39, 40….” Instead of “36, 40, 44…etc).
4. Web Management-Wireless and WAN Settings note not all security policies are available in all operation modes. For example, only WEP is available currently in WDS Bridge mode and Client Adhoc mode. All wireless devices on the same network must use the same security policy. We recommend using WPA-PSK or WPA2-PSK whenever possible. For WDS Bridge and Client Adhoc mode, we recommend using WEP-152 encryption. WEP WEP Encryption is the oldest and most available encryption method.
4. Web Management-Wireless and WAN Settings ASCII Characters if you choose this option. For example, “passw” HEX-64: This is a key with 64-bit key length of HEX type. Please enter 10 Hexadecimal digits if you choose this option. For example, “12345abcdef” ASCII-128: This is a key with 64-bit key length of ASCII type. Please enter 13 ASCII Characters if you choose this option. For example, “airlivewepkey” HEX-128: This is a key with 128-bit key length of HEX type.
4. Web Management-Wireless and WAN Settings WPA, WPA2, WPA-AUTO Wi-Fi Protected Access (WPA) introduces the Temporal Key Integrity Protocol (TKIP) that provides added security. WPA2 adds full support for 802.11i standard and the CCMP (AES Encryption). The WPA-AUTO tries to authenticate wireless clients using WPA or WPA2. All 3 requires a RADIUS server available in order to do authentication (same as 802.1x), thus there is no shared key required.
4. Web Management-Wireless and WAN Settings Pre-shared Key: This is an ASCII string with 8 to 63 characters. Please make sure that both the WHA-5500CPE-NT and the wireless client stations use the same key. Encryption Type: There are two encryption types TKIP and CCMP (AES). While CCMP provides better security than TKIP, some wireless client stations may not be equipped with the hardware to support it.
4. Web Management-Wireless and WAN Settings You can adjust the transmit output power of the WHA-5500CPE-NT’s radio from 10dBm to 24dBm. The higher the output power, the more distance WHA-5500CPE-NT can deliver. However, it is advised that you use just enough output power so it will not create excessive interference for the environment. Also, using too much power at close distance can create serious performance drop due to signal distortion.
4. Web Management-Wireless and WAN Settings transmission. Any unicast (data or control) frames larger than specified RTS threshold must be transmitted following the RTS/CTS handshake exchange mechanism. The RTS threshold should have a value between 256-2347 bytes, with a default of 2347. It is recommended that this value does not deviate from the default too much. Fragmentation: When the size of a unicast frame exceeds the fragmentation threshold, it will be fragmented before the transmission.
4. Web Management-Wireless and WAN Settings correct value for you. Enable Radio eXtended Range: XR is Atheros eXtended technology to increase range. When XR is turned on, the radio can increase the receiver sensitivity greatly. However, performance may be reduced significantly also. Use this mode only if you can trade more distance for lower performance. Enable privacy separator: Select the check box to prohibit data transmission between client stations.
4. Web Management-Wireless and WAN Settings Disable MAC address control list: When selected, no MAC address filtering will be performed. Enable GRANT address control list: When selected, data traffic from only the specified devices in the table will be allowed in the network. Enable DENY address control list: When selected, data traffic from the devices specified in the table will be denied/discarded by the network.
4. Web Management-Wireless and WAN Settings Configuring the Multiple SSID When you click on the “Multiple SSID” button, the following screen will appear Click here to Apply changes in “VLAN” and “DiffServe Marking” This is the default SSID Click here to apply changes on adding or deleting SSID How to add a SSID You can add up to 4 SSID in WHA-5500CPE-NT. 1. Enter the SSID name (i.e. BridgeNet) 2. Select the Security Policy (i.e. WPA2-PSK) 3. Enter the Security Key (i.e. BridgeNetKey). 4.
4. Web Management-Wireless and WAN Settings 1 2 3 4 How to Modify or Delete a SSID Please follow the procedure below: 1. Select the SSID you want to modify or delete 2. The SSID’s settings will be displayed in the box area. 3. Click on “APPLY” to complete the modification 4. Or click on “Delete Selected” to delete the SSID Modify any settings.
4. Web Management-Wireless and WAN Settings Configure the VLAN and DiffServ Markings When you check the Enable VLAN for All SSIDs and/or Enable DiffServ Marking, the following screen will appear: Click here to Apply changes in “VLAN” and “DiffServe Marking” Default SSID and VLAN Group. Enable VLAN for All SSIDs: Once this function is enabled, you can specify an individual VLAN ID and priority tag for each SSID.
4. Web Management-Wireless and WAN Settings DSCP Value: When you select “Best Effort” DSCP Type, you can enter the 6-dgit DSCP Value here. Select Security Policy: Select the encryption used for this SSID VLAN group. This policy can be different in each SSID VLAN group. For example, one SSID can be using WEP, the other policy can use WPA-PSK. Once you enable the VLAN ID. The incoming packet from Ethernet port to your VLAN group must carry the same VLAN ID tag or the packet will be dropped. 4.2.
4. Web Management-Wireless and WAN Settings Configure the WMM QoS Parameters AC Type The queue and associated priorities and parameters for transmission are as follows: Data 0 (Best Effort, BE): Medium priority queue, medium throughput anddel ay. Most traditional IP data is sent to this queue. Data 1 (Background, BK): Lowest priority queue, high throughput.
4. Web Management-Wireless and WAN Settings timer to determine the amount of time to wait before attempting to access a given channel again. Each access point waits some random period of time between retries. The wait time (initially a random value within a range specified as the Minimum Contention Window increases exponentially up to a specified limit Maximum Contention Window.
4. Web Management-Wireless and WAN Settings AIFS The Arbitration Inter-Frame Spacing (AIFs) specifies a wait time (in milliseconds) for data frames. 802.11e uses interframe spaces to regulate which frames get access to available channels and to coordinate wait times for transmission of different types of data. The AIFs ensures that multiple access points do not try sending data at the same time but instead wait until a channel is free. Valid values for AIFs are 1 through 255.
4. Web Management-Wireless and WAN Settings 4.2.17 RADIUS Settings Operation Mode -> Setup -> RADIUS Setting RADIUS servers provide centralized authentication services to wireless clients. Two RADIUS servers can be defined: one acts as a primary, and the other acts as a secondary backup. If you choose to use 802.1x, WPA, or WPA2 as security policy, you might need to set the RADIUS server settings. To Enable RADIUS Server: Server IP: The IP address of the RADIUS server.
4. Web Management-Wireless and WAN Settings 4.2.18 Bandwidth Control Operation Mode -> Setup -> Bandwidth Control Bandwidth Control can limit the maximum speed of entire wireless interface or individual device. It is also known as Traffic Shaping. The WHA-5500CPE-NT provides both Total Bandwidth and Per-User Bandwidth Control for both uplink and downlink speed. It controls the speed of both wireless and wired interface. To configure, please click on the “Bandwidth Control” button under wireless settings.
4. Web Management-Wireless and WAN Settings will easy the loading on the AP for bandwidth management. To begin, please enable the Bandwidth Management first. Then enter the downlink and uplink speed; click on Apply to finish. Total Downlink Speed: units. Enter speed you wish to limit the download traffic in Kbps Total Uplink Speed: Enter the speed you wish to limit the upload traffic in Kbps units.
4. Web Management-Wireless and WAN Settings units. Uplink Max: Enter the speed you wish to limit the upload traffic in kbps units Example 1: Total Bandwidth Control In this example, the WHA-5500CPE-NT is in Client Infrastructure mode connecting to a remote AP. We want to limit the Bandwidth of the link to 2048Kbps download and 512kbps Upload.
4. Web Management-Wireless and WAN Settings Example 2: Per User Bandwidth Control In this example, the WHA-5500CPE-NT is Access Point mode. There is a wireless client connecting to WHA-5500CPE-NT with MAC address of 00:04:6F:11:11:11. We want to limit the bandwidth of the wireless client to 1024 downstream and 512K upstream using WHA-5500CPE-NT’s Per-User Bandwidth Control. Step 1. Enable Bandwidth Control and select “Per User Bandwidth Control” Step 2.
4. Web Management-Wireless and WAN Settings 1 2 3 4 5 6 4.3 WDS Settings Operation Mode -> Setup -> WDS Settings WDS Bridge mode can make Point-to-Point and Multi-Point connections. Because of its faster performance, it is frequently used to build point-to-point bridge connection and backbone networks. In a WDS network, each node can have up to 4 connections. However, the total number of devices in a WDS network should not exceed 8. Currently, the WDS Bridge mode can only use WEP encryptions policy.
4. Web Management-Wireless and WAN Settings Here are the encryption key settings for WEP. Please make sure all bridges in the WDS network enter the same keys. This is where you enter the remote Bridge’s information. The SSID must be different between each Bridge. After you add a remote Bridge, it will be display here. Up to 4 entries are possible WEP Key: You can set up to 4 keys, each key can have different Key Length and Key type.
4. Web Management-Wireless and WAN Settings side of the link. z Press Add to finish 4.4 Router Mode Settings Operation Mode -> Setup This section will explain WAN port settings and other functions that are available only in WISP router and AP Router mode. 4.4.1 WISP Router Mode The WISP Router mode is also known as Client Router. The wireless side is connected to the remote AP as in Client Infrastructure mode. Between the wireless and LAN is the IP sharing router function.
4. Web Management-Wireless and WAN Settings WAN LAN 4.4.2 AP Router Mode In AP Router mode, the POE port of the WHA-5500CPE-NT will turn into the WAN port. The wireless interface will become the LAN side. It will turn WHA-5500CPE-NT into a wireless router. Since the Ethernet interface becomes WAN; if your PC is connected to the POE port, the management IP will change to the WAN IP (192.168.2.1). The remote management will be automatically turned on to allow you managing the device from the POE WAN port.
4. Web Management-Wireless and WAN Settings 4.4.3 WAN Port Settings Operation Mode -> Setup -> WAN Port Settings The WHA-5500CPE-NT support different authentication and IP assignment standards for the WAN port. It includes fixed IP, DHCP, PPPoE and PPTP protocols. Please consult with your ISP about what authentication type is used for the WAN port connection. Clone MAC Address: Some service provider (Cable Modem provider) lock to certain MAC address.
4. Web Management-Wireless and WAN Settings to clone the MAC address. Please check the “Clone MAC address” box and enter the address that need to be cloned. 4.4.4 Dynamic DNS Settings Operation Mode -> Setup -> Dynamic DNS Settings Dynamic DNS (DDNS) allows you to create a hostname that points to your dynamic IP or static IP address or URL. WHA-5500CPE-NT provide Dynamic DNS client using DynDNS, please visit http://www.dyndns.org for detail. 4.4.
4. Web Management-Wireless and WAN Settings HTTPS Web server Access: from WAN side You can enable or disable HTTPS Web Server Access Response to WAN ping: You can disable or enable whether WHA-5500CPE-NT will response to PING command. 4.4.
4. Web Management-Wireless and WAN Settings Select the routing protocol scheme used for the router’s LAN / WAN port. Static Routing: This allows you to manually configure static network routes. Static routes will override routes learned by standard routing protocol discover methods. IP Routing Table: To delete a static route from the table, select the route and click DELETE SELECTED. Note: Changes to the routing table will take effect immediately. 4.4.
4. Web Management-Wireless and WAN Settings 4.4.8 Multiple DMZ Advanced Settings >> Multiple DMZ Multiple DMZ opens all TCP/UDP ports to particular IP address on the LAN side. It allows setting up servers behind the WHA-5500CPE-NT. Select a DMZ type and then enter the local DMZ IP address. A DMZ server is a common term used to describe the default virtual server. If the DMZ server is selected, Internet traffic not destined for a valid virtual server is redirected to this privately addressed LAN client.
4. Web Management-Wireless and WAN Settings 4.4.10 Special Applications Advanced Setting >> Special Applications Some Internet application such as Instant Messaging or games use groups of ports, and are not easy to work behind a firewall. To work well with these special applications we will open ports to let traffic pass through. Note: You can use up to 3 sets of opened ports for a specific application. The opened ports can be separated by a comma and no spaces are allowed (e.g.
4. Web Management-Wireless and WAN Settings 4.4.11 IP Filtering Settings Advanced Setting>>IP Filtering Settings IP filtering is simply a mechanism that decides which types of IP datagram will be processed normally and which will be discarded. This allows you to define rules for allowing / denying access from / to the Internet. Please do set both inbound/outbound in order to get complete connection. Only inbound or outbound will not allow to get response from the destination IP.
5. Web Management2: System Configuration, Tools and Status 5 5. Web Management 2: System Configuration, Tools and Status In this chapter, we will explain about System Configurations in web management interface. Please be sure to read through Chapter 3’s “Introduction to Web Management” and “Initial Configurations” first. . 5.1 System Configuration When you click on the “System Configuration” menu on the top menu bar, the following screen will appear.
5. Web Management2: System Configuration, Tools and Status Assign Static IP to the Device If you choose to assign the IP address manually, enable the checkbox of “Assign static IP to this device” and then fill in the following fields IP Address and IP Subnet Mask: Default values are 192.168.1.1 and 255.255.255.0 respectively. It is important to note that there are similar addresses falling in the standard private IP address range and it is an essential security feature of the device.
5. Web Management2: System Configuration, Tools and Status 5.1.2 Time Settings System Configuration ->Time Settings It is important that you set the date and time for your WHA-5500CPE-NT so that the system log will record the correct date and time information. We recommend you choose “Enable NTP” so the time will be keep even after reboot. If your WHA-5500CPE-NT is not connected to Internet, please enter the time manually. Please remember to select your local time zone and click “Apply” to finish. 5.1.
5. Web Management2: System Configuration, Tools and Status 5.1.4 System Management System Configuration -> System Management In this page, administrator can change the management parameters and disable/enable management interface. System Administration HTTP Port No: The default port for HTTP is Port 80, you can change the value here Timeout: The default management timeout is 10 minutes. After timeout, the WHA-5500CPE-NT will ask you to login again. You can change the timeout value here.
5. Web Management2: System Configuration, Tools and Status Syslog server IP address: System event messages generated by the wireless access point will be sent to a Syslog daemon running on a server identified by this IP address 5.1.5 Ping Watchdog System Configuration -> Ping Watchdog The Ping Watchdog will ping remote IP addresses to make sure the wireless connection is active, if not, it can either reconnect or reboot.
5. Web Management2: System Configuration, Tools and Status 5.1.6 Firmware Upgrade System Configuration -> Firmware Upgrade can upgrade the firmware of your WHA-5500CPE-NT (the software that controls your WHA-5500CPE-NT’s operation). Normally, this is done when a new version of firmware offers new features that you want, or solves problems that you have encountered with the current version.
5. Web Management2: System Configuration, Tools and Status Step 2 Enter the path of the configuration file to save-to/restore-from (or click the Browse button to locate the configuration file). Then click the SAVE TO FILE button to save the current configuration into the specified file, or click the RESTORE FROM FILE button to restore the system configuration from the specified file. 5.1.
5. Web Management2: System Configuration, Tools and Status 5.2 Tools 5.2.5 Network Ping Please assign a IP address or a domain name for ping function. 5.2.2 Network Traceroute Please assign a IP address or domain name for traceroute function.
5.
5. Web Management2: System Configuration, Tools and Status 5.3 Device Status When you click on the “Device Status” on the top menu bar, the sub menu for device status will appear. 5.3.1 Device Information This page shows the general information about WHA-5500CPE-NT such as firmware version, device IP/MAC, WAN IP/MAC(in router modes), Gateway IP(in router modes), DNS IP…etc. Below are some additional explanations on some status information of this page: CPU Loading Display the CPU usage.
5. Web Management2: System Configuration, Tools and Status 5.3.2 Wireless Information This page shows the information about wireless status such as current operation mode, wireless traffic, error packets, RSSI, Remote device’s BSSD, connecting State, channel, and encryption used. 5.3.3 Internet Information This page shows the information about WAN port of the WHA-5500CPE-NT. It includes the type of WAN port authentication used and the IP address information about the WAN port.
5. Web Management2: System Configuration, Tools and Status 5.3.4 Wireless Client Table This function is available in AP mode and AP Router mode only. It displays the information about wireless clients that are associated with WHA-5500CPE-NT. It includes signal strength, TX and RX data rate, MAC address, and the state. 5.3.5 System Log The System Log displays the system activities, login, and system error report.
6. Command Line Interface 6 6. Command Line Interface In this chapter, we will explain commands that are available through Telnet interface. We will provide descriptions for the commands, example settings and the WHA-5500CPE-NT’s response. The purpose for this chapter is to introduce available CLI commands only. For detail descriptions on the concept and application of the settings, please refer to chapter 4 and chapter 5. Before reading this chapter, please go through Section 3.3 of Chapter 3.
6. Command Line Interface ftptest 11a Purpose: Test if a SSID’s connection is okay Example: Command> ftptest airlive 11a 40 Set SSID : airlive , mode = 11a , channel = 40 ok ! save config Purpose: save configuration file.
6. Command Line Interface signal survey Purpose : Display continuous RSSI for the remote AP/Bridge Example : Command> signal survey 00-4f-69-52-a1-ed 36 BSSID Channel Signal Strength(dbm) ================================================ 00-4F-69-52-A1-ED 36 -40 BSSID Channel Signal Strength(dbm) ================================================ 00-4F-69-52-A1-ED 36 -40 … . 6.2 Debugging Commands This debugging commands are commands used for manufacturing testing process.
6. Command Line Interface Example: Command> z_debug add ssid air1 z_debug reboot Purpose: reboot your WHA-5500CPE-NT Example: Command> z_debug reboot Rebooting... z_debug set port radio1 11a Purpose: Set SSID and Channel. We recommend using set commands instead; set ssid : to set the ssid name set rate mode : set radio mode to 11a | supera_no_turbo | supera_static_turbo.
6. Command Line Interface show upnp Purpose: Show UPnP information Example: Command> show upnp UPnP is disabled show mac Purpose: show the MAC address table in MAC filter mode.
6. Command Line Interface hello 00-4f-62-24-12-34 show radius server Purpose: Show radius server settings Example: Command> show radius server RADIUS Server State IP/Port ---------------------------------------------------------------------------------------Primary Disabled 0.0.0.0/1812 Secondary Disabled 0.0.0.
6. Command Line Interface Command> show system System Name: WHA-5500CPE-NT -----------------------------------------------------------------------------S/W Version: 1.00e09a H/W Version: S0A System LAN MAC: 00-4F-79-90-00-16 Wireless MAC: 00-4F-79-90-00-15 WMAC-0: 00-4F-79-90-00-15 show rssi Purpose: Show RSSI signal strength Example: Command> show rssi Please wait a moment for site survey...
6. Command Line Interface show wireless security Purpose: Show current wireless security policy Example: Command> show wireless security Radio1 security policy: none show settings Purpose: Show LAN or WAN port IP settings Example: Command> show lan settings Lan ip type : static Lan ip address : 192.168.1.1 Lan ip netmask : 255.255.255.0 Lan ip gateway : 192.168.1.254 Lan ip dnsserv : 0.0.0.
6. Command Line Interface 6.
6. Command Line Interface Using /lib/modules/2.4.25-LSDK-5.1.0.42/wlan/ath_ahb.
6. Command Line Interface set client isolation Purpose: Enable or Disable client isolation / privacy seperator Example: Command> set client isolation disable Set client isolation disable successful! set operation mode Purpose: set or change operation mode Example: Command> set operation mode AP Operation mode is already setting! Command> set operation mode wds_bridge System should be reboot...
6. Command Line Interface DNS server : 168.95.1.
6. Command Line Interface set beacon interval Purpose: set beacon interval for wireless interface. For explanation on advance wireless parameters, please refer to section 4.2.14 Example: Command> set beacon interval 100 Radio1 beacon internal: 100 set rts threshold Purpose: set rts threshold. For explanation on advance wireless parameters, please refer to section 4.2.
6. Command Line Interface Command> set age out time 5 Radio1 age out time: 5 set transmit power Purpose: To set the TX output power value of the radio Example: Command> set transmit power 20 Radio1 transmit power: 20 set data rate Purpose: To set the date rate. For example, 54mbps, 36mbps….
6.
6. Command Line Interface 6.5 Enable/Disable Commands Commands to enable or disable settings ( enable/disable ): upnp Purpose: To enable or disable UPnP Example: Command>enable upnp (Upnp)descDocName: BD.xml UPnP Daemon: Intializing UPnP with descDocUrl=http://192.168.1.1:80/BD.xml UPnP Daemon: ipaddress=192.168.1.1 port=80 UPnP Daemon: conf_dir_path=/var/upnp Initializing UPnP SDK ... UPnP SDK Successfully Initialized.
6. Command Line Interface 6.6 Add/Delete Commands Commands to add or delete settings ( add/delete ): add mac filter < Mnemonics Name> Purpose: to add an entry to the MAC address filter Example: Command> add mac filter aaa 00-4f-62-24-12-34 /etc/wlan/ap_service: 17: uname: not found killall: wpa_supplicant: no process killed /etc/wlan/ap_service: 17: uname: not found Using /lib/modules/2.4.25-LSDK-5.1.0.42/wlan/ath_hal.o Using /lib/modules/2.4.25-LSDK-5.1.0.
6.
6. Command Line Interface RTNETLINK answers: No such file or directory RTNETLINK answers: No such file or directory add radius server primary successfully add radius server Purpose: to add a primary or secondary radius server Example: Command> add radius server secondary enter server IP: 192.168.1.
6. Command Line Interface add ssid broadcast Purpose: to add a new ssid (AP and AP Router mode) to the multiple SSID list.
7. Application Example: Infrastructure 7 7. Application Example: Infrastructure In this chapter, you will learn how to utilize WHA-5500CPE-NT’s Access Point mode, Client Infrastructure Mode, and Bridge Infrastructure mode in one application example. In addition, you will also learn how to configure multiple SSID and bandwidth control. 7.
7. Application Example: Infrastructure Device B: WHA-5500CPE-NT in Bridge Infrastructure Mode Using Total bandwidth Control to limit the Bridge traffic to 10Mbps both way. Use Site Survey wizard to make the connection in a simple one stop process. Device C: WHA-5500CPE-NT in Client Infrastructure Mode Connect to the Access Point using Client Infrastructure Multiple User mode. Use Site Survey to connect and associate with the AP. 7.
7. Application Example: Infrastructure 7.2.1 Device A Wireless Settings Step 1 Click on “setup” button on the “Operation Mode” page Step 2 On the wireless setting page, please enter the SSID, Channel, and distance. Then press “Apply” to make changes.
7. Application Example: Infrastructure Step 3 Click on the “Security Settings”. Then choose “WPA-PSK” Policy. “airliveclientkey” as the pre-share key. Enter the airliveclientkey Step 4 Go back to the wireless setting page and click on “Multiple SSID” button 100 2000 Step 5 Follow the procedure below to create a new SSID “bridgeinf” 1. Enter the SSID name “bridgeinf” 2. Select WPA-PSK as the security policy 3. Enter the pre-share key as “bridgeinfkey” 4.
7. Application Example: Infrastructure 1 2 3 4 7.2.2 Device A Bandwidth Management This purpose is to limit the bandwidth of each wireless client in “airliveclient” network to have a download bandwidth of 2048kbps and upload speed of 512kbps. We should set the policy as followed. Set the Per-User Bandwidth Control by “IP Segment”. The IP segment here has address of 192.168.1.100 with subnet mask of 255.255.255.248. The available host IP addresses will be 192.168.1.96 to 192.168.1.02.
7. Application Example: Infrastructure 3. Enter “for client” in description 4. Select “IP Segment. subnet mask. Enter 192.168.1.100 for IP, and “255.255.255.248” for 5. Enter 2048 for downlink and 512 for uplink 6. Click on “Add” to add the bandwidth policy. 1 2 3 4 5 6 Note: Because the Bandwidth Control will limit devices on both wireless and Ethernet side, it is recommended to set the IP address of Ethernet side to have a larger IP scope so it will not be limited by the IP segment policy.
7. Application Example: Infrastructure 7.3 Device B: Bridge Infrastructure Mode SSID: bridgeinf Encryption: WPA-PSK2 Distance: 2000m SSID: airliveclient Encryption: WPA-PSK Distance: 2000m The configuration settings on the Device B will be as followed Set it to “Bridge Infrastructure Mode” Use “Site Survey” function to associate and connect with the Device A. Set “Total Bandwidth Control” to limit the bandwidth to 10Mbps both upstream and downstream 7.3.
7. Application Example: Infrastructure Step 2 Enter the Network ID(SSID) and distance information. Then click on “Apply” Step 3 Click on “Site Survey” in wireless settings page and the following screen will appear. Select “Bridgeinf”, then press “ASSOCIATE” button to connect. Step 4 The WHA-5500CPE-NT will prompt you to enter security policy information. Select WPA2-PSK and enter “bridgeinfkey” for Pre-Shared Key. Step 3 Click on “Apply”.
7. Application Example: Infrastructure 7.3.2 Device B Total Bandwidth Control Step 1 Select “Bandwidth Control” from the wireless setting page. Step 2 Enable Bandwidth Control, then select Total Bandwidth Control. Enter 10000Kbps (10Mbps) for both downlink and uplink bandwidth. Click on Apply to finish.
7. Application Example: Infrastructure 7.4 Device C: Client Infrastructure Mode SSID: airliveclient Encryption: WPA-PSK Distance: 2000m SSID: bridgeinf Encryption: WPA-PSK2 Distance: 2000m Device C: WHA-5500CPE-NT in Client Infrastructure Mode Set device IP to 192.168.1.100 with subnet mask of 255.255.255.248 Connect to the Access Point using Client Infrastructure Multiple User mode. Use Site Survey to connect and associate with the AP. 7.4.
7. Application Example: Infrastructure 7.4.2 Device C Wireless Settings Step 1 Go to “Operation Mode” menu. Select “Client Infrastructure”, and then click on “Change Mode” button. 1 2 Step 2 Press “Setup” to enter the wireless settings page. information and click on “APPLY” button.
7. Application Example: Infrastructure Step 3 Press “Site Survey” button, the following page should appear. “airliveclient” and press “Associate” button to connect Select Step 4 The WHA-5500CPE-NT will prompt you to enter security policy information. Select WPA-PSK and enter “airliveclientkey” for Pre-Shared Key. Step 5 Click on “Apply”. After a few seconds, the following screen will appear to show successful connection.
8. Application Example2: Bridge Network 8 8. Application Example 2: Bridge Network Before reading this chapter, please read section 4.3 first on WDS settings. In this chapter, you will learn to how to build a WDS Bridge network by following our step by step example. In addition, we will talk about the general concepts and knowledge about building a long distance connection. This chapter is divided into 3 sections 8.
8. Application Example2: Bridge Network More than 60% of First Fresnel Zone must be cleared for acceptable performance. 6. Secured Mounting is important If the mounting is not secured and shakes during wind, the performance might be drastically reduced. 7. Remember to set correct Distance for long distance connection Without setting the correct distance parameter (or ACKtimeout), the Bridge might not even transmit data at all. 8.
8. Application Example2: Bridge Network 11. For multi-point connection, use bandwidth control to manage the variable distance problem Using ACKtimeout for point-to-point connection is no problem. However, for point to multi-point connection, it becomes a problem at the center point. In the diagram below, the WHA-5500CPE-NT at point A is the center hub. While wireless clients at B, C,and D can set correct ACKtimeout values to point A, the center AP can set only one Acktimeout value.
8. Application Example2: Bridge Network use WEP encryptions policy. Bridge Infrastructure: Bridge Infrastructure mode connects to AP mode to form a star topology. Bridge Infrastructure mode can not make a Point-to-Point connection. However, it works with WPA-PSK and WPA2-PSK encryption. This mode is also unknown as Client Mode with MAC Address Transparency. When to use which bridge mode: WDS Bridge Mode: When you making point-to-point connection.
8. Application Example2: Bridge Network When you require more advance security like WPA and WPA2 TIPS: For step-by-step instruction on how to setup Bridge Infrastructure mode, please go to Chapter 8 Application Example: Infrastructure Mode. 8.3 WDS Bridge Network Example In this WDS Bridge example, you will learn how to: Setup the WDS settings Set to use different encryption key for different Link SSID’s function for WDS bridge PING watchdog to maintain the WDS Link.
8. Application Example2: Bridge Network ask you to select which key to use. You can select same key or different key for different WDS link (however, both side of the same link must use the same key). In this case, the Link between Bridge 1 and 3 is using Key1. Click on “Add” to add the WDS Link. 1 2 3.
8. Application Example2: Bridge Network The following table will be displayed to show the added WDS links: 4. Setup the PING watchdog. Ping watchdog will reboot or reconnect the WHA-5500CPE-NT when the remote device does not respond to PING command. It helps maintain the WDS Link. Please setup the PING watchdog according to graphic below: 192 192 168 168 1 1 .
8. Application Example2: Bridge Network WDS Bridge 2 Settings 1. Enter the WEP Encryption Keys. In this example, we have 4 WEP keys with WEP152-HEX, WEP152-ASCII, WEP128-ASCII, and WEP64-ASCII. Click on “Apply” after entering the keys. 2. Adding the WDS Link to WDS Bridge 1 Name: WDS1 SSID: airlive1-2 MAC address: you should enter the MAC address of WDS Bridge 1: 00-4f-79-90-00-0b Select Security Policy: Select “WEP” encryption. The WHA-5500CPE-NT will ask you to select which key to use.
8. Application Example2: Bridge Network 192 168 1 1 . WDS Bridge 3 Settings 1. Enter the WEP Encryption Keys. In this example, we have 4 WEP keys with WEP152-HEX, WEP152-ASCII, WEP128-ASCII, and WEP64-ASCII. Click on “Apply” after entering the keys. 2. Adding the WDS Link to WDS Bridge 1 Name: WDS1 SSID: airlive1-3 MAC address: you should enter the MAC address of WDS Bridge 1: 00-4f-79-90-00-0b Select Security Policy: Select “WEP” encryption.
8. Application Example2: Bridge Network 1 2 4. Setup the PING watchdog. below: Please setup the PING watchdog according to graphic 192 168 1 1 . After the above settings, the 3 WDS bridges should connect properly. Be sure to set the Distance parameter for long distance connection.
9. Application Example3: Routers and Repeater 9 9. Application Example 3: Router and Repeater In this chapter, you will learn how to use Repeater mode and WISP Router mode in one network example. In addition, some router settings such as how to setup virtual server will also be demonstrated. 9.
9. Application Example3: Routers and Repeater 9.2 WHA-5500CPE-NT in WISP Router Mode The following is the configuration procedure for the WHA-5500CPE-NT in WISP Router Mode: Change the WHA-5500CPE-NT to WISP Router Mode Change the LAN IP subnet to 192.168.2.X Change the WAN port IP Use Site Survey to connect with the Outdoor AP Open Virtual Server to FTP server on the LAN side 192.168.1.254 192.168.1.100 FTP Server: 192.168.2.100 192.168.1.1 SSID: OutdoorAP Encryption: WPA-PSK 9.2.
9. Application Example3: Routers and Repeater Step 2 Go to “System Configurations -> Device IP settings”. Change the LAN IP address to “192.168.2.1”. Changing this IP address will also change the DHCP IP range to 192.168.2.x subnet. Note: Please make sure your PC’s IP address is also changed to 192.168.2.x subnet in order to configure the WHA-5500CPE-NT. Step 3 Go to “Operation Mode -> Setup” to enter the wireless settings.
9. Application Example3: Routers and Repeater Step 5 Click on “Apply”. After a few seconds, the following screen will appear to show successful connection. 9.2.2 WISP Router: WAN Port and Virtual Server Objective: 1. Change WAN port’s IP address to 192.168.1.100 2. open a virtual server port to the FTP server at 192.168.2.100. Step 1 Go to “Operation Mode” menu, click on “Setup” button. page, selecct “WAN port” button.
9. Application Example3: Routers and Repeater Step 2 On the WAN port setting pave, Enter the Static IP information as bellowed: Step 3 Go to “Operation Mode” menu, click on “Setup” button. page, choose “Virtual Server” button.
9. Application Example3: Routers and Repeater Step 4 Select “FTP” for Service Name. Enter 192.168.2.100 for the FTP server’s IP address. Then click on “Add” to finish Step 5 Once the virtual server is added, it will be displayed in the boxed area.
9. Application Example3: Routers and Repeater 9.3 WHA-5500CPE-NT in Repeater Mode The following is the configuration procedure for the WHA-5500CPE-NT in Repeater: Change the WHA-5500CPE-NT to Repeater Mode Use “Site Survey” function to find remote AP with SSID “OutdoorAP”, then establish connection The local wireless network’s SSID is airlive. 192.168.1.100 FTP Server: 192.168.2.100 192.168.1.254 192.168.1.1 SSID: OutdoorAP Encryption: WPA-PSK 9.3.
9. Application Example3: Routers and Repeater Step 2 Click on the “Setup” button and the wireless setting page will appear. Please take a look at the description on the graphic below Enter the SSID of the remote AP that you want WHA-5500 CPE-NT to repeat Local wireless LAN’s SSID. This can be the same or different from the remote AP’s SSID. In this example, please enter airlive for local SSID.
9. Application Example3: Routers and Repeater Step 5 Click on “Apply”. After a few seconds, the following screen will appear to show successful connection. Now you should have established successful WISP Router and Repeater connections.
10. Emergency Firmware Recovery 10 10. Emergency Firmware Recovery The WHA-5500CPE-NT features an Emergency Recovery function in the bootloader to recovery the AP in case of a firmware crashed. When you can’t access the WHA-5500CPE-NT, please first try to repower the CPE or restore the settings to default. You should find the CPE at 192.168.1.1. If it still can not solve the problem, you can try to recover the CPE using the method described in this chapter.
10. Emergency Firmware Recovery 2. Set the PC as TFTP server, IP address of PC is 192.168.1.254, subnet mask is 255.255.255.0. 3. We recommend the freeware of tftp server, such as “tftpd32”. 4. Run the TFTP server application. Fig. tftpd32 application main window and setting window. 5. Assign the tftp folder in the tftp server. Click on “browse” the folder to select the directory Fig. tftpd32 application: Click on “browse” the folder to select the directory 6.
10. Emergency Firmware Recovery 8. Power on the WHA-5500CPE-NT again. If firmware crashed, the device will scan the 192.168.1.254 for TFTP server and read the tftp upload file. 9. Wait for about 20 seconds, a pop-up window shows the firmware repair progress screen.(Shown as Fig. 3) Fig.. Tftpd32 show at the beginning of firmware repair progress. Do not power off the PC or the WHA-5500CPE-NT during this process! Any disconnection or interruption can damage the WHA-5500CPE-NT permanently. 10.
11. Frequent Asked Questions 11 11. Frequent Asked Questions In this chapter, we will address some frequent asked questions about WHA-5500CPE-NT Question: I forgot my password or the IP address of WHA-5500CPE-NT. Answer: Please restore your settings to default by press the reset button for more than 5 seconds. You should be able to find your WHA-5500CPE-NT at 192.168.1.1 with password “airlive”.
11. Frequent Asked Questions please enable “WDS Dynamic” on Mikrotik’s “AP Bridge” mode. If using WEP, please choose “Static Key Required” on the Mirkrotik setting. For step-by-step example, please visit AirLive.com’s support page at: http://www.airlive.com/support/support_1.jsp. Type “WHA-5500CPE-NT” at the support search.
11. Frequent Asked Questions ==================================================================== Question: When do I use Per-User Bandwidth Control by IP, MAC, or IP segment? Answer: In general, IP address control limits the devices on the end node (i.e. PC and WISP router). MAC address control can limit the traffic of a AP/CPE in wireless client mmode. IP address: When you want to limit the bandwidth of a single notebook computer, PC, or WISP router.
12. Specifications 12 12. Specifications The specification of WHA-5500CPE-NT is subject to change without notice. the information with caution. Please use 12.1 Hardware Features 12.1.1 General Hardware Feature Atheros AR-2313 + AR-5112 chipset 802.11g/802.11b/Super-G/802.
12. Specifications 12.2 Radio Specifications 12.2.1 Frequency Band USA (FCC) 11 Channels: 2.412GHz~2.462GHz Europe (ETSI) 13 Channels : 2.412GHz~2.472GHz 5.15 to 5.25GHz: U-NII Low and ETSI Band1 5.25 to 5.35GHz: U-NII Mid and ETSI Band2 5.47 to 5.725GHz: U-NII World Wide and ETSI Band3 5.745 to 5.825GHz, U-NII Upper Band 12.2.2 Rate and Modulation 11b: 11, 5.
12. Specifications Super-G mode Turbo-G mode 11a mode SuperA without Turbo SuperA with Dynamic Turbo SuperA with Static Turbo 12.3 Software Feature 12.3.1 Operation Mode Access Point Mode (AP mode) Client Infrastructure Mode Client Adhoc Mode WDS Bridge Mode Bridge Infrastructure Mode Repeater Mode WISP Router Mode AP Router Mode 12.3.2 Management Interface Web HTTP Secured Web (HTTPS) Telnet (CLI) 12.3.
12. Specifications Noise Immunity Multiple SSID and Tag VLAN QoS (802.
13. Wireless Network Glossary 13 13. Wireless Network Glossary The wireless network glossary contains explanation or information about common terms used in wireless networking products. Some of information in this glossary might be outdated, please use with caution. 802.11a An IEEE specification for wireless networking that operates in the 5 GHz frequency range (5.15 GHz to 5.850 GHz) with a maximum of 54 Mbps data transfer rate. The 5 GHz frequency band is not as crowded as the 2.4 GHz band.
13. Wireless Network Glossary 802.11d Also known as “Global Roaming”. 802.11d is a standard for use in countries where systems using other standards in the 802.11 family are not allowed to operate. 802.11e The IEEE QoS standard for prioritizing traffic of the VoIP and multimedia applications. The WMM is based on a subset of the 802.11e. 802.11g A standard provides a throughput up to 54 Mbps using OFDM technology. It also operates in the 2.4 GHz frequency band as 802.11b. 802.
13. Wireless Network Glossary Adhoc A Peer-to-Peer wireless network. An Adhoc wireless network do not use wireless AP or router as the central hub of the network. Instead, wireless client are connected directly to each other. The disadvantage of Adhoc network is the lack of wired interface to Internet connections. It is not recommended for network more than 2 nodes. Access Point (AP) The central hub of a wireless LAN network.
13. Wireless Network Glossary Bootloader Bootloader is the under layering program that will start at the power-up before the device loads firmware. It is similar to BIOS on a personal computer. When a firmware crashed, you might be able to recover your device from bootloader. Bridge A product that connects 2 different networks that uses the same protocol. Wireless bridges are commonly used to link network across remote buildings. For wireless application, there are 2 types of Bridges.
13. Wireless Network Glossary Dynamic Domain Name System. An algorithm that allows the use of dynamic IP address for hosting Internet Server. A DDNS service provides each user account with a domain name. A router with DDNS capability has a built-in DDNS client that updates the IP address information to DDNS service provider whenever there is a change. Therefore, users can build website or other Internet servers even if they don't have fixed IP connection. DHCP Dynamic Hosting Configuration Protocol.
13. Wireless Network Glossary ESSID (SSID) The identification name of an 802.11 wireless network. Since wireless network has no physical boundary liked wired Ethernet network, wireless LAN needs an identifier to distinguish one network from the other. Wireless clients must know the SSID in order to associate with a WLAN network. Hide SSID feature disable SSID broadcast, so users must know the correct SSID in order to join a wireless network.
13. Wireless Network Glossary integrates NAT, firewall, bandwidth management, and other security functions. Hotspot A place where you can access Wi-Fi service. The term hotspot has two meanings in wireless deployment. One is the wireless infrastructure deployment, the other is the Internet access billing system. In a hotspot system, a service provider typically need an authentication and account system for billing purposes, and a wireless AP network to provide access for customers.
13. Wireless Network Glossary LACP (802.3ad) Trunking The 802.3ad Link Aggregation standard defines how to combine the several Ethernet ports into one high-bandwidth port to increase the transmission speed. It is also known as port trunking. Both device must set the trunking feature to work. MAC Media Access Control. MAC address provides layer-2 identification for Networking Devices. Each Ethernet device has its own unique address. The first 6 digits are unique for each manufacturer.
13. Wireless Network Glossary Packet A unit of data sent over a network. Passphrase Used much like a password, a passphrase simplifies the WEP encryption process by automatically generating the WEP encryption keys for the company products. POE Power over Ethernet. A standard to deliver both power and data through one single Ethernet cable (UTP/STP). It allows network device to be installed far away from power ource.
13. Wireless Network Glossary ADSL modem. Preamble Type Preamble are sent with each wireless packet transmit for transmission status. Use the long preamble type for better compatibility. Use the short preamble type for better performance Rate Control Ethernet switches' function to control the upstream and downstream speed of an individual port. Rate Control management uses "Flow Control" to limit the speed of a port. Therefore, the Ethernet adapter must also have the flow control enabled.
13. Wireless Network Glossary connection using NAT technology. A wireless router is a device that combines the functions of wireless Access Point and the IP sharing router. RSSI Receiver Sensitivity Index. RSSI is a value to show the Receiver Sensitivity of the remote wireless device. In general, remote APs with stronger signal will display higher RSSI values. For RSSI value, the smaller the absolute value is, the stronger the signal. For example, “-50db” has stronger signal than “-80dB”.
13. Wireless Network Glossary Subnet Mask An address code mask that determines the size of the network. An IP subnet are determined by performing a BIT-wise AND operation between the IP address and the subnet mask. By changing the subnet mask, you can change the scope and size of a network. Subnetwork or Subnet Found in larger networks, these smaller networks are used to simplify addressing between numerous computers. Subnets connect to the central network through a router, hub or gateway.
13. Wireless Network Glossary UDP User Datagram Protocol. A layer-4 network protocol for transmitting data that does not require acknowledgement from the recipient of the data. Upgrade To replace existing software or firmware with a newer version. Upload To send a file to the Internet or network device. URL Uniform Resource Locator. The address of a file located on the Internet. VPN Virtual Private Network.
13. Wireless Network Glossary 108-bit (128-bit) or 152-bit (Atheros proprietary) encryption modes. Wi-Fi Wireless Fidelity. An interoperability certification for wireless local area network (LAN) products based on the IEEE 802.11 standards. The governing body for Wi-Fi is called Wi-Fi Alliance (also known as WECA). WiMAX Worldwide Interoperability for Microwave Access. A Wireless Metropolitan Network technology that complies with IEEE 802.16 and ETSI Hiperman standards. The orginal 802.
13. Wireless Network Glossary WPA Wi-Fi Protected Access. It is an encryption standard proposed by WiFi for advance protection by utilizing a password key (TKIP) or certificate. It is more secure than WEP encryption. The WPA-PSK utilizes pre-share key for encryption/authentication. WPA2 Wi-Fi Protected Access 2. WPA2 is also known as 802.11i. It improves on the WPA security with CCMP and AES encryption. The WPA2 is backward compatible with WPA.