
User's Manual


K
KDC User YOUR KDC
Charge KDC Battery
Prior to using the KDC, the user should charge the battery. Follow the instructions below.
1. Connect the KDC cable to the mini USB connector on the KDC.
2. Connect the KDC cable to the Type A USB connector on the computer.
3. The KDC battery will begin charging. Within a few minutes, the two small LEDs (three LEDs in
case of KDC500) on the front panel will illuminate orange. When the battery is fully charged,
the LEDs will illuminate green.
Configure KDC
The KDC is designed to meet the data collection requirements of many different industries in a
variety of dynamic situations. To deliver the best performance in these diverse environments, the
KDC is designed to be configured quickly and easily.
However, to perform at its optimum level, the KDC must be configured properly. Until the user is
familiar with the KDC configuration settings, it is recommended that the user DOES NOT modify the
KDC settings. The KDC may be configured by using three different methods, which are explained in
Section 3.3 – KDC Menus, Chapter 5 –Synchronization, and Appendix C/D – Special Barcodes.
CONFIGURATION METHODS FOR THE KDC100/200/250/300/270/350/500
z KDC Menu
z KTSync Software
z Special Barcodes
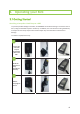
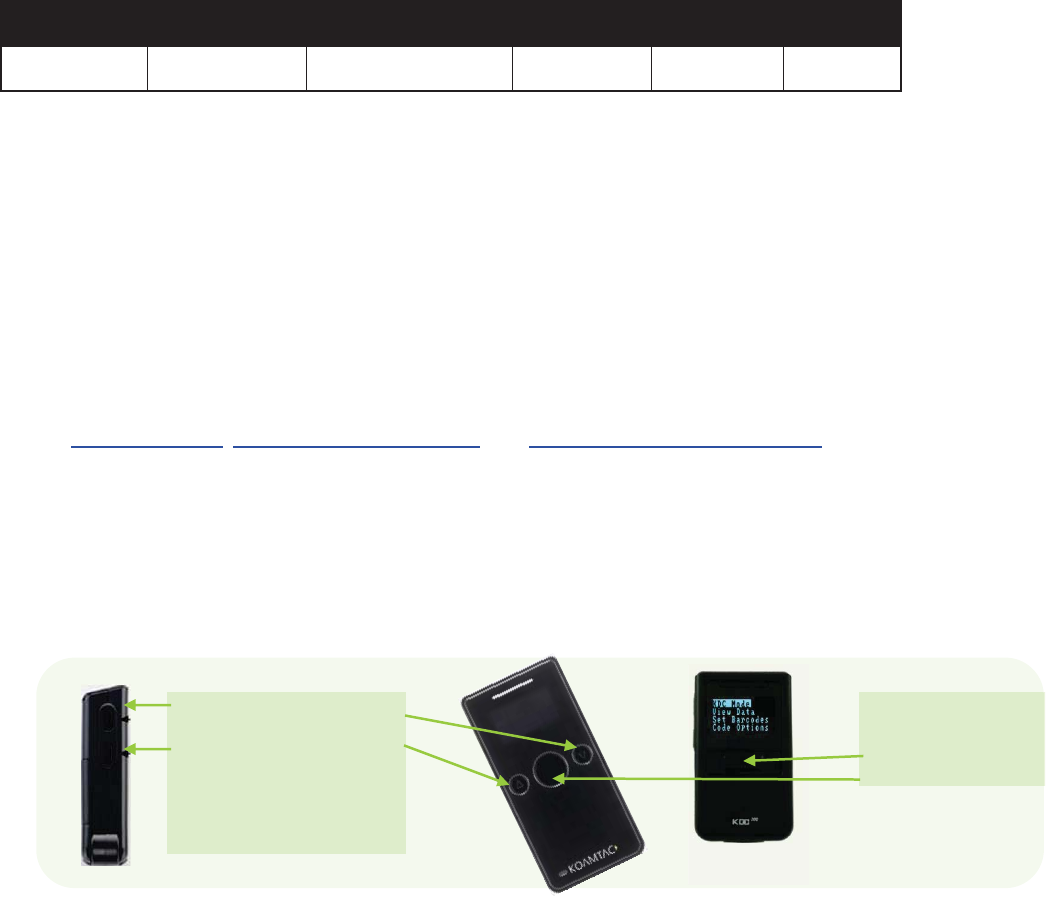
Figure 8 - Location of KDC Menu and use of buttons (KDC100/200/250/300/270)
KDC100 KDC20/200
KDC30/250/300/270
KDC350 KDC400
KDC500
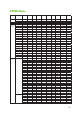
2 Hours 2 Hours 4 Hours 5 Hours 5 Hours
5 Hours
Table 2 - Number of hours required to fully charge a KDC Battery
Select one of the
menus by pressing
the S
Scan Button
.
Press the UUp and DOWN
Buttons
simultaneously to
access the KDC menu.
Move the menu bar up and
down
by pressing Up and
Down Buttons.