4-246-647-02 (1) Mini Hi-Fi Component System BMZ-K1/BMZ-K2
WARNING To prevent fire or shock hazard, do not expose the unit to rain or moisture. To avoid electrical shock, do not open the cabinet. Refer servicing to qualified personnel only. Do not install the appliance in a confined space, such as a bookcase or built-in cabinet. To prevent fire, do not cover the ventilation of the apparatus with newspapers, table-cloths, curtains, etc. And don't place lighted candles on the apparatus.
TABLE OF CONTENTS On safety • The unit is not disconnected from the AC power source (mains) as long as it is connected to the wall outlet, even if the unit itself has been turned off. • Unplug the system from the wall outlet (mains) if it is not to be used for an extended period of time. To disconnect the cord (mains lead), pull it out by the plug. Never pull the cord itself.
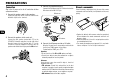
PREPARATIONS Connection Plug in the AC power cord to the AC outlet after all other connections are made. 1 Connect the speaker cords to the speakers. 3 Connect the supplied antennas. Connect the FM antenna to the FM 75 Ω terminal and the AM antenna to the AM LOOP jack. AM antenna Remote commander Detach the battery compartment lid at the rear of the remote commander and insert two R6 (size AA) batteries with correct polarity.
PARTS AND CONTROLS Main unit: front Refer to the pages indicated in parentheses for details. @ 1 2 3 4 5 6 7 8 9 # $ % ^ & * 0 ! 1 POWER 6STANDBY/ON (8, 15, 16) Switches the unit on and off (standby). 2 FUNCTION (10, 13, 18, 20) Switches the active function among CD, USB, TUNER, VIDEO and AUX. 3 BAND (8, 15) Select tuner function and the tuner band. 4 GEQ (9) Selects a sound equalization curve. i-Bass (9) Produces rich and clear low frequency sound.
Main unit: rear Refer to the pages indicated in parentheses for details. 1 2 3 4 En 5 6 1 AM LOOP jack and FM 75 Ω terminal (4) Plug in the supplied AM and FM antennas. 2 AUX (MD) IN jacks Accept analogue sound signals from external equipment. Connect external equipment using an optional connecting cable with RCA phono plugs (red plug to R jack, white plug to L jack). Refer also to the operating instructions for your equipment.
Remote commander Refer to the pages indicated in parentheses for details. 1 8 9 3 0 ! @ Buttons with the same or similar names on the main unit basically have the same function. 1 POWER (8, 16) 2 1-9,0/10, +10 (10, 11, 13, 15) CD: selects a track of the specified number. Tuner: tunes in the station with the specified preset number. The numbered buttons take on these functions when pressed with SHIFT held down. BAND (8, 15) SPECTRUM (8) Changes the spectrum analyser display.
ADJUSTMENTS BEFORE OPERATION 4 Press ENTER. POWER DISPLAY POWER 6STANDBY/ON BAND BAND SPECTRUM MODE MULTI JOG r,t zEJECT The time display stops flashing and the clock starts from 00 seconds. ENTER r CLOCK/TIMER SET t ENTER DISPLAY DISC SELECT (1-5) SHIFT En Power Turning the unit on Press POWER 6STANDBY/ON (POWER on the remote ). Alternatively, press BAND, DISC SELECT (1-5). Playback will start automatically if a disc is loaded. Turning the unit off Press POWER 6STANDBY/ON again.
SOUND ADJUSTMENTS 3 Within 6 seconds, turn MULTI JOG to select one of the three frequency ranges (1, 2 and 3). VOLUME After step 3, adjust the i-Bass level by turning BASS if needed. TREBLE/MIDDLE GEQ i-BASS BASS MODE GEQ MULTI JOG r t To cancel i-Bass Press i-Bass to select “I-BASS OFF”. Note ENTER ENTER SOUND SHIFT VOLUME When “I-BASS ON” is selected, BASS is deactivated; therefore, you cannot select “BASS” with SOUND on the remote. To activate BASS, cancel i-Bass.
CD OPERATIONS To insert discs consecutively You can insert discs consecutively at one time. c/d,f,g, a,s 1 Hold down zEJECT on the main unit for 2 seconds. When no disc is inserted, “INSERT ALL” will be displayed. When the disc(s) already inserted, “EJECT ALL” will be displayed and the unit will eject the disc(s) consecutively. 2 Insert a disc consecutively when “NO DISC” is displayed. Do not insert a disc forcibly. REPEAT To stop playback Press s.
To display the remaining playback time Press DISPLAY on the remote during playback. The display changes in the following order. Track number being played and elapsed playing time. Remaining time of current track. Remaining time of current disc* Clock display * During programmed playback, remaining time of program playback is displayed. * During program playback for plural discs, the remaining time is displayed. * During shuffle playback for all discs, the remaining time is displayed.
To clear the entire program Press s in stop mode. To add a track to the program Repeat steps 2 and 3 before starting playback. The track is added to the end of the program. To cancel programed play In stop mode, press PLAY MODE repeatedly until “PGM” disappears. •The program content is retained even if the program cancelled or after programmed playback finishes. The same program plays back if you carry out step 1 and 5. However, the program content is cleared when you eject either of CDs.
MP3-CD OPERATIONS FUNCTION PLAY MODE f/r, t/g zEJECT TITLE FUNCTION DISPLAY 1-9,0/10,+10 a,s,c r MULTI JOG ALBUMM PLAY MODE ALBUM/ PLAY LIST DISPLAY i,k DISC SKIP t c/d,f,g, a,s ALBUMN REPEAT DISC SELECT (1-5) Playback This unit plays back MP3-CDs: discs recorded with MP3 tracks (files). Basic operations for MP3-CDs are mostly the same as those in “CD OPERATIONS”. Before playing an MP3-CD, also refer to “Descriptions of MP3” for the details of MP3.
Programmed play 1 In stop mode, press PLAY MODE repeatedly until the “PGM” indicator is displayed. •The unit can play MP3 tracks having a file extension “.mp3”. •If you play a non-MP3 track that has the “.mp3” file extension, you may hear some noise. 2 Press DISC SELECT (1-5) (DISC SKIP on the remote) to select a disc. Notes on display indications during play •Up to 64 characters (in ASCII code) are displayed for the title of an album or a track. If ID3TAG version 1.
TUNER OPERATIONS Tuning in preset stations BAND POWER 1-9,0/10,+10 BAND f,g a,s,c MULTI JOG ENTER r s TUNER MODE t f,g ENTER SHIFT Manual tuning Preset tuning 1 Press BAND (hold down SHIFT and press BAND on the remote) to select a band. Preset up to 32 of your favourite stations and tune in directly. The unit switches to the tuner from any other function and alternates between FM and AM. 2 Press f or g repeatedly to tune in a station. "TUNED" is displayed when a station is tuned in.
TIMER OPERATIONS 7 Prepare the source. To play CD, load disc(s). To play the radio, select the band and tune in the desired station. POWER POWER 6STANDBY/ON MULTI JOG r,t ENTER r CLOCK/TIMER SET CLOCK/TIMER SELECT CLEAR t ENTER SLEEP En Sleep timer Timer playback Turns off the unit automatically after a specified time. Turns on the unit at a specified time for the specified duration. Make sure the clock is set correctly. Press SLEEP on the remote. "SLEEP" flashes in the display.
Notes •The timer playback performs every day at the specified time unless you cancel it. •You cannot set the same time for timer-on time and timeroff time. "SET NG" is displayed if you do that. In this case, reset the time. •The timer playback will not begin unless the unit is turned off first.
CONNECTING A PERSONAL COMPUTER Installing the Software on your PC Tip: When you connect a personal computer, see also "Set up Manual" in the supplied CD-ROM. Before Starting the Installation Before installing the software on the supplied BMZ USB Driver CD, check to be sure that your system meets the following system requirements.
To check the installation of the USB driver If your operating system is Windows 98 Second Edition or Windows Millennium Edition 1 Click “Start” > “Settings” > “Control Panel”. 2 In the “Control Panel” window, double click “System”. 3 In the “System Properties” window, double click “Device Manager”. 4 Check that the following devices are displayed under the following headings.
To hear the sound of the file which is played back with the personal computer This unit can output the sound of an audio file which is played back by the Winamp3 on your computer. Make sure to connect the computer to USB terminal on the unit first. 1 Press FUNCTION repeatedly to display “USB”. 2 Open the Winamp3 on your computer. 3 Operate your computer to play back audio file stored in it. 4 Adjust the volume level with Winamp3 on your computer.
REFERENCE Frequently Asked Questions for USB function Q. Compared to the volume of the main unit CD player, the volume of the PC connected by USB is too small. A. Adjust the volume setting on the PC. Open “Multimedia” or “Sound and Multimedia” on the Control Panel, and adjust “Sound volume” and “WAVE balance” in the Audio tab. Q. Winamp starts, but the display on the main unit shows only “USB”. A. The Winamp3 BMZ Plug-in is not installed. Install the plugin. Q.
The unit shut off suddenly •Possibly a short circuit in the speaker terminals. Disconnect the AC power cord from the AC outlet and reconnect the speaker cords correctly. The display blacks out when the unit is turned off. •ECO is mode set to on. (see "ECO mode" on page 8) Erroneous display •Reset the unit. (See "Resetting the unit".) There is severe hum or noise. •A TV or VCR is placed too close to the stereo system. Move the stereo system away from the TV or VCR.
CD PLAYER Specifications Laser MAIN UNIT CX-BK1 for BMZ-K1/CX-BK2 for BMZ-K2 TUNER FM tuning range FM usable sensitivity (IHF) FM antenna terminal AM tuning range AM usable sensitivity AM antenna 87.5 MHz to 108 MHz 13.
ADVERTENCIA Para evitar el riesgo de incendios o descargas eléctricas, no exponga la unidad a la lluvia ni a la humedad. Para evitar descargas eléctricas no abra la carcasa. En caso de reparaciones diríjase sólo a personal cualificado. No instale el aparato en un espacio reducido, como una estantería o carcasa incorporada. Para evitar un incendio, no cubra la ventilación del aparato con periódicos, manteles, cortinas, etc. Tampoco coloque velas encendidas sobre el aparato.
ÍNDICE Seguridad • La unidad no estará desconectada de la fuente eléctrica de CA (red eléctrica) mientras esté conectada a la toma de la pared, incluso si se ha apagado la unidad. • Desenchufe el sistema de la toma de la pared (red eléctrica) si no va a utilizarse durante un periodo de tiempo prolongado. Para desconectar el cable (cable de red) tire de éste por el enchufe. Nuca tire del propio cable.
PREPARACIONES Conexión Conecte el cable de alimentación de CA a la toma de CA una vez realizadas todas las demás conexiones. 1 Conecte los cables de los altavoces a los altavoces. 3 Conecte las antenas suministradas. Conecte la antena de FM al terminal FM 75 Ω y la antena de AM a la toma AM LOOP. Antena de AM Control remoto Abra la tapa del compartimento de las pilas en la parte posterior del control remoto e inserte dos pilas R6 (tamaño AA) con la polaridad correcta.
PARTES Y CONTROLES Unidad principal: panel frontal Para más información, consulte las páginas indicadas entre paréntesis. @ 1 2 3 4 5 6 7 8 9 # $ % ^ & * 0 ! 1 POWER 6STANDBY/ON (30, 37, 38) Enciende y apaga la unidad (en espera). 2 FUNCTION (32, 35, 40, 42) Cambia la función activa entre CD, USB, TUNER, VIDEO y AUX. 3 BAND (30, 35) Selecciona la función de sintonizador y la banda del sintonizador. 4 GEQ (31) Selecciona una curva de ecualización de sonido.
Unidad principal: panel posterior Para más información, consulte las páginas indicadas entre paréntesis. 1 2 3 4 5 E 6 1 Toma AM LOOP y terminal FM 75 Ω (26) Conecte las antenas de AM y FM suministradas. 2 Tomas AUX (MD) IN Aceptan señales de sonido analógicas de un equipo externo. Conecte el equipo externo utilizando un cable de conexión opcional con clavijas fonográficas RCA (clavija roja a la toma R, clavija blanca a la toma L). Consulte también el manual de instrucciones de su equipo.
Control remoto GEQ (31) Para más información, consulte las páginas indicadas entre paréntesis. 1 8 9 3 0 ! @ Los botones con nombres similares o idénticos en la unidad principal realizan básicamente la misma función. 1 POWER (30, 38) 2 1-9,0/10, +10 (32, 33, 35, 37) Disco compacto: selecciona una pista con el número especificado. Sintonizador: sintoniza una emisora con el número de presintonía especificado. Los botones numerados asumen estas funciones mientras se mantiene el botón SHIFT pulsado.
AJUSTES ANTES DEL FUNCIONAMIENTO 4 Pulse ENTER. POWER DISPLAY POWER 6STANDBY/ON BAND zEJECT BAND •También puede utilizar MULTI JOG en lugar de r o t. t Ajuste del reloj 1 Pulse CLOCK/TIMER SET en el control remoto. 2 Pulse repetidamente r o t hasta que se visualice “CLOCK” y, a continuación, pulse ENTER. 3 Realice los pasos 2 a 4 descritos en “Ajuste del reloj” para ajustar la hora. SPECTRUM MODE MULTI JOG r,t La pantalla de la hora dejará de parpadear y el reloj comenzará desde 00 segundos.
AJUSTES DE SONIDO 3 Antes de 6 segundos, gire MULTI JOG para seleccionar uno de los tres rangos de frecuencia (1, 2 y 3). VOLUME TREBLE/MIDDLE GEQ i-BASS BASS MODE GEQ MULTI JOG r ENTER SOUND SHIFT t Después del paso 3, ajuste el nivel de i-Bass girando BASS si fuera necesario. Para cancelar i-Bass Pulse i-Bass para seleccionar “I-BASS OFF”. ENTER Nota VOLUME Cuando se selecciona “I-BASS ON”, BASS se desactiva, por tanto no puede seleccionar “BASS” con SOUND en el control remoto.
FUNCIONAMIENTO DEL DISCO COMPACTO FUNCTION FUNCTION PLAY MODE f/r, t/g DISPLAY 1-9,0/10,+10 a,s,c r MULTI JOG PLAY MODE DISC SKIP t c/d,f,g, a,s DISPLAY zEJECT REPEAT DISC SELECT (1-5) Notas E •No inserte discos de 8 cm. Tales discos no pueden reproducirse en esta unidad. Además, si fuerza un disco de este tamaño hacia el interior del aparato, es posible que no pueda extraerlo. Esta unidad tampoco admite el adaptador de disco compacto.
Para visualizar el tiempo restante de reproducción Pulse DISPLAY en el control remoto durante la reproducción. La pantalla cambiará en el orden siguiente. Número de la pista que se está reproduciendo y tiempo de reproducción transcurrido. Tiempo restante de la pista actual. Tiempo restante del disco actual* Pantalla del reloj * Durante la reproducción programada, se visualizará el tiempo restante de la reproducción programada.
Para borrar todo el programa Pulse s en modo parada. Para añadir una pista al programa Repita los pasos 2 y 3 antes de iniciar la reproducción. La pista se añadirá al final del programa. Para cancelar la reproducción programada En modo parada, pulse repetidamente PLAY MODE hasta que desaparezca “PGM”. •El contenido del programa se mantiene aunque se cancele el programa o después de que finalice la reproducción programada. Se reproducirá el mismo programa si realiza los pasos 1 y 5.
FUNCIONAMIENTO DE DISCOS COMPACTOS-MP3 FUNCTION PLAY MODE f/r, t/g zEJECT TITLE FUNCTION DISPLAY 1-9,0/10,+10 a,s,c r MULTI JOG ALBUMM PLAY MODE ALBUM/ PLAY LIST DISPLAY i,k DISC SKIP t c/d,f,g, a,s ALBUMN REPEAT DISC SELECT (1-5) Reproducción Esta unidad reproduce discos compactos MP3: discos grabados con pistas (archivos) MP3. El funcionamiento básico para los discos compactos MP3 es básicamente el mismo que el de "FUNCIONAMIENTO DEL DISCO COMPACTO".
Reproducción programada 1 En modo parada, pulse repetidamente PLAY MODE hasta que se visualice el indicador “PGM”. 2 Pulse DISC SELECT (1-5) (DISC SKIP en el control remoto) para seleccionar un disco. Vaya al paso siguiente cuando desaparezca “CHANGE”. 3 Seleccione un álbum y una pista. 4 Repita los pasos 2 y 3 para programar otras pistas. 5 Pulse c (c/d en el control remoto).
FUNCIONAMIENTO DEL SINTONIZADOR Sintonización manual Sintonización de presintonías En el control remoto, pulse repetidamente r o t. Cada vez que pulse, se sintonizará la emisora con el número de presintonía anterior o posterior. Podrá sintonizar directamente la presintonía deseada pulsando los botones numerados del control remoto. - Para seleccionar el número de presintonía 7, pulse 7. - Para seleccionar el número de presintonía 12, pulse +10 y 2.
FUNCIONAMIENTO DEL TEMPORIZADOR 7 Prepare la fuente. Para reproducir un disco compacto, cargue el/los disco(s). Para escuchar la radio, seleccione la banda y sintonice la emisora deseada. POWER POWER 6STANDBY/ON MULTI JOG r,t E ENTER r CLOCK/TIMER SET CLOCK/TIMER SELECT CLEAR t ENTER SLEEP Temporizador de apagado Reproducción con temporizador Apaga la unidad automáticamente después de un tiempo especificado. Enciende la unidad a una hora especificada por el tiempo especificado.
Consejo: El ajuste del temporizador se mantiene aunque se cancele el temporizador. La próxima vez que se active el temporizador, podrá cambiar los ajustes anteriores o sencillamente utilizar de nuevo los mismos ajustes. Notas •La reproducción con temporizador se activa cada día a la hora especificada mientras no la cancele. •No puede ajustar la misma hora de activación y de desactivación del temporizador. Si lo hace, se visualizará "SET NG". En este caso, reajuste la hora.
CONEXIÓN DE UNA COMPUTADORA PERSONAL Instalación del Software en su PC Consejo: Cuando conecte una computadora personal, consulte también "Manual de configuración" en el CD-ROM suministrado. Antes de iniciar la instalación Antes de instalar el software del disco compacto suministrado BMZ USB Driver, asegúrese de que su sistema cumple los siguientes requisitos de sistema.
Para comprobar la instalación del controlador USB Si su sistema operativo es Windows 98 Segunda edición o Windows Millennium Edition 1 Haga clic en “Inicio” > “Ajustes” > “Panel de control”. 2 En la ventana “Panel de control”, haga doble clic en “Sistema”. 3 En la ventana de “Propiedades del sistema”, haga doble clic en “Administrador de dispositivos”. 4 Compruebe que los siguientes dispositivos se visualizan bajo los siguientes epígrafes.
Para escuchar el sonido del archivo que se reproduce con la computadora personal Esta unidad puede emitir el sonido de un archivo de audio que se reproduce mediante el Winamp3 en su computadora. En primer lugar, asegúrese de conectar la computadora al terminal USB de la unidad. 1 Pulse repetidamente FUNCTION hasta que se visualice “USB”. 2 Abra Winamp3 en su computadora. 3 Realice en su computadora las funciones necesarias para reproducir el archivo de audio que tenga almacenado.
REFERENCIA Preguntas frecuentes sobre la función USB P. En comparación con el volumen del reproductor CD de la unidad principal, el volumen del PC conectado mediante USB es muy bajo. R. Realice el ajuste de volumen en el PC. Abra “Multimedia” o “Sonido y multimedia” en el Panel de control y ajuste “Volumen de sonido” y “Balance” en la pestaña Audio. P. Se inicia Winamp, pero la pantalla de la unidad principal sólo muestra “USB”. R. El Plug-in Winamp3 BMZ no está instalado. Instale el Plugin. P.
La unidad se apaga repentinamente •Posiblemente se haya producido un cortocircuito en los terminales de los altavoces. Desconecte el cable de alimentación de CA de la toma de CA y vuelva a conectar los cables de los altavoces correctamente. La pantalla se oscurece cuando la unidad se apaga. •El modo ECO está activado (consulte "Modo ECO" en la página 30). Mala recepción de radio •Compruebe la conexión de la antena. Ajuste la antena para encontrar la mejor recepción.
Especificaciones UNIDAD PRINCIPAL CX-BK1 para BMZ-K1/CX-BK2 para BMZ-K2 SINTONIZADOR Gama de sintonización de FM 87.
Sony Corporation Printed in Malaysia http://www.aiwa.