COMPACT DISC STEREO RADIO CASSETTE RECORDER RADIOCASETE ESTÉREO CON REPRODUCTOR DE DISCOS COMPACTOS RADIO-CASSETTE LECTEUR DE CD STEREO CSD-EL300 8A-CH2-903-01 000205ACK-I-FM U En OPERATING INSTRUCTIONS (English) MANUAL DE INSTRUCCIONES (Español) MODE D’EMPLOI (Français) E F
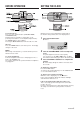
ENGLISH WARNING TO REDUCE THE RISK OF FIRE OR ELECTRIC SHOCK, DO NOT EXPOSE THIS APPLIANCE TO RAIN OR MOISTURE. CAUTION RISK OF ELECTRIC SHOCK DO NOT OPEN 7 Condensation – Moisture may form on the CD pickup lens when: - The unit is moved from a cold spot to a warm spot - The heating system has just been turned on - The unit is used in a very humid room - The unit is cooled by an air conditioner When this unit has condensation inside, it may not function normally.
TABLE OF CONTENTS PREPARATIONS POWER SUPPLY ................................................................. 4 REMOTE CONTROL ........................................................... 4 BEFORE OPERATION ........................................................ 5 SETTING THE CLOCK ........................................................ 5 SOUND ADJUSTING THE SOUND ................................................... 6 TAPE PLAYBACK TAPE OPERATIONS ..........................................................
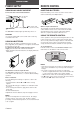
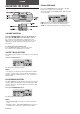
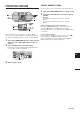
PREPARATIONS POWER SUPPLY REMOTE CONTROL USING ON AC HOUSE CURRENT INSERTING BATTERIES Connect the AC cord as illustrated below. Detach the battery cover on the rear of the remote control and insert two R03 (size AAA) batteries. 1 to the AC inlet of the unit AC cord (supplied) 2 to an AC outlet (AC 120 V, 60 Hz) The OPE/BATT indicator lights up while the power is on. CAUTION Use only the supplied AC cord. Use with other cords may result in the risk of fire.
BEFORE OPERATION SETTING THE CLOCK To turn the unit on Press one of the function buttons (TAPE/REV MODE, TUNER/BAND, CD). Playback of the inserted disc or tape begins, or the previously tuned station is received (Direct Play Function). The POWER button is also available. Pressing the z CD OPEN button turns the unit on as well. When the power code is plugged into an AC outlet for the first time after purchase, the clock display flashes. 1 Press the CLOCK button. 5 flashes.
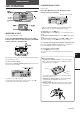
SOUND ADJUSTING THE SOUND EQUALIZER MODE Press the 3-MODE EQ button on the unit or the EQ button on the remote control repeatedly. The mode changes to the ROCK, POP, JAZZ or normal mode cyclically. ROCK: Powerful sound emphasizing treble and bass POP: More presence in the vocals and midrange JAZZ: Accented lower frequencies for jazz-type music VOLUME CONTROL Turn the VOLUME/TIMER control on the main unit or press the VOLUME buttons on the remote control.
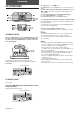
TAPE PLAYBACK TAPE OPERATIONS PLAYING BACK A TAPE Insert a tape. Press the d button (or the c button on the remote control) to start play. Playback side of the tape Tape counter x: The side facing upward is being played (forward). c: The opposite side is being played (reverse). INSERTING A TAPE Use Type I (normal) tapes only. Press the TAPE/REV MODE button (or the TAPE button on the remote control) and press the OPEN mark to open the cassette holder. To stop play, press the s button.
RADIO RECEPTION MANUAL TUNING When an FM stereo broadcast contains noise Press the MODE button on the remote control. MONO appears on the display. Noise is reduced, although reception is monaural. To restore stereo reception, repeat the above again. To change the AM tuning interval The default setting of the AM tuning interval is 10 kHz/step. If you use this unit in an area where the frequency allocation system is 9 kHz/step, change the tuning interval.
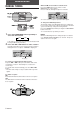
PRESETTING STATIONS PRESET NUMBER TUNING Use the remote control to select the preset number directly. 1 2 Press the TUNER/BAND button to select a band. Press the numbered buttons to select a preset number. Example: To select preset number 15, press the +10 and 5 buttons. To select preset number 10, press the +10 and 0 buttons. Another method to select a preset number Press the TUNER/BAND button to select a band. Then, press the d button (or the c button) repeatedly.
CD PLAYING CD OPERATIONS To stop play, press the s button. To pause play, press the a button. To resume play, press again. To search for a particular point during playback, keep the f or g button pressed and release the button at the desired point. To skip to the beginning of a track during playback, press the f or g button repeatedly. To remove the disc, press the CD OPEN button. To start play when the power is off (Direct Play Function) Press the CD button.
RANDOM PLAY PROGRAMMED PLAY All the tracks on the disc can be played randomly. Up to 30 tracks can be programmed from the inserted disc. Use the remote control. 1 In stop mode, press the MODE button on the remote control repeatedly until RANDOM lights up on the display. 1 In stop mode, press the MODE button on the remote control repeatedly until MEMO flashes on the display. 2 Press the c (d) button to start play. 2 Press the numbered buttons and the +10 button to program a track.
RECORDING RECORDING This section explains how to record from the radio or CD player. To record only the selected tracks Select the tracks in the same procedure for programmed play (page 11), then start recording. NOTE If squealing or beating sounds occur when recording an AM broadcast, press the MODE button on the remote control, so as to eliminate the noise. Each time the button is pressed, the dot light on the display is turned on and off.
TIMER TIMER PLAY/TIMER RECORDING The unit can be turned on at a specified time every day with the built-in timer. 7 Turn the VOLUME/TIMER control to set the volume. 8 Press the POWER button to turn the unit off. When the timer-on time is reached, the unit turns on and play begins with the selected source. NOTE Preparation Make sure the clock is set correctly. 1 Press the TIMER button once for timer play so that 5 flashes. Press the TIMER button twice for timer recording so that 5 and REC flash.
GENERAL CARE AND MAINTENANCE TROUBLESHOOTING GUIDE Occasional care and maintenance of the unit and the software are needed to optimize the performance of your unit. If the unit fails to perform as described in these Operating Instructions, check the following guide. GENERAL To clean the cabinet Use a soft and dry cloth. If the surfaces are extremely dirty, use a soft cloth lightly moistened with mild detergent solution.
SPECIFICATIONS FM tuner section Tuning range Antenna 87.
ESPAÑOL ADVERTENCIA PARA REDUCIR EL RIESGO DE INCENDIO O DESCARGA ELECTRICA, NO EXPONGA ESTE APARATO A LA LLUVIA O LA HUMEDAD. CAUTION RISK OF ELECTRIC SHOCK DO NOT OPEN “CAUTION:TO REDUCE THE RISK OF ELECTRIC SHOCK, DO NOT REMOVE COVER (OR BACK). NO USER-SERVICEABLE PARTS INSIDE. REFER SERVICING TO QUALIFIED SERVICE PERSONNEL.
ÍNDICE PREPARACIONES ALIMENTACIÓN .................................................................. 4 MANDO A DISTANCIA ........................................................ 4 ANTES DE LA OPERACIÓN ............................................... 5 AJUSTE DEL RELOJ .......................................................... 5 SONIDO AJUSTE DEL SONIDO ........................................................ 6 REPRODUCCIÓN DE CINTAS OPERACIONES CON LAS CINTAS ....................................
PREPARACIONES ALIMENTACIÓN MANDO A DISTANCIA USO CON ALIMENTACIÓN DE UNA TOMA ELÉCTRICA EN EL PROPIO HOGAR CÓMO INSERTAR BATERÍAS Conecte el cable de alimentación de CA como puede apreciar en la siguiente ilustración. Quite la tapa del compartimento de las baterías situada en la parte posterior del mando a distancia e inserte dos baterías R03 (tamaño AAA).
ANTES DE LA OPERACIÓN AJUSTE DEL RELOJ Cómo encender la unidad Pulse uno de los botones (TAPE/REV MODE, TUNER/ BAND, CD). Comenzará la reproducción del disco o de la cinta que se haya cargado o de la cinta, o se escuchará la emisora previamente sintonizada (Función de Reproducción Directa). También dispone del botón POWER. Oprimiendo el botón z CD OPEN se enciende también en aparato.
SONIDO AJUSTE DEL SONIDO SISTEMA Q SURROUND El sistema Q SURROUND que lleva incorporado este aparato usa solamente dos altavoces a la derecha y a la izquierda para crear una atmósfera que suena como si estuviese rodeado por dos altavoces frontales y dos traseros. Pulse el botón Q SURROUND. Para cancelar, pulse de nuevo el botón. NOTA CONTROL DEL VOLUMEN Gire el control VOLUME/TIMER que verá en la unidad principal o pulse los botones VOLUME del mando a distancia.
REPRODUCCIÓN DE CINTAS OPERACIONES CON LAS CINTAS REPRODUCCIÓN DE UNA CINTA Inserte una cinta. Pulse el botón d (o el botón c del mando a distancia) para iniciar la reproducción. Lado de reproducción de la cinta El contador de la cinta CÓMO INSERTAR UNA CINTA Use únicamente cintas del Tipo I (normales). Oprima el botón TAPE/REV MODE (o el botón TAPE del mando a distancia) y presione sobre la marca OPEN para abrir el portacasete.
RECEPCIÓN DE LA RADIO SINTONIZACIÓN MANUAL Cuando una emisión FM en estéreo contiene ruido Pulse el botón MODE en el mando a distancia. MONO aparece en la pantalla. Se reducirá el ruido, aunque la recepción será manoaural. Para regresar a la recepción estéreo, repita las instrucciones anteriores de nuevo. 1 Pulse repetidamente el botón TUNER/BAND para seleccionar la banda deseada. FM AM Si se apaga el aparato, se escuchará la emisora previamente sintonizada (Función de Reproducción Directa).
PRESINTONIZACIÓN DE EMISORAS SINTONIZACIÓN MEDIANTE PRESINTONÍAS Use el mando a distancia para seleccionar directamente la presintonía. 1 Oprima el botón TUNER/BAND para seleccionar una banda. 2 Pulse los botones numerados para seleccionar un número de presintonía. Ejemplo: Para seleccionar la presintonía número 15, pulse los botones +10 y el 5. Para seleccionar la presintonía número 10, pulse los botones +10 y el 0. Puede presintonizar hasta 15 emisoras en cada banda.
REPRODUCCIÓN DE DISCOS COMPACTOS OPERACIONES CON LOS DISCOS COMPACTOS Para detener la reproducción, pulse el botón s. Para pausar la reproducción, pulse el botón a. Para reiniciar la reproducción, púlselo de nuevo. Para buscar un punto en particular durante la reproducción, mantenga pulsados el botón f o g y suelte el botón al llegar al punto deseado. Para saltar al principio de una pista durante la reproducción, pulse repetidamente el botón f o g. Para sacar el disco, pulse el botón CD OPEN.
REPRODUCCIÓN ALEATORIA REPRODUCCIÓN PROGRAMADA Todas las pistas del disco pueden ser reproducidas aleatoriamente. Pueden programarse hasta 30 pistas del disco que se haya cargado. Use el mando a distancia. 1 En la modalidad de parada, pulse repetidamente el botón MODE del mando a distancia hasta que se ilumine RANDOM en la pantalla. 1 En la modalidad de parada, pulse repetidamente el botón MODE en el mando a distancia hasta que parpadee MEMO en la pantalla.
GRABACIÓN GRABACIÓN Esta sección le explica cómo grabar desde la radio o el reproductor de discos compactos. Para detener la grabación, pulse el botón s. Para pausar la grabación, pulse el botón a (instrucción valedera solamente cuando la fuente es RADIO). Para proseguir con la grabación, púlselo otra vez. Para grabar únicamente las pistas seleccionadas Seleccione las pistas siguiendo las mismas instrucciones que para la reproducción programada (página 11) e inicie la grabación.
TEMPORIZADOR REPRODUCCIÓN/GRABACIÓN CON 7 EL TEMPORIZADOR 8 Gire el control VOLUME/TIMER para establecer el volumen. Pulse el botón POWER para apagar el aparato. Cuando se llegue al tiempo de activación, el aparato se encenderá y comenzará la reproducción de la fuente seleccionada. El aparato puede encenderse a una hora predeterminada cada día gracias al temporizador que lleva incorporado. NOTA Preparación Asegúrese de que el reloj está configurado correctamente.
GENERAL CUIDADOS Y MANTENIMIENTO Se necesita un cuidado y mantenimiento ocasionales del aparato y del software para aprovechar al máximo su rendimiento. Cómo limpiar el cabinete Use un paño seco y suave. Si las superficies están extremadamente sucias, utilice un paño blando humedecido ligeramente con una solución de detergente suave. No use solventes fuertes, como el alcohol, la bencina o disolventes puesto que éstos podrían dañar el acabado del aparato.
ESPECIFICACIONES COPYRIGHT Sección del sintonizador de FM Le rogamos que compruebe las leyes de Copyright relacionadas con la grabación de discos, radio o cintas del país en el que se utilice el aparato.
FRANÇAIS AVERTISSEMENT POUR REDUIRE LES RISQUES D’INCENDIE OU D’ELECTROCUTION, N’EXPOSEZ PAS CET APPAREIL A LA PLUIE OU A L’HUMIDITE. CAUTION RISK OF ELECTRIC SHOCK DO NOT OPEN “CAUTION:TO REDUCE THE RISK OF ELECTRIC SHOCK, DO NOT REMOVE COVER (OR BACK). NO USER-SERVICEABLE PARTS INSIDE. REFER SERVICING TO QUALIFIED SERVICE PERSONNEL.
TABLE DES MATIÈRES PRÉPARATIFS ALIMENTATION FOURNIE .................................................. 4 TÉLÉCOMMANDE .............................................................. 4 AVANT LA MISE EN SERVICE ........................................... 5 RÉGLAGE DE L'HORLOGE ............................................... 5 SON RÉGLAGE DU SON ............................................................. 6 LECTURE DE CASSETTE OPÉRATIONS DE BASE .....................................................
PRÉPARATIFS ALIMENTATION FOURNIE TÉLÉCOMMANDE UTILISATION SUR COURANT SECTEUR INSERTION DES PILES Raccordez le cordon secteur comme indiqué sur Détachez le couvercle du logement des piles au dos de la télécommande et insérez deux piles R03 (format AAA). 1 À la prise secteur de l'appareil Cordon secteur (fourni) 2 À la prise secteur murale (CA 120 V, 60 Hz) L’indicateur OPE/BATT s’allume lorsque l’appareil est sous tension. PRÉCAUTION Utilisez uniquement le cordon secteur fourni.
AVANT LA MISE EN SERVICE RÉGLAGE DE L'HORLOGE Pour mettre sous tension Appuyez sur l'une des touches de fonction (TAPE/REV MODE, TUNER/BAND, CD). La lecture du disque inséré ou la cassette commence, ou la station précédemment accordée est reçue (fonction de lecture directe). La touche POWER est également validée. L’appareil s’éteint également lorsqu’on appuie sur la touche z CD OPEN.
SON RÉGLAGE DU SON SYSTÈME Q SURROUND Le système Q SURROUND intégré à cet appareil utilise uniquement deux enceintes à droite et à gauche pour créer une atmosphère qui vous donne l'impression d'être entouré de deux enceintes avant et deux enceintes arrière. Appuyez sur la touche QSURROUND. Pour annuler, appuyez à nouveau sur la touche. REMARQUE COMMANDE VOLUME Tournez la commande VOLUME/TIMER sur l'unité principale ou appuyez sur les touches VOLUME sur la télécommande.
LECTURE DE CASSETTE OPÉRATIONS DE BASE LECTURE D'UNE CASSETTE Insérez une cassette. Appuyez sur la touche d (ou la touche c sur la télécommande) pour démarrer la lecture. Face de lecture de la cassette Le compteur de la cassette x: La face avant est lue (en avant). c: La face opposée est lue (en arrière). INSERTION D'UNE CASSETTE Utilisez seulement des cassettes de Type I (normal).
RÉCEPTION RADIO ACCORD MANUEL Quand un programme stéréo FM contient du bruit Appuyez sur la touche MODE sur la télécommande. MONO apparait dans l'afficheur. Le bruit est réduit, mais la réception est monaurale. Pour revenir en réception stéréo, répétez l'opération précédente. 1 Appuyez plusieurs fois sur la touche TUNER/ BAND pour sélectionner la bande souhaitée. FM AM Si l'appareil est hors tension, c'est la station antérieurement captée qui s'écoutera (fonction de lecture directe).
PRÉRÉGLAGE DE STATIONS ACCORD PAR NUMÉRO DE PRÉRÉGLAGE Utilisez la télécommande pour sélectionner directement le numéro de préréglage. 1 Appuyer sur la touche TUNER/BAND pour sélectionner la gamme. 2 Appuyez sur les touches numérotées sur la télécommande pour sélectionner un numéro de préréglage: Exemple: Pour sélectionner le numéro de préréglage 15, appuyez sur les touches +10 et 5. Pour sélectionner le numéro de préréglage 10, appuyez sur les touches +10 et 0.
LECTURE DE CD OPÉRATIONS DE BASE Pour arrêter la lecture, appuyez sur la touche s. Pour interrompre temporairement la lecture (pause), appuyez sur la touche a. Appuyez une seconde fois pour la reprendre. Pour localiser un point particulier pendnt la lecture, maintenez la touche f ou g pressée et relâchez au point souhaité. Pour sauter au début d'une piste pendant la lecture, appuyez plusieurs fois sur la touche f ou g. Pour retirer la disque, appuyez sur la touche CD OPEN.
LECTURE ALÉATOIRE LECTURE PROGRAMMÉE Toutes les pistes du disque peuvent être lues de manière aléatoire. Vous pouvez programmer jusqu'a 30 pistes d'un disque inséré. Utilisez la télécommande. 1 En mode d’arrêt, appuyez plusieurs fois sur la touche MODE sur la télécommande jusqu'à ce que RANDOM s'allume dans l'afficheur. 1 En mode d’arrêt, appuyez plusieurs fois sur la touche MODE sur la télécommande jusqu'à ce que MEMO clignote dans l'afficheur.
ENREGISTREMENT ENREGISTREMENT Cette section vous explique comment enregistrer depuis la radio ou le lecteur de CD. Pour arrêter l'enregistrement, appuyez sur la touche s. Pour arrêter temporairement l'enregistrement, appuyez sur la touche a. (Applicable si la source est RADIO.) Pour reprendre l'enregistrement, appuyez à nouveau.
MINUTERIE LECTURE ET ENREGISTREMENT TEMPORISÉS L'appareil peut être mis sous tension à une heure spécifiée tous les jours avec la minuterie intégrée. Pour enregistrer depuis une émission de radio, appuyez sur la touche TUNER/BAND et accordez une station, puis insérez la cassette à enregistrer. 7 Tournez la commande VOLUME/TIMER pour régler le volume. 8 Appuyez sur la touche POWER pour mettre l'appareil hors tension.
GÉNÉRALITÉS ENTRETIEN ET MAINTENANCE GUIDE DE DÉPANNAGE L'entretien et la maintenance périodiques de l'appareil et des disques sont requis pour optimiser les performances de l'appareil. Vérifiez les points suivants si l'appareil ne fonctionne pas comme indiqué dans ce mode d'emploi. GÉNÉRALITÉS Nettoyage du coffret Utilisez un chiffon doux et sec. Si les surfaces sont très sales, utilisez un chiffon doux légèrement humidifié d'une solution détergente douce.
SPÉCIFICATIONS Section tuner FM Plage d'accord Antenne 87,5 MHz à 108 MHz Antenne à tige Section tuner AM Plage d'accord Antenne 530 kHz à 1710 kHz (pas de 10 kHz) 531 kHz à 1602 kHz (pas de 9 kHz) Antenne à barre en oxyde de fer Section platine cassette Format des pistes 2 canaux stéréo, 4 pistes Réponse de fréquence Cassette normale: 50 Hz – 12500 Hz Système d'enregistrement Polarisation CA Têtes 1 tête d'enregistrement/lecture, 1 tête d'effacement Section lecteur de disque compact Laser Convertisse
PARTS INDEX / ÍNDICE DE LOS COMPONENTES / INDEX 1 QSURROUND ................................ 6 T-BASS ........................................... 6 3-MODE EQ ................................... 6 2 POWER 6 STANDBY/ON .............. 5, 8, 13, 14 3 w REC/REC MUTE ....................... 12 4 f/r, t/g TUNING -/+ ................................. 5, 7, 8, 9, 10, 12, 13 5 PHONES ......................................... 5 6 TAPE/REV MODE .......................... 5, 7, 12, 13 TUNER/BAND .......................