For assistance and information, call toll free I-800 -WY+WVA.
TO REDUCE THE RISK OF FIRE OR ELECTRIC SHOCK, DO NOT EXPOSE THIS APPLIANCE TO RAIN OR MOISTURE.
TABLE OF CONTENTS PREPARATIONS CONNECTIONS ..................................................................4 REMOTE CONTROL ........................................................... 5 BEFORE OPERATION ........................................................ 5 SETTING THE CLOCK ........................................................ 6 SOUND ADJUSTING THE SOUND .................................................. 7 RADIO RECEPTION MANUAL TUNING ............................................................
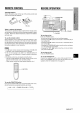
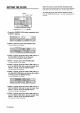
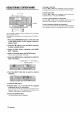
CONCERNING THE DISPLAY WINDOW’S DEMO DISPLAY CONNECTIONS When the AC cord is plugged into an electrical outlet for the first time after purchase, a demo display will appear in the display window. When the power is turned end. When the power is turned again. Until whenever % the clock the power will is set, the demo is turned off. display (For setting will appear the clock, see m ● Do not disconnect the AC cord while the power is on.
REMOTE CONTROL IBEFORE OPERATION Inserting batteries Detach the battery cover on the rear of the remote control and insert two R6 (size AA) batteries. R6’(AA) When to replace the batteries The maximum operational distance between the remote control and the sensor on the main unit should be approximately 5 meters (16 feet). When this distance decreases, replace the batteries with new ones.
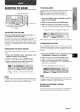
I When the power is turned off after setting the clock SETTING THE CLOCK If the power economizing mode is off, the clock remains displayed. If the power economizing mode is on, the clock also clears. To display the clock when another display is shown ENTER I cMULTI Press the TIMER/CLOCK JOG seconds. 1 2 or 3 turn the MULTI JOG dial to set the year. The year can be set between 1999 and 2040. 4 Within 1 minute, press the ENTER button. The month flashes on the display.
ADJUSTING THE SOUND EQ (EQUALIZER) This unit provides the following three different equalization curves. F1OCK: Powerful sound emphasizing treble and bass F’OP: More presence in the vocals and midrange JAZZ: Accented lower frequencies for jazz-type music the SOUND button repeatedly appears on the display. until EQ ? Press Within 5 seconds, press the ENTER button. Within 5 seconds, turn the MULTI JOG dial. Select one of the three equalization curves, or off position.
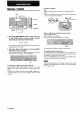
For better reception FM MANUAL TUNING ● Extend the FM antenna ● DISP Keep the AM antenna ~ r MULTI JOG aI 00. 000 000 000 000 and orient it for the best reception. AM and orient away from other electrical appliances it for the best reception. MODE ~BAND o ?~ +4, II * When an FM stereo broadcast Press the MODE 1 Press the TUNER/BAND button on the main unit or the BAND button on the remote control repeatedly to select the desired band. MONO appears contains noise button.
PRESETTING STATIONS PRESETTING STATIONS MANUALLY 1 Press the TUNER/BAND button on the main unit or the BAND button on the remote control to select a band. 2 Press the ++ or ➤> button or turn the MULTI JOG dial to select a station. 3 Press the EDIT button repeatedly SET ? appears. 4 Within 5 seconds, The station 2-_._l is stored press the ENTER button. and assigned 1 Press the TUNER/BAND When a station station. directly. is stored, Use the preset a preset number.
REGISTERING To change a character STATION NAME Press the <+ be changed or - button flashes. repeatedly until the character Then enter the desired character to again. To delete characters #------7 Press the 4+ be deleted or - flashes. button repeatedly Then press the II until the character to button. To insert a space between the characters Press entered the < or - button as a space flashes.
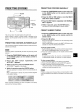
OPERATION Selecting a track with the remote control Press the numbered buttons and the +1 O button to select a track. Example: To select the 25th track, press the +1 O, +10 and 5 buttons. To select the 10th track, press the +10 and O buttons. The selected track starts to play and play continues to the end of that disc. Display in stop mode “The display shows the following Total number of tracks information.
rMULTl CDF~ PROGRAMMED JOG PLAY Up to 20 tracks can be programmed u“”,, disc. 1 In stop mode, press the MODE button on the main unit repeatedly until PROGRAM? appears on the display. . 2 Within 5 seconds, k II from the inserted press the ENTER button. L-#-.._, 3 Turn the MULTI JOG dial to select a track to be programmed, and press the ENTER button. All the tracks on the disc can be played randomly.
To set the tape counter to 0000 Press the ■ button in stop mode. OPERATION The counter is also set to 0000 when the cassette holder is opened. Selecting a reverse mode In stop mode, press the MODE button repeatedly. Each time the button is pressed, the reverse mode changes. P MODE 00:: 000 000 000 000 I ‘o p *:M VII II L MODEJ ‘TAPE+> 44, b- r =-+=)+(=) : “ To play one side only, select 1.
WHAT IS Ahl MD (MINI DISC)? An MD is only 64 mm (2 5/s inches) in diameter, about THE LIMITATIONS OF MD half the size of a conventional CD. But MD can be used to store and play back a full 74 minutes of data such as a CD. Unlike a CD, MD comes in a plastic cartridge, The cartridge also protects so that it can be handled with ease. the disc inside from shocks, dust and scratches. Unlike cassette tapes, which can become stretched or tangled, an MD is an excellent durable media.
OPERATION Selecting a track with the remote control Press the numbered buttons and the +1 O button to select a track. Example: To select the 25th track, press the +1 O, +1 O and 5 buttons. To select the 10th track, press the +10 and O buttons. —DISPLAY r The selected track starts to play and play continues to the end of that disc. To start play when the power is off (Direct Play Function) Press the MD > Inserted button. The power is turned on and play of the disc begins.
■ -l PROGRAMMED ~MULTl MD>= JOG PLAY Up to 20 tracks can be programmed ., from the inserted disc. 1 In stop mode, press the MODE button on the main unit repeatedly until PROGRAM? appears on the display. ””,,. 2 Within 5 seconds, press the ENTER button. 3 Turn the MULTI JOG dial to select a track to be programmed, and press the ENTER button. All the tracks on the disc can be played randomly.
m OPERATION If squealing or beating sounds occur when recording an AM broadcast, press the MODE button repeatedly and select one of the two modes, BEAT 1 or BEAT 2, which eliminates the noise better. F oDL— 000 000 000 I 000 0 3 L 2 [T +HII <, @ RECORDING A TAPE A WHOLE CD OR MD ONTO Use the CD/MD~TAPE button to record all the tracks of a CD or MD onto a tape from the beginning.
To record on a previously recorded MD ABOUT THE INDEX MARK If there is an unrecorded section left on the MD, the new recording automatically starts from where the previous recording finished. If you want to start recording from the beginning of a previously recorded MD, erase the previous recording completely. (See The unit registers index marks while recording on an MD. Index marks allow you to easily locate the desired tracks. page 25.
RECORDING ■---y A WHOLE CD r CD/MD}TAPE RECORDING A CD ONTO A TAPE AND AN MD SIMULTANEOUSLY 1 Load a CD and press the FUNCTION the remote control to select CD. ~DISpLAY I D .1Oo 000 000 000 OOQ button on 2 Load a tape to be recorded. 3 Insert a recordable MD into the disc drive. 00 o @ F( ■ 4 Press the CD - MD button and the CD/MD TAPE button simultaneously. Recording - onto the tape starts, while the CD enters playback pause mode and the MD enters the recording pause mode.
RECORDING OF A CD PROGRAMMED A CD ONLY ONE TRACK 2 9---) T RECORDING Up to 20 tracks can be programmed rMULTl and recorded 31!5 P 000 000 000 Oa I .lOcl 000 @ 000 ++, ➤> 000 000 0 button. starts. 1 Insert a recordable MD into the disc drive with the label side up and in the direction of the arrow.
RECORDING FROM A TAPE, CD OR THE RADIO MANUALLY EXTENDED (MONAURAL) RECORDING Twice as long as the time printed you select the monaural TUNER/BAND CDF Monaural TAPE<~ MDF ■ IF FMULTI recording on the MD can be obtained recording when recording mode is available , ➤> +-l P MDF q 0 ❑ TUNER/BAND 3F TAPE+F ~MULTl JOG P 44 @$?J---- (3 ,) II 3JL ENTER 44.
To change a character REGISTERING THE DISC TITLE AND TRACK TITLE Press the + be changed To delete You can register repeatedly or - button repeatedly be deleted flashes. Then press the II To insert a space between Press the + entered or - until the character character to again. until the character to button. the characters button as a space flashes. B“ 000 000 000 000 button Then enter the desired characters Press the + the titles of the discs and tracks.
m DIVIDING A TRACK ● If the track had a title before the division, the first of the two divided You can divide a track into two tracks by registering an index mark, ● A track cannot contains 254 tracks. be divided the title is assigned to tracks. when an inserted disc already Example To divide the 3rd track into two tracks at 2 minutes -2 minutes 30 seconds: 30 seconds (—---;: 1---) 1 Insert an MD and press the MD play.
CHANGING THE ORDER OF THE TRACKS COMBINING TWO TRACKS You can combine two tracks by erasing the index mark in between. You can change Example To combine the 2nd track and the 3rd track by erasing mark at the beginning the index the order of tracks after completing a recording. Example To move the 3rd track to the 1st position of the 3rd track: 2nd track 1st track 3rd track 4----)f--4 2--JI 7 Q---3,4 2-J 1 Insert an MD and play back the latter track of the two tracks to be combined.
ERASING TRACKS ERASING A SINGLE TRACK ERASING ALL TRACKS ON A DISC ■--) P000 000 000 000 000 c; ❑ L-+ 0@l II L 2--J “ ;,4 2-J 1 L “ ;,4 1 Insert an MD and play back the track to be erased. 2 Press the EDIT button repeatedly Erase ? appears on the display. 3 Within 10 seconds, The display changes until Track press the ENTER button. to Erase ??. m If you erase all the tracks, you cannot retrieve them again.
5 For timer play: select the source with the + or > button or the MULTI JOG dial, then press the ENTER button. For timer recording : select the destination (MD or TAPE) with the++ or W button or the MULTI JOG dial, then press the ENTER button. TIMER PLAY AND TIMER RECORDING When timer play is selected Source When timer recording The unit can be turned on at a specified built-in timer. Make sure the clock is set correctly. for timer play is selected time every day with the (See page 6.
To check or change the specific Press the TIMER/CLOCK or TIMER REC ? appears, items button repeatedly until TIMER then press the ENTER PLAY? SETTING THE SLEEP TIMER button within 5 seconds. Each time the ENTER button is pressed, If you want to change the specific each item is displayed.
Care of tapes CARE AND MAINTENANCE Occasional care and maintenance are needed to optimize ● Store tapes ● Do not leave tapes near magnets, any source of magnetism. of the unit and the software the performance in their cases after use. of your unit. ● and cause noise. Do not expose tapes to direct sunlight, parked To clean the cabinet motors, television This will downgrade sets, or the sound quality or leave them in a car in direct sunlight. Use a soft and dry cloth.
MD GUIDE MESSAGES Solution Message Cause Blank Disc Nothing Can’t Edit Tracks are too short to be joined is recorded The combine on the disc. function up. See “THE LIMITATIONS OF MD” on page 14. was used while playing back the first track, The divide function is used at the beginning of the track. The combine recorded function was used to join a track in monaural with a track recorded in stereo, Disc Error The disc is damaged The unit received by scratches.
COPYRIGHT SPECIFICATIONS Please check the laws on copyright discs, radio or external is being used. FM tuner section Tuning range Antenna 87.5 MHz to 108 MHz Rod antenna 530 kHz to 1710 kHz (1 O kHz step) 531 kHz to 1602 kHz (9 kHz step) Loop antenna CD player section Scanning method Frequency response D/A converter Cassette deck section Trackformat Frequencyresponse Recordingsystem Heads Non-contact optical scanner (semiconductor laser) 40 HZ tO 20,000 HZ % dB 1 bit dual Rules.
TROUBLESHOOTING GUIDE MD RECORDER SECTION The MD recorder cannot be operated ● If the unit fails Instructions, to perform as described check the following in these Operating guide. Is there a disc inside the unit ? .+ Insert a disc. ● Is the lens affected by condensation? .
PARTS INDEX Page Name Page Name ~ Display @ DISPLAY e Function buttons MD - button @ Numbered 5,15 CD > 5,11 button TUNER/BAND TAPE <> button 5,8,9,10 5,13 4, 5, 26 button @ POWER button 0 Operation buttons W STOP button +,* TUNING 4,11-13, 15-17, 19-21 DOWN/UP buttons 6,8-11,13, 15,22-24,26 II PRESET 9,11,13,15, CALL button 17 6, 26, 27 7 ~ TIMER/CLOCK button Cl SOUND button ~ A CD EJECT button ~ CD tray ~ Recording buttons ● MD REC button 11 21 ● TAPE REC button CD > MD
7 ADVERTENCIA PARA REDUCIR EL RIESGO DE INCENDIOS O SACUDIDAS ELECTRICAS, NO EXPONGA ESTE APARATO A LA LLUVIA NI A LA HUMEDAD. Ah k CAUTION Do 8 ● ● ● ● . A “CAUTION.TO REDUCE THE RISK OF ELECTRIC SHOCK, DO NOT REMOVE COVER (OR BACK). NO USER-SERVICEABLE PARTS INSIDE. REFER SERVICING TO QUALIFIED SERVICE PERSONNEL.
iNDICE PREPARATIVES CON EXIONES ..................................................................... 4 MANDO A DISTANCIA ....................................................... 5 ANTES DE LA OPERACION .............................................. 5 PUESTA EN HORA DEL RELOJ .......................................6 SONIDO AJUSTE DEL SONIDO ....................................................... 7 RECEPCION DE LA RADIO SINTONIZACION MANUAL ................................................
SOBRE LAS INDICACIONES DEMOSTRACION CONEXIONES Cuando pantalla se conecta el cable electrico de CA por primers vez, la produce indicaciones de demostracion. Cuando se enciende, Ias indicaciones se apaga, vuelve indication de demostracion unidad hasta que ponga No desconecte encendido. ● aparece la pagina finalizan, cada No desenrolle La vez que apague (Para la puesta la en 6.
MANDO A DISTANCIA ANTES DE LA OPERACION Colocacion de Ias pilas Abra la tapa distancia del portapilas y coloque en la parte trasera dos pilas R6 (tamatio del mando a AA). R6”(AA) Cuando cambiar Ias pilas La distancia de control maxima entre el mando a distancia y el sensor de la unidad principal debe ser de aproximadamente 5 metros. Cambie Ias pilas por otras nuevas cuando disminuya esta distancia. Para encender la unidad Pulse el boton POWER.
Mientras la unidad esta apagada despues de ajustar el reloj PUESTA EN HORA DEL RELOJ Si el modo permanece Si el modo de ahorro ENTER 1 cMULTI de ahorro Para visualizer Pulse el boton segundos. 2 Antes de 5 segundos, El aho parpadea hasta pulse el boton ENTER. en la pantalla. Pb, o 3 Antes de 1 minute, pulse el boton <0 gire el selector MULTI JOG para ajustar el afio. Se puede ajustar el afio entre 1999 y 2040. 4 Antes de 1 minute, pulse el boton ENTER. El mes parpadea en la pantalla.
E(Q (Ec~~LlzADOR) AJUSTE DEL SONIDO Esta unidad proporciona Ias siguientes tres diferentes curvas de ecualizacion. 7VOLUME RC)CK: Sonidos UP/DOWN poderosos PC)P: Mas presencia 1! JAZZ: con realce de agudos en Ias votes Frecuencias y graves y en la gama de registro medio bajas acentuadas para mtisica tipo jazz 000 000 000 000 000 :@= 1 Pulse el boton SOUND u b 6 VOLAIV I EQ ? aparezca varias veces hasta que en pantalla. 2 Antes de 5 segundos, pulse el boton ENTER.
SINTONIZACION Para una mejor recepcion FM MANUAL ● Extienda la antena recepcion. DISP ● de FM y orientela hasta obtener una mejor AM Mantenga orientela la antena de AM Iejos de aparatos hasta obtener electricos y una mejor recepcion. LI iODE 2 L Cuando la emisora de FM estereo tiene ruidos 1 Pulse varias veces el boton TUNER/BAND en la unidad principal o el boton BAND del mando a distancia hasta seleccionar la banda deseada.
PREAJUSTES DE EMISORAS F’REAJUSTE MANUAL DE EMISORAS 1 Pulse el boton TUNER/BAND en la unidad principal o el boton BAND del mando a distancia para seleccionar una banda. r rQ 2 Pulse el boton ++ o Fo gire el selector MULTI JOG hasta seleccionar una emisora. 000 000 000 000 000 0-9,+1 o 3 Pulse valrias veces el boton MANUAL SET ? aparezca. +BAND puede memorizar Se memoriza un total de 15 presintonias para Cuando se memoriza una emisora, recibe un ntimero de preajuste.
REGISTRO EMISORA DEL NOMBRE DE UNA Para cambiar un caracter Pulse varias veces el boton caracter a cambiar. 440- Luego vuelva hasta que parpadee a entrar el caracter el deseado. Para borrar Ios caracteres Pulse varias caracter o D clan 000 000 000 000 ~~A~~ ‘0!3 Puede registrar el nombre que desea para una emisora. El nombre registrado aparece en la pantalla al sintonizar emisora.
OPERACION Para empezar la reproduction con la unidad apagada (funcion de reproduction directs) Pulse el boton reproduction CD F. Para reemplazar ~ CD EJECT %!leccion La unidad se enciende y empieza la del disco colocado. el disco antes de la reproduction, para abrir el compartimiento pulse el boton del disco. de una pista con el mando a distancia PLllse Ios botones numerados y el boton +1 O para seleccionar una pista.
REPRODUCTION Se pueden colocado. PROGRAMADA programar hasta P“ 000 000 000 000 00[: 00 0“” @& 2 Antes de 5 segundos, En el modo la repetition parada, pulse el boton ENTER. 3 Gire et selector MULTI JOG para seleccionar una pista para programar, y pulse el boton ENTER. reproducer aleatoriamente. En el modo de parada, pulse varias veces el boton MODE en la unidad principal hasta que RANDOM? aparezca en la pantalla, y antes de 5 segundos, pulse el boton ENTER.
OPERACION Para ajustar e! contador de la cinta a 0000 El contador pcrtacasete, II ‘T ENTER lr F j ● Puede seleccionar o ambos Iados. ‘TAPE+ a 0000 cuando el pulse varias veces el boton MODE. el modo de inversion cambiara. MODE ~ II II “ Para reproducer una sola cara, seleccione Para reproducer de la cara delantera a la cara trasera Z, vez, seieccione Palra reproducer =).
LIMITACIONES LQUE ES UN MD (MINIDISCO)? La grabacion Un minidisco tiene aproximadamente minidisco solamente 64 mm de diametro, de un disco compacto se puede utilizar conventional. para grabar y reproducer de dates tales como Ios de un disco compacto. un disco compacto, el minidisco por 10que puede ser manejado la mitad Pero un 74 minutes A diferencia viene en un cartucho con mucha facilidad.
OPERACION Seleccion de una pista con el mando a distancia Pulse Ios botones numerados y el boton +1 O para seleccionar una pista. Ejemplo: Para seleccionar la pista +10 and 5. Para selecciorw La reproduction ntimero 25, pulse Ios botones +1 O, la pista numero 10, pulse Ios botones +1 O y O. de la pista seleccionada empieza y continua hasta el final del disco.
REPRODUCTION Se pueden hasta 20 pistas del disco que esta P. 1 En el modo de parada, pulse varias veces el boton MODE en la unidad principal hasta que aparezca PROGRAM? en la pantalla. REPEAT I on programar colocado. 000 000 000 000 00[: PROGRAMADA o#K%&ii- REPRODUCTION 2 Antes de 5 segundos, 3 Gire el selector MULTI JOG para seleccionar una pista para programar, y pulse el boton ENTER. ALEATORIA Todas Ias pistas del disco se pueden reproducer aleatoriamente.
OPERACION Palra parar la !grabacion, un disco compacto pulse el boton o de un minidisco, ■ . Cuando grabe de pulse de nuevo el boton ■ para parar la reproduction. Para hater una pausa de grabacion, OOL 000 000 000 0 L ( @ ~+m L I cuando grabacion, vuelva la fuente pulse es la radio.) el boton Para II. reanudar la a pulsar.
Para grabar en un minidisco MARCAS INDICATORIAS La unidad registra unas marcas indicatorias Si queda grabacion durante la grabaci6n anterior Las marcas indicatorias Ie permiten Iocalizar facilmente Ias pistas que desea. La information de la marca compacto se copia tal cual. indicatoria grabada en @l disco Pulse el boton seleccionar minidisco. Disco Compacto W pista 2* pista la grabacion desde el principio previamente grabado, borre completamente grabacion. (Vease la pagina 25.
GRABACION DE TODO UN DISCO COIVIPACTO GFIABACIC)N SIMULTANEA DE UN DISCO CC)MPACTO A UNA CINTAY A UN MINIDISCCII 1 Cargue un disco FUNCTION del $eleccionelr CD. 2 Cargue y pulse compacto mando a distancia la (cinta en la que desea 3 Inserte un minidisco minidiscos. grabable grabar. en la unidad de 4 Pulse e! boton CD > MD y el boton TAPE simultaneamente.
GRABACION PROGRAMADA UN DISCO COMPACTO GRABACION DE UNA SOLA PISTA DE UN DISCO COMPACTO 2 Se pueden > T ■ ~MULTl programar y grabar DE hasta 20 pistas en un minidisco. JOG DISPLAY T JOo 00 000 000 000 0 L % k grabable en el 1 Coloque un minidisco compartimiento de discos con el Iado de la etiqueta hacia arriba y en el sentido de la flecha. 2 Coloque CD -. Empieza un disco compacto y pulse el boton la pista deseada.
GRABACION MANUAL DE UNA CINTA, UN DISCO COMPACTO O DE LA RADIO GRABACION EXTENDIDA (MONOAURAL) Se puede hater en el minidisco TUNER/BAND CD* una grabacion si selecciona con el doble del tiempo el modo de grabacion El modo de grabacion grabacion de una cinta o la radio. monoaural esta impreso monoaural. disponible para la TAPE+> MDP y ~ MULTI JOG IF P 000 000 000 000 000 CIQ 44 gJ----- [3 ~+m ,) II ~.
Para cambiar un caracter REGISTRO DE TiTULOS DE DISCOS Y TiTULOS DE PISTAS Pulse varias caracter veces ei boton- a cambiar. o ›~ Luego vuelva hasta que parpadee entrar el caracter el deseado. Para borrar Ios caracteres Puede registrar el titulo de Ios discos Pulse varias y de Ias pistas. caracter veces el boton 4+ o M hasta que parpadee a borrar. Luego pulse el boton el II.
am DIVISION DE UNA PISTA s Si la pista tenia un tftulo antes de la division, para la primers de Ias dos pistas divididas. Puede dividir una pista en dos partes registrando una marca indicatoria. ● N’o se puede time dividir una pista cuando et tftulo se registra un disco insertado ya 254 pistas, Ejemplo Para dividir la 3’ pista en dos pistas a Ios 2 minutes 30 segundos: -2 minutes 30 segundos ZJ L{,6 3 1 Inserte un minidisco y pulse el boton MD empezar la reproduction.
COMBINATION Puede combinar CAMBIO DEL ORDEN DE LAS PISTAS DE DOS PISTAS dos pistas borrando la marca indicatoria entre ellas. Puede cambiar Ejemplo Para combinar principio el orden de Ias pistas despues de completar la grabacion. la 23 y la 3e pista borrando la marca indicatoria al Ejemplo de la 3a pista: Para mover 1 Inserte un minidisco y reproduzca la dos pistas a combinar. la segunda de 2 Pulse varias veces el boton EDIT aparezca Combine? en la pantalla.
BORRADO DE PISTAS BORRAD() DE lJNA 1 Ilnserte un minidisco Iborrar. SOLA PISTA y reproduzca la pista a 2 lPulse varias veces el boton EDIT hasta aparezca l-rack Erase ? en la pantalla. 3 Antes de 10 segundos, I.a pantalla 1 Inserte un minidisco y pulse el boton FUNCTION del mando a distancia para seleccionar la funcion minidisco. 2 En el modo de parada, pulse varias veces el boton EDIT hasta que aparezca All Erase ? en la pantalla.
5 Para la reproduction con temporizador: seleccione la fuente con el boton ++ o F- o el selector MULTI JOG, Iuego pulse el boton ENTER. Para la grabacion con temporizador: seleccione el destino (MD oTAPE) con el boton ++ 0-0 el selector MULTI JOG, Iuego pulse el boton ENTER.
Para comprobar o cambiar Ios detalles especificos Pulse varias veces el boton TIMER/CLOCK TIMER PLAY? o TIMER hasta que aparezca REC ?, Iuego pulse el boton ENTER antes de 5 segundos. Cada vez que pulsa el boton ENTER, aparece cada detalle AJUSTE DEL TEMPORIZADOR APAGADO DE en pantalla.
Cuidado de Ias cintas CUIDADO Y MANTENIMIENTO ● ● El mantenimiento software resultan la unidad. y el cuidado necesarios ocasional para optimizar de la unidad o fuentes de magnetism. y se escucharan ruidos. y del Ias prestaciones Guarde Ias cintas en sus cajas despues de utilizarlas. No deje Ias cintas cerca de imanes, motores, aparatos de ● Esto afectara No exponga Ias cintas estacionado bajo Ios rayos del sol.
MENSAJES GUiA DE MINIDISCOS Mensiaje Causa Soiucion Blank Disc (Disco virgen) No hay nada grabado — — Can’t Edit Las pistas son demasiado (No se puede en el disco. cortas — para ser unidas. editar) La funcion de combination reproduction La funcion se utiiizo mientras de la primers de division la Vease “LIMITACIONES pagina 14. DEL MI NIDISCO” en la pista, se utilizo al comienzc) de la pista.
ESPECIFICACIONES DERECHOS Seccion dei sintonizador Gama de sintonizacion Antena de FM 87,5 MHz a 108 MHz Antena de varilla del pais en el que se utilice la unidad.
GUiA PARA LA SOLUCION PROBLEMAS DE SECC1ON ● S! la unidad no funciona instrucciones, compruebe GENERALIDADES No hay sonido. . LEst~ bien conectado como se describe la siguiente DE LA GRABADORA La grabadora de minidiscos . ~tiay un disco en el interior en este Manual + Inserte un disco. L/\ fecta la condensaci~n -+ Espere de el cable electrico de CA? El sonido es inltermitente LEsta la unidad sobre una superficie mucho? + Ponga la unidad sobre una superficie Noes posible grabar .
iNDICE DE LAS PARTES Pagina Nombre 0 Pantalla O Botones de funcion Boton MD > 5,15 Boton CD b Boton TUNER/BAND Boton TAPE +> POWER 5,11 5,8,9,10 5,13 4,5,26 Botones de operation Boton ■ STOP 4,11-13, @ Boton 0 15-17,19- Nombre Pagina @ Boton MODE 4,12,13, 16,20,22 Boton DISP 8,11,15, 19,20 Boton EDIT 9,10,2225 Boton ENTER 6,7,9,10, 12,13,16, 20-27 11,15,19, @ Boton DISPLAY 21 Botones Boton II ++,- PRESET TUNING DOWN/UP CALL @ Boton TIMER/CLOCK 0 ~ Boton SOUND Boton ~ CD EJECT
7 AVERTISSEMENT POUR REDU!RE LE RISQUE D’INCENDIE OU DE DECHARGE ELECTRIQUE, NE PAS EXPOSER CET APPAREIL A LA PLUIE OU A L’HUMIDITE. AkiiiiidA “CAUTION”TO REDUCE ELECTRIC DO NOT REMOVE COVER SERVICING SERVICE Explication ● Alimentation 1 Sources d’alimentation – Raccordez (OR BACK). PARTS INSIDE TO QUALIFIED 2 PERSONNEL.
TABLE DES MATIERES PREPARATIFS RACCORDEMENTS ................ ....................... ..................... 4 TELECOMMANDE .....................m ........................................5 AVANT LA MISE EN SERVICE .......................................... 5 REGLAGE DE L’HORLOGE ...............................................6 SON REGLAGE DU SON ............................................................7 RECEPTION RADIO ACCORD MANUEL .............................................................
RACCORDEMENTS AFFICHAGE DE DEMONSTRATION A la premiere insertion une prise secteur apparaitra du cordon apres I’achat, sur I’afficheur. demonstration s’arr&era. DE L’AFFICHEUR d’alimentation un affichage secteur A la mise sous tension, II reapparaltra clans de demonstration I’affichage de a la mise hors tension. II apparaRra a chaque mise hors tension tant que I’horloge ne sera pas reglee. (Voir la page 6 pour Ie reglage de I’horloge.
TELECOMMANDE AVANT LA MISE EN SERVICE Insertion des piles Detachez Ie couvercle telecommande du Iogement et inserez des piles deux piles R6 (format au dos de la CD>— AA). MD>POWER cTUNER/BAND 7 ---w rTAPE+- D 000 000 000 000 000 00 R6 (AA) @ Replacement La ~ortee des piles maximale de la telecommande, entre la telecommande 5 metres. “L et Ie capteur Remplacez Ies piles quand a savoir de I’appareil, la distance l_pHONES est d’environ la portee diminue.
ou 8 Dans la minute, appuyez sur la touche + >, ou tournez Ie cadran MULTI JOG pour regler la minute, puis clans la minute, appuyez sur la touche ENTER. REGLAGE DE L’HORLOGE ENTER Lhorloge I cMULTI demarre a 00 secondes. JOG Alors que I’appareil est hors tension apres Ie reglage de I’horloge Si Ie mode economie d’energie est desactive, economie d’energie est active, I’horloge reste affichee. Si Ie mode egalement.
REGLAGE DU SON E(2 (EGALISEUR) Cet appareil permet d’egalisation ROCK: d’obtenir Ies trois differences courbes suivantes. Son puissant renfor~ant Ies sons aigus et Ies sons graves POP: Plus de presence aux frequencies vocales et a mi-gamme JA;ZZ: Frequencies plus basses accentuees pour la musique de type jazz 1 Appuyez plusieurs fois sur la touche ~usqu’a ce que EQ ? s’affiche. 2 Dans Ies 5 secondes, IENTER. appuyez SOUND sur la touche 3 Dans Ies 5 secondes, tournez Ie cadran MULTI JOG.
Pour une meilleure FM ACCORD MANUEL Etendez meilleure DISP ● I reception ● I’antenne FM et orientez-la reception. I’antenne orientez-la AM d’autres de fa~on a obtenir Quand un programme 1 Appuyez plusieurs fois sur la toucheTUNER/BAND sur I’unite principal ou la touche BAND sur la telecommande pour selectionner une bande souhaitee. ~FM + Appuyez sur la touche appareils une meilleure de la station, stereo FM contient MONO apparait clans I’afficheur.
PRfREGLAGE DE STATIONS P13EREGLAGE DE STATIONS MANUEL 1 Appuyez sur la touche TUNER/BAND sur I’unite principal ou sur la touche BAND sur la telecommande pour selectionner une bande. r Y Q 2 Appuyez sur la touche <+ ou ➤> ou tournez Ie cadran MULTI JOG pour selectionner une station. 000 000 000 000 000 0-9,+10 3 Appuyez plusieurs fois sur la touche EDIT jusqu’a Ice que MANUAL SET ? apparaisse. +B~~~ * II Ir ,-__Jk;, J ➤> ++, 4 IDans Ies 5 secondes, IENTER.
CONSIGNATION STATIONS DE NOMS DE Pour chanaer Appuyez un caractere plusieurs que Ie caractere fois sur la touche a changer clignote. +4 ou ~ Entrez alors jusqu’a ce Ie caractere souhaite. Pour supprimer Appuyez des caracteres plusieurs que Ie caractere touche 1I. fois sur la touche a supprimer ++ clignote. ou - jusqu’a Appuyez alors ce sur la Pour inserer un espace entre Ies caracteres Appuyez plusieurs fois sur la touche que I’endroit a entrer sur la touche DISP.
OPERATION Selection Appuyez d’une piste avec la tel@commande sur (es touches selectionner numerotbes et sur la touche +10 pour une piste. Exemple: Pour selectionner la piste 25, appuyez sur Ies touches +10, +10 et 5. Pour se[ectionner la piste 10, appuyez sur Ies touches +10 et O. La lecture de la piste selectionnee demarre et continue jusqu’a la fin du disque.
LECTURE PROGRAMMED CD;<(“”’T””’ Vous pouvez programmer jusqu’a P“ 000 000 000 REPEAT I U9 0“” @& ➤ 2 Dans Ies 5 secondes, ENTER. L’11 ,.~ LECTURE ALEATOIRE Toutes Ies pistes du disques peuvent 6tre insere. 1 En mode d’arr~t, appuyez plusieurs fois sur la touche MODE sur I’unite principal jusqu’a ce que PROGRAM? apparaisse clans I’afficheur. 000 00:: 20 pistes d’un disque Iues de maniere aleatoire.
OPERATION Pour demarrer la lecture quand l’appareil tension (fonction de lecture directe) Appuyez sur latouche et la lecture TAPE de la cassette Pour regler Ie compteur Appuyez F 00[; MODE 000 000 000 000 Da I o m: (@ Dll II CI-IARGEMENT ● ● seulement Le compteur cassette ● >. Uappareil se met sous tension chargee commence. de bande a 0000 ■ button en mode d’arr&.
(IU’EST-CEQU’UN MD (MINIDNIUE)? LIMITES DU MD L’enregistrement Un minidisque (MD) n’a que 64 mm de diametre, soit environ la moitie d’un disque compact (CD) ordinaire. Mais un MD peut &re utilise pour memoriser 74 minutes de donnees, comme un CD. A la difference du CD, Ie MD se presente sous cartouche plastique, ce qui facilite la manipulation. La cartouche protege oussi Ie disque contre Ies chocs, la poussiere et Ies rayures. A sur un minidisque se fait differemment (60 minutes ou 74 minutes).
OPERATION Selection d’une piste avec la telecommande Appuyez sur Ies touches selectionner une piste. Exemple: Pour selectionner numerotees et la touche +1 O pour la piste 25, appuyez sur Ies touches +1 O, +10 la piste 10, appuyez sur Ies touches +1 O et O. et 5. {--DISPLAY Pour selectionner La lecture de la piste selectionnee demarre et continue jusqu’a Ila fin du disque.
LECTURE PROGRAMMED Vous pouvez P“ 000 000 000 000 00[: a ,. REPEAT I ‘~!: L Ies pistes du disques peuvent &re jusqu’a Iues de maniere aleatoire. 20 pistes d’un disque insere. 1 En mode d’arr~t, appuyez plusieurs fois sur la touche MODE sur I’unite principal jusqu’a ce que PROGRAM? apparaisse clans I’afficheur. 2 Dans Ies 5 secondes, ENTER.
Pour arr~ter I’enregistrement, appuyez sur la touche ■ , Quand OPERATION vous enregistrez depuis un CD ou un MD, appuyez ■ pour arreter la lecture. Pour arr~ter temporairement I’enregistrement, a nouveau sur la touche Iatouche Il. (Applicable I’enregistrement ~_3 000 L000 000 000 0 I L 2 ( @l ~+m ( II g-Je::y”E la touche MODE ● la cassette Utilisez seulement a I’endroit ou I’enregist des cassettes ement va demarrer. de Type I (normal) pour la lecture.
AU SUJET DES MARQUES INDEX Lappareil consigne des marques index Iors de I’enregistrement Pour enregistrer sur un MD precedemment enregistre S’il reste une enregistrement partie non enregistree sur Ie MD, Ie nouvel demarrera automatiquement a partir de I’emplacement ou I’enregistrement Si vous sur un MD. Les marques index vous permettent Ies pistes souhait6es. de Iocaliser plus facilement de la marque index enregistree sur Ie CD est copiee telle quelle.
ENREGISTREMENT DE TOUT UN CD ■> r CD/MD>TAPE ~-—-DlSPLAY r 1 D Joo 000 000 000 000 ❑ 0 ENREGISTREMENT SIMULTAN~ SUR ICASSETTE ET MD DEplJls UN CD 1 Chargez un CD et appuyez sur la touche FUNCTION sur la telecommande pour selectionner CD. ;2 Chargez ;3 Inserez un MD enregistrable disque. 4 Appuyez sur la touche CD > MD et sur la touche CD/MD P TAPE simultanement. o @ L.
ENREGISTREMENT PISTE D’UN CD 2 ■ = T ENREGISTREMENT D’UN CD — — D’UNE SEULE Jusqu’a flMULTl JOG 20 pistes peuvent PROGRAMME &tre programmers ?-7(---$5 P 000 000 000 000 000 00 I 0-9,+10 ~ k Jon 000 000 000 000 a L L. II demarre. la touche la piste souhaitee. <+ ou ➤>, Ie cadran MULTI JOG, ou Ies touches numerotees souhaitee. sur la telecommande 4 Appuyez sur la touche CD > I’enregistrement.
ENREGISTREMENT MANUEL DEPUIS UNE BANDE, UN CD OU LA RADIO ENREGISTREMENT (MONAURAL) PROLONGE l-e mode d’enregistrement permet d’enregistrernent CDP— TUNER/BAND MD, l-e mode MDF TAPE+- I’enregistrement ■ nlF deux monaural d’enregistrement depuis d’obtenir fois plus long que celui monaural la cassette est un temps indique disponible sur Ie pour ou la radio, ~ MULTI JOG :J L; 1 Inserez un MD enregistrable clans Ie Iecteur de disque avec l’6tiquette dirigee vers Ie haut et clans Ie sen
8 Appuyez sur la touche ENTER. CONSIGNATION DE TITRES DE DISQUES ET DE PISTES Vous pouvez consigner Ie titre des disques Le titre du disque A la consignation ou de la piste entre s’affiche. d’un titre de piste pendant piste sera Iue de maniere repetee ENTER soit pressee. En enlevant Ie MD de I’unite, et des pistes. jusqu’a la lecture, la ce que la touche TOC-EDIT clignote et Ie titre entre est consigne.
DIVISION 11’UNE PISTE 6)Si la piste a un titre avant Vous pouvez une marque diviser une piste en deux parties en consignant index. la division, premiere moitie de la piste divisee. -, Une piste ne peut ~tre divisee quand il sera consigne Ie disque avec la insere cOntient deja 254 pistes. Exemple Pour diviser la piste 3 en deux parties a 2 minutes 30 secondes: c 1 Imserez un MD et appuyez pour demarrer la lecture.
COMBINAISON Vous pouvez combmer DE DEUX PISTES deux plstes en effagant la marque index CHANGEMENT PISTES DE L’ORDRE DES entre elles. Vous pouvez changer Exemple Pour combiner la piste 2 et la piste 3 en effagant la marque index au debut de la piste 3: I’ordre des pistes apres un enregistrement. Exemple Pour mettre la piste 3 en 1ere position 1 Inserez un MD et Iisez la derniere des deux pistes a combiner. 1 Inserez un MD et Iisez la piste a deplacer.
EFFACEMENT DE PISTES IEFFACEMENT D’UNE SEULE PISTE EFFACEMENT DE TOUTES LES PISTES D’UN DISQUE 9-) 2---J L n ;,4 Inserez un MD et Iisez la piste a effacer. Appuyez plusieurs fois sur la touche EDIT jusqu’a ce que Track Erase ? apparaisse sur I’afficheur. 2---J L Dans Ies 10 secondes, ENTER. ;,4 Laffichage change appuyez sur la touche a Erase ??. ~ Si vous effacez recuperer.
5 Pour lecture temporisee : selectionnez la source avec Ies touches ++ ou F> ou Ie cadran MULTI JOG, puis appuyez sur la touche ENTER. Pour I’enregistrement temporise : selectionnez la destination (MD ouTAPE) avec Ies touches + ou ou Ie cadran MULTI JOG, puis appuyez sur la touche ENTER. LECTURE ET ENREGISTREMENT TEMPORISES ~TUNER/BAND POWER cMULTI I JOG Quand la lecture temporisee Source Quand TIMER/CLOCK Uappareil peut 6tre mis sous tension Ies jours avec la minuterie integree.
Pour verifier ou changer Ies items specifiques Appuyez plusieurs fois sur la touche TIMER/CLOCK jusqu’a ce appuyez que TIMER PLAY? ou TIMER REC ? apparaisse, ensuite sur la touche A chaque pression ENTER clans Ies 5 secondes. de la touche ENTER, chaque item s’affiche, Si vous souhaitez changer Ies items specifiques, appuyez touche ++ ou ➤P ou tournez Ie cadran MULTI JOG.
Entretien des cassettes Rangez Ies cassettes clans Ieur bo~te apres I’usage. ENTRETIEN ET MAINTENANCE ● ● L’entretien et la maintenance periodiques disques sent requis pour optimiser de I’appareil Ies performances et des Toutes Ies 10 heures de fonctionnement, nettoyez de la bande avec une cassette ou bien une ouate de coton humidified denature. Ies t&es de nettoyage de Iiquide (Ces kits de nettoyage une d’enregistrement/lecture, Ies rouleaux presseurs.
MESSAGES GUIDES MD Message Cause Blank Disc (Disque vierge) Can’t Edit Solution Rien n’est enregistre sur Ie disque. Les pistes sent trop courfes (Montage impossible) La fonction lecture combinaison de la premiere La fonction division pour ~tre combinees. a ete utilisee pendant Voir “LIMITES DU MD” a la page 14. la piste. a ete utilisee au debut de la piste.
COPYRIGHT Veuillez vous informer sur Ies Iois concernant SPECIFICATIONS des enregistrements exterieures Section tuner FM 87,5 MHz a 108 MHz Antenne tige Gamme d’accord Antenne 530 kHz a 1710 kHz (pas de 10 kHz) 531 kHz a 1602 kHz (pas de 9 kHz) Antenne-cadre Antenne a ete teste et juge conforme de Classe raisonnable contre installation residentielle.
~EcTlc)N GUIDE DE DEPANNAGE ENREG[STREUR MD RECORDER L’enregistreur MD ne fonctionne pas. Y a-t-ii un disque clans I’appareil? + Inserez un disque. ● La Ientille est-elle affectee par la condensation? + Attendez environ une heure et essayez a nouveau. ● Verifiez Ies points suivants indique clans ce mode d’emploi. si I’appareil en fonctionne pas comme GENERALITIES Absence de son. ● Le cordon d’alimentation secteur est-il raccorde correctement? Affichage errone 01.Imauvais fonctionnement.
NOMENCLATURE f- Nom ~ Afficheur O Touches de fonction Touche MD Touche CD Touche TUNER/BAND Touche TAPE
Cil// fO// free l-800-BUY-A/WA. Printed in Japan (United States and Puerto Rico) AIWA CO.,LTD.