c d OPERATING INSTRUCTIONS MANUAL DE INSTRUCCIONES MODE D’EMPLOI CT-FX530M YU STEREO CAR CASSETTE RECEIVER RADIO-CASSETTE ESTEREOFONICO PARA AUTOMOVIL ENGLISH ESPAÑOL FRANÇAIS OWNER’S RECORD For your convenience, record the model number and serial number (you will find them on the right side of your set) in the space provided below. Please refer to them when you contact your AIWA dealer in case of difficulty. Model No. CT-FX530M Serial No.
8A-KT9-901-11 000131BTM-OX Printed in China A
Welcome Thank you for your purchasing this AIWA product. To optimize the performance of this unit, please read through this manual carefully. In addition to this operating instructions manual, be sure to refer to the separate installation and connections manuals as well. PRECAUTIONS • This unit is designed to be operated on a 12-volt DC negative-ground electrical system only.
TABLE OF CONTENTS PARTS AND CONTROLS .................................................................................................................. 3 DETACHING AND ATTACHING THE FRONT PANEL ...................................................................... 4 SETTING THE CLOCK ....................................................................................................................... 5 RADIO OPERATION .........................................................................................
PARTS AND CONTROLS Front panel Display window Rear panel Front panel Display window 1 FUNC (function) button 2 PWR (power on/off)/MUTE button 3 Jog Dial 4 TUNE i/t* (forward skip)/FF (fast forward) button 5 TUNE k/r* (back skip)/REW (rewind) button 6 Cassette compartment 7 z (eject) button 8 Sensor for the remote control 9 A.
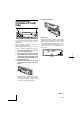
DETACHING AND ATTACHING THE FRONT PANEL Attaching the front panel Security Lamp You can detach the front panel from the unit and carry it with you when you leave your car unattended. When you carry the front panel out of your car, use the supplied carrying case. Before detaching the front panel, remove the cassette to prevent possible damage to the unit. 1 Press and hold PWR for more than 2 seconds to turn the unit off.
SETTING THE CLOCK RADIO OPERATION To turn the unit on You can turn the unit on by pressing any button on the front panel except %, z and the Jog Dial. 1 1 Press FUNC repeatedly to select the band from among F1 (FM1), F2 (FM2), F3 (FM3), A1 (AM1) and A2 (AM2). The band indications appear cyclically in order. • F1, F2 and F3 share the same frequency range. • A1 and A2 share the same frequency range. With the unit on, press and hold SEL for more than 2 seconds until the clock indication appears.
PRESETTING STATIONS To preset stations automatically (Auto Memory) To turn the unit off Press and hold PWR for more than 2 seconds. If you press this button for less than 2 seconds, it functions as MUTE. Note The unit turns on in the last mode selected when you turned off the unit. 1 Press FUNC repeatedly to select a desired band from among F1 (FM1), F2 (FM2), F3 (FM3), A1 (AM1) and A2 (AM2). 2 Press and hold A.ME/PS for more than 2 seconds to activate the automatic presetting function.
PRESETTING STATIONS To tune in a preset station To preset stations manually You can manually preset stations that have not been selected by an auto memory operation. 1 Press FUNC repeatedly to select the band from among F1 (FM1), F2 (FM2), F3 (FM3), A1 (AM1) and A2 (AM2). 2 Tune in the station that you wish to preset with TUNE i or TUNE k. 3 Press and hold one of the preset station buttons 1 to 6 for approximately 2 seconds.
MY INFORMATION SWITCH You can timer-activate the radio for up to two daily radio programs. The unit turns on and off in Radio mode at the preset turn-on and turn-off times automatically. 4 Set the time you wish the unit to turn on in Radio mode. Press TUNE i, then rotate the Jog Dial to set the hour. Press TUNE k, then rotate the Jog Dial to set the minute. 5 Press SEL. The “BAND SEL” indication flashes. Press SEL again. The radio indication flashes.
MY INFORMATION SWITCH Activating the timer You can activate the timer for program 1 and/or program 2. 1 With the unit on, press INFO. The “PRG1 ON” or “PRG1 OFF” indication (the current setting for program 1) appears. 2 3 Notes • When you preset two programs, be sure that they do not overlap. • Even if the unit is in a mode other than Radio mode, the unit switches to Radio mode and tunes in the preset radio program at the preset time automatically.
TAPE PLAYBACK Auto Reverse function When the end of the tape is reached during playback or fast tape transport, the direction of the tape is automatically reversed, and playback starts on the other side. Direction indications Displayed when the upper side of the cassette is being played. Displayed when the lower side of the cassette is being played. 1 Insert a cassette to start playback. Tape transport display When you start tape playback, the transport display indicates the tape movement.
SOUND ADJUSTMENTS 1 H-BASS (High BASS) You can enjoy music with strong bass sound. 1 Press SEL repeatedly to select H-BASS (High BASS) mode. 2 Rotate the Jog Dial to select the bass sound level. Press SEL repeatedly to select the mode that you wish to adjust from: BASS, TRE (treble), BAL (balance), FAD (fader) and VOL (volume). Each time you press SEL, one of the following indicators appears, in cyclic order. The bass sound level changes as follows. 2 Rotate the Jog Dial to adjust the level.
DSSA (Drivers Sound Stage Adjustment) You can adjust sound stage and tone balance to best serve a particular seat in the car. 1 Press SEL repeatedly to select DSSA (Drivers Sound Stage Adjustment) mode. Source Level Adjuster You can adjust the output level in each mode to equalize the volume level. 1 Press FUNC repeatedly to select the desired mode. 2 Press DISP while pressing SEL. The “LEVEL 0” indication appears. 2 Rotate the Jog Dial to select the position of sound stage.
CD CHANGER PLAY You can play CDs with this unit by connecting the optional AIWA CD changer. Make sure that the disc magazine loaded with the CDs is inserted in the connected CD changer. To install the unit, refer to the separate Installation and Connections manual.
CONNECTING A PORTABLE CD/MD/MP3 PLAYER OR OTHER EQUIPMENT SETTING THE BEEP TONE The unit is preset at the factory to beep each time you press any button on the front panel except % or z (no beep with the Jog Dial). You can mute this beeping by following the procedure below. This unit is equipped with a line-level input (AUX IN) jack, enabling high sound quality. 1 2 The “AUX IN” indication appears. 3 Start playback from the connected equipment.
• There may be cases in which the infrared signal does not reach the infrared receptor on the main unit, depending on the installation location. • Do NOT install the remote control unit on the outer rim of the steering wheel. Doing so may hinder steering and cause a traffic accident. Be sure to install the remote control unit on the inner rim of the steering wheel.
Setting up the remote control unit Installing the remote control unit Replacing the battery Installation in a vehicle with left-hand drive 1 1 Pull out the battery holder, gripping the claw B while pressing the groove A to the right to remove the lithium battery. Attach the belt d to the inner belt holder e. Steering-wheel-mounted remote control unit Lithium battery (CR2025) Battery holder 2 Install a new lithium battery with the 6 side facing upward in the battery holder.
STEERING-WHEEL-MOUNTED REMOTE CONTROL UNIT 2 Wind the belt d around the rim of the steering wheel and fit the holder’s claws into the holes of the belt to secure the holder. The excess must be trimmed off, as illustrated. 3 Attach the outer belt holder f securely to the inner belt holder. 4 Attach the remote control unit to the belt holder.
Remote control button TROUBLESHOOTING Error codes (when using the optional AIWA CD changer) In the following cases the corresponding error code indication appears. Follow the suggestions below to solve the problem. If the error code indication does not disappear, consult an AIWA service center. 1 VOLUME 6 button To increase the volume. 2 VOLUME 7 button To decrease the volume. 3 FUNCTION button To select Radio, Tape Play, CD Changer Play or AUX IN mode.
MAINTENANCE SPECIFICATIONS Cleaning the front panel RADIO SECTION When the front panel is soiled, wipe the surface of the panel with a soft, dry cloth. (FM) Cleaning the tape head Use a cleaning cassette to clean the playback head and capstans approximately once a month. If the head is dirty, the high tones may not be reproduced properly. Cleaning the connector The connector on the reverse side of the front panel needs to be cleaned occasionally.
GENERAL Power-Supply Voltage: 14.4 V (11 to 16 V allowable), DC, negative ground Load Impedance: 4Ω Tone Control: Bass ±10 dB at 100 Hz Treble ±10 dB at 10 kHz Preamp Output Voltage (load impedance): 2.2 V (10 kΩ) Installation size: 182 (W) × 53 (H) × 155 (D) mm (7 1/4 (W) × 2 1/8 (H) × 6 1/8 (D) inches) Accessory supplied: Carrying case (1) STEERING-WHEEL-MOUNTED REMOTE CONTROL UNIT Dimensions : Weight: Accessory supplied: approx.
Bienvenidos Muchas gracias por su compra de este producto AIWA. Para utilizar este aparato en las mejores condiciones posibles, lea cuidadosamente las instrucciones de este manual. PRECAUCION Las modificaciones y ajustes de este producto que no han sido autorizadas a título expreso por el fabricante pueden anular el derecho o autoridad del usuario para hacer funcionar este producto. Además de este manual de instrucciones, lea también los manuales de instalación y de conexiones que vienen por separado.
INDICE PARTES Y CONTROLES ................................................................................................................... 3 DESMONTAJE E INSTALACION DEL PANEL DELANTERO ........................................................... 4 AJUSTE DE RELOJ ............................................................................................................................ 5 FUNCIONAMIENTO DE LA RADIO ...........................................................................................
PARTES Y CONTROLES Panel delantero Pantalla Panel trasero Panel delantero Pantalla 1 Botón FUNC (función) 2 Botón PWR (conexión/desconexión)/MUTE 3 Aro de avance lento 4 Botón TUNE i/t* (salto adelante)/FF (avance rápido) 5 Botón TUNE k/r* (salto atrás)/REW (rebobinado) 6 Compartimiento de cassettes 7 Botón z (expulsión) 8 Sensor para el control remoto 9 Botón A.
DESMONTAJE E INSTALACION DEL PANEL DELANTERO Instalación del panel delantero Luz de seguridad Se puede desmontar el panel delantero de aparato y llevarlo consigo cuando se deja el coche estacionado sin vigilancia. Para llevarse el panel delantero utilice la caja de transporte provista. Antes de desmontar el panel delantero, saque la cassette para evitar que puede dañarse el aparato. 1 2 3 Mantenga presionado PWR durante más de 2 segundos para desconectar el aparato.
AJUSTE DE RELOJ FUNCIONAMIENTO DE LA RADIO Para conectar el aparato Se puede conectar el aparato presionando cualquier botón del panel delantero excepto %, z y el aro de avance lento. 1 1 Con el aparato conectado, mantenga presionado SEL durante más de 2 segundos hasta que aparezca la indicación del reloj. Presione FUNC repetidamente para seleccionar la banda entre F1 (FM1), F2 (FM2), F3 (FM3), A1 (AM1) y A2 (AM2). Aparecen los indicadores de banda en ese orden y en ciclo.
PROGRAMACION DE LAS ESTACIONES Programación automática de las estaciones (memoria automática) Para desconectar el aparato Presione y mantenga PWR durante más de 2 segundos. Si presiona este botón durante menos de 2 segundos, funciona como MUTE. Nota El aparato se conecta en el último modo seleccionado cuando desconectó el aparato. Botón LO (local/DX) Puede utilizar el modo local cuando desea sintonizar sólo estaciones fuertes durante la sintonización con búsqueda.
PROGRAMACION DE LAS ESTACIONES Verificación de estaciones programadas (exploración programada) • Si se desean verificar las estaciones programadas, presione A.ME/PS durante menos de 2 segundos. Las estaciones programadas memorizadas se irán sintonizando cada una durante 5 segundos. • Para parar esta función, presione nuevamente A.ME/PS o presione cualquiera de los botones de estaciones programadas 1 a 6. Repita estos procedimientos para programar hasta 6 estaciones cada una en F1, F2, F3, A1 y A2.
INTERRUPTOR DE INFORMACION PROPIA Se puede activar la radio con el temporizador para hasta dos programas diarios de radio. El aparato conecta y desconecta automáticamente el modo de radio a la programada. 4 Seleccione la hora a la que desea que se conecte el modo de radio. Presione TUNE i y gire el aro de avance lento para ajustar la hora. Presione TUNE k y gire el aro de avance lento para ajustar los minutos. 5 Presione SEL. Destella la indicación “BAND SEL”. Presione nuevamente SEL.
INTERRUPTOR DE INFORMACION PROPIA Activación del temporizador Se puede activar el temporizador para el programa 1 y/o programa 2. 1 Con el aparato conectado, presione INFO. Aparece la indicación “PRG1 ON” o “PROG1 OFF” el ajuste actual del programa 1). 2 Presione TUNE k o TUNE i repetidamente hasta que destelle la indicación “PRG2 ON”. 3 Pulse INFO. Notas • Cuando se programan dos programas, asegúrese de que no se superponen.
REPRODUCCION DE LA CINTA Función de inversión automática Cuando se llega al final de la cinta durante la reproducción o el transporte rápido de la cinta, el sentido de la cinta se invierte automáticamente y empieza a reproducir el otro lado. Indicaciones de sentido Se enciende cuando se reproduce el lado superior de la cassette. Se enciende cuando se reproduce el lado inferior de la cassette. Indicaciones de movimiento de la cinta 1 Coloque una cassette para empezar a reproducir.
AJUSTES DEL SONIDO Botón MUTE Presione este botón para bajar temporalmente el volumen. Presione nuevamente para volver al volumen original. El indicador “MT” en la pantalla destella cuando se ha activado la función de silenciamiento. H-BASS (graves altos) Se puede disfrutar de una música con un sonido de graves fuertes. 1 Presione SEL repetidamente para seleccionar el modo que desea ajustar de entre: BASS (graves), TRE (agudos), BAL (balance), FAD (equilibrio) y VOL (volumen).
DSSA (Ajuste de etapa de sonido de conductor) Se puede ajustar la posición de etapa de sonido y balance de tono que sea la mejor para determinado asiento. 1 Presione repetidamente SEL para seleccionar el modo DSSA (ajuste de etapa de sonido de conductor). Ajustador de nivel de fuente Puede ajustar el nivel de salida en cada modo para ecualizar el nivel de volumen. 1 Presione FUNC repetidamente para seleccionar el modo deseado. 2 Pulse DISP mientras pulsa SEL. Aparece la indicación “LEVEL 0”.
REPRODUCCION CON CAMBIADOR DE DISCOS COMPACTOS Se pueden reproducir los discos compactos en este aparato cuando se conecta un cambiador de discos compactos opcional AIWA. Confirme que se han colocado discos en el magazín y que este está introducido en el cambiador de discos compactos conectado. Para instalar el aparato, consulte el manual de instalación y conexiones que viene por separado.
CONEXION DE UN TOCADISCOS DE DISCOS COMPACTOS/ MINIDISCOS/MP3 PORTATIL U OTRO EQUIPO AJUSTE DE LA ALARMA El aparato está programada de fábrica para sonar cada vez que presione cualquier botón en el panel delantero excepto % o z (no suena con el aro de avance lento). Puede silenciar esta alarma siguiendo el procedimiento siguiente. Este aparato tiene una entrada a nivel de línea (AUX IN), que permite sonidos de alta calidad. 1 2 1 2 Conecte un tocadiscos de discos compactos/minidiscos/MP3 portátil, etc.
CONTROL REMOTO INSTALADO EN EL VOLANTE DE DIRECCION Precauciones • Cuando el receptor infrarrojo en el aparato principal se expone a los rayos del sol directos, puede que no responda a las señales del control remoto. • Mientras conduce, mantenga sus ojos sobre el camino cuando manipule el control remoto. NUNCA opere el control remoto durante un viraje. • NO instale el control remoto en un lugar en donde pueda perjudicar la función de un equipo de seguridad, como por ejemplo el colchón de aire.
Ajuste del control remoto Colocación de la pila 1 Saque el portapilas tomando por la garra B mientras presiona la ranura A hacia la derecha para sacar la pila de litio. Instalación del control remoto Instalación en un coche con volante a la izquierda. 1 Coloque el cinto d en el sujetador de cinto interior e. Control remoto instalado en el volante de dirección Pila de litio (CR2025) Portapilas 2 Instale una nueva pila de litio con el lado 6 hacia arriba en el portapilas.
CONTROL REMOTO INSTALADO EN EL VOLANTE DE DIRECCION 2 Enrolle el cinto d alrededor del volante y ajuste las garras del sujetador en los orificios del cinto para asegurar el sujetador. El sobrante debe cortarse, como se ve en la figura. 3 Instale el sujetador de cinto exterior f firmemente al sujetador de cinto interior. 4 Instale el control remoto al sujetador de cinto.
Botones de control remoto LOCALIZACION DE AVERIAS Códigos de error (cuando se utiliza el cambiador de disco compactos opcional de AIWA) 1 Botón VOLUME 6 Para subir el volumen. 2 Botón VOLUME 7 Para bajar el volumen. 3 Botón FUNCTION Para seleccionar el modo de radio, reproducción de cinta, reproducción con cambiador de discos compacto o AUX IN. 4 Botón DISC/PRESET M /REW Cambiador de discos compactos: Presione y suelte para volver atrás al principio de la pista actual o de una canción anterior.
MANTENIMIENTO ESPECIFICACIONES Limpieza del panel delantero SECCION DE LA RADIO (FM) Cuando el panel delantero está sucio, limpie la superficie del panel con un paño suave y seco. Limpieza de las cabezas de cintas Utilice una cassette de limpieza para limpiar la cabeza de reproducción y los cabrestantes aproximadamente una vez al mes. Si la cabeza estuviera sucia, los tonos altos pueden no reproducirse correctamente.
GENERALIDADES Tensión de suministro de corriente: 14,4 V (11 a 16 V admisible), CC, tierra negativa Impedancia de carga: 4 Ω Control de tono: Graves ± 10 dB a 100 Hz Agudos ± 10 dB a 10 kHz Tensión de salida de pre-amplificación (impedancia de carga): 2,2 V (10 kΩ) Tamaño de instalación: 182 (An.) × 53 (Al.) × 155 (Prof.) mm Accesorio suministrado: Caja de transporte (1) Las especificaciones y aspecto exterior están sujetos a cambios sin previo aviso.
Bienvenue Nous vous remercions d’avoir choisi ce produit AIWA. Pour optimiser ses performances, veuillez lire attentivement ce mode d’emploi. ATTENTION Les modifications ou ajustements à ce produit, non expressément approuvées par le fabricant, peuvent annuler le droit ou l’autorité de l’utilisateur à faire fonctionner ce produit. Outre ce mode d’emploi, veuillez également vous référer aux manuels d’installation et de connexion séparés.
TABLE DES MATIERES ORGANES ET COMMANDES ............................................................................................................ 3 RETRAIT ET FIXATION DU PANNEAU AVANT ................................................................................ 4 REGLAGE DE L’HEURE .................................................................................................................... 5 FONCTIONNEMENT DE LA RADIO ............................................................................
ORGANES ET COMMANDES Panneau avant Fenêtre d’affichage Panneau arrière Panneau avant Fenêtre d’affichage 1 Touche FUNC (fonction) 2 Touche PWR (mise sous/hors tension)/MUTE 3 Bague Jog 4 Touche TUNE i/t* (saut en avant)/FF (ravance rapide) 5 Touche TUNE k/r* (saut en arrière)/ REW (rebobinage) 6 Logement de cassette 7 Touche z (éjection) 8 Détecteur pour la télécommande 9 Touche A.
RETRAIT ET FIXATION DU PANNEAU AVANT Vous pouvez détacher le panneau avant de l’appareil et l’emporter quand vous laissez la voiture sans surveillance. Utilisez le sac de transport fourni pour transporter le panneau avant hors de la voiture. Avant de détacher le panneau avant, retirez la cassette pour éviter tout dommage éventuel à l’appareil. 1 Appuyez sur PWR plus de 2 secondes pour mettre l’appareil hors tension.
REGLAGE DE L’HEURE FONCTIONNEMENT DE LA RADIO Pour mettre l’appareil sous tension L’appareil peut être mis sous tension en appuyant sur n’importe quelle touche du panneau avant, sauf %, z et la bague Jog. 1 1 L’appareil sous tension, presser et maintenir enfoncé SEL plus de 2 secondes jusqu’à ce que l’indication de l’horloge s’affiche. Appuyez plusieurs fois sur FUNC pour sélectionner une bande parmi F1 (FM1), F2 (FM2), F3 (FM3), A1 (AM1) et A2 (AM2).
PREREGLAGE DE STATIONS Préréglage automatique de stations (mémoire automatique) Mise hors tension de l’appareil Appuyez sur PWR plus de 2 secondes. Si la touche est pressée moins de 2 secondes, elle opérera comme MUTE. Remarque Cet appareil se met sous tension dans le dernier mode sélectionné avant la mise hors tension. Touche LO (local/DX) Vous pouvez utiliser le mode Local pour accorder seulement des stations puissantes pendant la recherche d’accord.
PREREGLAGE DE STATIONS Contrôle des stations préréglées (balayage de préréglage) • Si vous souhaitez contrôler les stations préréglées, appuyez sur A.ME/PS moins de 2 secondes. Les stations préréglées mémorisées seront accordées dans l’ordre pendant 5 secondes chacune. • Pour arrêter cette fonction, appuyez à nouveau sur A.ME/PS ou sur une des touches 1 à 6 de stations préréglées. Répétez ces procédures pour prérégler jusqu’à 6 stations pour chacune des bandes F1, F2, F3, A1 et A2.
FONCTION MES INFORMATIONS La radio peut être activée par minuterie pour un maximum de deux programmes radio quotidiens. L’appareil se met automatiquement sous et hors tension en mode radio aux heures d’allumage et d’extinction préréglées. 4 Presser TUNE i, puis tourner la bague Jog pour régler les heures. Presser TUNE k, puis tourner la bague Jog pour régler les minutes. 5 Presser SEL. L’indication “BAND SEL” clignote. Presser une seconde fois SEL. L’indication radio clignote.
FONCTION MES INFORMATIONS Activation de la minuterie La minuterie peut être activée pour le programme 1 et/ou le programme 2. 1 L’appareil sous tension, appuyer sur INFO. L’indication “PRG1 ON” ou PRG1 OFF” (le réglage actuel pour le programme 1) apparaît. 2 Presser plusieurs fois TUNE k ou TUNE i jusqu’à ce que l’indication “PRG1 ON” clignote. 3 Presser INFO. Remarques • Si l’on prérègle deux programmes, vérifier qu’ils ne se chevauchent pas.
LECTURE DE CASSETTE Fonction d’inversion automatique En arrivant en fin de bande pendant la lecture ou le transport rapide, le sens de défilement est automatiquement inversé, et la lecture de l’autre face démarre. Indications de direction Affiché pendant la lecture de la face supérieure de la bande. Affiché pendant la lecture de la face inférieure de la bande. 1 Insérez une cassette pour démarrer la lecture.
AJUSTEMENTS DU SON Touche MUTE Appuyez pour réduire temporairement le volume. Appuyez à nouveau pour rétablir le volume précédent. L’indicateur “MT” clignote dans le fenêtre d’affichage pendant l’activation de la fonction d’assourdissement. H-BASS (High BASS) Vous pouvez apprécier la musique avec des graves renforcés. 1 Appuyez plusieurs fois sur SEL pour sélectionner le mode à ajuster parmi: BASS (graves), TRE (aiguës), BAL (balance), FAD (fader) et VOL (volume).
DSSA (ajustement de l’étage audio par le conducteur) Il est possible d’ajuster la position de l’étage audio et l’équilibre de la qualité sonore au mieux pour un siège particulier. 1 Presser plusieurs fois SEL pour sélectionner le mode DSSA (ajustement de l’étage audio par le conducteur). Réglage de niveau sonore Vous pouvez ajuster le niveau de sortie en chaque mode pour égaliser le volume. 1 Appuyez plusieurs fois sur FUNC pour sélectionner le mode souhaité.
LECTURE DU CHANGEUR DE CD Cet appareil permet de lire des CD en raccordant le changeur de CD AIWA en option. Vérifier que le chargeur contenant les CD est inséré dans le changeur de CD raccordé. Consulter le manuel d’installation et de connexion pour l’installation du changeur de CD.
RACCORDEMENT D’UN LECTEUR DE CD/MD/MP3 PORTABLE OU D’UN AUTRE EQUIPMENT Cet appareil est équipé d’une prise d’entrée de niveau de ligne (AUX IN) qui assure une haute qualité sonore. REGLAGE DE LA TONALITE BIP L’appareil est préréglé à l’usine pour émettre une tonalité bip à toute pression d’une touche sur le panneau avant, sauf % ou z (pas de tonalité bip avec la bague Jog). Cette tonalité peut être assourdie en procédant comme suit. 1 L’appareil hors tension, appuyez sur SEL plus de 2 secondes.
TELECOMMANDE MONTEE SUR LE VOLANT • N’installez PAS la télécommande sur le bord extérieur du volant. Cela pourrait gêner la conduite et provoquer un accident de la circulation. Installez bien la télécommande sur le bord intérieur du volant. Précautions • Quand le récepteur infrarouge de l’appareil est exposé en plein soleil, il peut ne pas répondre aux signaux de la télécommande. • Pendant la conduite, continuez à regarder la route en opérant la télécommande.
Préparation de la télécommande Installation de la télécommande Remplacement de la pile Installation dans une conduite à gauche 1 1 Retirez le logement de pile en saisissant l’ergot B tout en poussant la cannelure A vers la droite pour retirer la pile au lithium. Attachez la courroie d au support de courroie interne e. Télécommande montée sur le volant Pile au lithium (CR2025) Logement de pile 2 Installez une pile au lithium neuve avec le pôle 6 dirigé vers le haut dans le logement de pile.
TELECOMMANDE MONTEE SUR LE VOLANT 2 Enroulez la courroie d autour de la jante du volant et insérez les ergots du support dans les trous de la courroie pour fixer le support. La partie en excès pourra être éliminée comme indiqué sur l’illustration. 3 Fixez fermement le support de courroie externe f au support de courroie interne. 4 Fixez la télécommande sur le support de courroie.
Touches de la télécommande DEPANNAGE Codes d’erreur (quand vous utilisez le changeur de CD AIWA en option) 1 Touche VOLUME 6 Augmente le volume. 2 Touche VOLUME 7 Diminue le volume. 3 Touche FUNCTION Pour sélectionner le mode radio, lecture de cassette, lecture du changeur de CD ou AUX IN. 4 Touche DISC/PRESET M /REW Changeur de CD: Presser et relâcher pour sauter au début de la piste actuelle ou de la plage précédente. Presser et maintenir enfoncé pour passer au CD précédent.
ENTRETIEN SPECIFICATIONS Nettoyage du panneau avant SECTION RADIO (FM) Quand le panneau avant est sale, essuyez la surface avec un chiffon doux et sec. Nettoyage de la tête de lecture Utilisez une cassette de nettoyage pour nettoyer la tête de lecture et les cabestans environ une fois par mois. Si la tête est sale, les tonalités aiguës ne seront pas reproduites correctement. Nettoyage du connecteur Le connecteur au dos du panneau avant doit être nettoyé de temps à autre.
GENERALITES Tension d’alimentation: 14,4 V (11 à 16 V tolérés), CC, masse négative Impédance de charge: 4 Ω Contrôle de la tonalité: Graves ±10 dB à 100 Hz Aiguës ±10 dB à 10 kHz Tension de sortie préampli (impédance de charge): 2,2 V (10 kΩ) Encombrement (l × h × p): 182 × 53 × 155 mm Accessoires fournis: Sac de transport (1) Les spécifications et l’aspect extérieur sont sujets à modification sans préavis pour amélioration du produit.