DVD PLAYER PLATINA DVD LECTEUR DVD XD-DV480 OPERATING INSTRUCTIONS MANUAL DE INSTRUCCIONES MODE D’EMPLOI En (English) E (Español) F (Français) 8B-AVD-906-01 010518AMK-H-L EZ
ENGLISH WARNING TO REDUCE THE RISK OF FIRE OR ELECTRIC SHOCK, DO NOT EXPOSE THIS APPLIANCE TO RAIN OR MOISTURE. 4 Ventilation — The unit should be situated with adequate space around it so that proper heat ventilation is assured. Allow a clearance of 10 cm from the rear and the top of the unit, and 5 cm from each side. - Do not place the unit on a bed, rug, or similar surface that may block the ventilation openings.
Introduction Precautions ............................................................... 2 Before Use ................................................................. 4 Supported disc formats .................................... 4 Disc-related terms .............................................. 4 Types of Video CDs ............................................ 4 Handling the unit ................................................ 5 Handling discs ....................................................
BEFORE USE Please read the following before operating the unit. Supported disc formats This unit can play discs with the following marks only. DVD (8 cm disc/12 cm disc) Video CD (VCD) (8 cm disc/12 cm disc) Note on DTS-encoded CDs When playing DTS-encoded CDs, excessive noise will be exhibited from the analogue stereo outputs. To avoid possible damage to the audio system, turn down the volume before playing back such discs, adjust the volume gradually, and keep the volume level low.
When shipping the unit The original shipping carton and packing materials come in handy. For maximum protection, re-pack the unit as it was originally packed at the factory. Cleaning discs Fingerprints and dust on the disc can cause poor picture quality and sound distortion. Before playing, clean the disc with a clean cloth. Wipe the disc from the centre out. When setting the unit The picture and sound of a nearby TV, VCR, or radio may be distorted during playback.
PARTS AND CONTROLS The instructions in this manual refer mainly to the buttons on the remote control. Buttons on the main unit with the same names as those on the remote control can be used as well. Front panel 1 2 3 4 # 5 6 @ ! 0 9 7 8 1 6STANDBY/ON indicator 9 g/t button • Lights in red when the unit is in standby mode. • Lights in green when the unit is turned on. 2 POWER button Press to turn on and off the unit. 3 Disc tray Loading and removing discs.
Remote control 2 % ^ 3 & 4 * 5 6 7 8 9 0 ! @ ( # ' $ , ) = [ ] \ ; 1 A-B button Press to memorize the point you want to repeat. 2 POWER button Press to turn on and off the unit. 3 REPEAT button Press to repeat playback. 4 AUDIO button Press to select the soundtracks. 5 SUBTITLE button Press to change the subtitle language during DVD playback. 6 TOP MENU button Press to display the title menu on the DVD. 7 i/k/j/l/ENTER buttons • Press a i/k/j/l cursor button to select an item.
PARTS AND CONTROLS (CONTINUED) Display window This unit shows On Screen Display messages on the screen of the TV connected to the unit, as well as the display window of the unit. The On-Screen Display of each operation makes operation simple and easy, especially when playing DVDs or video CDs. They appear when you press the DISPLAY button on the remote control. The instructions in this manual refer mainly to the On Screen Display messages. 1 2 MP3 VCD @ 3 4 5 CD DVD TITLE 6 CHP/TRK ! 7 PROG.
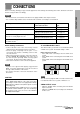
CONNECTIONS Before connecting, identify your type of audio equipment or TV referring to the following chart. Then, decide the connection and the setup procedure accordingly. PREPARATIONS NOTES • The unit cannot be connected to a TV which is not equipped with a video input connector. • Use a commercially available stereo-monaural audio cord when connecting to a monaural TV.
CONNECTIONS (CONTINUED) A Connecting to a TV only Rear of the TV 21 pin scart connector 21 pin scart cable (not supplied) to 21 pin scart connector DIGITAL OUT COAXIAL DIGITAL OUT PAL AUTO NTSC OPTICAL S-VIDEO SCART VIDEO OUTPUT Rear of the unit AUDIO OUT L R S-VIDEO OUT VIDEO OUT to an AC power socket When your TV is equipped with an S-video input terminal, see page 16.
B Connecting to a TV and an amplifier with a Digital In jack PREPARATIONS Use either a commercially available optical cord or a 75 ohm coaxial cord when connecting the unit to an AV amplifier with a Digital In jack. The supplied video cord is also available instead of a coaxial cord.
CONNECTIONS (CONTINUED) C Connecting to a TV and an audio system TV set to 21 pin scart connector 21 pin scart cable (not supplied) to 21 pin scart connector DIGITAL OUT COAXIAL DIGITAL OUT PAL AUTO NTSC S-VIDEO SCART VIDEO OUTPUT OPTICAL Rear of the unit AUDIO OUT L R S-VIDEO OUT white red VIDEO OUT to AUDIO OUT L (white)/ R (red) jacks to an AC power socket Audio cord (supplied) to audio input jacks (Left/ white, Right/ red) Audio system When your TV is equipped with an S-video input t
D Connecting to a TV and an AV receiver equipped with a Dolby Digital (AC-3) decoder PREPARATIONS Use either a commercially available optical cord or a 75 ohm coaxial cord when connecting this unit to an AV receiver with a Digital In jack. The supplied video cord is also available instead of a coaxial cord.
CONNECTIONS (CONTINUED) E Connecting to a TV and an AV receiver equipped with a DTS decoder Use either a commercially available optical cord or a 75 ohm coaxial cord when connecting the unit to an AV receiver with a Digital In jack. The supplied video cord is also available instead of a coaxial cord.
PREPARATIONS F Connecting to a TV and an AV receiver with the Dolby Pro Logic Surround system to 21 pin scart connector 21 pin scart cable (not supplied) TV set to 21 pin scart connector Rear of the unit DIGITAL OUT AUDIO OUT COAXIAL DIGITAL OUT PAL AUTO NTSC L S-VIDEO SCART VIDEO OUTPUT OPTICAL R S-VIDEO OUT VIDEO OUT white red to AUDIO OUT L (white)/ R (red) jacks Audio cord (supplied) to an AC power socket to audio input jacks (Left/ white, Right/ red) Reciver equipped with Dolby Pro
CONNECTIONS (CONTINUED) Connecting to a TV equipped with an S-video jack Rear of TV set S-video input connector (S1, S2) S-video cord (not supplied) Set the VIDEO OUTPUT switch to S-VIDEO to S-VIDEO OUT connector Rear of the unit DIGITAL OUT COAXIAL DIGITAL OUT PAL AUTO NTSC OPTICAL S-VIDEO SCART VIDEO OUTPUT AUDIO OUT L R S-VIDEO OUT VIDEO OUT to an AC power socket Before connecting! Set the VIDEO OUTPUT switch to S-VIDEO when connecting to a TV with an S-video jack.
PREPARATIONS Connecting to a TV or monitor with a composite video connector Rear of the TV to the video input jack (yellow) yellow Video cord (supplied) yellow to VIDEO OUT jack (yellow) Rear of the unit DIGITAL OUT AUDIO OUT COAXIAL DIGITAL OUT PAL AUTO NTSC OPTICAL L S-VIDEO SCART VIDEO OUTPUT R S-VIDEO OUT VIDEO OUT En to an AC power socket Set the setup menu correctly after connecting! According to the audio equipment and TV set to which the unit is connected, set the “TV Aspect” of
REMOTE CONTROL Installing batteries Detach the battery cover on the rear of the remote control, and insert two R03 (size AAA) batteries with 0 and 9 aligned correctly. ABOUT SYMBOLS Although this unit can play DVDs, video CDs, audio CDs or MP3 discs, some of the functions are restricted dependent on the type of disc. The following symbols are used to make distinction. Playback of MP3 discs is different from that of other kinds of discs. For information about playing back MP3 discs, see page 34.
PLAYBACK 6STANDBY/ON indicator 1 3 2,4 i/k/j/l/ c s ENTER • Turn on the TV, and set its video source (Video 1, Video 2, Video 3, etc.) to the one connected to the unit. • Turn on the audio equipment connected to the unit. Set its input source to the one connected to the unit. 1 Press POWER. The unit turns on and the 6STANDBY/ON indicator turns green. The “aiwa DVD VIDEO” screen appears on the TV screen. r/f a MENU g/t 2 BASIC OPERATIONS Getting ready to play Press zOPEN/CLOSE.
PLAYBACK (CONTINUED) When the menu screen is displayed The menu screen may be displayed first after loading a DVD or video CD which contains a menu. Still (Pause) Press a during playback. Use the i/k/j/l buttons to select the title/chapter you want to view, then press ENTER to start playback. Press TOP MENU or MENU to return to the menu screen. To return to normal playback Press c. Frame Advance Use the number buttons to select the track you want to view. Press vRETURN to return to the menu screen.
Press g or f on the remote control during playback. Each time you press the button, the playback speed changes as shown below. Skipping Press r or t. To skip to the next chapter or track: t The disc position advances one chapter or track each time the button is pressed. To return to the previous chapter or track: r Pressing r once skips to the beginning of the chapter (track) currently being played, and pressing r twice skips to the previous chapter.
PLAYBACK (CONTINUED) On Screen Display (OSD) menu The general playback status can be displayed on the TV screen. Some items can be changed on the menu. 1 2,3 1 2 Press DISPLAY during playback. Press i/k to select the desired item. The currently selected item is indicated by a yellow frame on its OSD menu. 3 Press j /l to select the desired setting. The number buttons can also be used for setting numbers (e.g., title number). For some functions, press ENTER to execute the setting.
Each item shows its current status and can be changed on the OSD menu. For details of the functions or optional settings, refer to the page in parentheses.
SEARCH Title search/Track search 1 DISPLAY Press DISPLAY during playback or in stop mode. If in DVD stop mode continue to step 3. i/k/j/l/ ENTER 2 Press i/k to select “T (title/track)”. 1 3 Number buttons CLEAR Press j/l to enter the desired title or track number. 3 • The number buttons can also be used to select the desired number. This unit provides 4 types of DVD searches. Example: Title search/Track search Example: Specifies a title or track number.
Chapter search Press DISPLAY during playback. Press i/k to select “C (chapter)”. 1 3 When the elapsed time is displayed during DVD playback, you can specify a time on the disc to locate the desired position. 1 2 Press DISPLAY during playback. Press i/k to select TIME icon. MORE FEATURES 1 2 Time search -:--:-Press j /l to enter the desired chapter number. 3 3 Use the number buttons to enter the time of the desired position. • The number buttons can also be used to select the desired number.
SEARCH (CONTINUED) 1 Press M-SEARCH during playback or in stop mode. The marked pictures are displayed. i/k/j/l/ ENTER MARKED PICTURE 1 MARKED PICTURE 2 MARKED PICTURE 4 MARKED PICTURE 5 MARKED PICTURE 3 M-SEARCH MARK c * PRESENT PICTURE *The picture currently playing. CLEAR 2 Press i /k /j /l to select the desired marked picture. 3 Press c or ENTER. Playback resumes from the selected marked point.
ZOOMING AND CHANGING THE ANGLE ANGLE ZOOM i/k/j/l/ ENTER When playing a DVD with multi-angles recorded (photographed from several different angles), you can select the angle you want to view. When a multi-angle scene comes on during playback, “ ” will blink in the display window to let you know that you can change the angle. You can also change the angle using the i/k/j/l buttons after displaying the OSD menu (page 22). The following procedure is the simpler method.
RANDOM AND REPEAT PLAYBACK Repeat playback Press REPEAT during playback. Repeat mode will change each time you press REPEAT. REPEAT RANDOM CHAPTER: Repeats the chapter currently being played. A-B CHAPT t/r TITLE: Repeats the title currently being played. TITLE OFF: Cancels repeat playback. (Normal playback) Random playback KARAOKE OFF Press RANDOM during playback or in stop mode. The unit automatically begins Random playback and the “RANDOM” indicator lights in the display window.
TRACK You can select a portion of a track to be repeated. The portion to be repeated cannot span a track boundary, but must be within a single track. 1 During playback, press A-B at the starting point (A) of the section you want to repeat. MORE FEATURES TRACK: Repeats the track currently being played. Repeating a portion between two specified points (A-B Repeat) ALL: Repeats all tracks on the disc. A * ALL 2 OFF: Cancels repeat playback.
PROGRAMMED PLAYBACK the number buttons to select the 2 Press desired track number. Program Step 1 Total Time 03:58 1 REPEAT 3,4,5 t/r Clear All 3 2,3,4 1 Press the l right cursor button and the number buttons to select the next track number. Program 1 5 19 Step 3 Total Time 08:32 CLEAR Clear All You can select up to 20 tracks, and play them in programmed order. • To use this feature with video CDs that support PBC, turn PBC off first. See “CHANGING SETUP VALUES” on page 38.
The unit can produce a 3D Surround effect, which simulates multi-channel audio playback from two conventional stereo speakers, instead of the five or more speakers normally required to listen to multi-channel audio from a home theatre system. You can also change the sound effect using the i/k/j/l buttons after displaying the OSD menu (page 22). The following procedure is the simpler method. 3D 1 Press 3D during playback. MORE FEATURES CREATING A 3D SURROUND EFFECT NORM.
CHANGING THE AUDIO TRACK Some discs have more than one audio track, such as soundtracks with different languages. While playing such a disc, the audio track can be changed to play the different soundtracks. You can also change the soundtrack using the i/k/j/l buttons after displaying the OSD menu (page 22). The following procedure is the simpler method. AUDIO 1 Press AUDIO during playback. The audio soundtrack language is displayed.
When playing DVD discs which contain subtitles, you can display the subtitles on the screen or change the language of the subtitles. You can also change the subtitle language using the i/k/j/l buttons after displaying the OSD menu (page 22). The following procedure is the simpler method. 1 SUBTITLE Press SUBTITLE during playback. When no subtitles are recorded, no display appears. MORE FEATURES DISPLAYING AND CHANGING SUBTITLES OFF 2 Press SUBTITLE repeatedly until the desired language is selected.
PLAYING BACK AN MP3 DISC The unit can play back MP3s recorded on CD-ROM, CD-R or CD-RW discs. Before playing back an MP3 disc, read the following notes. Notes on MP3 discs An MP3 file stores audio data compressed using MPEG1, the audio layer-3 file-coding scheme. In this manual, we refer to what, in PC terminology, are called “folders” and “files” as “albums” and “tracks”. Notes on playing MP3s • An MP3 track must be recorded on a disc in the format compliant with ISO 9660.
Press i /k to select the album containing the track you want to play. MP3 MORE FEATURES 2 Program MP3-1 MP3-2 MENU TOP MENU MP3-3 2,3,4 4 vRETURN s MP3-4 MP3-5 MP3-6 MP3-7 MP3-8 MP3-9 Clear All t/r To return to the previous MP3 menu a Press vRETURN. To move to the first MP3 menu Press MENU. 3 Press ENTER and press i/k to select the desired track. MP3 Program MP3-1 .. TRACK_1 Playing back an MP3 disc TRACK_2 TRACK_3 1 TRACK_4 TRACK_5 Load an MP3 disc.
PLAYING BACK AN MP3 DISC (CONTINUED) 2 Press PROGRAM to list the selected track on the MP3 Program list. Repeat steps 1 and 2 to select tracks within the album or select a track from another album. REPEAT MP3 Program MP3-1 TOP MENU .. i/k/j/l/ ENTER TRACK_2 TRACK_7 TRACK_1 TRACK_6 TRACK_2 TRACK_9 Program list TRACK_3 TRACK_4 TRACK_5 c TRACK_6 TRACK_7 TRACK_8 Clear All To check the order of programmed tracks CLEAR PROGRAM Press the l right cursor button. Then press TOP MENU repeatedly.
To play back a programmed track repeatedly Press i/k in step 4 to the left to delete the track from the MP3 program list, then press CLEAR. Press REPEAT once during programmed playback. The current track will be played back repeatedly. To clear all the programs MP3 Press i/k in step 4 to the left to select “Clear All” on the MP3 program list, then press ENTER. The program settings are also cleared when the disc is removed. MORE FEATURES To clear the programs one by one Program MP3-1 TRACK_2 ..
CHANGING SETUP VALUES i/k to select the item to be 2 Press changed, then press the l right cursor button or ENTER. Disc Audio* Sets the audio soundtrack language. i/k/j/l/ ENTER SETUP vRETURN Disc Subtitle* Sets the subtitle language. Disc Menu* Sets the language used in the DVD menu screen. * If the selected language does not exist on the disc, the original language for the disc is selected. Rating CLEAR Sets the preset restriction level for playback.
Disc Subtitle The audio soundtrack language on a DVD disc can be changed. If the selected language is not available on the disc, the original language for the disc is selected. The subtitle language on a DVD disc can be changed. If the selected language is not available on the disc, the original language for the disc is selected. 1 1 Press i/k to select “Disc Audio” on the setup menu and press the l right cursor button.
CHANGING SETUP VALUES (CONTINUED) 2 i/k/j/l/ ENTER Press i/k to select the desired restriction level and press ENTER. Disc Audio 8 Blocked Disc Subtitle 7 Blocked Disc Menu 6 Rating 5 Password 4 TV Aspect 3 Menu Language 2 1 Digital Audio Output Unlock Others You cannot play DVD discs rated higher than the level you select unless you cancel the parental lock function. For example, when you select level 6, discs rated higher than level 6 are blocked and cannot be played.
The password is set. A 4-digit password can be set to prevent playing discs with higher ratings. Disc Audio Change Disc Subtitle Clear Disc Menu AS NECESSARY Password Rating 1 Password Press i/k to select “Password” on the setup menu and press the l right cursor button. TV Aspect Menu Language Digital Audio Output Others Disc Audio NEW Disc Subtitle –––– Disc Menu Rating Password The rating is locked. Any discs with a higher rating than the setting cannot be played back.
CHANGING SETUP VALUES (CONTINUED) 4:3 Panscan : TV Aspect Select the appropriate screen type of your TV: conventional size screen (4:3) or wide-screen (16:9). 1 Select this when playing media that contains pan-scan encoding. Media recorded in wide (16:9) format will be played at the full screen height, with the left and right portions cut off. Other media will be played in “Letterbox” style. Press i/k to select “TV Aspect” on the setup menu and press the l right cursor button.
Menu Language The language used in this setup menu can be changed. 1 Press i /k to select “Menu Language” on the setup menu and press the l right cursor button. Disc Audio English Disc Subtitle Spanish Disc Menu French Rating German Password Italian TV Aspect Menu Language Each DVD disc has a variety of audio output options. Set the Digital Audio Output of the unit according to the type of audio system you use.
CHANGING SETUP VALUES (CONTINUED) DOLBY DIGITAL/PCM: Select this when connecting to an AV receiver or other equipment equipped with a Dolby Digital (AC-3) decoder or a Dolby Pro Logic Surround decoder. 2 Press i /k to select the desired items and press ENTER. Stream/PCM: Each time you press ENTER, the setting turns “On” or “Off” in turn. Select this when connecting to an AV receiver or other equipment equipped with a DTS decoder or an MPEG decoder.
Code 6565 6566 6570 6577 6582 6583 6588 6590 6665 Language Afar Abkhazian Afrikaans Amharic Arabic Assamese Aymara Azerbaijani Bashkir Code 7285 7289 7365 7378 7383 7384 7387 7465 7473 Language Hungarian Armenian Interlingua Indonesian Icelandic Italian Hebrew Japanese Yiddish Code 8084 8185 8277 8279 8285 8365 8368 8372 8373 Language Portuguese Quechua Rhaeto-Romance Romanian Russian Sanskrit Sindhi Serbo-Croatian Singhalese 6669 6671 6672 6678 6679 6682 6765 6779 6783 6789 6865 6869 6890 6976 6978 6
TROUBLESHOOTING If something seems to be wrong with your DVD player, first check the items in the table below. Symptom Check See page The power does not come on. • Is the power cord plugged firmly into a live outlet? 9 The disc does not play. Playback stops almost immediately. • Is there condensation inside the unit? (Leave the player idle with the power on for 1 to 2 hours.
Power supply 230 V AC, 50 Hz Power consumption 16 W Power consumption in standby mode 2.9 W Weight 2.