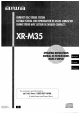
For assistance and information, call toll free I-800 -BUY-AIWA.
7 Condensation – Moisture WARNING may form on the CD pickup lens when: - The unit is moved from a cold spot to a warm spot - The heating system has just been turned on - The unit is used in a very humid room - The unit is cooled by an air conditioner When this unit has condensation inside, it may not function normally. Should this occur, leave the unit for a few hours, then try to operate again. TO REDUCE THE RISK OF FIRE OR ELECTRIC SHOCK. DO NOT EXPOSE THIS APPLIANCE TO RAIN OR MOISTURE.
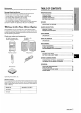
TABLE OF CONTENTS Wtenance Clean the unit only as recommended m~qe Reauirina in the Operating Instructions.
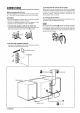
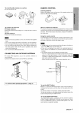
CONNECTIONS 3 Connect the AC cord to an AC outlet. When the AC cord is connected window is turned Before connecting the AC cord The rated voltage AC. of your unit shown Check that the rated voltage matches Connect There antennas, can be connected 1 Connect the speaker between terminals display the is overridden power the front cords To activate, speakers. the button or turn the MULTI JOG dial right or left. press the DEMO button again.
To stand the AM antenna on a surface REMOTE CONTROL Fix the claw to the slot. Inserting batteries Detach the battery cover on the rear of the remote control and insert two R6 (size AA) batteries. P. L / ) R6 (AA) To prxition the antennas FM feeder antenna: Extend this antenna horizontally in a T-shape and fix its ends to When to replace the batteries the wall. (16 feet).
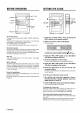
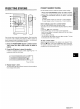
BEFORE OPERATION SETTING THE CLOCK POWER – -@l – CLOCK DEMO Function m U PHONES - ““m Remote sensor II - II Ej 1“””””””’”~ ,.-, —. ...... To turn the unit on Press one of the function buttons CD, MD). Playback of the inserted (TAPE, TUNER, disc or tape begins, VIDEO/AUX, or the previously tuned station is received (Direct Play Function). The POWER button is also available. The disc compartment may open and close to reset the unit.
THE SOUND ~BIJIJsTING EQ (EQUALIZER) This unit provides ROCK: Powerful the following sound POP: More presence JAZZ: Accented three different emphasizing in the vocals lower frequencies kinds. treble and bass and midrange for jazz-type music Press the MODE button repeatedly until “GEQ oFF” appears Then, turn the MULTI JOG dial right or left to EQ on the display. T-BASS select one of the three kinds, or off position within 10 seconds. —.—.....
MANUAL TUNING When an FM stereo broadcast Press the BAND/MODE button on the remote “MONO” appears Noise is reduced, TUNER contains noise button while pressing the SHIFT control. on the display. although reception is monaural. BANDI MODE TUNER 1 MONO SHIFT 2 To restore stereo reception, repeat the above again. To change the AM tuning interval The default setting of the AM tuning interval is 10 kHz/step.
PRESET NUMBER TUNING PFIESETTING STATIONS Use the remote 1 control to select the preset Press the TUNER/BAND 2 Press the numbered number. number directly. button to select a band. buttons to select a preset Example: To select preset number 15, press the +1 O and 5 buttons. To select preset number 10, press the +1 O and O buttons. Other methods to tune in to a preset station Press the TUNER/BAND button to select a band. Then follow any one of the methods described below to select a station.
To start play when the power is off (Direct Play OPERATION Function) Press the CD button. loaded OPENI Z- \ CLOSE MULTI JOG
2 Press the numbered to program a track. RANDOM PLAY All ttle tracks on the disc can be played randomly. Example: During playback or in stop mode, press the RANDOM button while pressing the SHIFT button on the remote control. “RAPdDOM” To cancel To select the 12th track, press the +1 O and 2 buttons. To select the 20th track, press the +10, +1 O and O buttons. Selected number lights up on the display. random play, repeat the above buttons and the +10 button again.
PLAYING BACK A TAPE OPERATION Insert a tape MULTI JOG MODE 7 Press the MODE button repeatedly until “DOLBY” appears on the display. Then, turn the MULTI JOG dial right or left to turn Dolby NR on or off to match the playback tape within 10 seconds. TAPEIREV MODE II EJECT For tapes recorded with DOLBY For tapes recorded without NR, turn on no DOLBY 2 Press the + ➤ button to start play. INSERTING TAPES Playback . You can select a reverse ● Use Type I (normal), tapes for playback. NR.
MUSIC SENSOR If there is a 4-second search for the beginning playl]ack or longer of the current between each track, or next track a during can be done easily. When the D indicator * blank on the cassette other pointed on the display is appearing, button to move to the next track or the << to the beginning About cassette tapes o To prevent accidental erasure, break off the plastic tabs of the current tape after recording with a screwdriver or tool.
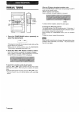
This section MD recorder ● button to start recording. 5 Press the BASIC RECORDING When start simultaneously. When the selected explains how to record from the tuner, CD player, or external equipment. m the selected function is CD, playback function and recording is MD or VI DEO/AUX, To stop recording, press the ■ button. To pause recording, press the II button.
Al EDIT RECORDING 4 3 5 2 Fb 5 E autc,matically of tracks enables and track calculates is rearranged (Al: Artificial CD recording length, When 10 to 99 minutes can be specified. using a 60-minute When the microcomputer to designate also available to designate determines the tracks JOG dial are the tape length. Tape length without worrying If necessary, Tape side A (front side) about Remaining of side A o time the unit the order so that no track is cut short.
PROGRAMMED RECORDING EDIT 6 Repeat step 5 for the rest of the tracks for side A. A track whose cannot playing time is longer than the remaining time be programmed. 3,7 4,5 Program number M 3,7 8 o Total number of programmed tracks 8 Programmed tracks ■ Remaining Programmed edit function the remaining programmed.
4 Select the duration for the timer-activated period with the +< or ➤F button or the MULTI JOG dial, and press the 11 button. SETTING THE TIMER 1 1,2,3,4 ,/ m 1 The duration 2,4 3 6 Use the remote period can be set between steps. To listen to a CD, load the disc. To listen to a tape, insert the tape into the deck. To listen to the radio, select the band and tune into a station. To listen to an MD, set the timer of the MD recorder (with an external timer) and prepare to play the MD.
CONNECTING EQUIPMENT SETTING THE SLEEP TIMER OPTIONAL 1 1 2 MD VI DEO/AUX LINE OUT SUPER WOOFER Refer to the operating The unit can be turned off automatically at a specified time. ● Use the remote instructions of the connected equipment for details. control. The connecting connecting 7 Press the SLEEP button while pressing the SHIFT button. ● Consult cords are not supplied. Obtain the necessary cords. your local Aiwa dealer for optional equipment.
LISTENING TO EXTERNAL SOURCES CARE AND MAINTENANCE —. Occasional care and maintenance are needed to optimize of the unit and the software the performance of your unit. To clean the cabinet Use a soft and dry cloth, POWER If the - surfaces moistened are with extremely mild detergent dirty, use a soft solution. solvents, such as alcohol, benzine damage the finish of the unit.
SPECIFICATIONS ltltEskiTEh.i The word “BBE” and the “BBE symbol” are trademarks of BBE Sound, Inc. Under license from BBE sound, Inc. Main unit XR-M35 FM tuner section Tuning range Usable sensitivity (IHF) Antenna terminals 87.5 MHz to 108 MHz 13.2 dBf 75 ohms (unbalanced) DOLBY NR Dolby noise reduction Laboratories “DOLBY” AM tuner section Tuning range Usable sensitivity Antenna Amplifier section Power output 25 watts per channel, Min. RMS at 6 ohms, from 60 Hz to 15 kHz, with no more than 17.
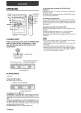
TROUBLESHOOTING If the unit fails Instructions, to perform GUIDE as described check the following PARTS INDEX in these Operating Instructions guide. are indicated GENERAL TheI-e is no sound. “ Is ihe AC cord connected properly? o Is ihere a bad connection? (+ page 3) ● Was an incorrect The sound function becomes button pressed? inaudible or the unit is turned off suddenly. DThsre + may be a short circuit Disconnect in the speaker terminals.
7 ADVERTENCIA PARA REDUCIR EL RIESGO DE INCENDIOS O DESCARGAS ELECTRICAS, NO EXPONGA ESTE APARATO A LA LLUVIA NI A LA HUMEDAD. A ● 8 RISK OF ELECTRIC SHOCK DO NOT OPEN ~ “CAUTION:TO REDUCE ELECTRIC DO NOT REMOVE COVER SERVICING SERVICE Explication RISK OF SHOCK, NO USER-SERVICEABLE REFER THE ● A (OR BACK). PARTS INSIDE. TO QUALIFIED PERSONNEL.
~ltenimiento Liml~ie la unidad solo como se recomienda en el Manual de INDICE Instwcciones. PREPARACIONES WIOS aue Solicite rwcesitan que ser reparados un tecnico cualificado ser~icio en Ias unidades si: - El cable de alimentacion de en reparaciones CA o su enchufe realice estan esi ropeados. - Objetos extrafios o lfquido han entrado en la unidad, - La unidad ha estado expuesta a la Iluvia o al agua. - La unidad no parece funcionar normalmente.
CONEXIONES 3 Conecte el cable de alimentacion toma de C.A. a una C.A. Antes de conectar el cable de alimentacion de CA La tension nominal de su unidad indicada en el panel posterior es de 120V CA. Compruebe que esta tension coincide con la de la red local, Cuando se conecta por primers vez el cable de alimentacion de Corriente Aiterna, la ventana de la pantalla mostrara Ias funciones de la unidad.
Para poner la antena de AM sobre una superficie CONTROL REMOTO Fije et gancho en la ranura. Insertion de Ias baterias Quite la tapa de Ias bater(as, ubicada en la parte trasera control remoto, e inserte dos baterias de R6 (tamario AA). del R6 (AA) Para posicionar Anlena Ias antenas alimentadora Extienda esta antena extremos a la Ipared.
AJUSTE DEL RELOJ ANTES DE LA OPERACION rr”’” ‘“”””’”’’”””’””’”””””””””””””””””””””;-”! MULTI JOG POWER ■ ✍ MODE CLOCK DEMO Funcion SHIFT U,FF FE- +4, II !—— .._ ...._ Sensor Remoto 1 r‘SJ....... .._ EI - PHONES= Para encender la unidad Presione uno de Ios botones de funcion (TAPE, TUNER, VIDEO/ AUX, CD, MD). Comenzara la reproduction del disco o de la cinta insertada o se recibira la emisora previamente sintonizada (Funcion de Reproduction Tambien Directs).
REALZAR SONIDOS GRAVIES AJUSTE DEL SONIDO El sistema T-BASS realza el realismo del sonido de baja frecuencia. Presione “T-BASS” hacia la derecha MULTI JOG - niveles o izquierda o a la position segundos. El nivel T-BASS MODE VOLUME el boton MODE repetidamente hasta que aparezca en la pantalla. Tras ello, gire el selector MULTI JOG - para seleccionar de apagado no cambia antes uno de Ios tres de que pasen 10 ciclicamente. (Cancelar) ~zl=lz~:~ Ire’”” m “ .
SINTONIZACION Cuando una emision en FM estereo contenga MANUAL Presione el boton BAND/MODE TUNER boton SHIFT del control remoto. “MONO” aparecera en la pantalla. El ruido se reduce aunque la recepci6n mientras ruido presiona el sea monoaural. BANDI MODE MONO TUNER Para SHIFT restaurar la recepcion estereo, presione de nuevo 10s botones. Para cambiar el intervalo de sintonizacion de AM El ajuste por omision del intervalo de sintonizacion deAM es de 10 kHz/paso.
PREAJUSTE DE EMISORAS SINTONIZACION PREAJUSTE MULTI JOG -—. MEDIANTE Utilice el control remoto para seleccionar
I I OPERACION Para detener la reproduction, presione el boton ■ . Para hater una pausa en la reproduction, presione el boton RANDOM OPENI CLOSE REPEAT MULTI JOG 4> ~ -x, ) ‘\.._., ~ ~ B 0-9,+10 ,’ EDITI CHECK ❑ SHIFT U,E+ Il. Para reanudar la reproduction, ptilselo de nuevo. Para buscar un punto particular durante la reproduction, mantenga pulsado el boton 4< 0 - y sueltelo en el punto deseado.
REPRODIJCCION Todas Ias pistas ALEATORIA del disco pueden Use el control reproducirse remoto de forma aleatoria. Durante la reproduction o en modo de parada, presione el boton RANDOM mientras presiona ei boton SHIFT del control remoto. Se vera aparecer Para cancelar “RANDOM” en la pantalla. la reproduction aleatoria, presione Ios botones de nuevo. m Si presiona * Aunque se presione el boton + o se gire el selector MULTI JOG, una pista previamente reproducida no podra ser omitida.
REPRODUCTION OPERACION Introduzca 1 MULTI JOG ■ MODE TAPEIREV MODE II EJECT @l”m~ INSERCION CintaS grabadas Cintas grabadas DE CINTAS ● Puede Seleccionar ● o ambos Iados.
SENSOR MUSICAL Si existe un hueco de 4 segundos realizarse facilmente actual o siguiente o mas entre cada pista, puede una btisqueda durante hacia el principio de la pista ~ principio para ir a la siguiente pista o el boton Ias Iengi.ietas 4+ de plastico u otra herramienta puntiaguda del casete el para ir al de la pista actual. Wanda, aparezca el indicador + boton 4H para ir a la siguiente principio de la pista actual. La funci6n romps con un destornillador la reproduction.
GRABACION 4 Presione uno de Ios botones de funcion y prepare la fuente de sonido de la que vaya a grabar. BASICA Para grabar de un disco compacto, presione e introduzca Esta seccion explica como grabar desde la radio, el reproductor de CDs, la grabadora de MDs o desde equipo externo. Para grabar de una emision radiofonica, presione TUNER/BAND y sintonice la emisora.
GRABACION CON EDICION Al Longitud de la cinta Cara A de la cinta o (Iado delantero) Tiempo restante de la cara A Numero de pistas programadas u Con la funcion de edition Al es posible grabar sin tener que preoeuparse sobre la Iongitud de la cinta ni de la pista. Cuando se inserta un CD, la unidad calcula automaticamente la Iongitud de Ias pistas.
6 Repita GRABACION CON EDICION PROGRAMADA el paso 5 para el resto de las pistas de la cara A. Noes posible programar una pista con una duration mayor a la del tiempo restante. Pista seleccionada 3,7 4,5 M 3,7 8 Ntimero de programa n 8 Numero total de pistas programadas ■ Tiempo La funcion de edition programada permite la grabacion de un CD mientras se comprueba el tiempo restante en cada Iado de la cinta segun se programan Ias pistas.
AJUSTE DEL TEMPORIZADOR 1 4 1 1,2,3,4 3 2,4 5 6 emisora. Para escuchar un MD, configure el temporizador de la grabadora MD (con un temporizador externo) y preparese para realizar la reproduction del MD. Para escuchar el equipo conectado a Ilas tomas AUX, establezca el temporizador de la fuente conectada (con un temporizador externo) y preparela para repmducir su sonido. La unidad puede encenderse cada dia automaticamente en et memento que se Ie especifique gracias al tempo rizador incorporado.
AJUSTE DEL TEMPORIZADOR APAGADO DE CONEXION DE UN EQUIPO OPCIONAL CD DIGITAL (OPTICAL) OUT MD —2 VIDEO/AUX LINE OUT SUPER L La unidad puede apagarse automaticamente Ie especifique. en el memento que se WOOFER Consulte el Manual de Instrucciones del equipo conectado obtener mas detalles. ● No se suministran cables de conexion, Debe adquirirlos separado. ● para por Consulte con su centro Aiwa local si desea obtener equipo optional. Use el control remoto.
.,..~.: L AUDICION DE FUENTES DE SONIDO EXTERNAS CIUIDADO Y MANTENIMIENTO El rnantenimiento y cuidado ocasional de la unidi~d y del software resultan necesarios para optimizar el funcionamiento de su unidad. Para Iimpiar POWER 1 1 am! ..... S m ~G=/( = ya (qLieestos /;”.::\ c) L::;> mfi Pa[ra Iimpiar Ios cabezales pasa la cinta al acabado de la unidad.
ESPECIFICACIONES ftftESYSTEM El termino “BBE” y el simboio BBE son marcas BBE Sound Unidad principal XR-M35 Seccion del sintonizador de FM 87,5 MHz a 108 MHz Gama de sintonizacion Seccion del sintonizador titil Seccion del amplificador Potencia de salida Distortion Armonica Total Entradas Salidas Seccion platina de casete Formato de pista Respuesta de frecuencia Relation seiial/ruido Sistema de grabacion Cabezales Seccion reproductor DOLBY Convertidor D-A Relation sefial/ruido Distortion armo
Glh PARA LA SOLUCION PROBLEMAS iNDICE DE LOS COMPONIENTES DE Las instrucciones del control Si la lJnidad no funciona como se describe Instrucciones, compruebe la guia siguiente: en este Manual de de cada component remoto se indican de la unidad en Ias paginas principal mostradas o a continuation (En orden alfabetico) GENERALIDADES Partes Paginas No hay sonido.
7 AVERTISSEMENT AFIN DE REDUIRE DFcHARGE TOUT RISQUE ELECTRIQUE, APPAREILSOITA L’ABRI A DE LA PLUIE ~ OU QUE DE CET ET DE L’HUMIDITE. REDUCE DO NOT REMOVE SERVICE THE COVER SERVICING ● A RISK OF SHOCK, NO USER-SERVICEABLE REFER 8 SHOCK DO NOT OPEN ELECTRIC (OR BACK). PARTS INSIDE. TO QUALIFIED PERSONNEL.
W?t —— ien Nettoyez I’appareil recornmandations en suivant scrupuleusement faites clans ces instructions Ies TABLE DES MATIERES d’utilisation.
CONNEXIONS 3 Branchez Ie cordon secteur sur une prise de courant. La premiere fois que Ie cordon secteur est branche, la fen6tre de I’affichage demontre Ies fonctions de I’unite. Lorsque I’appareil Avant de connecter Ie cordon secteur La tension nominale indiquee sur Ie panneau arriere de votre appareil est de 120V c.a. Verifiez si cette tension nominale correspond bien a la tension locale. est allume, cet affichage de demonstration I’affichage de fonctionnement.
TkLECOMMANDE Pour installer l’antenne AM sur une surface: Insertion des piles Fixez la griffe clans la rainure. Retirez Ie couvercle au dos de la telecommande et inserez deux piles R6 (taille AA) \ L r. R6 (AA) Quand changer Ies piles Pour placer Ies antennes: Antenne d’alimentation FM: Etirezc(?tte antenne extremit& au mur, horizontalement en formede II est possible de faire fonctionner la telecommande a une distance maximum d’environ 5 metres du capteursitue sur I’unite principal.
REGLAGE DE L’HORLOGE AVANT L’UTILISATION CLOCK Ivlwul- SHIFT ++, II u .. Pour aliumer I’appareil: Appuyez sur I’une des touches 1 Appuyez sur la touche CLOCK tout en appuyant de fonction VIDEO/AUX, CD, MD). La lecture du disque ou de la cassette (TAPE, inseree commence ou (Fonction de bien la station captee precedemment est regue lecture directe). La touche POWER est egalement disponible.
REGLAGE IN SON ACCENTUATION Le systeme T-BASS DES GRAVES ameliore Ie realisme du son a basses frequencies. Appuyez a plusieurs reprises sur la touche MODE jusqu’a ce que “T-BASS” apparaisse sur I’affichage. Puis tournez le cadran MULTI JOG vers la droite ou vers la gauche afin de selectionner un des trois niveaux ou la position ‘off’ clans Ies 10 EQ T-BASS secondes qui cycliquement. suivent.
Lorsqu’une emission FM stereo contient du bruit: Appuyez sur la touche BAND/MODE TUNER tout en appuyant ACCORD MANUEL sur la touche SHIFT sur la telecommande. “MONO” est alors affiche. Le bruit est reduit mais la reception est monophonique. :m; - BANDI MODE 1- 2“ TUNER MONO Pour revenir -SHIFT w plusieurs stereo, appuyez de nouveau sur Pour changer I’intervalle d’accord AM Le reglage par defaut de I’intervalle d’accord AM est 10 kHz/ pas.
PRfF1~GLAGE DES STATIONS ACCORD SUR LES NUMEROS PRkREGLES . o–9, +10 Utilisez la telecommande numero preregle. pour selectionner 1 Appuyez sur la touche srYectionner une bande. est memorisee, un numero de prereglage est attrib\Je a cette station. Utilisez ce numero pour capter directement cette station. de prereglage sur Ies Pour selectionner preregle 10, appuyez sur Ies Ie numero +1 O et O.
REPEAT Pour arrater la lecture, appuyez sur la touche ■ . Pour interrompre temporairement la lecture, appuyez sur la touche Il. Pour continuer la lecture, appuyez de nouveau sur cette touche. Pour Iocaliser un point particulier du disque pendant la ou ➤F enfoncee et rel~chez-la lecture, tenez la touche - 0–9,+10 au point souhaite. Pour passer au debut EDITI appuyez CHECK cadran UTILISATION (—RANDOM OPENI CLOSE MULTI JOG +> ■ SHIFT plusieurs MULTI JOG.
Utilisez LECTURE ALEATOIRE Toutes I,ss pistes sur Ie disque peuvent &re Iues de fagon aleatoira. 1 Appuyez sur la touche PRGM tout en appuyant sur la touche SHIFT clans Ie mode d’arri% “PRGM” sur la touche RANDOM tout en appuyant .eur la Itouchr? SHIFT sur la telecommande. A,ppuyez “RANDCIM” est alors affiche.
LECTURE D’UNE CASSETTE UTILISATION Inserez une cassette. 1 Appuyez a plusieurs reprises sur la touche MODE apparaisse sur jusqu’a ce que “DOLBY” I’affichage. Puis tournez Ie cadran MULTI JOG vers la droite ou vers la gauche clans Ies 10 secondes qui suivent pour activer ou desactiver Ie systeme Dolby NR en fonction de la cassette a Iire.
13ETECTEUR DE IVIUSIQUE S’il y a w espace vide entre chaque piste, il est facile de chercher, pendant la lecture, Ie commencement de la piste en tours de lecture CJUde la piste suivante. Au sujet des cassettes Pour eviter un effacement accidental de la bande, utilisez ● un tournevis pastilles Gfuand 11’indicateurD apparalt sur I’affichage, appuyez sur ou un autre en plastique objet pointu sur la cassette afin d’enlever apres Ies avoir effectue I’enregistrement.
ENREGISTREMENT DE BASE 4 Appuyez sur une des touches la source a enregistrer. preparez de fonction et Pour enregistrer un disque compact, appuyez sur la touche Cette section explique comment effectuer utilisant Ie syntoniseur, Ie Iecteur de I’enregistreur MD ou un appareil externe. un enregistrant disque CD et inserez en Ie disque. Pour enregistrer une emission de radio, appuyez sur la compact, touche TUNER/BAND et reglez Ie syntoniseur Pour enregistrer a partir MD et inserez un MD.
ENRKWTREMENT NIONITAGE Al AVEC Longueur 3 4 3 5 2 E 5 ■ de montage Al permet d’enregistrer (Al = intelligence est modifie de maniere a ce artificielle) L’enregistrement avec montage milieu de la bande. Al ne peut pas commencer II faut enregistrer au a telecommande commence. debut de la piste de la face pendant Quand (face A) se termine, 10 secondes I’enregistrement I’enregistrement intitulee pour Ies operations 3 a 5. sur Ie cde (face B) commence.
ENREGISTREMENT AVEC MONTAGE PROGRAMME 6 Repetez I’operation 5 pour Ies autres pistes pour la face A de la bande. II est impossible de programmer une piste dent Ie temps de lecture est plus long que Ie temps qui reste sur la bande.
REGLAGE DE LA MIIWTERIE Vous pouvez regler la duree de la periode deactivation de I’appareil par la minuterie entre 5 et 240 minutes, par pas de 5 minutes. 1 1 1,2,3,4 3 5 Preparez la source. Pourecouter un disque compact, inserez Ie disque. Pour ecouter une cassette, inserez la cassette clansla platille. Pour ecouter la radio, selectionnez la bande et accordez Ie recepteursur une station.
REGLAGE DE LA MINUTERIE DE SOMMEIL CONNEXION OPTIONNEL D’UN APPAREIL CD DIGITAL OUT (OPTICAL) ❑ ❑ ❑ 1 ❑ D 422 1 @@ am mm 2 !!! a MD VIDEO/AUX LINE OUT @? .m LjLd----supERw Consultez Ies instructions d’utilisation de I’appareil connecte pour avoir plus de details. Les cordons de raccordement ne sent pas fo~rnis. Procurez-vous Ies cordons de raccordement adequats. Renseignez-vous aupres de votre distributeur Aiwa local pour ● L’appareil peut &re eteint automatiquement a un moment specifie.
FCOIMTE DE sOURcEs EXTERNES SOINS ET ENTRETIEN Vous devez effectuer un entretien periodique de votre chahe Iogiciel afin d’optimiser Ieur bon fonctionnement. ei du ‘owERm Pour nettoyer Ie coffret Utilisez un chiffondoux et sec. Si Ies surfaces sent extr~mement sales, utilisez un chiffon doux Iegerement humecte d’une solution de detergent doux, N’utilisez pas de solvants forts tels que de I’alcool, de la benzine ou du diluant car ils pourraient endommager la finition de I’appareil.
SPECIFICATIONS MCE.SYSTEM Unite principal XR-M35 Partie syntoniseur FM Gamme d’accord Sensibility utilizable (IHF) Bornes d’antenne Partie syntoniseur Partie 25W par canal, min RMS a 6 ohms, de 60 Hz a 15 kHz, avec pas plus de 17.
INDEX MJIIIIE DE DEPISTAGE DES [IIEFAUTS Vous trouverez concernant Si l’appi~reil instructic)ns ne fonctionne d’utilisation, pas comme consultez decrit clans ces clans Ies pages indiquees chaque fonction ci-apres sur I’unite Ies instructions principal ou sur la telecommande. Ie guide ci-dessous. (Par ordre alphabetique) Parts GENERALITES II n’y a pas de son + Le corclon secteur est-il connecte correctement? Y a-t-ii une mauvaise connexion ? (+ page 3) .
.
Printed in China AIWA CO.,LTD.