2004 Excalibur and Viking Manual Version 3.0 Nov 2003 EXCALIBUR®, VIKING™, TORNADO® VALVE (pat#5791328), LIGHTNING BOLT®, SODA CAN MOD/SCM™ and SIDEWINDER®(pat pend) are Trademarks or Registered Trademarks of AKALMP, Inc. Design rights and all rights reserved. All patterns, drawings, photographs, instructions or manuals remain the intellectual property of the manufacturer. Covered under US Patent 5791328 and other Patents Pending. All rights will be strictly enforced. All rights reserved.
CONTENTS I. Safety Guidelines & Instructions II. Specifications III. Operating instructions A. Power Supply B. Compressed Air/Nitrogen Supply C. Turning “ON & FIRING” the Marker D. Velocity Adjustment IV. Electronics A. Equalizer Board B. Nelson Board V. Maintenance A. Cleaning B. Sidewinder C. Ball Detents D. SCM™ / LPR E. Tornado Valve F. Lightning bolt G. Excalibur Hammer H. Viking Hammer I. Excalibur Ram J. Trigger Frame K. Solenoid valves L. O-rings and Screws VI. Troubleshooting VII. Schematics A.
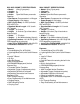
Introduction: Congratulations on purchasing an EXCALIBUR® or VIKING™ paintball marker. We hope you enjoy using this marker. Please read the information in the manual and get familiar with you marker before use. This manual covers both the EXCALIBUR® and VIKING™ series of paintball markers as well as covering the SIDEWINDER® regulator and the SCM™ low pressure pneumatics regulator. This manual includes information for both the 2000-2003 and the 2004 models of EXCALIBUR® and VIKING™.
• Individuals under 18 years of age must have adult supervision when using or handling the EXCALIBUR® or VIKING™. • Use only nitrogen and compressed air from approved storage bottle. Do not use CO2. • Do not exceed 850 psi input pressure. • Read operator’s manual before use and comply with all safety instructions. • Use .68 caliber paintballs only. • Always keep EXCALIBUR® or VIKING™ turned off when not in use. • Always switch gas source off when EXCALIBUR® or VIKING™ is not in use.
II. SPECIFICATIONS. 2000-2003 EXCALIBUR SPECS: • Model: Excalibur®(pat. pending) • Version: A • Caliber: .68 • Action: Closed Bolt Electro-pneumatic Operation • Gas Source: Compressed air or Nitrogen • Power Supply: 9 Volt battery • ROF (Cyclic Rate): 13+BPS • Standard Barrel Length: 12.0" Javelin (AC Threads) • Length: 8.0 inches • Height: 8.4 inches (Top of feed tube to bottom of grip) • Width: 1.75 inches • Weight: 3.
2001-2003 VIKING™ SPECIFICATIONS: • Model: Viking™(pat pend) • Version: A • Caliber: . 68 • Action: Open Bolt Electro-pneumatic Operation • Gas Source: Compressed air or Nitrogen • Power Supply: 9 Volt battery • ROF (Cyclic Rate): 13+BPS (unlimited ROF with EYE’s) • Standard Barrel Length: 12.0" Javelin (AC Threads) • Length: 8.0 inches • Height: 8.4 inches (Top of feed tube to bottom of grip) • Width: 1.75 inches • Weight: 3.
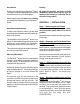
III. OPERATING INSTRUCTIONS. A. POWER SUPPLY: B. COMPRESSED AIR/NITROGEN The ECALIBUR® and VIKING™ uses a 9-volt battery stored in the grip as its power supply. For maximum number of shots and velocity stability you should only use high quality alkaline batteries. SUPPLY. The EXCALIBUR® and VIKING™ are designed to operate on nitrogen or compressed air. It requires a high flow of CLEAN gas. Most adjustable nitrogen systems or preset bottle systems, will work fine.
Use only steel braided hose and stainless steel quick disconnects or Macro-line. Microline restricts airflow and unsafe for use in paintball. DO NOT USE TEFLON TAPE. Improper use of Teflon tape can result in pieces of tape going through the regulator and into the marker. This can cause blockages and damage to solenoid valves. Do not use of pro-connects and fittings like those, they restrict airflow which can cause a drop in efficiency or can cause drop off problems while firing the EXCALIBUR® or VIKING™.
IV. ELECTRONICS: Equalizer TM Installation and Usage Manual for AKA Viking and Excalibur EqualizerTM is a trademark of Wicked Air Sportz All material including, but not limited to photographs, text, and concepts contained in this manual is copyright ©2002-2003 By Wicked Air Sportz and Jim Drew. Distribution of this data without permission is strictly prohibited! All rights reserved, worldwide. Reprinted with permission. This section provided by Wicked Air Sportz http://www.wickedairsportz.com/home.htm.
Introduction Liability Thank you for purchasing the EqualizerTM board. By using this product, you agree to hold This board is a direct replacement for the stock Wicked Air Sportz free from any type of liability either directly or indirectly due to circuit board found in your AKA marker. the use of this product.
Step 5 – Testing the Board Before reassembling the marker, you should do a quick test to make sure that connections are correct and that the board is working. Making sure that nothing is grounding the grip frame, move the power switch to the on position. If everything is working, you should see the LED light up orange. If this occurs, turn the power switch to the off position and continue to step 6. If you don’t see the LED light up, make sure your battery is connected.
responsive to the trigger, decrease the common, this does happen enough to Debounce time. justify the creation of this mode. The factory default is Delayed. Remember, if you pull the trigger once and the recoil causes your marker to fire again by itself, it is NO LEGAL for tournament play The Eye Mode can be set to one of four and is a SEVERE SAFETY HAZARD! different modes for the Excaliburâ: Eye Mode Bypass - The anti-chop system is disabled.
cannot supply power to your hopper to run it (in place of its own batteries), it can provide a trigger that could force activation for a programmable period of time. More information about the interface to the EqualizerTM will be provided in separate documentation. Possible values are .1 to 2.0 seconds, with either a positive or negative going pulse. The factory default is positive pulse, lasting 1.0 second. This configuration was designed to work directly with the Warpfeed from Air Gun Designs.
programming mode, it is always good to practice safe marker handling. Pull the trigger, and hold it in the back position. Now, turn the power switch to the on position. The LED will light green. Now, immediately release the trigger. The LED will light red. Pulling and releasing the trigger will toggle the LED color between red, green, and orange.
LED will return to the color representing what the current programming mode is. At this point, you can once again press and release the trigger to toggle between Dwell, Debounce, and Eye Mode programming modes. You can perform a complete reset of the Dwell, Debounce, and Eye Mode to the factory defaults when you are in the program starting point (where you can toggle the programming mode). To do this, just hold down the trigger for 5 full seconds.
B. NELSON BOARDS. Note: As of April 2003 these boards are no longer being used or produced for the EXCALIBUR® or VIKING™ this section is only being include as a reference for people still using the old Nelson boards. (The Excalibur®(pat pend) is controlled by a state of the art software driven computer board. The board is equipped with many features that are not found on other electronic paintball markers.
seen before in an electronic paintball marker. This setting is used with a new feature that has been added to the circuit board that increases battery life. This dwell setting is used in conjunction with the hammer drive dwell setting to control the amount of time that the circuit board draws power from the battery to charge the coils on the hammer solenoid and to charge up the capacitors that will continue to power the hammer solenoid after the circuit board stops drawing power from the battery. Example.
time that the circuit board draws power from the battery to charge the coils on the solenoid and to charge up the capacitors that will continue to power the solenoid after the circuit board stops drawing power from the battery. Example. The hammer fires for 17 milliseconds and the Hammer Draw Enable dwell is set for 10 milliseconds.
V. MAINTENANCE. A. CLEANING. A clean marker is a happy marker. The barrel on the EXCALIBUR® and VIKING™ can be cleaned during a game by either unscrewing the barrel from the marker or by removing the bolt and swabbing through the marker and the barrel. The bolt can be field-stripped from the EXCALIBUR® and VIKING™ while the marker is pressurized with gas. This allows you to clean the marker and oil the bolt when needed. The Excalibur® and VIKING™ should be cleaned externally using a cotton cloth.
Looking at the regulator from the bottom, turn the allen wrench clockwise to decrease the pressure. Increase output: Looking at the regulator from the bottom, turn the allen wrench counter clockwise to increase the pressure. of 900 psi. Use only steel braided hose and stainless steel quick disconnects or Macro-line. Microline restricts airflow and is unsafe for use in paintball.
6. To disassemble the swivel joint, clamp the threaded end of the swivel between the two pieces of wood. Use the adjustable wrench to loosen the swivel nut. The swivel nut is BLUE LOCTITED in place. 7. Using a gentle twisting action gently pull the swivel sleeve from the regulator body lower. Inspect the o-rings for damage or wear. Replace if needed. 8. Use an allen wrench and unscrew the regulator core from the regulator body lower. The core comes out through the front of the regulator body lower.
C. BALL DETENTS. 2004 EXCALIBUR® & VIKING™ BALL DETENT. The ’04 EXCALIBUR® and ’04 VIKING™ has been supplied with a dual ball detent to keep paintballs from double feeding and to keep paintballs centered directly in the breech for better detection by eyes when installed. Replacement of dual ball detent: The dual ball detent may need cleaning or become worn or broken over time. This is normal. The ’04 EXCALIBUR® and ’04 VIKING™ detents are available through your local dealers or AKA. To replace the detent.
D. SCM™ & LPR’s SCM™ PNEUMATICS REGULATOR: (SODA CAN MOD) The SCM™ is a modular pressure compensating low pressure regulator that supplies air for the pneumatics of the paintball markers. It can fit a large number of different paintball markers. The SCM™ pneumatics regulator controls the air pressure fed to the solenoid valves, which in turn operate the rest of the marker. The maximum operating pressure of the solenoid valves is 100 psi.
maintenance to the SCM™ can be done on the marker. 2. Unscrew the “Reg End cap” from the front of the SCM™. 3. Using a small set of needle nose pillars gently pull the spring and piston out of the “Body Sleeve”. Now you can change the “Reg Piston” o-ring if needed. 4. Using a SCM™ tool or a small set of needle nose pillars gently unscrew the “Regpin Fitting” from the SCM™. The rest of the parts underneath should come with it when you remove it. You can change o-rings and seats at this point. 5.
2000-2003 Stock EXCALIBUR® and VIKING™ LPR The pneumatics regulator controls the air pressure fed to the solenoid valves, which in turn operate the rest of the gun. The maximum operating pressure of the solenoid valves is 100 psi, but the components of the EXCALIBUR® and VIKING™ needs only 6085 psi to operate. Use of the pneumatics regulator keeps the solenoid valves from receiving too high a pressure, and will keep them operating properly for many years.
reg-washer and o-ring from the end of the pneu-reg body. You can also unscrew the reg core from the pneu-reg endcap through the back of it, but not through the front. 5. Using snap ring pliers remove the snap ring from the end of the pneu-reg body. (only needed on early version pneumatics regulators) 6. Gently push the reg piston and spring out of the pneu-reg body using something soft like a plastic cap from a ball point pen which will not damage the sealing area of the regulator piston. 7.
E. TORNADO VALVE®(Patent #5791328). The TORNADO®(pat #5791328) valve is used in the EXCALIBUR®, VIKING™ and MERLIN™. This version of the TORNADO® valve is a bigger, stronger and more efficient version then the original TORNADO® valve designed for the cockers. The TORNADO®(pat #5791328) valve has a lifetime warranty that covers replacement of the valve unless you modify the valve.
TORNADO® Valve(Patent #5791328) Parts: 2000-2003 EXCALIBUR® and VIKING™ Part: Qty: Part Number: Valve Chamber endcap (Excal) 1 Valve Chamber endcap (Viking) 1 -015 o-ring buna 70D 1 ORB015-0000 To remove the bolt: Pull the bolt pull pin knob straight up from the bolt and gun body. The pin is designed to stay in the bolt. Then, slide the bolt out the back of the marker. To install the bolt, slide it into the bolt bore to the location of the hammer or Hbar.
2004 Viking™ Bolt Parts: Part Description: Number: Black Delrin Lightning bolt 5/32 ball bearing Spring (long) 10-32x3/8 Setscrew pull pin w/ knob Qty: Part 1 1 1 1 1 2002-2003 Viking™ Bolt Parts: Part Description: Qty: Part Number: Black Delrin Lightning bolt 1 ball plunger 1 pull pin w/ knob 1 2002-2003 VIKING™ BOLT 2004 VIKING™ BOLT 2000-2003 Excalibur® Bolt Parts: Part Description: Qty: Part Number: Black Delrin Lightning bolt 1 -015 o-rings 2 ORB015-0000 -013 o-ring 1 ORB013-0000 ball plunger
Re-assemble in reverse order. Oil the quadrings when you re-assemble the hammer also use a small drop of blue-loctite on the threads that hold the hammer cap on the hammer cartridge to keep the hammer cap from coming loose. Troubleshooting: Air leaking from solenoid: 1. Check the solenoid valve, it may need to be replaced. 2. Check the hammer piston quad-ring. Air may be leaking around it. If air is leaking around it, replace the hammer piston quadring. Air leaking around the front of the hammer: 1.
over-tighten. Make sure the -013 o-ring on the endcap is in good condition. It will keep the nose from coming loose. You will also want to put a small drop of BLUE Loctite on the threads as you re-assemble the hammer cartridge. 2001-2003 EXCALIBUR® Hammer Troubleshooting: Air leaking from solenoid: 1. Check the solenoid valve, it may need to be replaced. 2. Check the hammer piston o-ring. Air may be leaking around it. If air is leaking around it, replace the hammer piston o-ring.
pull it out the back of the VIKING™(pat pend). Using a 5/8 wrench and the pneumatics reg removal wrench loosen the hammer endcap. Unscrew the endcap from the hammer cartridge and gently pull the pieces apart. You can now replace the quad-rings if needed. Re-assemble in reverse order. Oil the quadrings when you re-assemble the hammer also use a small drop of blue Loctite on the threads that hold the hammer cap on the hammer cartridge to keep the hammer cap from coming loose.
put a small drop of BLUE Loctite on the threads as you re-assemble the hammer cartridge. Troubleshooting: Air leaking from solenoid: 1. Check the solenoid valve, it may need to be replaced. 2. Check the hammer piston o-ring. Air may be leaking around it. If air is leaking around it, replace the hammer piston o-ring. Air leaking around the front of the hammer: 1. Check the u-cup or o-ring seal around the hammer shaft. It may need to be replaced. 2. Check the o-rings on the outside of the cartridge.
2004 EXCALIBUR® Ram Parts: Part Description: Qty: Part Number: H-bar 1 Ram Endcap Urethane bumper -010 quad-ring 1 1 1 Ram Bushing -010 o-ring 1 1 Ram Shaft -010 quad-ring Urethane bumper 1 1 1 Ram tube -015 o-ring 1 5 Ram Retaining Pin 1 ORU010-0000 ORU015-0000 2004 EXCALIBUR® Ram 2000-2003 EXCALIBUR RAM. Removal of Pneumatic Cyclinder (ie: the Ram): De-gas the marker and remove all paint. Remove the bolt, the body endcap, and pneumatics regulator.
2000-2001 EXCALIBUR® Ram When adjusting the spring tension on the trigger, it is best to leave some spring tension so normal movement during play will not accidentally activate the trigger. The spring can be interchanged with those used on AC™ triggers so you can personalize it to your own spring tension. **Do not cut the trigger guard off.** J. TRIGGER FRAME.
K. SOLENOID VALVES. 2004 EXCALIBUR® and VIKING™ SOLENOID VALVES. Removal of the solenoid valves: Remove the grip frame and grip plate as one piece. Carefully pull the grip and grip plate straight away from the body. The grip plate locates on two pins in the marker body. Carefully unplug the solenoid valves from the circuit board. Using an allen wrench, remove the screws holding solenoid valve you want to replace. Lift the valve and manifold straight out of the marker body.
2004 EXCALIBUR® Screws & Pins. Serial # 1500+ Quanity: Type: Location: 1 5/16-24 x .3125 setscrew valve retaining screw 2 10-32 x 1.000 Button head screws grip frame 4 6-32 x .250 Button head screws grip panels 1 10-32 x .375 setscrew trigger stop 2 8-32 x .5 Setscrews trigger stop 1 6-32 x .250 setscrew trigger stop lock 1 10-32 x .375 button head screw grip plate/frame 4 4-40 x .5 button head screws solenoid valves 4 4-40 x .250 button head screws detent cover/on-off switch 4 4-40 x .
2000-2003 EXCALIBUR® Screws and Pins. Quantity: Type: Location: 1 5/16-24 x .3125 setscrews valve retaining screw 2 10-32 x 1.000 Button head screws grip frame 4 6-32 x .250 Button head screws grip panels 1 10-32 x .375 setscrew trigger stop 2 8-32 x .500 Setscrew trigger stop 1 6-32 x .250 setscrew trigger stop lock 1 8-32 x .125 setscrew pivot pin screw 1 10-32 x .375 button head screw grip plate/frame 4 4-40 x .5 button head screws solenoid valves 2 4-40 x .
VI. TROUBLESHOOTING Troubleshooting: EXCALIBUR® or VIKING™ will not fire. • Is there a battery in the marker? • Is there air/nitrogen or CO2 gas present? • Was the compressed air or nitrogen clean? • Is the marker turned on? • Is the trigger adjusted correctly? • Is the bolt stuck? • Is the SCM™/LPR regulator working? • Is the circuit board working? • Are the dwells set correctly? • Are the wires damaged. • Are the solenoids working correctly? Velocity too Low or too High.
2004 EXCALIBUR® SCHEMATICS RIGHT VIEW BOTTOM VIEW
2004 EXCALIBUR® SCHEMATICS BACK VIEW LEFT VIEW
2004 EXCALIBUR® & VIKING™ SCHEMATICS GRIP TRAY GRIP FRAME
2004 VIKING™ SCHEMATICS RIGHT VIEW BOTTOM VIEW
2004 VIKING™ SCHEMATICS BACK VIEW; LEFT VIEW
VIII. Warranty, Liability and Contact Information THIS WARRANTY WILL NOT BE HONORED WITHOUT A COMPLETED PRODUCT WARRANTY REGISTRATION CARD ON FILE WITH AKALMP, INC. PRIOR TO A WARRANTY CLAIM. The EXCALIBUR® or VIKING™ is warranted to be free from manufacturing defects for life. AKALMP, Inc.