
User guide

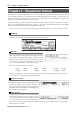

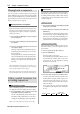
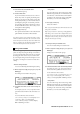
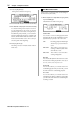

Table Of Contents
- warning_page.pdf
- MPC1000
- Table of contents
- Chapter 1 : Introduction
- Chapter 2 : Basic Operation
- Chapter 3 : Sequencer feature
- MAIN page
- Recording the performance
- Playing back a sequence
- Other useful features for recording sequences
- Detailed information on sequence feature
- Setting the length of a sequence
- Setting the time signature of the sequence
- Setting tempo
- Setting the loop for a sequence
- Changing the default settings
- Changing the sequence name
- Changing the default name for a sequence
- Copying a sequence
- Deleting a sequence
- Deleting all sequences
- Handling the duration (the length of a note) at the loop boundary
- Track features
- MIDI sequencer features
- Chapter 4 : Editing sequences
- Chapter 5 : Step editing
- Chapter 6 : Song mode
- Chapter 7 : Functions of a pad
- Chapter 8 : Q-Link slider
- Chapter 9 : Using the MPC1000 with external devices
- Chapter 10 : Recording a sample
- Chapter 11 : Editing a sample
- Chapter 12 : Program
- Creating a program
- Assigning/Reassigning samples to the pads
- Playing the sample while the pad is being hit
- Setting the volume and the tuning for a sample
- Changing the sample volume with velocity
- Playing several samples with one pad
- Switching between samples using velocity
- Setting the envelope for a pad
- The functions in the Program window
- Editing the sound of a sample
- Simulating the open/close hi-hat (setting the mute group)
- Setting the overlap of the sounds on the same pad (voice overlap)
- Delete all the unused samples at the same time (PURGE)
- Setting a MIDI note number to the pads
- Assigning MIDI note numbers to the pads (changing the default setting)
- Chapter 13 : Mixer
- Chapter 14 : Effect
- Chapter 15 : Save / Load
- Chapter 16 : Connecting the MPC1000 to your computer
- Chapter 17 : Other settings
- Appendix

MPC1000 v2 Operator’s Manual rev 1.0
14
Chapter 3: Sequence feature
Playing back a sequence
You can play back a recorded sequence by pressing the
[PLAY START] key. The sequence will be played repeatedly
until you press the [STOP] key. If you press the [PLAY] key
again, the MPC1000 will resume the playback from where
the previous play back was stopped.
Repeat play back of a sequence
You can play back several sequences in a series by us-
ing the Next Sequence feature. The Next Sequence fea-
ture allows you to select the next sequence to play, dur-
ing playing back a sequence, so that you can play the
sequences in a series.
01. In the Sq field in the MAIN page, select the sequence
you wish to play first.
02. Press the [PLAY START] key to start the play back of
the sequence.
03. Select the Sq field during play back, and select the
next sequence to play.
Selecting a sequence in the Sq field during the play-
back brings up the Next field, where you can select
the next sequence.
After playing back the currently selected sequence
to the end, the MPC1000 will start playing back the
sequence you select in the Next field. By repeating
this step, you can play back several sequences con-
tinuously.
Tips: With the [NEXT SEQ] key, you can select the next se-
quence with a pad. For more information, see the “Selecting a
sequence to play with pads” section on page 43.
Tips: In the SONG mode, you can set the order to play sequences.
For more information, see the “SONG mode” section on page 37.
Other useful features for
recording sequences
Undo Sequence feature
When overdubbing sequences, you can cancel the last
recording and reset to the setting before the recording.
01. During overdubbing, press the [STOP] key to stop
the overdub and press the [UNDO] key.
The LED of the [UNDO] key will be off and only the
last added recording will be deleted. To restore the re-
cording, press the [UNDO] key again to light the LED.
Note:
You can use the [UNDO] key only for the last recording.
Erase feature
You can delete a certain pad performance by using the
[ERASE] key. There are two ways to use this feature:
by deleting real-time during overdub, and by selecting
a pad and part to delete in the ERASE window when
overdub is stopped.
• Deleting in real time
01. Press the [PLAY START] key while holding the [OVER
DUB] key to start overdub.
02. Hold the pad you wish to delete while holding the
[ERASE] key.
From the performance data being recorded, only the
section from where you press the [ERASE] key and
pad and you release them will be deleted. By press-
ing the pad at the right timing, you can delete the
performance data at a certain timing in the phrase.
• Deleting in the Erase window
Performance data will be recorded in a track as an event.
In the Erase window, you can select specific events in a
track to delete.
01. Press the [STOP] key to stop a sequence.
02. Press the [ERASE] key.
The Erase window will open up.
The Tr field displays the number and the name of
the selected track. To delete all the events of the
track, select “Tr : 00 - ALL TRACKS” by turning
the DATA wheel to the left.
03. In the Time field, specify the area to delete events.
You will select the start and end point of the area in
the Time field. For example, to delete only the event
in the first bar from 2-bar sequence, set “001.01.00 -
002.01.00”. In this case, the event at 002.01.00 point
will not be deleted.
If you set the end point “002.01.00” like this, the
area right before the end point will be included in
the area.
002.01.00
001.04.95001.04.94 002.01.01001.04.93
EVENT EVENT EVENT EVENT EVENT