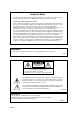
Reference Manual WARNING To prevent fire or shock hazard, do not expose this appliance to rain or moisture.
Important Notice The material in this document is copyright to AKAI professional M.I. Corp., and may not be quoted or reproduced in any form without written permission from the company. LIMITED SOFTWARE WARRANTY POLICY All the software provided with, or purchased especially for, AKAI professional products has been tested for functionality. AKAI professional M.I. Corp. will make its best efforts to correct reported software defects for future releases subject to technical practicabilities.
WARNING: WHEN USING ELECTRIC PRODUCTS, BASIC PRECAUTIONS SHOULD ALWAYS BE FOLLOWED, INCLUDING THE FOLLOWING: WARNING The MPC4000 is designed to be used in a standard household environment. Power requirements for electrical equipment vary from area to area. Please ensure that your MPC4000 meets the power requirements in your area. If in doubt, consult a qualified electrician or AKAI professional dealer.
For U.K. customers only WARNING THIS APPARATUS MUST BE EARTHED IMPORTANT This equipment is fitted with an approved non-rewireable UK mains plug. To change the fuse in this type of plug proceed as follows: 1) Remove the fuse cover and old fuse. 2) Fit a new fuse which should be a BS1362 5 Amp A.S.T.A or BSI approved type. 3) Refit the fuse cover.
FCC WARNING This equipment has been tested and found to comply with the limits for a Class B digital device pursuant to Part 15 of the FCC rules. These limits are designed to provide reasonable protection against harmful interference in a residential installation. This equipment generates, uses, and can radiate radio frequency energy and, if not installed and used in accordance with the instructions, may cause harmful interference to radio communications.
Contents Contents MPC400 Reference Manual . . . . . . . . . . . . . . . . . . . . . . . . . . . 1 How to use this reference manual . . . . . . . . . . . . . . . . . . . . . . . . . . . . . . 1 Main mode . . . . . . . . . . . . . . . . . . . . . . . . . . . . . . . . . . . . . . . . . 4 Main page . . . . . . . . . . . . . . . . . . . . . . . . . . . . . . . . . . . . . . . . . . . . . . . . . 4 Recording/playing a sequence . . . . . . . . . . . . . . . . . . . . . . . . . . . . . . .
Contents Step edit mode . . . . . . . . . . . . . . . . . . . . . . . . . . . . . . . . . . . . . 52 Step edit page . . . . . . . . . . . . . . . . . . . . . . . . . . . . . . . . . . . . . . . . . . . . . 52 Using the event list to edit a sequence . . . . . . . . . . . . . . . . . . . . . . . . 52 ■ Copying/cutting MIDI events . . . . . . . . . . . . . . . . . . . . . . . . . . 56 ■ Pasting MIDI events . . . . . . . . . . . . . . . . . . . . . . . . . . . . . . . . . 57 Song mode . . . . . . . . . . . .
Contents ■ Returning the MPC4000 to the factory-set condition . . . . . . . Memory page . . . . . . . . . . . . . . . . . . . . . . . . . . . . . . . . . . . . . . . . . . . . Viewing the amount of free memory. . . . . . . . . . . . . . . . . . . . . . . . Configuration page . . . . . . . . . . . . . . . . . . . . . . . . . . . . . . . . . . . . . . . . Setting the digital output sync source and the SCSI ID etc. . . . . . . Foot switch page. . . . . . . . . . . . . . . . . . . . . . . . . . . . . . . . . .
Contents Trimming or looping a sample . . . . . . . . . . . . . . . . . . . . . . . . . . . . . 166 ■ Making various settings for a sample . . . . . . . . . . . . . . . . . . . 169 ■ Setting various points while the sample plays. . . . . . . . . . . . . 170 ■ Automatically detecting the start/end points . . . . . . . . . . . . . . 170 ■ Automatically detecting the loop points . . . . . . . . . . . . . . . . . 171 ■ Applying crossfading. . . . . . . . . . . . . . . . . . . . . . . . . . . . . . . .
Contents ■ Making portamento settings (Key group programs) . . . . . . . . ■ Specifying the temperament of a program (Key group programs) . . . . . . . . . . . . . . . . . . . . . . . . . . . . . . . Assign page . . . . . . . . . . . . . . . . . . . . . . . . . . . . . . . . . . . . . . . . . . . . . Assigning note numbers to pads (Drum programs). . . . . . . . . . . . . 225 226 227 227 The Q-LINK function . . . . . . . . . . . . . . . . . . . . . . . . . . . . . . . . 229 Q-LINK setup page . . . . . . .
How to use this reference manual MPC400 Reference Manual This reference manual explains the pages that appear in the display, the major popup windows, and typical procedures for each mode and function of the MPC4000. * Adobe and Adobe Acrobat are trademarks of Adobe Systems Incorporated. How to use this reference manual To learn about a specific mode or page →Use the index or bookmarks to find the name of the mode (function) or page.
MPC400 Reference Manual To learn which page to use for a specific function →Use the table of contents to find the subtitle of the page. The explanation in each page has a subtitle that describes the function and use of that page. In the table of contents, look for the appropriate subtitle to see which mode or page you should use. In Adobe Acrobat Reader, you can click an entry in the table of contents to go directly to that mode or page.
How to use this reference manual To learn the procedure for a specific use →Look for the procedure in the table of contents. The explanation of each page begins with a summary of how that page can be used. Search the table of contents to find the desired procedure. In Adobe Acrobat Reader, you can click an entry in the table of contents to go directly to that mode or page.
Main mode Main mode Main page Recording/playing a sequence You can use the pads or an external MIDI keyboard to record performance data (MIDI events) in a sequence, or play back a recorded sequence. To access this page........[MAIN] key A Position bar block 1 2 B Now block C Sequence block 3 D Track block E Simul block 4 5 Functions • [F2] key (TR LIST) Displays the TR List (Track List) Out 1 page. • [F3] key (TRACK –) Selects the previous-numbered track for operations.
Main page Now block This indicates the current location within the sequence. 1 3 2 4 5 A Now field Shows the current location within the sequence, in units of measures/beats/ticks. When the cursor is at each field, you can move the current location in units of measures/beats/10 ticks/1 tick. B Time field Shows the time of the current location within the sequence. If loop playback is occurring, this shows the time from when playback began until now.
Main mode Sequence block Here you can select the sequence that you want to record or play back, and make various settings for the sequence such as the number of measures and the time signature. 1 56 7 9 J K 2 3 4 8 A Seq field Selects the sequence that will be recorded or played. If you turn the [JOG] dial to select a different sequence while a sequence is playing, playback will switch to the newly selected sequence when the current sequence has been played to the end.
Main page If you move the cursor to this field and press the [WINDOW] key, the Auto Punch In/Out popup window will appear, allowing you to specify the punch-in/punch-out points. J Sync field Turns synchronization with external devices on/off. If you move the cursor to this field and press the [WINDOW] key, the Sync In/Out popup window will appear, allowing you make synchronization-related settings. Hint: Synchronization-related settings can also be made in the MISC. mode Sync page. K Sequence Trans.
Main mode Depending on the value you select, one of the following fields will appear at the right of the PART field. OUT1 field display PART MIDI A–D INT-A/B Field Content Part field (left of field) Selects the destination part number. Program field (right of field) Displays the program name assigned to the part. Ch field Selects MIDI channel 1–16 or ANY as the output destination. Device field Displays the device name for the MIDI channel selected in the Ch field.
Main page I Velocity field This lets you apply a relative adjustment during playback to the note-on velocities of the note events recorded in the selected track. (This does not affect the note events recorded in the track.) The range is 1–200%. With a setting of 100%, the velocities will be unchanged. If you move the cursor to this field and press the [WINDOW] key, the Edit Velocity window will appear, allowing you to rewrite the velocities of the note events recorded in the track.
Main mode 1 3 2 4 5 A Current bars field Displays the current number of measures. B New bars field Specifies the number of measures to which the sequence will be changed. C [F1] key (CANCEL) Cancels the operation and closes the popup window. D [F4] key (BAR EDIT) Displays the Edit Bars popup window, where you can edit the sequence in units of measures. E [F6] key (DO IT) Finalizes the changes you have made. 4.
Main page Hint: The time signature is specified independently for each measure. A “–” symbol will be displayed below the time signature field of measures that you modified. By holding down the [SHIFT] key and pressing the CURSOR [®] key, you can select multiple measures, and change the time signature of the selected measures in a single operation. 7. Make settings as desired for the other fields of the Sequence block. 8.
Main mode 13. Hold down the [REC] key and press the [PLAY] key. Sequence recording will begin. 14. Perform using the pads or your MIDI keyboard. Hint: On the MPC4000, MIDI events received from the MIDI IN connector or generated by the pads are input to the track as “omni on.” If the data being recorded contains multiple MIDI channels, the events will be recorded with their channel information preserved. 15. To stop recording, press the [STOP] key.
Main page • Normal field ................ Specifies the note number and velocity for unaccented beats. MIDI (an externally-connected MIDI device) • • • • Port field...................... Selects the MIDI connector. Ch field........................ Selects the MIDI channel. Accent field................. Specifies the note number and velocity for accented beats. Normal field ................ Specifies the note number and velocity for unaccented beats. 3.
Main mode J [F5] key (NOW) Inserts a tempo change event at the current location of the sequence. K [F6] key (INSERT) Inputs a tempo change event at the same location as the selected event. 2. Move the cursor to the Tempo change field, and turn the [JOG] dial to switch it on. When the Tempo change field is on, the tempo change events you specify in this popup window will be valid. 3. Move the cursor to any row of the Location field, and press the [F6] key (INSERT).
Main page • Time signature field .... Specify the time signature of the measures that will be inserted. If you selected DELETE • First bar....................... Specify the first measure number that will be deleted. • Last bar ....................... Specify the last measure number that will be deleted. If you selected COPY • From Seq field............. Select the sequence from which you want to copy measures. • To Seq field ................. Select the copy-destination sequence.
Main mode ■ Copying a sequence Here’s how to copy a sequence from memory to an empty sequence. 1. Move the cursor to the Seq field, and press the [WINDOW] key. The Sequence popup window will appear. 1 2 3 4 5 6 A Sequence name field Edits the sequence name. B Default name field Edits the default sequence name. C [F1] key (CLOSE) Closes the popup window. D [F2] key (DEFAULT) Registers the various settings of the sequence as the default values for an empty sequence.
Main page D [F3] key (PARAMS) Copies only settings such as the number of measures in the sequence, and the time signature. The MIDI events will not be copied. E [F5] key (DO IT) Executes the copy. 3. Move the cursor to the Copy source field, and turn the [JOG] dial to select the copy-source sequence. 4. Move the cursor to the Copy destination field, and turn the [JOG] dial to select the copy-destination sequence.
Main mode ■ Copying a track Here’s how the settings and MIDI events recorded in a track within a sequence can be copied to another track. 1. Move the cursor to the Trk field, and press the [WINDOW] key. The Track popup window will appear. 13 2 4 5 6 7 8 9 A Track name field Edits the track name. B Trk field Selects the track whose settings will be memorized as the default. C Default name field Edits the default name for the track you selected in the Trk field (2).
Main page B Copy destination field Selects the copy-destination track. C Mode field Specifies whether any data existing in the copy-destination track will be overwritten (REPLACE), or merged with the copied data (MERGE). D [F1] key (CANCEL) Closes the popup window. E [F5] key (DO IT) Executes the copy. 3. Move the cursor to the Copy source field, and turn the [JOG] dial to select the copy-source track. 4. Move the cursor to the Copy destination field, and turn the [JOG] dial to select an empty track.
Main mode 4. To execute the deletion, press the [F6] key (DO IT). The contents that were recorded in the track will be deleted, and the track will return to an empty state. ■ Customizing the default settings for a sequence You can customize the default settings (number of measures, time signature, tempo, loop on/off, etc.) that are used when you select an empty sequence, and specify the default name that is assigned when you record data in an empty sequence. 1.
Main page ■ Applying timing correction to an already-recorded track You can apply timing correction to a track that has already been recorded. Executing this operation will rewrite the timings of the note events. 1. Play back the sequence, and verify the track, measure location, and range of notes (or pads) to which you want to apply timing correction.
Main mode 4. Move the cursor to the Time field, and specify the region to which timing correct will be applied. 5. Perform the following operations as appropriate for the type of track. For a DRUMS type track Move the cursor to the Pad field, and press the pad to which you want to apply timing correct. The corresponding pad number will be displayed in the field, and will be selected for editing.
Main page D Notes/Pad field Specifies the note numbers/pad numbers for which the velocity values will be rewritten. E [F1] key (CANCEL) Closes the popup window. F [F6] key (DO IT) Executes the velocity change operation. 3. Move the cursor to the Time field, and turn the [JOG] dial to specify the region of time in which the velocity values will be rewritten. 4. Move the cursor to the Notes/Pad field, and select the note numbers/pad numbers for which the velocity will be rewritten.
Main mode D Notes/Pad field Specifies the note numbers/pad numbers for which the duration will be rewritten. E [F1] key (CANCEL) Closes the popup window. F [F6] key (DO IT) Executes the change in duration. 3. Move the cursor to the Time field, and turn the [JOG] dial to specify the region of time in which the duration will be rewritten. The left side of the Time field specifies the starting location, and the right side specifies the ending location. 4.
Main page B Time field Selects the region of time for which the pitch will be transposed. C [F1] key (CANCEL) Cancels the operation and closes the popup window. D [F4] key (ALL) Transposes all INST type tracks by the value specified in the Transpose field of the Main page. E [F6] key (FIX) Executes the transpose operation. 3. Move the cursor to the Transpose amount field, and turn the [JOG] dial to specify the amount of transposition. 4.
Main mode 4. Move the cursor to the Default name field, and turn the [JOG] dial to input the default name. 5. Press the [F2] key (DEFAULT). The track settings and track name will be memorized as the default settings for that track number. Hint: This procedure will not affect tracks in which events have already been recorded. If you hold down the [SHIFT] key and press the [F2] key, the state of the currently selected track will be memorized as the default setting for all empty tracks. 6.
Main page 5. Turn the [JOG] dial to select the location into which the track will be inserted. 6. To finalize the changed track number, press the [F5] key (INSERT). ■ Separating a track by MIDI channels Here’s how a track containing multiple MIDI channels can be separated by MIDI channel. 1. Move the cursor to the Trk field, and press the [WINDOW] key. The Track popup window will appear. 2. Press the [F3] key (SEPARATE). The Separate by Midi popup window will appear.
Main mode ■ Erasing all muted tracks Here’s how to erase all tracks for which muting is currently turned on. 1. Check the muted status of the tracks in the sequence. 2. Move the cursor to the Mute field, and press the [WINDOW] key. The Erase All Muted Tracks popup window will appear. 1 2 A [F1] key (CANCEL) Cancels the operation and closes the popup window. B [F6] key (DO IT) Execute the erasure. 3. To execute, press the [F6] key (DO IT).
Main page E Transmit program changes in this track field Specifies whether program change events within the track will be transmitted. Program change events will be transmitted if you select YES, and will be ignored if you select NO. F [F1] key (CLOSE) Updates the settings and closes the popup window. 2. Set each field as desired. 3. To update the settings, press the [F1] key (CLOSE). ■ Performing auto punch-in/out Here’s how to use auto punch-in/out to automate sequence recording. 1.
Main mode 5. In the same way, move the cursor to the Out time field, and turn the [JOG] dial to set the punch-out point. The punch-in point is indicated by a symbol in the position bar of the Main page. 6. Press the [F1] key (CLOSE). 7. Make sure that the setting of the A.Punch field is ON. 8. Hold down the [REC] key, and press the [PLAY] key (or [PLAY START] key) to perform the sequence record operation.
Main page ■ Naming the external devices connected to the MIDI OUT connectors You can assign a name to the external device(s) connected to the [MIDI OUT A]–[MIDI OUT D] connectors. A separate device name can be specified for each MIDI channel. 1. Access the Main page, and make sure that the Out1 field is set in the range of MIDI A–D. 2. Move the cursor to the Device field, and press the [WINDOW] key. The Device List popup window will appear.
Main mode TR list/Out 1 page Listing the track output destinations (Out 1) Here you can view a list of the output destinations (Out 1) for the tracks in the currently selected sequence. To access this page........[MAIN] key → [F2] key (TR LIST) A Track list block 1 Functions • [F1] key (MAIN) Displays the main page. • [F3] key (OUT 2) Displays the TR List/Out 2 page. • [F4] key (PARAMS) Displays the TR List/PARAMS page. • [F5] key (MUTE) Mutes the currently selected track.
TR list/Out 1 page D Out1 field Selects the main output destination for each track. E Channel/part field Selects the channel number or part number that will be the output destination. The device name or program name is shown at the right of the field.
Main mode TR list/Out 2 page Listing the track output destinations (Out 2) Here you can view a list of the output destinations (Out 2) for the tracks in the currently selected sequence. To access this page......... [MAIN] key → [F2] key (TR LIST) → [F3] key (OUT 2) A Track list block 1 Functions • [F1] key (MAIN) Displays the main page. • [F2] key (OUT 1) Displays the TR List/Out 1 page. • [F4] key (PARAMS) Displays the TR List/PARAMS page. • [F5] key (MUTE) Mutes the currently selected track.
TR list/PARAMS page TR list/PARAMS page Listing the track parameters Here you can view a list of settings such as transpose and duration for each track in the currently selected sequence. To access this page ....... [MAIN] key → [F2] key (TR LIST) → [F4] key (PARAMS) A Track list block 1 Functions • [F1] key (MAIN) Displays the Main page. • [F2] key (OUT 1) Displays the TR List/Out 1 page. • [F3] key (OUT 2) Displays the TR List/Out 2 page • [F5] key (MUTE) Mutes the currently selected track.
Main mode C Dura% field Specifies the amount of relative change in duration for each track. Changing this value will not affect the events recorded in the track. The Edit Duration popup window will appear if you press the [WINDOW] key. D Velo% field Specifies the amount of relative change in velocity for each track. Changing this value will not affect the events recorded in the track. The Edit Velocity popup window will appear if you press the [WINDOW] key.
Sequence edit page Sequence edit mode Sequence edit page Using the graphic editor to edit a sequence Here’s how to use the graphic editor to edit the MIDI events recorded in a track. To access this page ....... [SEQ EDIT] key A Track block 1 2 B Now block C Graphic editor block D View block 3 4 Functions • [F1] key (OPTION) Displays the Step Edit Option popup window, where you can make option settings for step input.
Sequence edit mode A Track field Turn the [JOG] dial to select the track that you want to edit. If you move the cursor to this field and press the [WINDOW] key, the Track popup window will appear. B Tempo field Specifies the tempo of the sequence. If you move the cursor to this field and press the [WINDOW] key, the Tempo Change popup window will appear. C SEQ/MAS field Selects the timing source of the sequence. D Timing correct field Specifies the timing correct setting.
Sequence edit page B Pad number Indicates the pad numbers. You can use the [PAD BANK] keys to switch the pad bank that is shown in the matrix. C Grid Specifies the editing region. If one or more note events exist within a grid location, a ● symbol will be displayed. The Timing correct field of the Track block sets the horizontal resolution of the grid. D Vertical marker This is used to indicate the current location or to select a grid.
Sequence edit mode Graph display This block will be displayed if you select other than note events (i.e., control changes or pitch bend, etc.) in the View field for a DRUM or INST type track. 2 1 3 A Graph display Displays the continuously-variable events recorded in the track. The horizontal dimension is the time axis, and the vertical dimension is the value of the continuously-variable event. B Time ruler Displays the time axis of the track.
Sequence edit page A View field Selects the type of MIDI events that will be displayed in the graphic editor. You can select the following types of MIDI events. • NOTES (note events) • PITCH BEND (pitch bend) • CONTROL CHANGE (control change) • CH PRESSURE (channel pressure) • POLY PRESSURE (polyphonic key pressure) If you select control change or polyphonic key pressure, you can use the field at the right to specify the control change number or note number.
Sequence edit mode • TC VALUE ..................The setting of the Timing correct field will specify the duration. The value at the right of the field indicates the proportion of the duration relative to the timing correct value. If this is set to 100%, the duration will match the number of ticks in the TC field. • AS PLAYED................The duration of the note event will depend on the length of time that you hold down the pad or MIDI keyboard. 7.
Sequence edit page 4. Press the [F4] key (CUT). If you had selected a single grid, pressing this key will delete the data and copy it to the clipboard. If you had selected a region, the Cut Data dialog box will appear. 1 2 3 4 A Time field Displays the region of the time axis (left/right) from which data will be deleted. B Notes field Displays the region of note numbers (up/down) that will be deleted. C [F1] key (CANCEL) Cancels the Delete operation and closes the popup window.
Sequence edit mode The screen will switch to the piano-roll display, and various fields will appear, allowing you to specify the move-destination of the MIDI event(s), and how the move will be handled. 1 5 2 6 3 7 4 8 A Move field Selects the direction in which the data will be moved. B From field Indicates the current location of the move-source MIDI event. If you have selected multiple MIDI events, this indicates the location of the first event.
Sequence edit page ■ Copying/cutting MIDI events A phrase (MIDI events) selected in the graphic editor can be cut/copied and placed in the clipboard or phrase library. Hint: The clipboard contains only the content that was most recently copied or cut. The contents of the clipboard will be lost when the power is turned off. 1. Select the track that contains the phrase you want to cut or copy. 2.
Sequence edit mode F [F6] key (CLIP BD) Places the copied or cut MIDI events in the clipboard. G [F3] key (DELETE) Only deletes the data without copying it. 5. As necessary, move the cursor to the Time field and the Notes field, and adjust the region to be copied. 6. If you want to place the copied/cut MIDI events in the clipboard, press the [F6] key (CLIP BD). The MIDI events in the selected region will be placed in the clipboard. 7.
Sequence edit page G [F2] key (RENAME) Displays the Rename popup window, allowing you to edit the name of the phrase library. H [F3] key (DELETE) Deletes the phrase library that you selected in the Phrase Library field. I [F4] key (PLAY) Plays the phrase library that you selected in the Phrase Library field. J [F5] key (LIBRARY) Pastes the phrase library that you selected in the Phrase Library field. K [F6] key (CLIP BD) Pastes the contents of the clipboard. 4.
Sequence edit mode 4. Press the [F5] key (EDIT). The Edit Multiple popup window will appear. 1 2 3 4 5 6 7 A Edit field Selects the element of MIDI data that will be modified. This field will be displayed only if you selected note events. B Edit type field Selects the way in which the data will be modified. C Value field Specifies the adjustment value. D Time field Specifies the region in which data will be modified. E Notes field Indicates the range of note events that will be modified.
Sequence edit page ■ Inserting continuously-variable events Here’s how to insert continuously-variable events (such as control changes) into the desired track. You can insert a series of continuously-variable events by specifying the desired values for the starting and ending locations. 1. Select the sequence/track into which you want to insert events. 2. Move the cursor to the View field, and turn the [JOG] dial to make the graphic editor show the continuously-variable event you want to insert.
Sequence edit mode • Control number field Selects the control change number. • Value (Start value) field Specifies the value of the control change events that will be inserted. If you have specified a region, this specifies the value of the control change that will be inserted at the starting point. • End value field Specifies the value that will be inserted at the ending point. (Displayed only if you specified a region.
Sequence edit page • Interval field Selects the spacing of the polyphonic key pressure events that will be inserted. (Displayed only if you specified a region.) • Curve field Selects the curve by which the polyphonic key pressure values will change. (Displayed only if you specified a region.) • Graph display Displays a curve showing the polyphonic key pressure values that will be inserted. (Displayed only if you specified a region.) 6. Make sure that the Time field is set to the desired region.
Step edit mode Step edit mode Step edit page Using the event list to edit a sequence You can use the event list to edit MIDI events recorded in a sequence. To access this page........[STEP EDIT] key A Track block B Now block C Event list block D View block 1 2 3 4 Functions • [F1] key (OPTION) Opens the Step Edit Option popup window, where you can make option settings for step-recording. • [F2] key (MOVE) Moves the location of the selected MIDI event(s).
Step edit page Event list block This displays an event list showing the MIDI events recorded in the track. Hint: When the cursor is located in the event list, you can use the CURSOR [π]/[†] keys to select the event or region that you want to edit. Use the BLOCK CURSOR [π]/[†] keys to move the cursor to a different block. 2 3 4 1 A Event list Shows the MIDI events recorded in the track. The event at which the cursor is located is selected for editing.
Step edit mode Polyphonic key pressure From the left, these are the note number, value, and bar fields. System exclusive The system exclusive message is displayed in hexadecimal form. View block This selects the type of MIDI event that will be displayed in the graphic editor. 1 2 A View field Selects the MIDI events that will be displayed in the event list. • ALL EVENTS .............All MIDI events • NOTES ........................Note events • PITCH BEND..............Pitch bend • CONTROL CHANGE.
Step edit page 8. Press the [REC] key or the [OVER DUB] key. The [OVER DUB] key LED will light, step-recording will be enabled. 9. Strike the pads (or play your MIDI keyboard). Note events will be input. The velocity values will be input according to how strongly you strike the pads or play your MIDI keyboard. The settings you made in step 5 will determine what happens after an event has been input, and the duration value. 10. When you want to input a rest, press the STEP [>] key.
Step edit mode H [F4] key (+) Moves the selected region toward the end of the track, in steps of one tick. 3. Move the cursor to the to field, and specify the move-destination for the MIDI events. 4. As necessary, move the cursor to the Mode field, and select one of the following to specify how processing will be performed if note events exist in both the move-source and move-destination. MERGE..................Existing note events will remain, and the move-source note events will be added. REPLACE.....
Step edit page 6. To place the selected region in the clipboard, press the [F6] key (CLIP BD). The MIDI events in the selected region will be placed in the clipboard. Hint: The data that was copied/cut from the event list can be saved in a phrase library if you press the [F5] key (LIBRARY) instead of the [F6] key. For details on saving data to a phrase library, refer to page 46. ■ Pasting MIDI events MIDI events that you saved in the clipboard or the phrase library can be pasted into the desired track.
Step edit mode The Edit Multiple popup window will appear. 1 2 3 4 5 6 7 8 A Type field Selects the type of MIDI event that will be edited. B Edit field Selects the element of MIDI data that will be modified. This field will be displayed only if you selected note events. C Edit type field Selects the way in which the data will be modified. D Value field Specifies the adjustment value. E Time field Specifies the region in which data will be modified.
Step edit page Inserting note events Here’s how to insert note data into a track. 1. Select the sequence/track into which you want to insert note events. 2. Move the cursor to the Now field, and move the current location to the location at which you want to insert a note event. 3. Press the [OVER DUB] key. Now you are ready to step-record. During step-recording, the function assigned to the [F6] key will change to INSERT. 4. Press the [F6] key (INSERT). The Insert Event popup window will appear.
Step edit mode PITCH BEND ............................. Pitch bend CONTROL CHANGE ................ Control change PROGRAM Change.................... Program change CH PRESSURE .......................... Channel key pressure POLY PRESSURE...................... Polyphonic key pressure The fields that are displayed will depend on the event you selected. PITCH BEND • Time field Indicates the location at which the data will be inserted.
Step edit page • Program number field Selects the program change number that will be inserted. CH PRESSURE • Time field Indicates the location at which the data will be inserted. If you are inserting multiple events in a single operation, the left side of the Time field shows the starting location of the inserted events, and the right side shows the ending location. • Value (Start value) field Specifies the value of the channel pressure events that will be inserted.
Step edit mode Hint: You can insert a single event by setting the left and right values of the Time field to the same location. 6. Set the various fields to specify the event(s) you want to insert. 7. To execute the insertion, press the [F5] key (DO IT). Inserting a system exclusive message Here’s how to insert a system exclusive message into a recorded track. 1. Select the sequence/track into which you want to insert a system exclusive message. 2. Press the [OVER DUB] key.
Step edit page 8. Press the CURSOR [®] key to move to the next field, and specify the next hexadecimal value in the same way. 9. Repeat the preceding step to finish inputting all of the hexadecimal values. 10. To finalize the system exclusive message you specified, press the [F5] key (DO IT).
Song mode Song mode Song page Creating a song Sequences you create can be arranged in the desired playback order to create a song. To access this page........[SONG] key A Position bar block B Now block C Song block 1 2 3 D Sequence list block 4 Functions • [F1]/[F2] keys (CONVERT TO SEQ) Displays the Convert Song to Sequence popup window, where a song you created can be converted into a sequence. • [F3] key (COPY) Copies the selected step to the clipboard.
Song page A Now field Indicates the current location within the song in units of measures/beats/ticks. When the cursor is at each of these fields, you can turn the [JOG] dial to move the current location in steps of measures/beats/ten ticks/one tick. B Time field Indicates the current time location within the song. Song block Here you can select the song to be created or played, and turn tempo and looping on/off. 1 2 3 4 A Song field Selects the song that will be played or created.
Song mode C Sequence field Selects the sequence that will play at that step. The step that displays (end of song) indicates the end of the song. D Bars field Indicates the number of measures in the sequence selected for that step. If you move the cursor to this field and press the [WINDOW] key, the Copy and Replace popup window will appear. E Repeats field Specifies the number of times that the step will be repeated.
Song page When copying or deleting a step, your operation will apply to the step you select here. When inserting or pasting a step, the step will be inserted or pasted at the location of the step you select here. Hint: When copying/deleting/pasting steps, you can hold down the [SHIFT] key and use the CURSOR [π]/[†] keys to select two or more adjacent steps as the edit region. Use the [F3] key (COPY)–[F6] key (PASTE) to execute the editing function. Each key has the following function. • [F3] key (COPY) ..
Song mode Copying a song Here’s how to copy a song in memory to a different song number. 1. Move the cursor to the Song field, and turn the [JOG] dial to select the song you want to copy. 2. Press the window key. The Song popup window will appear. 1 2 3 4 5 A Song name field Displays the name of the currently selected song. If you turn the [JOG] dial in this field, the Rename popup window will appear, allowing you to edit the song name.
Song page C [F1] key (CANCEL) Cancels the operation and closes the popup window. D [F5] key (DO IT) Executes the copy. 4. Move the cursor to the Copy source field, and turn the [JOG] dial to select the copy-source song. 5. Move the cursor to the Copy destination field, and turn the [JOG] dial to select the copy-destination song number. 6. To execute the copy, press the [F5] key (DO IT). The window will close automatically when the copy has been completed.
Song mode 5. To execute the deletion, press the [F6] key (DO IT). The song you selected in step 4 will return to an empty state. The window will close automatically when the deletion is completed. Converting a song into a sequence Here’s how you can convert a completed song into a sequence. When you execute this conversion, the sequences within the song will be combined by track number. This is convenient when you want to add solo parts to a completed song. 1.
Song page • OFF TRACKS IGNORED ..........Tracks in each sequence that are turned off will not be converted. After conversion, all tracks will be on. (However, there will be no data for the regions in which tracks were off.) Settings such as MIDI output will be the same as for the first sequence. Note: Regardless of the method you select, the settings of the sequence selected for step 1 will be used as the track settings (e.g., output destination, track type, etc.) after conversion.
Song mode Setting all tempo values to the tempo of the sequence This operation sets the basic tempo of each sequence in the song to the same value. When you execute this operation, the basic tempo of each sequence will be rewritten. 72 1. Move the cursor to the Song field, and turn the [JOG] dial to select the song for which you want to make settings. 2. Move the cursor to the tempo field, and press the [WINDOW] key. The Tempo popup window will appear. 3.
Setup page MISC mode Setup page Making other settings Here you can make various settings for the sequencer. To access this page ....... [MISC.] key A Setup block 1 Functions • [F2] key (SYNC) Displays the Sync page. Setup block Here you can make various settings such as specifying how events will be processed when you record a sequence in realtime, selecting the receive MIDI channel, and specifying whether program changes will switch sequences.
MISC mode UP TO SEQUENCE END .......... The duration will automatically be adjusted so that note-off occurs at the end of the sequence. (The note will not play back across the loop.) AS RECORDED......................... The note events will be recorded just as you play them. C Active track receive channel field Selects the MIDI channel(s) that the MPC4000 will receive; either ALL (all MIDI channels) or a specific channel 1–16.
Sync page Sync page Making synchronization-related settings Here you can make various settings for synchronization between an external device and the MPC4000. To access this page ....... [MISC.] key → [F2] key (SYNC) A Sync In/Sync Out block 1 Functions • [F1] key (SETUP) Displays the Setup page. Sync In/Sync Out block Here you can make settings for the synchronization signals that the MPC4000 will transmit and receive.
MISC mode C MIDI clock field Selects the MIDI connector that will transmit MIDI clock. If you select OFF, MIDI clock will not be transmitted. D MIDI time code field Selects the MIDI connector that will transmit MTC. If you select OFF, MTC will not be transmitted. E SMPTE field Switches SMPTE output on/off. F Frame rate field Specifies the frame rate of the MTC/SMPTE that is transmitted. G Send MMC (MIDI Machine Control) field Switches MMC transmission on/off.
Sync page 9. If you want to synchronize an MPC4000 sequence with the external device, go to the Main page and select the sequence that you want to play. 10. If you want to synchronize an MPC4000 song with the external device, press the [SONG] key and select the song that you want to play. 11. Begin playback on the external device. The MPC4000 will operate in synchronization with the external device, and will begin playing the sequence or song.
MIDI mode MIDI mode Routing page Changing the routing of MIDI events Here you can changing the routing of the MIDI events that are input from the [MIDI IN I] and [MIDI IN II] connectors or generated by the pads. To access this page........[MIDI] key A Routing block 1 Functions • [F2] key (FILTER) Displays the Filter page. • [F3] key (EVENT) Displays the Event page. • [F6] key (PANIC) Sends All Note Off, Reset All Controllers, Damper Off, and Bend 0 messages from the MIDI connectors.
Routing page INT-B .....................Virtual MIDI port B of the sampler section SEQUENCER ........The sequencer section D Drum pad field Selects one of the following as the destination of the MIDI events generated by the pads. INT-A .....................Virtual MIDI port A of the sampler section OUT-A....................MIDI OUT A SEQUENCER ........
MIDI mode Filter page Filtering the incoming MIDI events Here you can filter out specific MIDI events that are being input from the [MIDI IN I] and [MIDI IN II] connectors. To access this page........[MIDI] key → [F2] key (FILTER) A MIDI input filter block 1 B Event block 2 Functions • [F1] key (ROUTING) Displays the Routing page. • [F3] key (EVENT) Displays the Event page. • [F6] key (PANIC) Sends All Note Off, Reset All Controllers, Damper Off, and Bend 0 messages from the MIDI connectors.
Filter page A Event type field Indicates the various type of MIDI event. When the cursor is in this field, you can scroll the display. B ALL field By turning the [JOG] dial in this field you can switch the nels. symbols on/off for all chan- C 1–16 field Indicates MIDI channels 1–16. By turning the [JOG] dial you can switch the symbol on/off. The corresponding MIDI event will be filtered out from channels for which this symbol is displayed.
MIDI mode Event page Monitoring MIDI events Here you can view a list of MIDI events for the specified channel. To access this page........[MIDI] key → [F3] key (EVENT) A MIDI event monitor block 1 Functions • [F1] key (ROUTING) Displays the Routing page. • [F2] key (FILTER) Displays the Filter page. • [F6] key (CLEAR) Clears the list display. MIDI event monitor block This displays a list of the MIDI events that are being transmitted or received on the specified channel.
Event page B View channel field Selects the MIDI channel(s) that will be displayed in the list, from a range of 1–16 or ALL (all MIDI channels). By selecting ALL, you can monitor all MIDI events that are being transmitted or received via the selected MIDI connector or port. C List field Displays the MIDI events that are being transmitted or received. The MIDI event displayed at the “Latest>” indicator is the event that was transmitted or received most recently.
Save mode Save mode Save page Saving data to a storage device Here you can save various types of data from internal memory to an external storage device. A Type block 1 B Disk information block C Data list block D Disk block 3 E File list block 4 2 5 Functions • [F2] key (UTILITY) Displays the Disk Utility page. • [F3] key ( NEW) Creates a new folder in the selected level of the file list. • [F5] key (MULTIPLE) Displays a popup window where you can save multiple items of data.
Save page Disk information block This area shows various information about the storage device that is selected as the save-destination. 1 2 3 A Device field An icon indicates the type of device that is selected. The way in which the device is connected is shown below this icon. • INTERNAL ................ Internal ATA device • USB............................. USB device • SCSI0–7......................
Save mode File list block Here you can select the save-destination folder. 2 1 A File list Displays the internal hierarchy of the storage device. The left side of the list shows the level in which the save-destination folder is located, and the right side of the list shows the contents of the save-destination folder. Use the CURSOR [√]/[®] keys to move between levels, and use the CURSOR [π]/[†] keys to move between folders in the same level or to select a file.
Save page 3. Move the cursor to the Disk field, and turn the [JOG] dial to open the Disk List popup window. 1 5 2 6 3 7 4 8 A Media field Indicates the type of storage device. B Name field Indicates the volume name of the storage device. C Device field Indicates the way in which the storage device is connected. D Free field Indicates the free space on the storage device. E [F1] key (CANCEL) Cancels the operation and closes the popup window. F [F3] key (UPDATE) Updates the displayed information.
Save mode If an identically-named file already exists in the save-destination folder, the File Exists popup window will appear. 1 2 3 A [F1] key (CANCEL) Cancels the operation and closes the popup window. B [F3] key (RENAME) Changes the file name and saves the file. C [F5] key (REPLACE) Overwrites the file (i.e., the existing file will be lost). Either press the [F3] key (RENAME) to change the name of the file, or press the [F5] key (REPLACE) to overwrite the existing file.
Save page 4. Move the cursor to the data list, and use the CURSOR [π]/[†] keys to move the cursor to the sequence that you want to save. When the cursor is in the data list, you can also turn the [JOG] dial to select a sequence. 5. In the file list block, select the folder in which you want to save the data. Hint: When you execute the Save operation, the file will be saved in the folder that is selected in the left side of the file list (i.e.
Save mode 6. In the file list block, select the folder in which the data will be saved. Hint: When you execute the Save operation, the file(s) will be saved in the folder that is selected in the left side of the file list (i.e., the level whose contents are shown in the right side of the file list). ● To save a single sample 7. To save a single sample, make sure that the appropriate sample is selected in the sample list field, and press the [F6] key (DO IT).
Save page ■ Saving programs Here’s how to save one or more programs from memory to a storage device. 1. In the Save page, move the cursor to the Type field and turn the [JOG] dial to select SAVE PROGRAMs. The data list block will change to a display like the following. 2 3 4 1 A Program list field Lists the programs that are in internal memory. B Tag field Tags individual programs to select them for saving. C Program field Lists the programs in memory (and indicates the type of each program).
Save mode The Save a Program popup window will appear. 1 2 3 4 A Save field Specifies whether to save just the program, or the samples as well as the program. B Replace same samples field Specifies what will be done if the save-destination contains an identically-named sample file. C [F1] key (CANCEL) Cancels the Save operation and closes the popup window. D [F5] key (DO IT) Executes the Save operation. 8. Move the cursor to the Save field, and select one of the following methods.
Save page The Save Multiple Programs popup window will appear, allowing you to select the programs that you want to save. 1 2 3 4 5 6 7 A Replace same programs field Specifies what will be done if an identically-named program file exists in the save-destination. B Save field Specifies whether to save only programs, or samples and programs. C Replace same samples field Specifies what will be done if an identically-named sample file exists in the save-destination.
Save mode B Tag field Tags individual multis to select them for saving. C Multi field Displays the multis that are in memory. When saving an individual multi, the multi that is selected in this field will be saved. D Size field Indicates the size of each multi. Hint: The * symbol before the multi name indicates that you have modified the multi after it was last saved or loaded. If you press the [WINDOW] key in the Tag field, a popup window will appear, allowing you to untag all multis at once. 2.
Save page • WITH PROGRAMS............................. The programs included in the multi will be saved together with the multi (samples will not be saved). • MULTI ONLY .................................. Only the multi will be saved. • WITH NEW & MODIFIED ............. Of the programs and samples included in the multi, only those that were modified after they were last saved or loaded will be saved. 9.
Save mode Disk Utility page Managing files on a storage device Here you can copy or delete files that were saved on a storage device, or initialize the storage device. To access this page........[SAVE] key → [F2] key (UTILITY) [LOAD] key → [F2] key (UTILITY) A Do block 1 Functions • [F1] key (SAVE)/(LOAD) Displays the Save page. (Displays the Load page if you accessed the Utility page from Load mode.) • [F6] key (DO IT) Executes the operation you selected in the Do field.
Disk Utility page ■ Deleting a file from a storage device Here’s how to delete a file that was saved on a storage device. 1. Access the Utility page, and move the cursor to the Do field. 2. Turn the [JOG] dial to set the field to DELETE. The page will change to a display like the following. 2 1 3 4 5 6 A Disk information block Displays information about the storage device that is selected for operations. B Disk block Selects the storage device for operations.
Save mode ■ Formatting a storage device Here’s how to format an internal or externally-connected storage device. Note: When you perform this operation, all data on that storage device will be lost forever. Use this operation with care to ensure that you do not accidentally erase important files. 1. In the Utility page, move the cursor to the Do field. 2. Turn the [JOG] dial to select the formatting method you want to use; QUICK FORMAT, FULL FORMAT, or WIPE VOLUME.
Disk Utility page Finding a file Here’s how you can search for a specific file on a storage device, and delete it. 1. Access the Utility page. 2. Move the cursor to the Do field, and turn the [JOG] dial to select DELETE. 3. Press the [F5] key. The Fine File popup window will appear. 1 2 3 4 A Find field Specifies the character string to find. B File type field Selects one of the following types of file to find. ALL FILES ............All files MULTI ...................Multi files PROGRAM ..........
Save mode B [F1] key (CLOSE) Closes the popup window without deleting files. C [F5] key (DELETE) Deletes the selected file in the file list. 100 8. Turn the [JOG] dial to select the file that you want to delete. 9. To delete the selected file, press the [F5] key (DELETE).
Load page Load mode Load page Loading data from a storage device In this page you can load various types of data from a storage device. To access this page ....... [LOAD] key A Disk information block 1 B Disk block C File list block D View block E Memory block 3 2 4 5 Functions • [F2] key (UTILITY) Displays the Disk Utility page. (For details on the Disk Utility page, refer to page 96.) • [F5] key (FIND) Opens the Find File popup window, where you can search for a file saved on a storage device.
Load mode Disk block Here you can select the storage device from which you want to load data. 1 A Disk field Indicates the storage device that is currently selected as the load-source. If you move the cursor to this field and turn the [JOG] dial, the Device List popup window will appear, letting you select a storage device. File list block Here you can select the file that will be loaded. 2 1 A File list block Indicates the internal structure of the storage device.
Load page SEQUENCE...........Only sequence files will be displayed. MULTI ...................Only multi files will be displayed. PROGRAM ............Only program files will be displayed. SAMPLE ................Only sample files will be displayed. ALL ........................Only ALL files will be displayed. Memory block This area indicates the free space within the MPC4000’s internal memory. 1 2 3 A Wave free field Indicates the amount of free space in sample memory.
Load mode A [F1] key (CLOSE) Closes the popup window. B [F3] key (SEQ) Loads only a specific sequence from within the ALL file. C [F5] key (DO IT) Loads the data. ● To load the ALL file 7. Press the [F5] key (DO IT). After the data has been loaded, the popup window will close. ● To load only a specific sequence from within the ALL file 8. After step 6, press the [F3] key (SEQ). The Load a Sequence popup window will appear.
Load page ■ Loading an individual sequence Here’s how to load an individual sequence file from a storage device into internal memory. 1. Access the Load page, and move the cursor to the Disk field. 2. Turn the [JOG] dial to open the Disk List popup window. 3. Move the cursor to the storage device from which you want to load the sequence, and press the [F6] key (SELECT). The load-source storage device will be selected. 4. Move the cursor to the view block, and turn the [JOG] dial to select SEQUENCE.
Load mode ● To load a single sample 5. Move the cursor to the file list block, and select the sample file that you want to load. 6. Press the [F6] key (DO IT). The selected sample will be loaded. ● To load multiple samples 7. After step 4, move the cursor to the file list block, and select the folder that contains the sample files you want to load. 8. Press the [F6] key (DO IT). The Load Folder popup window will appear. 1 2 3 4 5 A Load field Selects the type of file that will be loaded.
Load page ■ Loading programs Here’s how to load one or more program files from a storage device into internal memory. 1. Access the Load page and move the cursor to the Disk field. 2. Turn the [JOG] dial to open the Disk List popup window. 3. Move the cursor to the storage device from which you want to load the data, and press the [F6] key (SELECT). The load-source storage device will be selected. 4. Move the cursor to the view block, and turn the [JOG] dial to select PROGRAM.
Load mode 9. To execute the Load operation, press the [F5] key (DO IT). The program or the program+samples will be loaded. When loading has been completed, the popup window will close. Hint: By pressing the [F3] key (CLEAR) instead of the [F5] key, you can clear the memory before loading the program. ● To load multiple programs 10. After step 4, move the cursor to the file list block, and select the folder that contains the program files you want to load. 11. Press the [F6] key (DO IT).
Load page Hint: By pressing the [F3] key (CLEAR) instead of the [F5] key, you can clear the memory before loading the programs (or programs+samples). ■ Loading multis Here’s how to load one or more multi files from a storage device into internal memory. 1. Access the Load page, and move the cursor to the Disk field. 2. Turn the [JOG] dial to open the Disk list popup window. 3. Move the cursor to the storage device from which you want to load the data, and press the [F6] key (SELECT).
Load mode Note: Be aware that if you select WITH PROGRAMS, the multi cannot be played correctly if the internal memory of the MPC4000 does not contain the necessary samples. If you selected MULTI ONLY, the multi cannot be played correctly if internal memory does not contain the necessary programs and samples. 8.
Load page 14. If you selected YES in step 13, move the cursor to the Replace same sample in memory field, and specify what will be done if internal memory already contains identically-named data. YES ........................The data will be loaded, overwriting the data in memory. NO ..........................Identically-named data will not be loaded. 15. To load the data, press the [F5] key (DO IT). When the data has been loaded, the popup window will close.
Load mode 7. Move the cursor to the File type field, and turn the [JOG] dial to select the type of file that you want to find. 8. To execute the search, press the [F6] key (FIND). When the file search has been completed, the Found Files popup window will appear. 1 2 3 A File list Displays the files that match the search conditions. B [F1] key (CLOSE) Closes the popup window without loading data. C [F5] key (LOAD) Loads the file that is selected in the file list. 9.
Global page Global mode Global page Making overall settings for the MPC4000 Here you can make settings that affect the operation of the entire MPC4000, such as adjusting the master tuning, making word clock settings, and setting the internal clock. To access this page ....... [GLOBAL] key A Global block B Word clock block 1 2 Functions • [F2] key (MEMORY) Displays the Memory page. • [F3] key (CONFIG) Displays the Configuration page. • [F4] key (FOOT SW) Displays the Foot Switch page.
Global mode D Time field Displays the time of the internal clock. When you move the cursor to this field and turn the [JOG] dial or press the [WINDOW] key, the Set Date/Time popup window will appear. E Item sort field Selects the order in which items will be shown when you view a list of files. You can select NAME (sort by name) or CHRONIC (sort by order in which the data was written). System clock block Here you can set the system clock of the MPC4000.
Global page ■ Setting the internal clock Here’s how to adjust the internal clock used to set the time stamp of files you save. 1. In the Global page, move the cursor to the Date field and press the [WINDOW] key. The Set Date/Time popup window will appear. 1 2 3 4 5 6 7 8 A Day field Sets the day of the month. B Month field Sets the month. C Year field Sets the year. D Hour field Sets the hour. E Minute field Sets the minute. F Second field Sets the second.
Global mode ■ Returning the MPC4000 to the factory-set condition Here’s how to return all settings of the MPC4000’s internal memory to the factory-set condition. 1. In the Global page, press the [F6] key (INITIAL). The Initialize ALL Parameters popup window will appear. 1 2 A [F1] key (CANCEL) Cancels the Initialize operation and closes the popup window. B [F5] key (DO IT) Executes the Initialize operation. 2. 116 To execute the Initialize operation, press the [F5] key (DO IT).
Memory page Memory page Viewing the amount of free memory Here you can view the amount of free space in the MPC4000’s memory, check the memory, or defragment the memory. To access this page ....... [GLOBAL] key → [F2] key (MEMORY) A Memory block 1 Functions • [F1] key (GLOBAL) Displays the Global page. • [F3] key (CONFIG) Displays the Configuration page. • [F4] key (FOOT SW) Displays the Foot Switch page. • [F5] key (TEST) Tests the installed memory.
Global mode D CPU bar The length of this bar indicates the amount of free memory for the MPC4000’s work area. The percentage of free memory is shown at the right of this bar. E Multis field Indicates the number of multis in the memory of the MPC4000. F Programs field Indicates the number of programs in the memory of the MPC4000. G Samples field Indicates the number of samples in the memory of the MPC4000.
Configuration page Configuration page Setting the digital output sync source and the SCSI ID etc. Here you can specify the sync source for the digital audio output signal, and set the SCSI ID of the MPC4000. In this page you can also check whether option cards are installed in the MPC4000. To access this page ....... [GLOBAL] key → [F3] key (CONFIG.) A Configuration block 1 Functions • [F1] key (GLOBAL) Displays the Global page. • [F2] key (MEMORY) Displays the Configuration page.
Global mode C Type field Selects the format of the signal that is output from the Digital Out sync jack. You can select either CONSUMER (consumer devices) or PROFESSIONAL (professional devices). D SCSI self ID field Specifies the SCSI ID of the MPC4000 itself. E Version field Indicates the software version of the MPC4000. Hint: If the optional ADAT interface card is connected, the ADAT (8 assignable) out 1/2 field will be displayed.
Foot switch page Foot switch page Making foot switch settings Here you can select the functions of the foot switches connected to the [FOOT SWITCH 1] and [FOOT SWITCH 2] jacks. To access this page ....... [GLOBAL] key → [F4] key (FOOT SW) A Setting block 1 Functions • [F1] key (GLOBAL) Displays the Global page. • [F2] key (MEMORY) Displays the Memory page. • [F3] key (CONFIG.) Displays the Configuration page.
Global mode • ODUB/PNCH ..............If stopped, performs Play. If playing, performs Punch-in (overdub). If recording, performs Punch-out. • TAP ..............................The same function as the [TAP TEMPO] key. • PAD BANK A–F .........The same function as the PAD BANK [A]–[F] keys. • PAD 01–16 ..................The same function as striking a pad 1–16. The velocity value will always be the maximum. • F1–F6...........................The same function as the [F1]-[F6] keys.
List page Multi mode List page Selecting a multi Here you can select the desired multi from internal memory. To access this page ....... [MULTI] key → [F1] key (LIST) A Multi list block 1 Functions • [F2] key (MIX) Displays the Mix page. • [F3] key (MIDI) Displays the MIDI page. • [F4] key (SPAN) Displays the Span page. Multi list block This shows the multis that are in the internal memory of the MPC4000. 1 2 3 A Tag field Assigns a tag to the desired multi.
Multi mode ■ Creating a new multi Here’s how to create a new multi. 1. Move the cursor to the Multi field of the List page, and press the [WINDOW] key. The Multi popup window will appear. 1 2 3 4 5 A Multi name field Displays the name of the selected multi. If you move the cursor to this field and turn the [JOG] dial, the Rename popup window will appear, allowing you to edit the name. B [F1] key (CLOSE) Closes the popup window.
List page 3. Move the cursor to the New name field, and turn the [JOG] dial. The Rename popup window will appear. 4. Input the desired name for the multi that will be created, and press the [F6] key (ENTER). The name will be finalized, and the popup window will close. 5. Move the cursor to the Number of parts field, and specify the number of parts that the multi will include. You may change the number of parts later if you wish. 6. To create the multi, press the [F6] key (DO IT).
Multi mode ■ Deleting a multi Here’s how to delete a specific multi from memory. 1. Move the cursor to the multi field in the List page, and press the [WINDOW] key. The Multi popup window will appear. Hint: If you want to delete several multis, you can tag them in the List page. 2. Press the [F4] key (DELETE). The Delete Multi popup window will appear. 1 2 3 4 5 A Delete multi field Selects the multi that will be deleted. B [F1] key (CANCEL) Cancels the operation and closes the popup window.
List page ■ Assigning a multi number to a multi Here’s how to assign a multi number to a multi so that you can use MIDI events to select that multi from memory. 1. In the List page, move the cursor to the Multi No. field of the multi to which you want to assign a number. 2. Turn the [JOG] dial. The Multi Number popup window will appear. 1 2 3 4 5 A Multi field Indicates the name of the multi for which you will assign a number. B Multi number field Specifies the multi number.
Multi mode Mix page Editing the mix parameters of each part Here you can view a list of the parts in the currently selected multi, and adjust mix parameters such as volume, pan, and effect send level. To access this page........[MULTI] key → [F2] key (MIX) A Multi block 1 B Part list block 2 Functions • [F1] key (LIST) Displays the List page. • [F3] key (MIDI) Displays the MIDI page. • [F4] key (SPAN) Displays the Span page. • [F5] key (MUTE) Mutes the part selected in the part list.
Mix page Part list block This area lists the parts in the currently selected multi, and displays their mix parameters. 1 2 3 45 6 7 A Part field Displays the part numbers. You can move the cursor to this field and turn the [JOG] dial to scroll the list. When you mute or solo a part, a symbol (M/S) indicating the mute or solo status will appear at the left of the part number. If you press the [WINDOW] key in this field, the Part popup window will appear.
Multi mode ■ Adding parts to a multi Here’s how to add one or more parts to the currently selected multi. 1. In the Mix page, move the cursor to the Part field and press the [WINDOW] key. The Part popup window will appear. 1 2 3 4 5 6 A Program change field Specifies whether MIDI program changes will select programs within the part. B Number of new parts field Specifies the number of parts to be added. C Delete part field Selects the part number to be deleted.
Mix page ■ Assigning a program to each part Here’s how to assign a program to each part of the multi. 1. In the Mix page, move the cursor to the Program/Type field and turn the [JOG] dial. The Program List popup window will appear. 1 2 3 4 A Program/Type field Shows the programs in memory and their types. B Prog.No. field Indicates the program change number assigned to that program. C [F1] key (CANCEL) Cancels the operation and closes the popup window.
Multi mode MIDI page Making MIDI-related settings for each part Here you can view a list of the parts in the currently selected multi, and edit MIDI related parameters such as the MIDI receive channel and the program change number. To access this page........[MULTI] key → [F3] key (MIDI) A Multi block 1 B Part list block 2 Functions • [F1] key (LIST) Displays the List page. • [F2] key (MIX) Displays the Mix page. • [F4] key (SPAN) Displays the Span page.
MIDI page B Program/Type field Selects the program used by each part. When you move the cursor to this field and press the [WINDOW] key, the Program List popup window will appear. C MIDI Ch field Specifies the MIDI receive channel for each part. If you select 1A–16A, MIDI events of the corresponding channel 1–16 from virtual MIDI port A will be sent to the part. If you select 1B–16B, MIDI events of the corresponding channel 1–16 from virtual MIDI port B will be sent to the part.
Multi mode Span page Specifying the range of notes played by each part Here you can view a list of the parts within the currently selected multi, and specify the range of notes that each part will play. To access this page........[MULTI] key → [F4] key (SPAN) A Multi block 1 B Part list block 2 Functions • [F1] key (LIST) Displays the List page. • [F2] key (MIX) Displays the Mix page. • [F3] key (MIDI) Displays the MIDI page. • [F5] key (MUTE) Mutes the part that is selected in the part list.
Span page B Program/Type field Selects the program used by each part. If you move the cursor to this field and press the [WINDOW] key, the Program List popup window will appear. C Low field Specifies the lowest note that will be sounded by this part. The range of notes will extend from this note to the note you specify in the Hi field. If you press the [WINDOW] key, the Keyspan popup window will appear. D Hi field Specifies the highest note that will be sounded by this part.
Mixer mode Mixer mode Part page Adjusting the mix parameters for each part Here you can view the parts that are included in the currently selected multi, and adjust the volume, pan, and effect send level. To access this page........[MIXER] key A Mixer block 1 Mixer block Here you can adjust the volume, pan, and effect send level for each part. 1 2 3 4 A Part number field Move the cursor to this field and turn the [JOG] dial to select the number of the part you want to control.
Select page Effect mode Select page Specifying the effect type and routing Here you can select the effect type used for effects 1–4, and change the input/output signal routing. To access this page ....... [EFFECT] key A Effect block Functions • [F2] key (EDIT) Displays the Edit page. • [F3] key (MIX) Displays the Mix page 1 Effect block Here you can select the effect type used for effects 1–4, and select the input signal and output destination for each effect.
Effect mode 1–8 ......................... The signal will be output in monaural to individual outputs 1–8. (This can be selected only if the individual output option is installed.) D Stereo link field Switches the stereo link function on/off for effects 1/2 or 3/4. If stereo link is turned on, effects 1–2 or effects 3–4 can be used together as a stereo-in/stereo-out effect.
Edit page Edit page Editing the effect parameters Here you can edit the parameters of the effect type used by each effect 1–4. To access this page ....... [EFFECT] key → [F2] key (EDIT) A Fx block 1 B Parameter block 2 Functions • [F1] key (SELECT) Displays the Select page. • [F3] key (MIX) Displays the Mix page. • [F6] key (ON/OFF) Switches the effect on/off. Fx block Here you can select the effect whose parameters you want to edit.
Effect mode C Wet/Dry field Adjusts the mix balance within the effect between the original sound (the signal sent from the effect bus) and the effect sound (the signal processed by the effect). Setting the Wet side to 100 (100/0) means that only the effect sound will be heard; setting the Dry side to 100 (0/100) means that only the original sound will be heard. D Effect field Switches the effect on/off. This is linked with the [F6] key (ON/OFF).
Edit page CHORUS+DELAY This is a monaural composite effect that connects chorus and delay in series. Parameter Range Function Rate 0.1Hz–10.0Hz Adjusts the LFO speed of the chorus effect. Depth 0–127 Adjusts the LFO depth of the chorus effect Feedback 0–127 Adjusts the amount of feedback for the chorus effect. Delay 1ms–1500ms Adjusts the delay time of the delay effect. Feedback 0–127 Adjusts the amount of feedback for the delay effect.
Effect mode DELAY>MULTITAP This is a delay that lets you produce special effects by adjusting the spacing of the feedback sounds and the volume change curve of the feedback sound. Parameter Range Function Delay 1–127 Width 2–15 Adjusts the left/right spread of the feedback sound. Shape –10–+10 Adjusts the spacing of the feedback sounds. Slope –10–+10 Adjusts the decay curve of the feedback sounds. Feedback 0–127 Adjusts the amount of feedback.
Edit page DELAY>STEREO This is a stereo delay in which left and right channels can be set independently. Parameter Range Function LDelay 1ms–1500ms Adjusts the L channel delay time. Feedback 0–127 Adjusts the amount of feedback for the L channel delay. HFdamp 20Hz–20kHz Adjusts the frequency at which the high-frequency range of the L channel feedback sound will be cut. RDelay 1ms–1500ms Adjusts the R channel delay time.
Effect mode DISTORTION This is a monaural distortion effect that distorts the input signal. An EQ for shaping the tone is connected in series. Parameter Range Function Depth 0–31 Adjusts the amount of distortion. EQ frequency 0–127 Adjusts the center frequency of the EQ. EQ Gain –15dB–+15dB Adjusts the gain of the EQ. EQ Q 0.5–10 Adjusts the Q of the EQ. Wet/Dry 100/0–0/100 Adjusts the balance of the effect sound and dry sound. (With a setting of 100/0, only the effect sound is output.
Edit page FLANGER>PAN This is an effect in which the effect sound of a monaural flanger is auto-panned (the sound image will automatically move between left and right). Parameter Range Function Rate 0.1Hz–10.0Hz Adjusts the LFO speed. Depth 0–127 Adjusts the LFO depth. FB Invert ON/OFF Inverts (ON) the phase of the feedback signal. Feedback 0–127 Adjusts the amount of feedback. Width 0–127 Adjusts the width of panning.
Effect mode NOISE GATE This is a monaural effect that silences the signal if it drops below a specified level (threshold). It is convenient to use this to cut any noise that may be heard while you are not playing. Parameter Range Function Threshold –60dB–0dB Adjusts the threshold of the noise gate. Key SEND A–SEND Specifies the signal source (send A–D) that will drive the noise gate. Output –20dB–+20dB Adjusts the output level of the effect sound.
Edit page PHASER>MONO This is a conventional phaser effect. The effect itself is mono-in/mono-out, but you can adjust the panning of the effect sound if you are playing in stereo. Parameter Range Function Rate 0.1Hz–10.0Hz Adjusts the LFO speed. Depth 0–127 Adjusts the LFO depth. Feedback 0–127 Adjusts the amount of feedback. Pan L63–MID–R63 Adjusts the panning of the effect sound. Wet/Dry 100/0–0/100 Adjusts the balance of the effect sound and dry sound.
Effect mode PHASER+DELAY This is a monaural composite effect that connects a phaser and delay in series. Parameter Range Function Rate 0.1Hz–10.0Hz Adjusts the LFO speed of the phaser effect. Depth 0–127 Adjusts the LFO depth of the phaser effect. Feedback 0–127 Adjusts the amount of feedback for the phaser effect. Delay 1ms–1500ms Adjusts the delay time of the delay effect. Feedback 0–127 Adjusts the amount of feedback for the delay effect.
Edit page PITCH SHIFTER This effect modifies the pitch. Parameter Range Function Left –12.99–+12.99 Feedback 0–127 Adjusts the amount of delay feedback for the L channel. Right –12.99–+12.99 Adjusts the amount of pitch shift for the R channel. Feedback 0–127 Adjusts the amount of delay feedback for the R channel. Wet/Dry 100/0–0/100 Adjusts the balance of the effect sound and dry sound. (With a setting of 100/0, only the effect sound is output.) Effect ON/OFF Switches the effect on/off.
Effect mode REVERB>THEATER Stereo reverb that simulates the reverberation of a theater. REVERB>VOCAL PLATE Simulates the reverberation of a plate reverb device suitable for vocals. REVERB>WAREHOUSE Simulates the reverberation of a warehouse. REVERB>NON LINEAR This is a special type of stereo reverb that abruptly cuts the reverb after a certain length of time has elapsed. The parameters of this reverb differ from those of other reverbs.
Edit page • When using control changes to switch speeds Rate1 will be selected when a control change with a value of 0–63 is received, and Rate2 will be selected when a value of 64–127 is received. The CtrlNo. field specifies the control number, and the Accel field specifies the time over which the speed change occurs. Note: To avoid confusion, we recommend that the MIDI channel used to control this effect be different than the receive MIDI channels used for each of the MPC4000’s parts.
Effect mode Mix page Adjusting the effect output level Here you can adjust the level of the signal that is output from effects 1–4. This page also lets you specify whether the effect will also output the direct signal. To access this page........[EFFECT] key → [F3] key (MIX) A Effect block 1 Functions • [F1] key (SELECT) Displays the Select page. • [F2] key (EDIT) Displays the Edit page.
Mix page ■ Applying effects to each part Here’s how to select an effect type for effects 1–4, and specify the effect bus and send levels for each part. 1. Press the [EFFECT] key and then the [F1] key (SELECT). The Select page will appear. 2. To select the effect type, move the cursor to the Effect field for effects 1–4 and turn the [JOG] dial. The Select Effect type popup window will appear, allowing you to select an effect type. 1 2 3 A Effect list Selects the effect type that you will use.
Effect mode • If you want to send only the effect sound directly to the output jack Turn the Direct signal field OFF in step 6, and set the Wet/Dry field to 100/0 (effect sound= 100%). Use these settings when you want to apply compressor or distortion to only a specific part. • If you want to send the original sound + effect sound from the effect directly to the output jack Turn the Direct signal field OFF in step 6, and adjust the Wet/Dry field according to the effect type or the desired effect depth.
Record page Record mode Record page Recording a sample Here you can record a sample, and make various settings for recording. You can also process the sound through the internal effects as you record it. To access this page ....... [RECORD] key A Input block B Record block 1 C Memory block 2 3 Functions • [F1]/[F2] keys (RESET PEAK) Resets the peak hold indicator that is shown in the level meter.
Record mode D Monitor field Selects whether the input source will be monitored during recording. E Original field Specifies the original pitch of the sample. When the sample is played back, the note number you specify here will play the sample at its original pitch. F Auto normalize field If this field is on, the recorded sample will be normalized automatically. Record block Here you can select the recording method and view the recording level.
Record page ■ Recording a new sample Here’s how to record an input signal as a new sample, and assign it to a program. 1. Move the cursor to the Input source field, and select the source that you want to record. You can choose from the following sources. • ANALOG IN .............. The input signal from the rear panel REC IN [PHONO] jacks or REC IN [LINE/MIC] jacks. • DIGITAL IN ............... The input signal from the rear panel [DIGITAL IN] jack (only if the ID-4D option is installed). • MAIN OUT ......
Record mode 9. Press the [F6] key (RECORD). The next step will depend on the way that you have chosen to start recording. If you selected MANUAL as the recording-start method Press the [F6] key (RECORD), and play the audio source that you want to record. Recording will begin the moment you press the key. (If you specified a Pre-recording time, the recording will include the corresponding length of sound that was heard before you pressed the key.) The Recording...
Record page D [F6] key (KEEP) Retains the sample in memory. 11. Press the [F3] key (PLAY) to audition the sample. If you decide to re-try the recording, press the [F1] key (RETRY) to discard the sample and return to the record page. Hint: A default name of “Sample xxx” (xxx will be a number indicating the number of times you recorded) will be added to the recorded sample. If desired, you can turn the [JOG] dial in the Keep or Retry popup window to assign a new name to the sample. 12.
Record mode If you select a drum program 1 A Assign to pad field Selects the pad to which the sample will be assigned. You can turn the [JOG] dial to select a pad number, or directly strike a pad to specify it. 14. Edit the various sample parameters as appropriate for the type of program (key group or drum) you selected in step 12. 15. Press the [F6] key (DO IT). The sample will be assigned to the program you selected, and you will return to the Record page.
Record page If you selected COMMAND 1 2 3 A Command field Selects up to two commands that will process the sample. B Parameter field Sets two parameters according to the selected command. C [F1] key (CLOSE) Finalizes the settings and returns to the previous page. The available commands and their parameters are as follows.
Record mode C Effect field Switches each effect on/off. D [F1] key (CLOSE) Finalizes the settings and returns to the previous page. E [F5] key (EDIT) Accesses the Effect mode Edit page. The available effect types and their parameters are the same as in Effect mode (→p.137). 162 3. Move the cursor to the various fields in the window, and set the type of command/effect and the desired parameter values.
List page Sample mode List page Viewing the sample list Here you can view a list of the samples that are currently in memory. In this page you can also copy or delete samples. To access this page ....... [SAMPLE] key → [F1] key (LIST) A List block 1 Functions • [F2] key (TRIM/LP) Displays the Sample mode Trim/Loop page. • [F3] key (REGION) Displays the Sample mode Region page.
Sample mode ■ Copying a sample Here’s how to copy a specific sample within memory. 1. In the List page or the Trim/Loop page, move the cursor to the Sample field and press the [WINDOW] key. The Sample popup window will appear. 1 4 2 3 5 6 7 8 A Sample name field Edits the name of the sample. Move the cursor to this field and turn the [JOG] dial to open the Name popup window. B Original note field Specifies the original key of the sample. C Tune field Adjusts the pitch of the sample.
List page ■ Deleting a sample Here’s how to delete a specific sample from memory. 1. In the List page or the Trim/Loop page, move the cursor to the sample field and press the [WINDOW] key. The Sample popup window will appear. Hint: If you want to delete two or more samples, it is convenient to tag them in the List page. 2. Press the [F4] key (DELETE). The Delete Sample popup window will appear. 1 2 3 4 5 6 A Delete sample field Indicates the sample that will be deleted.
Sample mode Trim/Loop page Trimming or looping a sample Here you can specify the points at which the sample will begin playing (start point) and stop playing (end point), switch looping on/off, and specify the points at which looping will start (loop start point) and end (loop end point) when looping is enabled. To access this page........
Trim/Loop page When you move the cursor to this field and press the [WINDOW] key, the Waveform Display popup window will appear, allowing you to select how the waveform display field will be shown. • Scale field Selects how the waveform amplitude will be displayed; either LINEAR (linear) or LOG (logarithmic). • View field Selects whether the waveform amplitude will be displayed in both positive and negative directions (BIPOLAR) or only one direction (RECTIFIED).
Sample mode Loop block Here you can switch loop playback on/off, and specify the points at which the loop will start and end. 1 2 3 A Lp Start field Specifies the point at which loop playback will start (loop start point), in units of one sample. B Lp end field Specifies the point at which loop playback will end (loop end point). By moving the cursor to END and turning the [JOG] dial, you can select how the loop end point is displayed. • END.............................
Trim/Loop page Waveform display field (lower) According to the field in which the cursor is located, this area displays the waveform before and after the start point, before and after the end point, or before and after the loop start/loop end points. 1 A Display field Indicates the point that is shown in the waveform display field (lower). By holding down the [SHIFT] key and using the BLOCK CURSOR [π]/[†] keys, you can zoom-in/zoom-out on the waveform display field (lower).
Sample mode 7. If you selected LOOP as the playback method, set the loop start/loop end points in the same way. Hint: By holding down the [SHIFT] key and using the CURSOR [√]/[®] keys, you can change the place (digit) that is modified by the [JOG] dial. It is also possible to set the start/end points or loop start/loop end points simply by pressing a key while you listen to the sample play. For details, refer to the section that follows.
Trim/Loop page 2. Move the cursor to the Threshold field, and turn the [JOG] dial to specify the threshold value. The value you specify here will be used as the reference for automatic detection. 3. Press the [F6] key (FIND). The waveform will be searched to find the point at which the threshold is exceeded; starting from the beginning of the sample when searching for the start point, or starting from the end of the sample when searching for the end point.
Sample mode G [F6] key (FIND) Executes automatic detection of the loop points. 3. Press the [F6] key (FIND). The sample will be searched from the beginning to find an appropriate loop start point, and this will be set as the loop start point. Play a pad or your MIDI keyboard to check the result. 4. Make fine adjustments to the detected loop point as necessary.
Trim/Loop page ■ Resampling with Q-FX The MPC4000 lets you apply effects to an already-recorded sample and re-record (resample) it. This function gives you an easy way to create new samples. 1. In the Trim/Loop page, select the sample that you want to resample, and press the [F4] key (Q-FX). The Quick FX popup window will appear, allowing you to specify the effects that will be applied to the sample. 1 A Mode field Select one of the following Q-FX modes to specify how effects will be applied. COMMAND ..
Sample mode If you select EFFECT 2 3 6 7 1 4 5 8 A FX 1–FX 4 field Selects up to four effect types. The available effect types are the same as in Effect mode. B Wet/Dry field Adjusts the mix balance between the original sound (Dry) and effect sound (Wet) for FX1–FX4. C Effect field Switches each effect on/off. D [F1] key (CANCEL) Cancels the operation and returns to the previous page. E [F3] key (®EFFECT) Auditions the sound processed by the effect.
Trim/Loop page The new sample will be recorded, and the Keep or Retry window will appear. 1 2 3 4 5 6 7 A New name field Allows you to edit the name of the sample. B [F1] key (RETRY) Discards the edited result, and returns to the previous page. C [F2] key (OVER WR) Overwrites the edited result onto the original sample in memory. D [F3] key (P®NEW) Plays the edited sample. E [F4] key (P®ORIGIN) Plays the original (unedited) sample.
Sample mode Region page Dividing a sample A portion of a sample or the entire sample can be divided into as many as 32 regions. Editing commands can be used to write the divided regions as individual samples, or to exchange their order. To access this page........[SAMPLE] key → [F3] key (REGION) A Sample block 1 2 B Region block C Waveform display field (upper) 3 D Region select block 4 E Waveform display field (lower) 5 Functions • [F1] key (LIST) Displays the Sample mode List page.
Region page • LENGTH .................... Number of samples from the start point • TIME........................... Time from the start point Waveform display field (upper) This area displays the waveform of the entire sample, and indicates the locations at which each region will be divided. The region that is currently selected for operations is highlighted. The currently selected region Region select block 1 A Region field Indicates the region number that will be the subject of operations.
Sample mode The Number of Regions popup window will appear, allowing you to specify the number of regions into which the sample will be divided. 1 2 3 4 A Refer to field Selects the portion of the sample that will be divided into regions. B Number of regions field Specifies the number of regions into which the specified portion will be divided. C [F1] key (CANCEL) Cancels the operation and returns to the Region page. D [F6] key (DO IT) Executes the division, and returns to the Region page. 3.
Region page 2. Move the cursor to the Region start field, and specify the region start point. You can edit the value either by turning the [JOG] dial, or by using the numeric keys to directly enter a number of samples and then pressing the [ENTER] key. 3. To check the region start point you specified, move the cursor to the Region start field, and press pad 14 or 15. In the Region page, the function of pads 14 and 15 will change as follows. Pad 14 (PLAY TO)...........
Sample mode D End margin field When creating the new samples, this specifies how much of the waveform data following the region end point will be included in each new sample. E [F1] key (CANCEL) Cancels the slice command and closes the popup window. F [F6] key (DO IT) Executes the slice command and closes the popup window. 3. Move the cursor to the Generate sequence field, and select YES.
Region page ■ Adjusting the tempo of a sample Here’s how you can change the length of a sample by specifying the tempo in BPM units. 1. Move the cursor to the Sample field of the Region page, and select the sample whose tempo you want to modify. 2. Press the [F4] key (B.P.M.) The B.P.M. Match popup window will appear, allowing you to change the length or pitch of the sample according to the BPM value you specify. 3.
Sample mode If you select STRETCH 1 2 3 A Preset field Selects how time stretch will be performed. The following eighteen presets are provided so that you can obtain optimal results for different types of sample. Each preset also provides variations A, B, and C. If you select A, processing will be performed with normal audio quality. If you select C, processing will require more time, but the audio quality will be higher. B is mid-way between A and C in processing time and audio quality.
Region page The Keep or Retry popup window will appear. 5. Use the [F3] key (P®ORIGIN) and [F4] key (P®NEW) to compare the original sample with the edited result. 6. If you are satisfied with the edited result, assign a new name to the sample as necessary, and press either the [F2] key, [F5] key, or [F6] key to save the edited data as a new sample. However if you press the [F2] key (OVER WR), the new sample name will be ignored and the edited data will be written over the original file.
Sample mode The Keep or Retry popup window will appear, allowing you to compare the original sample with the edited result, and keep the result or retry the operation. 4. Use the [F3] key (P®ORIGIN) and [F4] key (P®NEW) to compare the original sample with the edited result. 5. If you are satisfied with the edited result, assign a new name to the sample as necessary, and press either the [F2] key, [F5] key, or [F6] key to save the edited data as a new sample.
Region page C Quality field Specifies the quality and speed of the conversion. HIGH will produce the best audio quality, but will take the most time for processing. LOW will decrease the quality, but processing will be faster. MID is mid-way between the other two choices in quality and processing time. SECTION -> NEW SAMPLE Extracts part of a sample and creates a new sample. 1 A Section field Selects the section of the sample that will be extracted. TRIM......................
Sample mode SILENCE SECTION Converts the selected section to silence. 1 A Section field Selects the section of the sample that will be converted to silence. TRIM......................Between the start and end points LOOP .....................Between the loop start and loop end points REGION ................The region selected in the Region page REVERSE SECTION Reverses the selected section of the sample along the time axis. 1 A Section field Selects the section of the sample that will be reversed.
Region page JOIN SAMPLE Joins two samples to create a new sample. 2 3 4 1 A Sample A/B field Selects the samples that will be joined. Sample A will be first, and sample B will be last. B Level A/B field Adjusts the level of each sample. C X-fade field Specifies the length of the crossfade that will connect the two samples. D Curve Select the crossfade curve. FADE Fades-in/out the beginning and end of the sample. 1 3 2 A Up field Specifies the duration of the fade-in.
Sample mode A Sample A/B field Selects the samples that will be mixed. B Level A/B field Adjusts the level of each sample. NORMALIZE Boosts the overall level so that the peak level of the sample is the maximum value for the currently selected bit depth. 1 2 A [F3] key (ALL) Normalizes all samples in memory. B [F4] key ( TAGGED) Normalizes only samples that are tagged in the List page. RE-SCALE Modifies the level of the sample. 1 2 3 A Level field Specifies the adjustment level.
Region page TIME STRETCH Expands or contracts only the length of the sample without changing its pitch. 1 2 3 A Amount field Specifies the amount of time stretch, in a range of 50.00%–200.00%. B Preset field Selects the preset algorithm that will be used for time stretch processing. For each preset, variation A will perform processing at the standard audio quality. Variation C will take longer, but the audio quality will be better.
Sample mode SLICE SAMPLE Writes each divided region into memory as a separate sample. In addition, this command automatically creates a program to which the written samples are assigned, and generates a sequence that will use that program to recreate the original phrase. 1 2 3 4 A Generate sequence field Specifies whether program/sequence data will be created at the same time (YES), or whether only a new program will be created (NO).
List page Program mode List page Viewing a list of programs in internal memory Here you can view a list of the programs that are in internal memory. To access this page ....... [PROGRAM] key → [F1] key (LIST) A Program list block 1 Functions • [F2] key (KG MIX) Displays the Key Group Mix page. • [F3] key (MISC.) Displays the MISC. page • [F4] key (ASSIGN) Displays the Assign page. Program list block This area lists the programs that are in internal memory.
Program mode ■ Creating a new program Here’s how to create a new, empty program. 1. In the List page, move the cursor to the Program field and press the [WINDOW] key. The Program popup window will appear. 1 2 3 4 5 6 7 8 A Program name field Displays the name of the currently selected program. If you turn the [JOG] dial in this field, the Rename popup window will appear, allowing you to edit the name of the program. B Type field Indicates the type of the currently selected program.
List page B Type field Selects the type of program that will be created. C [F1] key (CANCEL) Cancels the operation and closes the popup window. D [F6] key (DO IT) Executes the Create New Program operation. 3. Move the cursor to the New name field, and turn the [JOG] dial. The Rename popup window will appear. 4. Input the program name, and press the [F6] key (ENTER). The name will be finalized, and the popup window will close. 5.
Program mode ■ Copying a program Here’s how to copy a specific program within memory. 1. In the List page, move the cursor to the Program field and press the [WINDOW] key. The Program popup window will appear. 2. Press the [F6] key (COPY). The Copy Program popup window will appear. 1 2 3 4 A Copy source field Selects the copy-source program. B New name field Specifies a name for the newly created program. C [F1] key (CANCEL) Cancels the operation and closes the popup window.
List page ■ Deleting a program Here’s how to delete a program from memory. 1. In the List page, move the cursor to the Program field, and press the [WINDOW] key. The Program popup window will appear. Hint: If you want to delete multiple programs, it is convenient to tag them in the List page. 2. Press the [F4] key (DELETE). The Delete Program popup window will appear. 1 2 3 4 5 6 A Delete program field Selects the program that will be deleted.
Program mode ■ Converting the program type You can convert the type (key group/drum) of a program and copy it to a new program. 1. In Program field of the List page, move the cursor to the program whose type you want to convert, and press the [WINDOW] key. The Program popup window will appear. 2. Move the cursor to the Do field, and turn the [JOG] dial to select CONVERT. 3. Press the [F3] key (CONVERT). The Convert Program popup window will appear.
List page ■ Merging two programs Here’s how to merge two programs and copy the result to a new program. You can even merge a drum program with a key group program. 1. Move the cursor to the Program field, and press the [WINDOW] key. The Program popup window will appear. 2. Move the cursor to the Do field, and turn the [JOG] dial to change the setting to MERGE. The function assigned to the [F3] key will change to MERGE. 3. Press the [F3] key (MERGE). The Merge Program popup window will appear.
Program mode Key group mix page Editing the mix parameters of a program Here you can assign samples to a key group program or drum program, and adjust the level, pan, and output destination for each key group or note number. To access this page........[PROGRAM] key → [F2] key (KG MIX) 1 1 2 2 A Program block B Sample list block Functions • [F1] key (LIST) Displays the List page. • [F3] key (PITCH) Displays the pitch page. • [F4] key (EDIT 1) Displays the Edit 1 page.
Key group mix page D Level field Indicates the level of the program. When the cursor is located at this field, you can turn the [JOG] dial to adjust the setting. E Tune field Indicates the pitch of the program. When the cursor is located at this field, you can turn the [JOG] dial to adjust the setting. F Monitor field Specifies how the program will be played from the pads or a MIDI keyboard. MULTI ...................
Program mode F FX field Adjusts the send level of the signal sent from each key group or note number to the effect bus, in a range of –40.00–+06.00 (dB). G Send field Selects one of the following as the effect bus used by each key group or note number. OFF ........................The signal will not be sent to an effect bus. A–D........................The signal will be sent to an effect bus A–D. AB/CD ...................The signal will be sent to effect buses A and B, or C and D. MULTI ...................
Key group mix page ■ Copying a key group (Key group programs) Here’s how to copy only a specific key group from a key group program in memory to a different program. 1. In the Key Group Mix page, move the cursor to the Kg field and press the [WINDOW] key. The Create New Keygroup popup window will appear. 2. Press the [F4] key (COPY). The Copy Keygroup popup window will appear. 1 2 3 4 5 A From pgm field Selects the copy-source program. B Kg field Selects the copy-source key group.
Program mode The Delete Keygroup popup window will appear. 1 2 3 4 A Kg field Selects the key group that will be deleted. B [F1] key (CANCEL) Cancels the operation and closes the popup window. C [F4] key (BLANK) Deletes all key groups within the currently selected program to which no sample is assigned. D [F6] key (DO IT) Deletes the key group that you selected in the Kg field. 3.
Key group mix page ■ Copying note number parameters to another note number (Drum programs) Here’s how the contents of a specific note number in a drum program can be copied to the desired note number of the desired drum program. 1. In the Key Group Mix page, move the cursor to the Note field and press the [WINDOW] key. The Copy Parameters popup window will appear. 2 1 3 4 7 56 8 A From program field Selects the copy-source program. B Note field (copy-source) Select the copy-source note number.
Program mode ■ Making program modulation settings Here’s how to specify the modulation source, modulation destination, and modulation depth for each of the 64 modulation routings of a program. 1. In the List page, move the cursor to any one of the Lvl/Pan/Out/FX/Send fields, and press the [WINDOW] key. The Program Modulation popup window will appear. 1 2 3 45 6 A Mod field Indicates the modulation number (1–64).
Key group mix page you assign a control change), EXT 1-8 (used for Q-Link control), MODWHEEL, BEND UP, BEND DOWN, EXT 1-8, LFO1, LFO2, CTRL. Hint: In the case of a modulation source marked with a quarter note ( ), only the value at the moment that the key is pressed (the moment the note-on is received) is used; any subsequent changes will be ignored. For example if you select BEND as the modulation source, moving the bend wheel after note-on will affect the note that is sounding.
Program mode ■ Viewing information on samples Here’s how to view information such as sampling rate, original key, and pitch for the sample assigned to each key group or note number. 1. In the Program field of the Key Group Mix page, select the program for which you want to view sample information. 2. Move the cursor to the Sample field of the key group or note number for which you want to view the information, and press the [WINDOW] key. The Sample popup window will appear.
Pitch page Pitch page Specifying the tuning or zone of a key group or note number Here you can specify the playback pitch, note range, and polyphony etc. for a key group or note number. To access this page ....... [PROGRAM] key → [F2] key (KG MIX) → [F3] key (PITCH) 1 1 2 2 A Program block B Sample list block Functions • [F1] key (LIST) Displays the List page. • [F2] key (KG MIX) Displays the Key Group Mix page. • [F4] key (EDIT 1) Displays the Edit 1 page.
Program mode Sample list block Here you can adjust the tuning of a key group or note number, or specify the range of notes for a key group. 1 2 3 4 5 67 1 2 4 5 67 A Kg/Note field Shows the key groups or note numbers of the selected program. B Sample field Shows the samples that are assigned to each key group or note number. C Span Low/Hi fields Select the key range of the key group. The Low field specifies the lowest note number, and the Hi field specifies the highest note number.
Pitch page The Key Span Option popup window will appear. 1 2 3 4 5 A Keygroup X-fade field Specify whether crossfading will occur if adjacent key groups have overlapping ranges. B X-fade curve field Select the volume curve that will be used for crossfading. You can select LINEAR, EXPONENTIAL, or LOGARITHMIC curves. C Set keyrange via MIDI field Specifies whether you will be able to use the pads or your MIDI keyboard to set the Span Low/High fields.
Program mode The Mute Group popup window will appear. 3 1 2 4 A Mute Group field Indicates the mute group that will be displayed in the list. B Kg/Note field Indicates the key groups or note numbers that are assigned to the same mute group. C Zone 1 Sample field Indicates the name of the sample that is assigned to zone 1 of each key group or note number. D [F1] key (CLOSE) Closes the popup window. 6. 210 To close the popup window, press the [F1] key (CLOSE).
Edit 1 page Edit 1 page Adjusting the pitch, filter, and amp Here you can adjust pitch, filter, and amp parameters for each key group or note number. To access this page ....... [PROGRAM] key → [F2] key (KG MIX) → [F4] key (EDIT 1) A Program block C Pitch block 1 2 3 D Filter block 4 B Kg/Note block E Amp block 5 Functions • [F1] key (LIST) Displays the List page. • [F2] key (KG MIX) Displays the Key Group Mix page. • [F3] key (PITCH) Displays the Pitch page.
Program mode ONE .......................Your editing will affect only the key group or note number selected in the Kg/Note field. ALL........................Your editing will change simultaneously the absolute value of all key groups or note numbers. ADD.......................Your editing will apply a relative change to the values of all key groups or note numbers. C Zone field Selects the zone (1–4) that will be displayed in the Zone Sample field (4).
Edit 1 page G Reference field Specifies the reference level (0–100) of the envelope. An offset will be applied to the entire envelope so that the filter cutoff matches the Cutoff freq field setting when the envelope reaches the level you specify here. This level is shown by a dotted horizontal line in the envelope display. L1 L3 L2 R1 R2 L4 R3 R4 Hint: When the cursor is located at a field in the Filter block, you can press the [WINDOW] key to open the Program Modulation popup window.
Program mode G Decay field Adjusts the decay time of the key group or note number. H Sustain field Adjusts the sustain level of the key group or note number. I Release field Adjusts the release time of the key group or note number. Sustain Attack Decay Release Hint: When the cursor is located at one of the fields in the AMP block, you can press the [WINDOW] key to open the Program Modulation popup window. ■ Filter types The MPC4000 provides the following types of filter.
Edit 2 page Edit 2 page Adjusting the program LFOs and auxiliary envelope Here you can edit the two LFOs and the envelope used by program modulation. To access this page ....... [PROGRAM] key → [F2] key (KG MIX) → [F5] key (EDIT 2) A Program block B Kg/Note block 1 2 C LFO1 block 3 D LFO2 block E AUX ENV block 4 5 Functions • [F1] key (LIST) Displays the List page. • [F2] key (KG MIX) Displays the Key Group Mix page. • [F3] key (PITCH) Displays the Pitch page.
Program mode LFO1 block Here you can adjust the LFO1 parameters. 1 2 6 9 3 4 5 7 8 J K A Wave field Selects one of the following waveforms for LFO1. TRIANGLE (Triangle wave) SINE (Sine wave) SQUARE (Square wave) SAW UP (Upward sawtooth wave) SAW DOWN (Downward sawtooth wave) RANDOM (Random) B Selected waveform field Displays the selected waveform. The display will change according to the parameter settings. C Depth field Adjusts the LFO1 output level in a range of 0–100.
Edit 2 page J Beat field Selects the ratio at which the LFO1 rate will synchronize to MIDI clock. You can choose from 1/8, 1/6, 1/4, 1/2, and 1–64. The setting of this field is valid if the MIDI sync field (9) is turned on. K Re-trigger field Selects whether the LFO will be retriggered each time a note-on is received. If this setting is on, the LFO waveform will start from the beginning each time a note-on is received.
Program mode AUX ENV block Here you can make settings for the auxiliary envelope that can be used for program modulation. 1 2 3 A R1–R4 fields Specifies the rate 1–rate 4 values of the auxiliary envelope. B L1–L4 fields Specifies the level 1–level 4 values of the auxiliary envelope. C Reference field Specifies the reference level (0-100) of the envelope. This level is shown by a dotted horizontal line in the envelope display.
Zone page Zone page Editing the zone 1–4 parameters Here you can individually edit the zones 1–4 that are included in the key group or note number. To access this page ....... [PROGRAM] key → [F2] key (KG MIX) → [F6] key (ZONE) A Program block B Kg/Note block 1 2 C Sample block 3 D Pitch block 4 Functions • [F1] key (LIST) Displays the List page. • [F2] key (KG MIX) Displays the Key Group Mix page. • [F3] key (PITCH) Displays the Pitch page. • [F4] key (EDIT 1) Displays the Edit 1 page.
Program mode Sample block Here you can edit the parameters of zones 1–4. 1 2 3 7 4 5 6 8 A Zn field Indicates the zone number. B Sample field Selects the sample that is assigned to each zone. If you press the [WINDOW] key in this field, the Sample popup window will appear. Hint: If you assign a sample to a key group or note number while you are in any other screen, the sample will automatically be assigned to zone 1. In order to assign a sample to a zone 2–4, you must use this Sample field.
Zone page Pitch block Here you can specify the pitch and playback method for the sample assigned to each zone 1–4. 1 2 3 4 5 6 A Zn field Indicates the zone number. B Tune field Adjusts the tuning of the sample assigned to each zone, in units of semitones and cents. C Pitch field Specifies how the pitch of the sample will be affected by the note number. You can select TRACK (the pitch will change according to the note number) or CONST (the pitch will be the same for any note number in the key span).
Program mode 222 5. If you want to use a modulation source other than velocity to switch between zones, move the cursor to the Range field and press the [WINDOW] key. The Program Modulation popup window will appear. 6. Move the cursor to an empty Source field, and select the desired modulation source. 7. Move the cursor to the Destination field at the right, and choose ZONE SELECT as the modulation destination. 8. Move the cursor to the Depth field, and set the value to 100. 9.
MISC. page MISC. page Editing parameters common to the entire program To access this page ....... [PROGRAM] key → [F3] key (MISC.) A Program block 1 B MIDI block 2 C Bend block D Scale block 3 E Soft pedal block 4 5 Functions • [F1] key (LIST) Displays the List page. • [F2] key (KG MIX) Displays the Key Group Mix page. • [F4] key (ASSIGN) Displays the Assign page. Program block This area displays information about the currently selected program.
Program mode E Portamento field (Key group programs only) Specifies the portamento setting. ON..........................Portamento will be used. OFF ........................Portamento will not be used. Bend block Here you can make pitch bend settings. 3 2 1 5 4 A Bend up field Specifies the amount of change (in semitone units, over a range of 00–24) that will occur when you move the pitch bender all the way upward.
MISC. page Soft pedal block Here you can specify what will happen when soft pedal messages (control change #67) are received. 1 2 3 A Loudness reduction field Specifies the amount by which the volume will be attenuated when the soft pedal is on. B Attack stretch field Specifies the amount by which the attack will be deleted when the soft pedal is on. C Filter close field Specifies the amount by which the filter will be closed when the soft pedal is on.
Program mode 4. Set each field as desired. 5. To close the popup window, press the [F1] key (CLOSE). The setting will be applied and the popup window will close. ■ Specifying the temperament of a program (Key group programs) Here’s how you can create your own original temperament for a program to use. 1. Select the program for which you want to create a temperament, and access the MISC. page. You can also select a program in the Program field of the MISC. page. 2.
Assign page Assign page Assigning note numbers to pads (Drum programs) Here you can assign the note numbers of a program to the pads. To access this page ....... [PROGRAM] key → [F4] key (ASSIGN) A Program block 1 B Pads 1–16 2 Functions • [F1] key (LIST) Displays the List page. • [F2] key (KG MIX) Displays the Key Group Mix page. • [F3] key (MISC.) Displays the MISC. page. Program block This area indicates the selected program.
Program mode C GM field Indicates the name of the instrument that corresponds to that note number in a GM-standard drum set. Hint: By using the PAD BANK [A]–[F] keys to switch pad banks, you can switch the pad bank that is displayed in the page.
Q-LINK setup page The Q-LINK function Q-LINK setup page Assigning parameters to the Q-LINK knobs/sliders Here you can assign MPC4000 internal parameters to the knobs and sliders of the Q-LINK section. To access this page .......
The Q-LINK function Destination block 1 2 3 4 5 6 1 2 3 4 5 6 A PART/FX field Selects the parameter that will be assigned to the knob/slider. The field at left specifies whether operating the knob/slider will affect the program assigned to a part (PART), or an effect parameter (FX). If you select PART, use the right field to specify the part number. If you select FX, use the right field to specify the effect number 1–4.
Q-LINK setup page F MIDI field Specifies the MIDI channel on which control change messages will be received. If you select Part for the PART/FX field, this will automatically be set to the MIDI channel of that part. ■ Assigning parameters to the Q-LINK knobs/sliders Here’s how to assign the desired parameters to the knobs and sliders of the Q-LINK section. 1. Press the Q-LINK section [SETUP] key. The Q-LINK setup page will appear.
The Q-LINK function Q-Link sequence page Recording and playing movements of the Q-LINK knobs and sliders You can record the movements of the Q-LINK knobs and sliders in a dedicated step sequencer, and play them back in synchronization with a sequence or song. To access this page........
Q-Link sequence page When STEP=1/64 When STEP=1/16 Settings block 1 1 A Settings field This field specifies the knob or slider value at each step. Use the CURSOR [√]/[®] keys to move the cursor to the desired step, and use the Q-LINK knob or slider to specify the desired value for that step.
The Q-LINK function 6. When you have finished making settings, save the sequence as necessary. The contents of the Q-LINK sequence are saved as part of the sequence. 7. Press the [Q-LINK SEQUENCE] key to play back the Q-LINK sequence. The LED will light, and Q-LINK sequence playback will be enabled. 8. If you want to switch the knobs and sliders on/off individually, access the Q-LINK sequence page, and press the [F3]–[F6] keys.
Track Mute page Track Mute function Track Mute page Using pads to mute tracks Here’s how to use the pads to mute/unmute tracks in realtime while a sequence plays. To access this page ....... [NEXT SEQUENCE] key A Pad block 1 B Sequence block C Now block 2 3 Functions • [F2] key (EDIT) Displays the Edit page. • [F3] key (SUDDEN) Pressing this key during playback will make playback switch immediately to the sequence shown in the Next field.
Track Mute function B Track field Shows the number and name of the track assigned to each pad. Muted tracks are indicated by an symbol beside the track number. The pad banks correspond to the following track numbers. PAD BANK [A] key ................... Tracks 1–16 PAD BANK [B] key.................... Tracks 17–32 PAD BANK [C] key.................... Tracks 33–48 PAD BANK [D] key ................... Tracks 49–64 PAD BANK [E] key .................... Tracks 65–80 PAD BANK [F] key ....................
Track Mute page The track assigned to that pad will be muted. Press the pad once again to defeat muting. Hint: You can use the PAD BANK [A]–[F] keys to switch the tracks that are shown in the display. You can also switch muting on/off for multiple tracks simultaneously. 5. If you want to solo a specific track, hold down the [F6] key (SOLO) and press the pad that corresponds to that track. All other tracks will be muted. To defeat the solo setting, press the [F6] key (SOLO) once again.
Track Mute function Edit page Editing track mute operations that were recorded in a sequence Here’s how you can use an event list to edit Track Mute events that you recorded in a sequence. To access this page........[NEXT SEQUENCE] key → [F2] key (EDIT) A Now block B Event list block 1 C View block 2 3 Functions • [F1] key (TR MUTE) Displays the Track Mute page. • [F4] key (DELETE) Deletes the track mute event that is selected in the event list block.
Edit page B Time field Indicates the location at which the events are recorded in the sequence, in units of measures/beats/ticks. The mute event at the cursor is selected for editing. C Track field Shows the content of the track mute event. The track number is shown at the left, and the mute on/off status at the right. When the cursor is at this field, you can turn the [JOG] dial to change the track number or the mute on/off status.
Next Sequence function Next Sequence function Next Sequence page Using the pads to switch sequences You can play back sequences in succession while using the pads to switch sequences. If you have divided a song into multiple sequences, you can “assemble” the song by striking the pads to switch between sequences in realtime. To access this page........
Next Sequence page PAD BANK [E] key .................... Sequences 65–80 PAD BANK [F] key .................... Sequences 81–96 Hint: Only sequence numbers 1–96 can be controlled in the Next Sequence page. If you want to use a sequence that is numbered 97 or higher, copy it to a sequence numbered 96 or lower. Sequence block This area shows the currently-playing sequence and the sequence that will be played next. 1 2 A Seq field Selects the sequence that will be played.
Next Sequence function 242 4. If you want to switch immediately to the next sequence, strike a pad to select the next sequence and then press the [F3] key (SUDDEN). When you press the [F3] key (SUDDEN), you will move immediately to the sequence shown in the Next field, even if the previous sequence had not finished playing. You can also switch sequences immediately by holding down the [F3] key (SUDDEN) and striking a pad. 5. If you want to hold the currently-playing sequence, press the [F4] key (HOLD).
Current page Pad Assign Functions Current page Changing the note number and sample assignment for each pad When a drum program is selected as the output destination of a track, you can change the note number and sample that are assigned to each pad. Even when a key group program or an external MIDI device is selected as the output destination of a track, you can choose a preset combination of note number assignments, or change the note number for each pad. To access this page .......
Pad Assign Functions B MIDI channel field Selects the MIDI channel of the MIDI events generated by the pad.
Current page If a drum program is selected 1 2 3 A Note field Shows the note number/note name assigned to each pad by this drum program. You can move the cursor to this field and change the note number. B Sample field Shows the sample that is assigned to each pad by this drum program. You can move the cursor to this field and change the sample. C GM field Shows the GM (General MIDI) drum set instrument name that corresponds to the note number assigned to this pad.
Pad Assign Functions Sensitivity page Adjusting the sensitivity of the pads Here you can adjust the velocity sensitivity of the sixteen pads. A Pad block 1 Functions • [F1] key (CURRENT) Displays the Current page. Pad 1–16 block Here you can adjust the sensitivity of the sixteen pads. 1 2 3 A Sensitivity field Specifies the sensitivity of the pad to the force with which you strike it. A setting of 100% is the normal sensitivity.
Name/Rename popup window Other popup windows Name/Rename popup window Inputting a name This window lets you input a name for various types of data. To access the popup window..... Move the cursor to a field that displays a name, and turn the [JOG] dial. A New name block 1 Functions • [F1] key (CANCEL) Cancels the name input and closes the popup window. • [F3] key (COPY) Copies the currently selected name to the clipboard. • [F4] key (PASTE) Pastes the name that was previously copied to the clipboard.
Other popup windows Locate popup window Performing auto locate operations and making transport settings Here you can specify locate points and locate to them, and change the functions that are assigned to the keys of the transport section. To access the popup window[GO TO] key A Locate block B Assign locate keys block 1 2 Functions • [F1] key (CLOSE) Closes the popup window. • [F2] key (LOCATE 1) Locates to the location specified by the Locate 1 field.
Locate popup window Assign locate keys block Here you can change the functions that are assigned to the STEP [<]/[>] keys and BAR [<<]/[>>] keys etc. of the transport section. 1 2 5 6 7 8 3 9 4 A field Changes the function assigned to the STEP[>] key. The factory setting is STEP>. C EVENT field Changes the function assigned to the [GO TO] key + STEP[<] key. The factory setting is
Other popup windows Functions that can be assigned 250 Move to the next event. Move to the next step. Move to the next measure. START Move to the beginning of the sequence/song. END Move to the end of the sequence/song. LOCATE1–LOCAT E3 Move to locate point 1–3.
Check the included items Appendix: Installing storage devices (for service engineers) This appendix explains how to install storage devices (ATA hard disk, CD-ROM drive, Zip drive, etc.) in the MPC4000. Check the included items The following items are included with the MPC4000 for use when installing storage devices. Check to make sure that no items are missing.
Appendix: Installing storage devices (for service engineers) 252 3. Remove the screw (located in the center of the front panel) that fastens the top panel from the lower front side. 4. Remove the screw (located in the center of rear panel) that fastens the top panel from the rear side. 5. Use both hands to lift the protrusion on the front of the top panel, and open the top panel.
Installing a drive 6. Use a metal rod or similar object as a prop inside the chassis to hold up the top panel. • The side panels and screws you removed must be kept in a safe place. • To close the top panel, re-tighten the screws in the opposite order to which they were removed. Installing a drive 1. If you are installing a removable-media drive such as a CD-ROM drive or Zip drive, remove the blank panel from the front panel. 2. Detach the bracket that is attached to the bottom panel of the chassis.
Appendix: Installing storage devices (for service engineers) When installing a drive in the 5 inch bay PC IO PC IO AD_DA P23 P7 P8 P2 PC CPU Cable connections Connecting the flat cable 1. Remove two screws from the cover that conceals the PC CPU board. When you remove the cover, you will see the P2 connector for the ATA drive. PC IO AD_DA P7 P8 PC IO 254 P2 Step 1 PC CPU 2. 3Insert the blue connector of the included flat cable into the P2 connector of the PC CPU board. 3.
Cable connections Connecting the power cable 1. Insert the connector of the included power cable into the P7 connector or P8 connector of the PC I/O board. Use the power cable with the ferrite core if you are installing a hard disk. Use the power cable without a ferrite core if you are installing a Zip drive or CD-ROM drive. 2. Connect the other end of the power cable to the drive.