
User Guide


Chapter 3—Creating and editing a sequence
20
1. If you want to use a drum program of the internal sampler as your sound source, load the
desired program into the internal memory of the MPC4000.
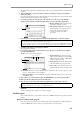
2. If you want to use an external rhythm machine as your sound source, connect one of the [MIDI
OUT A]–[MIDI OUT D] connectors to the MIDI IN connector of your MIDI sound source.
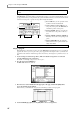
3. Press the [MAIN] key to access the main page.
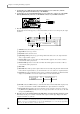
The Track block of the main page lets you select the track that you want to record, and specify the output
destination.
A Trk field: Selects the track that you want to record.
B Type field: Selects the type of track.
C Play field: Switches the track on/off.
D Pgm Change field: Specifies the program change number that will be sent to the output destination
when you play back the sequence.
E Velocity field: Specifies an offset value of 0–200% that will be applied to the velocities of all note
events when the track is played back.
F Duration field: Specifies an offset value of 0–200% that will be applied to the duration of all note
events when the track is played back.
G Out1 field
H Out2 field:
These fields specify the output destinations of the track. By setting the OUT1 field and OUT2
field to different output destinations, you can transmit the events of one track to two output destinations.
I Part field: Selects the part number(s) and program(s) to which the track will be sent. This field will be
displayed only if PART is selected as the output destination for the Out1/Out2 fields.
J Ch field: Selects the MIDI channel(s) to which the track will be sent. This field will be displayed only
if you have selected OUT-A–OUT-D or INT-A/INT-B as the output destination for Out1/Out2.
K Device field: This field displays the device name that you have assigned to the devices connected to
the [MIDI OUT A]–[MIDI OUT D] connectors. To assign a device name, move the cursor to this field
and press the [WINDOW] key.
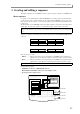
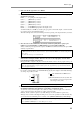
4. Move the cursor to the Trk field, and turn the [JOG] dial to select the track that you want to record.
Immediately after the power is turned on, all tracks in the sequence will be empty. Empty tracks will be
assigned a track name of “(Unused).”
Hint: You can directly switch to the next upper or lower track by using the [F4] key (–) or [F5] key (+).
When you record MIDI events, a track name of “track_xxx” (where xxx is a track number 001–128) will be assigned.
When the cursor is located at the Trk field, you can press the [WINDOW] key to access the Track popup window,
where you can edit the track name or edit the entire track.
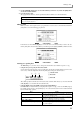
MIDI IN
MIDI sound source
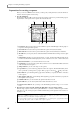
1
2
879
45
6
3
J K