
User Guide


Chapter 3—Creating and editing a sequence
22
11. To start recording, hold down the [REC] key and press the [PLAY] key. Then play the pads while
you listen to the metronome.
The [REC] key and [PLAY] key LEDs will light, and recording will begin on the currently selected track.
12. To stop recording, press the [STOP] key.
When you record or edit a track, the [UNDO SEQ] LED will light. If you press the [UNDO SEQ] key in
this state, the track will return to the state in which it was before you modified it.
13. To hear the content that you recorded, press the [PLAY] key (or the [PLAY START] key).
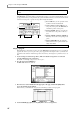
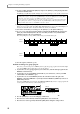
14. To erase a note event that you input by mistake, hold down the [OVER DUB] key and press the
[PLAY] key. Then immediately before the note event that you want to erase, hold down the
[ERASE] key and press the corresponding pad.
The corresponding note event(s) will be erased as long as you hold down the pad.
15. Save the sequence if desired (→p.38).
Realtime-recording a key group program
Here’s how you can use the pads or a MIDI keyboard to play a key group program of the internal sampler
or an external MIDI sound module, and record your performance.
1. If you want to use a key group program as your sound source, load the desired program into the
MPC4000’s internal memory.
2. If you want to use an external MIDI sound module as your sound source, connect your MIDI
sound module to the MPC4000 (→p.6).
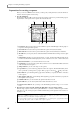
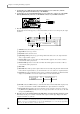
3. If you want to use an external MIDI keyboard as the controller instead of the pads of the
MPC4000, connect the MIDI OUT of your keyboard to the MPC4000’s [MIDI IN I] connector or
[MIDI IN II] connector.
You can use a MIDI keyboard connected to the [MIDI IN I]/[MIDI IN II] connectors to play programs and
record sequences in the same way as when using the pads.
4. Press the [MAIN] key to access the main page of Main mode.
5. Move the cursor to the Trk field, and turn the [JOG] dial to select a new track.
6. Move the cursor to the Type field, and turn the [JOG] dial to change the setting to INST.
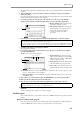
Hint: If you press the [PLAY START] key instead of the [PLAY] key, recording will always start from the
beginning of the sequence. If you press the [OVER DUB] key instead of the [REC] key, the existing MIDI
events will be kept, and the newly-recorded MIDI events will be added to them.
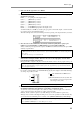
If the Loop field is set to ON/1-END, and you reach the end of the sequence, you will automatically return
to the beginning and continue recording. At this time, the [OVER DUB] key LED will light instead of the
[REC] key LED, and the newly-recorded MIDI events will be added.
12341234
12341234
Pad 2
Pad 1
Pad 2
Pad 1
[ERASE] key + Pad 1 [ERASE] key + Pad 2
• • • •
• • • •
MIDI IN
MIDI keyboard