For Macintosh
Rev.
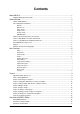
Contents About MESA II ..................................................................................................................1 Modular Editing System by AKAI ...................................................................................................... 1 Getting Started .................................................................................................................2 How to install MESA II ..................................................................................
Overview of Keyboard Editor ...........................................................................................................17 Sampler Editor ...........................................................................................................................................18 File Menu .........................................................................................................................................18 New ...............................................................
Disk Window ....................................................................................................................................30 Quick Access Window ......................................................................................................................31 Mute Groups Window ......................................................................................................................31 Multi Window .......................................................................
DSP Menu ....................................................................................................................................... 44 +3dB / -3dB ........................................................................................................................................... 44 Analyse... ............................................................................................................................................... 44 EQ Filter... ......................................
About MESA II Modular Editing System by AKAI MESA II is the computer based software system that provides the centralized control of hardware operation and data transfer in a wide range of AKAI Samplers and digital recorders, etc. from a single screen on the Macintosh. It currently supports S-series Samplers, S2800, S3000, S3200 and CD3000, and XL-series Samplers, S2000, S3000XL, S3200XL and CD3000XL.
Getting Started How to install MESA II Double click MESA II Installer icon. Install program is booted, and MESA II will itself decompress and install files into the selected folder in your Mac hard disk. File Configuration of MESA II When the installation is completed, the folder "MESA II" that has been created on your hard disk contains the following folder and files: MESA II This is the application body itself. Double clicking this icon will boot MESA II.
* * * "Audio Filing" folder contains the AIFF plug and SD2 plug to translate between different Audio files; "DSP" folder contains various Filters and general DSP plugs for Digital Processing; SCSI and/or OMS MIDI files enabling MESA II to communicate with external devices. Example Scripts Useful AppleScript file This folder contains MESA II script source code written using AppleScript. MESA II is fully compatible with AppleScript and some useful scripts are provided.
How to setup MESA II in a SCSI environment Audio data transfer from Samplers to the MAC needs SCSI to run SCSI (Small Computer System Interface) is a fast communication protocol designed primarily for the data transfer of computer. Because of its speed, it is the required environment to run MESA II in if you do a sample data transfer. If you use the Sampler Editor, you must place the SCSI Plug file into the "PlugIns" folder.
About MESA II developer team MESA II has been developed by Andy Bull of Living Memory, London as part of a worldwide AKAI professional team of developers residing in Japan, Britain, and the USA. Support This software is available free of charge when it is downloaded from our web site (http:/ /www.akaipro.com). Therefore, we offer no guarantee for this software. Accordingly, the technical backup and support on this software are not available in principle.
New Functions A much neater conceptual operability MESA II is a major update from earlier versions of MESA. The interactivity of the program has been drastically enhanced, resulting in an easier-to-use interface for professional sound engineers while offering an extended set of sophisticated functions for the ‘power user’.
Dynamic Menu Bars All menu options are now accessible from a single menu bar All menu bars are now dynamically interactive and display a specific set of menu options - dependent on where the user is within the program. For instance, if the Sampler Editor is chosen, the menu bar shows the specific menu options like Sampler and EB16. Drag and Drop Use drag and drop it’s fast and doesn’t prompt you with dialogue boxes Drag and drop function has been extended.
Scripting ‘Power Users’ will find writing AppleScript a lot more convenient 8 New Functions With a dictionary of MESA II objects provided, writing AppleScript has been made easier to use scripting functions. Some useful scripts have been provided. As AppleScript must be integrated with the hardware and software setup of individual systems, these scripts are included in text format and must be compiled before they can be run. Refer to the MESA II “AppleScript” Chapter for further information.
Tutorial Application Made Easy to use You will find it easier to digest this manual if you first work through the Tutorial This simple Tutorial is written to provide a quick 'hands-on' overview of MESA II. It will take about half an hour to work through. This chapter, by the way, is described on the assumption of that the Macintosh and Sampler are connected without having any trouble, and MESA II has been installed properly. For the set up of MESA II, refer to "Getting Started" Chapter.
the selection. When OMS is used; * Select the name of your Sampler and click OK. * Select "Memory" (Command + 3) from the Windows Menu to open the Memory Window. The AKAI Sampler contains the TEST PROGRAM and 4 sample data in default. Check if they are displayed on the Memory Window. Step 3: Loading disk data into the memory of Sampler. * Select "Disk" (Command + 4) from the Windows Menu, and the Disk Window will open up. * Insert the sample floppy disk included with AKAI Sampler into your Sampler.
empty Information Window will appear. If a sample is too large to load into Mac memory, you will have to adjust the memory by closing MESA II, clicking its icon on the Finder and selecting "Get Info..." * Select a sample from the Memory Window and drag and drop it into the "untitled" Window. To load stereo samples, select both left and right samples and drop them. The Audio Editor Window is now filled with the selected samples' wave form and the Information Window shows the information about the samples.
lected part, the Shift key and Selection Tool are used. Click anywhere outside the selected part to deselect. The Information Window shows the beginning and end locations of the selected part. * Select "Reverse" from the DSP Menu. The selected part is now reversed. Only the edited part will be played when the Spacebar is pressed. * Select the Selection Tool, and click anywhere outside the selected part of wave form in the Audio Editor Window.
Step 7: Creating a new program To create a new (empty) program; * Open the Memory Window on the Sampler Editor, and select "New Program" from the File Menu. Input the name as a dialogue to allow you to name the new program appears. * Input "TEST" and select OK. Next, to set the MIDI channel of program to 2; * While holding down the Option key, click the channel number and input "2" - the default MIDI channel number of the new program is set as "1".
Step 9: Creating more sophisticated programs To create a more sophisticated program with several samples assigned in the Sampler memory, we need to add further keygroups containing further samples to our program. The Control Center, and the Program Selector are described in details in their own Chapters Now open the Control Center Window by selecting the Control Center (Command + 1) from the Window Menu. This gives you full control over all program parameters.
Now let's play this program. At the lower half of the Keyboard, "SINE" is played, and at the higher half of the Keyboard, "SQUARE" is played. With repeating this procedure, many more keygroups can be created in the Program Selector Window. The whole program setting and the sample parameter control can be performed only in the Control Center Window. Here, we will make a wide spread stereo program using only one sample, "SAWTOOTH". * Select the New Program from the File Menu.
Overview of MESA II Editors About MESA II Editors Boot several Editors, and open several screens for each Editor at the same time MESA II is operated in the scope of each Editor. Those Editors supported are, the Sampler Editor, Audio Editor, and Keyboard Editor, When you start MESA II, the editor files in the Editors Folder will be loaded in. The Editor is selected from the Editors Menu. A tick appears on the left of the active Editor.
Finder easy. The programs and samples created on the Sampler can be saved as the files on the Macintosh. Besides, a database of SCSI disk connected to the Sampler can be created on the Finder. If the disk contents of Sampler is changed, the database has to be recreated to reflect the changes. Overview of Audio Editor Use for samples editing The Audio Editor lets you record, playback and manipulate individual Sound Samples.
The Sampler Editor In this chapter, the menu command and window of the Sampler Editor will be explained. Selecting the Sampler Editor from MESA II Editors menu opens up one of the Sampler Editor Window. File Menu New Depending on the currently active window, one of the following alternatives is presented. New Program...(normal operation with a single program) Creates a new program. New Volume...(Disk Window is active and SCSI disk is mounted) Creates a new volume on a Sampler hard disk.
Export Program.../Export FX File... Saves the selected program to your Mac hard disk. The sample can be exported at the same time in the AIFF format. It can also be exported to the Finder by drag and drop. When the Effect Window is open, the current effect files can be exported. Rename current Program... Renames the current program being edited. Create Disk Database...
Duplicate Program... Duplicates the current program being edited. Duplicate Keygroup(s) Duplicated the current keygroups being edited. Sample Menu Use MIDI / Use SCSI If possible use SCSI rather than OMS MIDI- it is much faster Selects MIDI or SCSI for communicating with the external devices. If you are using MIDI, the menu will read "Use SCSI", and if you are using SCSI, it will indicate "Use MIDI". To perform the MIDI communication, the OMS Plug file must be moved in the PlugIns Folder.
Program Selector Window The Program Selector Window lets you select the program and select, add and delete the keygroups, and the on/off control of Solo function. Program: Solo Button: Keygroups: Keygroups to Edit: To select a set of discontinuous keygroups, hold the shift key down and click MESA II Selects the program to be edited. This program can be edited on the other Windows. Lets you play the selected program only. "+" and "-" buttons let you add/delete the keygroups.
Control Center Window The main access Window to edit programs The Control Center Window provides almost all controls that are used to create and edit a program from the front panel of Sampler. The Control Center Window is divided into the several sections, and the pop-up menu at the top of each section lets you choose the section to edit. For example, the top left section can be used as either "Output & Levels" or "MIDI Setup".
Output & Levels This section lets you set the parameters related to the output of the program. MIDI Setup This section lets you set the MIDI related parameters of the program.
Tuning & Bend This section lets you set the parameters related to the tuning and bend of the program. Portament This section lets you set the parameters related to the portament of the program. Filter 1 (2) This section lets you set the parameters related to the Filter 1 (2) of the program.
Modulation This section lets you set the parameters related to the modulation of the program. LFO 1 This section lets you set the parameters related to the LFO1 of the program.
LFO 2 This section lets you set the parameters related to the LFO2 of the program. VerocityZone 1 (2, 3, 4) This section lets you set the parameters related to the Velocity Zone of the program.
Envelope 1 This section lets you set the parameters related to the Envelope 1 of the program. Envelope 2 (3) This section lets you set the parameters related to the Envelope 2 (3) of the program. Temperament This section lets you set the parameters related to the tuning template of the program. Filter 2, Envelope 3, and etc. can be set if 2'nd Filter IB-304F (an option for some types of Samplers) is installed on the Sampler.
Sample Assign & Key Span Window This window is used to assign samples, their keyspan, and their velocity zone for each keygroup in a selected program. Audition samples Select velocity zones Assign key spans On the keyboard at the top of Window, clicking a note key will play the sample. The setting is performed on each keygroup. Setting items are as follows; kg; Keygroup number lo(hi); The key range can be typed from the keyboard or dragged with the mouse.
Memory Window The Memory Window shows the programs and samples that are currently residing in the Sampler memory. It also shows you how much Sampler memory is free. The upper part of the window shows; Programs in memory: Number of programs in the Sampler memory. Samples in memory: Number of samples in the Sampler memory. Program being edited: Name of the current program being edited.
Disk Window The Disk Window shows the contents of a floppy disk or the external SCSI devices connected to the Sampler. Check what's on the Sampler Disk Select Sampler partitions and volumes The upper part of the window shows; Floppy icon: Clicking this icon accesses to the floppy disk. SCSI icon: Clicking this icon accesses to the SCSI devices connected to the Sampler. Total in volume: Total capacity of the currently selected volume.
Quick Access Window The main access window for mixing programs The Quick Access Window provides an easy access to the key parameters in all programs and keygroups in the Sampler. Quickly access a program's key parameters All the programs in the Sampler are shown in the Program Field. Click on a little arrow mark beside the program name, or select the program name and press Enter key; the keygroup parameters will be shown.
Multi Window Only XL-series Samplers support this function. This function is not supported by S2800, S3000, S3200, and CD3000. The Multi Window sets the multi mode parameters of the Sampler. The manipulation of this window is the same as that of Quick Access Window.
FX Routing/Selection Window The Effect related windows open up only when the EB16 Effect board is installed in the Sampler. The FX Routing/Selection Window sets the input/output parameters of 4 Effect buses. It is also used to set the Effect and its routing to the current program. Mute: External Input: Output: Program FX bus: Keygroup FX bus: Effect/Reverb pop-up menus: Level and Pan section: FX Routing dial: Dir Signal: MESA II Switches On/Off the bus output.
Ring Mod/Distortion Window The Distortion simulates the distortion as if the input signal is overloaded. The Ring Modulator is an Effect of the input signal being modulated by the internal oscillator. Experiment the sound without any metallic sound. The Ring Mod/Distortion Window sets the Ring Modulator and Distortion parameters.
Modulation Window The Modulation Window sets the modulation parameters. There are 5 types of modulation functions available: one can be used selecting from the "Function" pop-up menu. Phase/Flange/Chorus The Phaser brings the sound with so called "swooshing" Effect. The Flanger also gives the sound with the "swooshing" Effect, but brings more deep sound. The Chorus gives the effect like the several music instruments are simultaneously played.
Freq Mod/Auto Pan Experiment the Vibrato, Doppler effect, etc.
Pitch Shift + Fdbk Adds the delay effect on the pitch shift Semi: Cent: Delay: Feedback: Sets the amount of shift in semi-tone step Sets the amount of shift in cent (1/100 of semi-tone) step Sets the delay time Sets the feedback amount Bypass Bypasses this module.
Delay/Echo Window Widens the sound by overlapping the delayed sound to the original sound The Delay/Echo Window sets the Delay/Echo parameters. There are 4 types of Delay/Echo functions available, Mono L, Mono L+R, Crossover L+R, and Stereo: one can be used selecting from the "Mode" pop-up menu.
Reverb Window Adds reverb to the original sound The Reverb Window sets the Reverb parameters. There are several types of Reverb functions available: one can be used selecting from the "Type" pop-up menu.
FX Filing and Naming Window Controls the Effect file Note that only one Effect file can be saved to one disk volume in the Sampler disk This window will let you rename the Effect and Reverb names, and copy, save and load the files. FX Filename: Effects List: Reverb List: Name of Effect file. Click it with mouse to rename it. List of Effect set List of Reverb set When saving the entire Effect file to a Sampler disk, select "Save..." from the File Menu.
Audio Editor In this chapter, the Menu Commands and Windows regarding the Audio Editor will be explained. Selecting the “Audio Editor” from MESA II Editor Menu changes to the Audio Editor. File Menu New Audio Editor Creates a new Audio Editor Window. Open... Opens a Audio file saved in your Mac. Acceptable file types depend on the “Audio Filing” folder in the PlugIns . Close Closes the active Window. When all the Windows are closed, the Audio Editor itself will close.
Edit Menu Undo Allows you to undo the last edit operation. Cut Not enabled. Copy Copies selected 16 bit audio data to the clipboard (‘snd’ format) Paste Pastes 16 bit audio copied from the clipboard into the same Audio Editor Window, another Audio Editor Window or any other Mac applications. The start of Pasted is the insertion point of the Cursor. Paste + Merge Pastes 16 bit audio copied from the clipboard into the selected area of the Audio Editor Window, and merges (mixes with present audio data) it.
View Menu The View Menu sets the parameters of Audio Editor display. Tool Bar Opens the Tool Bar Window. It contains the editing tools for working in an Audio Editor Window. See the Tool Bar Window section for a detailed description. Info Bar Opens the Info Bar Window. It contains information about the audio in the active Audio Editor Window. See the Information Bar Window section for a detailed description. Sample Points Set you Ruler Style Sets the time display style to Sample Points for the Ruler.
DSP Menu Select the editing part and channel first, then use this DSP functions. The DSP Menu contains various Digital Signal Processing functions. The options in the DSP Menu corresponds to the DSP PlugIns that are present in the MESA Pouch/ PlugIns/DSP folder. First select the editing part and channel, then use DSP.
Fade... Allows you to fade in/fade out in either logarithmic (Log) or linear (Lin) form. High Pass Filter... Sets the cutoff frequency to cut the lower frequency component of sound. Select the filter slope: 6dB/Oct or 12dB/Oct, and adjust the gain. Invert Inverts the wave form up side down. Low Pass Filter... Sets the cutoff frequency to cut the higher frequency component of sound. Select the filter slope: 6dB/Oct or 12dB/Oct, and adjust the gain. Noise Creates a random noise.
Quick Filter... Integrates the High Pass and Low Pass Filters into the one window. Select either one of them. Reverse Reverses the wave form front side back. Time Stretch... Extends or shortens the time axis without changing the musical tone. Original: Sample Points (Sample Length) of original sample. Required Length: Sample Length after performing the Time Stretch. Type: Selects the type of sound source. Quality: Selects the quality of Time Stretch. It will take a longer time at Best selection.
Audio Editor Window Start Marker Title Bar Loop Start Marker Ruler Loop End Marker End Marker The main access window for editing samples Overview Area Edit Area Selected Area Title Bar: Ruler: Overview Area: Displays the sample name. Shows the location in the unit specified in the View Menu. Shows the whole sample wave form. The area shown in the Edit Area appears by surrounded dotted line. Edit Area: Shows the sample wave form for editing. Possible to enlarge/scale down the display.
another mono sample of the same length copied from other Audio Editor Window to an empty right channel to make a stereo file. If a stereo sample is saved to your Mac from the Audio Editor Window, it will be saved as one stereo AIFF file. If you drag and drop a stereo sample to the Memory Window of the Sampler Editor, it will be saved as two separate mono files.
Tool Bar Window Select a Tool and edit a sample with it The Tool Bar Window provides tools and transport controllers to edit samples. If the Tool Bar Window is not open, select “Tool Bar” from the View Menu. The drawing of the Tool Bar Window are; Arrow Tool SelectionTool Zoom Tool Speaker Tool Drag Tool Play/Stop Tool Pencil Tool Fit Button Enlarge (V) Button Shrink (Y) Button Enlarge (H) Button Shrink (H) Button Ruler Switch Loop Switch Note that the top six blue icons are the Tool buttons.
Drag Tool You can drag the wave form from the Audio Editor Window and drop it to the Finder or to the Memory Window in the Sampler Editor to save. Pencil Tool Enables you to draw wave form freely. You can remove the noise, etc. by actually drawing the wave form. Play/Stop Button Spacebar does the Play/Stop functions Select the area in the Overview Area and this shows the selected area in the Edit Area. One click plays the sample and the second one stops it playing.
Info Bar Window The Info Bar Window shows the information about the sample in the Audio Editor Window. Displays the information about the sample being edited Rename the Sample directly in the Title bar Change the display unit selecting from the View Menu To open the Info Bar Window, select Info Bar from the View Menu. If several Audio Editors Audio Editor.
Record Window The Record Window opens up when “Record...” is selected from the File Menu. In this Window, the sample will be recorded on your Mac, but not recorded on the Sampler.
MIDI Keyboard MIDI Keyboard Editor provides a very basic Mac interface to let you play MIDI Notes with the little keyboard on the screen to the Sampler over MIDI. For this communication, OMS MIDI must be installed on your Mac. You can play simple MIDI notes without using an external MIDI keyboard.
MESA II AppleScript Use AppleScript to extend the functionality of MESA II and to improve your work efficiency Scripts must be saved as applications MESA II comes with a useful suite of scripts AppleScript is available to Mac user as part of the Mac OS (version 7.5 or later), and is a very simple programming language that can be used as very powerful method to perform "batch" operations automatically on the data in an application. MESA II is fully compatible with AppleScript.
"Display Dialogue" ("Display"). If these scripts do not work on your system, either remove the references files of the offending objects or try to recover the missing objects. In your extensions folder in the system folder, there should be the system script objects stored in a folder called "Scripting Additions".
Troubleshooting Symptoms MESA II does not boot The Mac freezes No access to external devices Suspected Cause The file is not in the correct location. Troubleshooting Check that the Editors and PlugIns that you want to use are in the "MESA Pouch" Folder, and this Folder resides in the same directory (location) as the MESA II application. Necessary extensions are not installed. If you run an older Mac System OS than v 7.5, check whether you have the necessary extensions installed.
No AppleScript functions AppleScript has not been installed correctly. Reinstall AppleScript. Large samples not loaded Allocated memory size is not enough. Select MESA II icon from the Finder, and select "Get Info..." from the "File" Menu to change the memory allocation. MESA II If you are running Mac OS v 7.5, you can rectify this easily as it comes with a complete AppleScript Setup Installation. If you use System 7.
% 1-3, Hiranuma 1-chome, Nishi-ku, Yokohama, Japan 000420-2 APC Printed in Japan