QUICKSTART MANUAL ENGLISH (1 – 14) GUÍA DE INICIO RÁPIDO ESPAÑOL (15 – 28) GUIDE D'UTILISATION RAPIDE FRANÇAIS (29 – 42) KURZANLEITUNG DEUTSCH (43 – 56) GUIDA RAPIDA ITALIANO (57 – 70)
QUICKSTART GUIDE BOX CONTENTS Please make sure the following items can be located in the box: XR20 Power Adapter (12V DC 500mA) Quickstart Manual Reference Manual Safety and Warranty Information READ THE SAFETY AND WARRANTY INFORMATION BOOKLET BEFORE USING THIS PRODUCT! CONNECTION DIAGRAM As you hook up the XR20, the volume control on your power amp and the XR20 should be all the way down, and power to both units should be off. 1. 2. 3. 4. 5. 6. 7. 8.
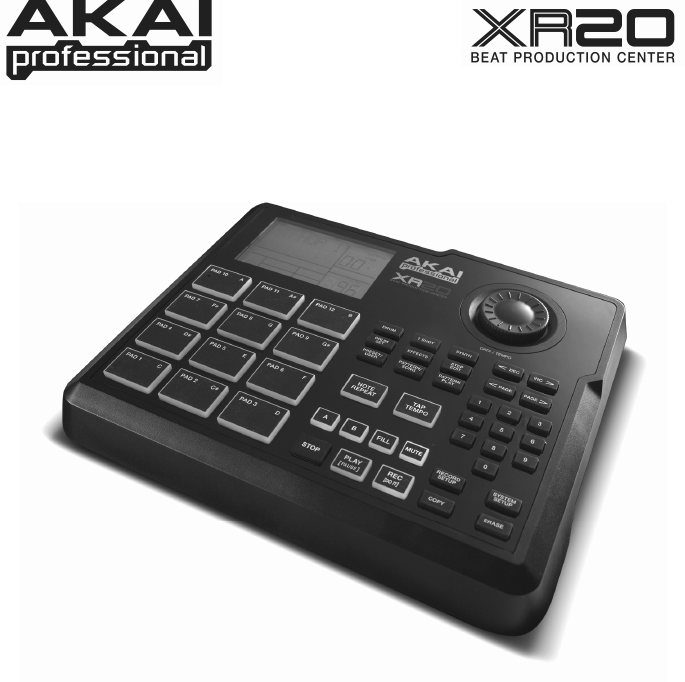
INTRODUCTION TO THE XR20 Welcome to the XR20 Beat Production Center. The XR20 allows you to quickly and easily program drum, 1 shot and synth sounds into rhythm Patterns and to turn these Patterns into Songs. Let’s begin with a quick explanation of some of the key elements: PATTERNS VS. SONGS PATTERNS – When recording with a drum machine, it's often easier to divide a song into shorter individual Patterns and work on these rather than record an entire song.
OVERVIEW OF THE CONTROLS Now that we have introduced you to the infrastructure of the XR20, let’s dive in and take a closer look at some of the controls. GENERAL CONTROLS: 1. LCD – The display helps you keep track of system parameters and settings as you use the XR20. 2. PADS – The 12 pads are used to trigger sounds on the XR20. The pads can address 3 different types of sounds: drums, 1 shot and synth.
5. TAP TEMPO – You can use this button to tap in a tempo. The XR20 will average the time between successive taps and will derive a tempo. You can also change the tempo by holding down the TAP TEMPO button and using the VALUE dial, the INC / DEC buttons or entering a value with the numeric keypad. The LED will blink at a rate equal to the tempo displayed on the screen’s bottom right corner. 6. A & B – Each Pattern consists of two Main sub-patterns – A & B.
MODE BUTTONS: 15. PATTERN / SONG – This button toggles between the two different modes on the XR20. In Pattern Mode, you can play, record and edit individual patterns. Patterns are short (i.e. 8-beat, 16-beat, etc) rhythm sequences which are assembled together to create Songs. A Song is a sequence of Patterns. In Song Mode, you can perform or program your Patterns to create a Song. The currently selected mode will be indicated on the display. 16.
PLAYING PATTERNS STEP 1 If the display’s upper right window shows SONG, press the PATTERN / SONG button once to select Pattern Mode. STEP 2 If the display’s upper right window shows USER, press the PRESET / USER button once until USER disappears; this selects the Preset patterns. STEP 3 Press the INC / DEC buttons or use the DATA dial to select a Pattern. You can also enter a Pattern number (00-99) with the number buttons. Use a “leading zero” (i.e. 01, 02, 03) for the first nine Patterns.
PLAYING FILLS STEP 1 Begin by selecting a Pattern and pressing PLAY. STEP 2 Press and release the FILL button while the main A Pattern is playing. You’ll hear a drum fill that leads right into the associated B Pattern. STEP 3 Press the FILL button again. A different fill will transition from the B Pattern back into the A Pattern. STEP 4 Fills do not always have to be transitional Patterns. Suppose an A Pattern is playing.
RECORDING YOUR OWN PATTERNS STEP 1 If the display’s upper right window shows SONG, press the PATTERN / SONG button once to select Pattern Mode (PATTERN will be displayed). STEP 2 If the display’s upper right window does not show USER, press the PRESET / USER button once to select User Patterns (USER will be displayed in the upper right corner). STEP 3 Press the INC / DEC buttons or use the DATA dial or number buttons to select an empty Pattern. If the Pattern is empty, the display will read EMPTY PATT.
STEP 8 Now you are ready to start recording your Pattern. Press and hold the REC button, then press PLAY to begin recording. The REC LED will illuminate to let you know that you are recording. STEP 9 You will hear a metronome sound and the top line of the screen will display the Pattern’s current Beat Number. Play the pads to the beat. As the Pattern loops, you can add more layers until you are satisfied. Note that the Quantization and Swing settings will affect how your pattern is recorded.
LOADING AND CREATING DRUM SETS The XR20 has 100 Preset and 100 Editable Drum Sets (groups of sounds). After pressing the DRUM SET button, you can use the INC / DEC buttons, the DATA dial, or the number buttons to select a different set (each set can have its own sounds, tuning, volume, panning, etc). You may also edit individual pad sounds within each kit. In addition, you may also choose different Synth sounds for each kit. STEP 1 Press the DRUM SET button to bring up the Drum Set Menu.
STEP 7 Note that Drum and 1 Shot sounds are grouped in each Drum Set. This means that changing the drum sounds to a different set on page 1 of the Drum Set menu will cause the 1 Shot sounds to change as well (although individual pad sounds may be replaced freely once a Drum Set has been loaded). You can, however, independently choose a different set of Synth sounds for the selected set.
CREATING AND ERASING SONGS The XR20 can remember the order in which you selected Patterns, which variations were selected, and when you selected fills. Recording this information in XR20’s Song Mode creates a complete Song. Begin with the XR20 stopped. STEP 1 Select Song Mode by pressing the PATTERN / SONG button so the display says SONG. STEP 2 The display should say EMPTY SONG. If not, press the INC / DEC buttons (or use the DATA dial) to select an empty song.
STEP 6 Once you have finished creating the sequence of Patterns for your Song, press the STOP button to stop the recording. STEP 7 You will see the screen displayed on the right. The top line will indicate the last step of the Song (STEP 48 in this example) and the bottom line will say END. To move between the steps, use the PAGE RIGHT / LEFT buttons. Each step of the sequence will show the Pattern associated with it.
FOOTSWITCH CONTROL Now that we have the basics down, let's investigate some live performance options using footswitch control. This is particularly useful if you're playing along with Patterns and Songs on the pads and can't use your hands to punch buttons. There are two jacks for footswitches (Start/Stop and Count/A/B/Fill). Always plug these footswitches in before turning on power.
GUÍA DE INICIO RÁPIDO CONTENIDO DE LA CAJA Asegúrese de que la caja contenga los siguientes elementos: XR20 Adaptador de alimentación (12 V CC 500 mA) Manual de inicio rápido Manual de referencia Información sobre la seguridad y la garantía ¡LEA EL FOLLETO DE INFORMACIÓN SOBRE LA SEGURIDAD Y LA GARANTÍA ANTES DE USAR ESTE PRODUCTO! DIAGRAMA DE CONEXIÓN Cuando se conecta la XR20, el control de volumen de su amplificador de potencia y de la XR20 deben estar totalmente al mínimo y la alimentación de ambas u
INTRODUCCIÓN A XR20 Bienvenido al Centro de producción de beats XR20. El XR20 le permite programar rápida y fácilmente sonidos de tambor, “1 shot” y de sintetizador en patrones de ritmo y convertir estos patrones en temas musicales. Comencemos por explicar rápidamente algunos de los elementos más importantes: PATRONES Y TEMAS MUSICALES PATRONES - Al grabar con una caja de ritmos, a menudo es más fácil dividir un tema en patrones individuales y trabajar sobre estos en vez de grabar toda el tema.
DESCRIPCIÓN GENERAL DE LOS CONTROLES Ahora que le hemos introducido en la infraestructura de la XR20, echemos un vistazo más detenido a algunos de los controles. CONTROLES GENERALES: 1. LCD – La pantalla le ayuda a mantener el seguimiento de los parámetros y valores de ajuste del sistema mientras usa la XR20. 2. PADS – Los 12 pads se usan para disparar sonidos en el XR20. Los pads pueden admitir 3 tipos de sonidos diferentes: tambores, 1 shot y sintetizador.
6. A y B – Cada patrón consiste en dos subpatrones principales – A y B. Puede seleccionar cada uno de los dos subpatrones pulsando su botón correspondiente. Estos subpatrones le permiten programar variaciones en sus patrones (por ej., el subpatrón A es el verso y el B el coro). 7. FILL – Cada patrón incluye también dos rellenos asociados con cada uno de los dos subpatrones. Los rellenos se usan para hacer la transición entre un subpatrón y otro (por ej., transición de verso a coro). 8.
BOTONES DE MODO: 15. PATTERN / SONG – Este botón conmuta entre los dos modos diferentes de la XR20. En modo Pattern (Patrón), puede reproducir, grabar y editar patrones individuales. Los patrones son breves secuencias de ritmos (de 8 beats, 16 beats, etc.) que se ensamblan para crear temas musicales. Un tema es una secuencia de patrones. En modo Song (Tema) puede interpretar o programar sus patrones para crear un tema musical. El modo seleccionado se muestra en la pantalla. 16.
CÓMO REPRODUCIR PATRONES PASO 1 Si la ventana superior derecha de la pantalla muestra SONG (Tema), presione el botón PATTERN/SONG una vez para seleccionar el modo de patrón. PASO 2 Si la ventana superior derecha de la pantalla muestra USER (Usuario), pulse el botón PRESET / USER una vez hasta que desaparezca —de esta forma se seleccionan los patrones predeterminados. PASO 3 Pulse los botones INC / DEC o use el cuadrante DATApara seleccionar un patrón.
CÓMO REPRODUCIR RELLENOS PASO 1 Comience seleccionando un patrón y pulse PLAY. PASO 2 Presione y suelte el botón FILL (relleno) mientras se está reproduciendo el patrón principal A. Escuchará un relleno de batería que conduce directamente al patrón B correspondiente. PASO 3 Presione el botón FILL otra vez. Un relleno diferente realizará la transición del patrón B de vuelta al patrón A. PASO 4 Los rellenos no tienen que siempre ser patrones de transición. Suponga que se está reproduciendo un patrón A.
CÓMO GRABAR SUS PROPIOS PATRONES PASO 1 Si la ventana superior derecha de la pantalla muestra SONG (Tema), presione el botón PATTERN/SONG una vez para seleccionar el modo de patrón (aparece PATTERN). PASO 2 Si en la ventana superior derecha de la pantalla no aparece USER, pulse el botón PRESET / USER una vez para seleccionar los patrones del usuario (aparece USER en la esquina superior derecha).
PASO 8 De esta forma queda listo para comenzar a grabar su patrón. Pulse y retenga el botón REC y pulse PLAY para iniciar la grabación. Se ilumina el LED REC para hacerle saber que está grabando. PASO 9 Escuchará un sonido de metrónomo y la línea superior de la pantalla mostrará el número de beat actual del patrón. Toque los pads de acuerdo al beat. A medida que se produce el loop del patrón, puede agregar más capas hasta que esté satisfecho.
CÓMO CARGAR Y CREAR CONFIGURACIONES DE BATERÍA La XR20 cuenta con 100 configuraciones de batería (grupo de sonidos) predeterminados y 100 editables. Después de pulsar el botón DRUM SET, puede usar los botones INC / DEC, el cuadrante DATAo los botones de números para seleccionar una configuración diferente (cada configuración puede tener sus propios sonidos, afinación, volumen, panning, etc). Puede editar también sonidos de pads individuales dentro de cada kit.
PASO 7 Tome nota de que los sonidos de tambores y 1 shot se agrupan en cada configuración de batería. Esto significa que cambiar los sonidos de tambores a un conjunto diferente en la página 1 del menú Drum Set causa que los sonidos de 1 shot cambien también (si bien los sonidos de pads individuales se pueden reemplazar libremente una vez cargada una configuración de batería). Es posible, sin embargo, elegir un conjunto diferente de sonidos de sintetizador para la configuración seleccionada.
CÓMO CREAR Y BORRAR TEMAS La XR20 puede recordar el orden en que el usuario seleccionó los patrones, qué variaciones fueron seleccionadas y cuándo se seleccionaron los rellenos. Al grabarse esta información en el modo de canción de XR20, se crea un tema completo. Comience con la XR20 detenida. PASO 1 Seleccione el modo de tema pulsando el botón PATTERN / SONG de modo que la pantalla indique SONG. PASO 2 La pantalla debe indicar EMPTY SONG (Tema vacío).
PASO 6 Una vez que termine de crear la secuencia de patrones de su tema, pulse el botón STOP para detener la grabación. PASO 7 Verá la pantalla ilustrada a la derecha. La línea superior indica el último paso del tema (STEP 48 en este ejemplo) y la línea inferior indicará END (Fin). Para desplazarse entre los pasos, use los botones < PAGE / PAGE >. Cada paso de la secuencia muestra el patrón asociado con el mismo.
CONTROL CON PEDALES Ahora que conocemos los puntos básicos, veamos algunas opciones de espectáculo en vivo usando el control del interruptor de pedal. Esto es especialmente útil si está tocando con patrones y canciones en los pads y no puede usar las manos para presionar los botones. Hay dos conectores para los interruptores de pedal (Start/Stop y Count/A/B/Fill). Siempre enchufe estos interruptores de pedal antes de conectar la alimentación.
GUIDE D’UTILISATION RAPIDE CONTENUE DE LA BOÎTE Assurez-vous que tous les articles énumérés ci-dessous se retrouvent dans la boîte : Guide de référence Consignes de sécurité et information sur la garantie XR20 Bloc d’alimentation (12 V CA 500 mA) Guide d'utilisation simplifié AVANT D'UTILISER CE PRODUIT, VEUILLEZ LIRE LES CONSIGNES DE SÉCURITÉ ET L'INFORMATION CONCERNANT LA GARANTIE.
INTRODUCTION AU XR20 Voici le studio de production XR20 La XR20 vous permet de programmer rapidement et facilement des sons de batterie, de synthétiseur et 1 Shot dans des enchaînements rythmiques, puis de tourner ces enchaînements en chansons. Commençons avec une petite explication de certains éléments clés : ENCHAÎNEMENTS CONTRE CHANSONS PATTERNS –When recording with a drum machine, it's often easier to divide a song into shorter individual Patterns and work on these rather than record an entire song.
SURVOL DES COMMANDES Maintenant que nous vous avons présenté l’infrastructure du XR20, nous regarderons les commandes de plus près. COMMANDES PRINCIPALES : 1. ACL – L’écran d’affichage vous permet de garder un oeil sur les paramètres et les réglages du système du XR20. 2. PADS – Les 12 PADS sont utilisés pour déclencher les sons du XR20. Les pads peuvent déclencher 3 types de son différents : batterie, 1 Shot et synthétiseur.
6. A et B – Chaque enchaînement est fait de deux sous enchaînements principaux, A et B. Vous pouvez sélectionner chacun des deux sous enchaînements en appuyant sur la touche correspondante. Ces sous enchaînements vous permettent d'ajouter des variations dans vos enchaînements (par exemple, le sous enchaînement A est le couplet, le sous enchaînement B est le refrain). 7. FILL – Chaque enchaînement contient également deux rythmes de remplissage associés avec les deux sous enchaînements.
TOUCHES DE NAVIGATION : 11. INC/DEC – Ces touches permettent d’augmenter ou de diminuer les valeurs et les réglages du XR20. 12. DATA – Cette molette permet également d’augmenter ou de diminuer les valeurs et les réglages. 13. TOUCHES NUMÉROTÉES – Vous pouvez également utiliser ces touches afin d’entrer les valeurs. 14. < PAGE / PAGE > – Ces deux touches permettent de passer d’une page à l’autre du menu des options. TOUCHES DES MODES : 15.
TOUCHES DE DÉFILEMENT : 23. PLAY - If the XR20 is stopped, pressing PLAY will play the sequence from the current position. Si le XR20 est en cours de lecture et que la touche PLAY est enfoncée, la séquence sera pausée. Pour retourner au début de l’enchaînement encours (ou étape en cours si vous êtes en mode Song) appuyez sur les touches < PAGE. Pour aller au début de l’enchaînement suivant (ou l’étape suivante si vous êtes en mode Song) appuyez sur les touches PAGE >. 24.
UTILISATION DE SÉQUENCES D’ENCHAÎNEMENTS ÉTAPE 1 Commencez par sélectionner un enchaînement et en appuyant ensuite sur la touche PLAY. ÉTAPE 2 Si un enchaînement A joue, appuyez sur la touche B (ou A si c’est un enchaînement B qui joue). L’enchaînement d’alternance commence à jouer aussitôt que l’enchaînement en cours se termine. ÉTAPE 3 Vous pouvez également faire appel à un numéro d’enchaînement différent lorsque le XR20 joue.
ÉTAPE 3 Frappez un autre pad. L'enchaînement assigné au pad commencera à jouer dès que l’enchaînement précédent tire à sa fin. ÉTAPE 4 Pour modifier l’enchaînement assigné à un pad, appuyez sur la touche PAGE >. Appuyez sur le pad que vous désirez modifier. Maintenant, utilisez la molette DATA, les touches INC/DEC ou les touches numérotées pour sélectionner un enchaînement qui sera déclenché par le pad. Vous pouvez également spécifier A, B ou FILL pour enchaînement sélectionné.
ÉTAPE 5 Sur la page 1 (indiqué dans le coin inférieur droit de l’écran) du menu de configuration d’enregistrement (Record Setup), vous pouvez sélectionner l’intervalle de quantification à l’aide des touches INC/DEC ou de la molette DATA. La quantification modifie le son au rythme spécifié lorsque vous jouez, alors il est préférable de choisir la valeur désirée avant d'essayer vos rythmes. Sélectionnez des réglages de quantification plus élevés pour un son plus précis et plus complexe rythmiquement.
ÉTAPE 12 Une fois satisfait avec l’enchaînement que vous avez enregistré, appuyez sur la touche STOP afin de faire arrêter l’enregistrement. ÉTAPE 13 Pour écouter l’enchaînement, appuyez sur la touche PLAY. ÉTAPE 14 Pour enregistrer d’autres enchaînements, sélectionnez un autre enchaînement à l’aide des touches INC/DEC ou de la molette DATA, et répétez la procédure cidessus.
ÉTAPE 3 Frappez les pads pour faire l’écoute des sons de l’ensemble. Pour modifier le son assigné à un pad, appuyez sur la touche PAGE > (page 2). Appuyez sur le pad pour accéder à ses propriétés. Le numéro du pad sera affiché dans le coin supérieur droit de la fenêtre (8 dans cet exemple), le nom du son assigné au pad sera affiché sur la première ligne (CowBell5 dans cet exemple) et le numéro du son sera affiché sur la dernière ligne (252 dans cet exemple).
ÉTAPE 9 Lorsque vous êtes satisfait de l'ensemble de sonorité de batterie, vous devez le sauvegarder. Autrement, vos réglages seront supprimés lorsque l’appareil sera mis hors tension. Pour sauvegarder l’ensemble, appuyez sur la touche SAVE. Tout en maintenant la touche SAVE enfoncée, utilisez les touches INC/DEC, la molette DATAou les touches numérotées afin de sélectionner un emplacement pour sauvegarder votre ensemble de sonorité de batterie.
ÉTAPE 5 Pour sélectionner l’enchaînement suivant, utilisez les touches INC/DEC. Vous pouvez également utiliser la molette DATAou entrer un numéro d’enchaînement à l’aide des touches numérotées. N’oubliez pas d’ajouter un zéro à gauche pour les enchaînements 0 à 9 (p. ex. 00, 05, 09, etc.). L’écran affichera NEXT et le numéro d’enchaînement inscrit s’affichera sur la dernière ligne. L’enchaînement commence à jouer aussitôt que l’enchaînement en cours se termine.
RÉGLAGE DE L'INTERRUPTEUR AU PIED Maintenant que nous connaissons les fonctions de base, passons aux options de réglage de l'interrupteur au pied pour les performances en direct. Ceci est particulièrement utile lorsque vous vous accompagniez d'enchaînements et de chansons en utilisant les pads et que vous ne pouvez vous servir de vos mains pour appuyer sur les touches. Il y a deux prises pour les interrupteurs au pied (Marche/Arrêt (Start/Stop) et Comptage/A/B/Remplissage (Count/A/B/Fill)).
AUFBAUANLEITUNG INHALT DER VERPACKUNG Überprüfen Sie bitte, dass folgende Bestandteile in der Verpackung enthalten sind: XR20 Netzteil (12V DC 500mA) Kurzanleitung Bedienungsanleitung Sicherheits- und Garantieinformationen BITTE LESEN SIE DIE SICHERHEITS- UND GARANTIEINFORMATIONEN VOR DER VERWENDUNG DES PRODUKTS! ANSCHLUSSÜBERSICHT Beim Anschluss der XR20 sollten der Lautstärkeregler des Verstärkers und der XR20 zugedreht sein. Beide Geräte sollten ausgeschaltet sein. 1. 2. 3. 4. 5. 6. 7. 8.
EINFÜHRUNG ZUR XR20 Willkommen zum XR20 Beat Production Center. Das XR20 ermöglicht es, schnell und einfach aus Drums, 1 Shot und Synth Sounds Rhythmuspatterns zu programmieren und diese Patterns zu Songs zu kombinieren. Beginnen wir mit einer kurzen Erklärung der Grundelemente: PATTERNS UND SONGS PATTERNS – Bei der Aufnahme mit einer Drum Machine ist es oftmals einfacher, einen Song in einzelne kurze Patterns zu unterteilen und mit diesen, anstatt mit einem ganzen Song zu arbeiten.
ÜBERBLICK ÜBER DIE BEDIENELEMENTE Nun, da wir die Grundfunktionen der XR20 kennen gelernt haben, XR20, sollten wir uns die Bedienelemente des Gerätes genauer ansehen. ALLGEMEINE BEDIENELEMENTE: 1. LCD – Das Display hilft Ihnen bei der Arbeit und zeigt Systemparameter und Einstellungen der XR20 an. 2. PADS – Die 12 Pads werden zum Spielen der Sounds des XR20 verwendet. Über die Pads können Sie drei verschiedene Soundarten ansprechen: Drums, 1 Shot und Synth.
7. FILL – In jedem Pattern sind zwei Fills enthalten, die als Übergang zu einem der Sub-Patterns dienen (z.B. Übergang von der Strophe zum Refrain). 8. ERASE – Diese Taste dient zum Löschen von Patterns oder Songs. Halten Sie dazu diese Taste gedrückt. Im LCD erscheint eine Abfrage, die von Ihnen verlangt, den Vorgang zu bestätigen. Um den Part zu löschen, drücken Sie die REC Taste, während ERASE gedrückt gehalten wird.
16. PRESET / USER – Diese Taste schaltet zwischen den Preset und User Patterns um. Der gewählte Modus wird in der oberen rechten Ecke des Displays angezeigt. In den Preset Patterns finden Sie zahlreiche Hip-Hop Rhythmen, die von professionellen Drummern programmiert wurden und nicht überschrieben oder editiert werden können. Damit Sie Preset Patterns bearbeiten können, müssen Sie es als User Pattern kopieren. User Patterns sind Patterns, die Sie editieren und abspeichern können (sofern Sie das wollen).
PATTERNS ABSPIELEN SCHRITT 1 Falls das Display in der oberen rechten Ecke SONG anzeigt, drücken Sie die PATTERN / SONG Taste einmal, um den Pattern Modus auszuwählen. SCHRITT 2 Wenn im rechten oberen Displaybereich USER angezeigt wird, drücken Sie PRESET / USER einmal, bis USER verschwindet; dadurch wählen Sie die Preset Patterns aus. SCHRITT 3 Wählen Sie mit den INC / DEC Tasten oder mit dem DATARad ein Pattern aus. Sie können auch eine Pattern Nummer (00-99) mit dem Ziffernblock eingeben.
FILLS ABSPIELEN SCHRITT 1 Wählen Sie ein Pattern aus und drücken Sie PLAY. SCHRITT 2 Drücken Sie während der Wiedergabe des Main A Patterns die FILL Taste und lassen Sie sie los. Sie hören nun ein Drum Fill, welches dann zum dazugehörigen B Pattern führt. SCHRITT 3 Drücken Sie noch einmal die FILL Taste. Ein anderes Fill erklingt und leitet vom Main B Pattern zum A Pattern zurück. SCHRITT 4 Fills müssen nicht zwangsläufig zu anderen Patterns überleiten. Nehmen Sie an, ein A Pattern wird abgespielt.
AUFNAHME IHRER EIGENEN PATTERNS SCHRITT 1 Falls in der rechten oberen Seite des Displays SONG anzeigt, drücken Sie einmal die PATTERN / SONG Taste, um den Pattern Modus auszuwählen (PATTERN wird dann angezeigt). SCHRITT 2 Wenn in der rechten oberen Ecke des Displays nicht USER steht, drücken Sie einmal die PRESET / USER Taste. Dadurch wählen Sie ein User Pattern aus (USER wird in der oberen rechten Ecke des Displays angezeigt).
SCHRITT 9 Nun hören Sie einen Metronomsound und in der oberen Zeile des Displays sehen Sie die aktuelle Taktnummer des Patterns. Spielen Sie im Takt des Metronoms auf den Pads. Wenn das Pattern wieder von Beginn loopt, können Sie nach und nach weitere Instrumente durch das Anschlagen der anderen Pads einspielen (Layering), bis Ihnen das Pattern gefällt. Beachten Sie, dass die Einstellungen für Quantisierung und Swing Einfluss darauf haben, wie Ihr Pattern aufgenommen wird.
DRUM SETS LADEN UND ERZEUGEN In der XR20 befinden sich 100 Preset und 100 editierbare Drum Sets (Soundgruppen). Nachdem Sie mit der DRUM SET Taste in den Drum Set Modus gewechselt sind, haben Sie die Möglichkeit mit den INC / DEC Tasten, dem DATARad oder dem Ziffernblock ein Drum Set auszuwählen. Jedes Set besteht aus bestimmten Sounds mit unterschiedlichen Einstellungen für Tonhöhe, Lautstärke, Panorama usw. Einzelne Pad Sounds innerhalb eines Kits lassen sich editieren.
SCHRITT 7 Beachten Sie, dass Drum- und 1 Shot Sounds in jedem Drum Set gruppiert sind. Das bedeutet, dass eine Änderung der Drum Sounds auf Seite 1 des Drum Set Menüs auch eine Änderung der 1 Shot Sounds zur Folge hat (auch wenn sich einzelne Pad Sounds nach dem Laden eines Drum Sets ändern lassen). Sie können jedoch unabhängig davon ein anderes Synth Sound Set für das gewählte Drum Set definieren.
SONGS ERZEUGEN UND LÖSCHEN Die XR20 ist in der Lage, sich die Reihenfolge der von Ihnen ausgewählten Patterns, der gewählten Variationen und die gewählten Fills zu merken. Die Aufnahme dieser Informationen im Song Modus der XR20 erzeugt einen kompletten Song. Beginnen wir bei gestoppter Wiedergabe. SCHRITT 1 Wechseln Sie mit der PATTERN / SONG Taste in den Song Modus. Im Display steht dann SONG. SCHRITT 2 Das Display sollte mit EMPTY SONG einen leeren Song anzeigen.
SCHRITT 6 Nachdem Sie Ihre Pattern Sequenz als Song aufgenommen haben, drücken Sie die STOP Taste, um die Song Aufnahme zu beenden. SCHRITT 7 Nun sehen Sie im Display die hier rechts dargestellte Anzeige. Die obere Zeile zeigt den letzten Step des Songs (STEP 48 in diesem Beispiel) an. In der unteren Zeile steht END. Um zwischen den Steps zu wechseln, nehmen Sie die < PAGE / PAGE > Tasten. Jeder Step einer Sequenz zeigt das dazugehörige Pattern an.
STEUERUNG ÜBER FUßSCHALTER Nachdem wir jetzt die Grundlagen abgehakt haben, können wir uns ein paar Optionen für die Live Performance ansehen, bei denen sich Fußschalter einsetzen lassen. Gerade, wenn Sie zu Ihren Patterns und Songs dazu spielen möchten, und keine Hand zur Bedienung der Tasten frei haben, werden Sie die Fußschalteroptionen bald sehr zu schätzen wissen. Die XR20 besitzt zwei Fußschalter-Anschlüsse (Start/Stop und Count/A/B/Fill).
GUIDA RAPIDA CONTENUTI DELLA CONFEZIONE Assicurarsi che tutti gli elementi elencati di seguito si trovino nella confezione: XR20 Adattatore di alimentazione (12V CC 500mA) Manuale rapido Manuale di riferimento Istruzioni di sicurezza e garanzia PRIMA DI UTILIZZARE IL PRODOTTO, LEGGERE ATTENTAMENTE LE ISTRUZIONI DI SICUREZZA E LA GARANZIA! SCHEMA DEI COLLEGAMENTI Al momento di collegare l’XR20, volume dell’ampli di alimentazione e dell’XR20 stesso devono essere completamente abbassati e l’alimentazione d
INTRODUZIONE ALL’ XR20 Benvenuti al XR20 Beat Production Center. L’XR20 permette di programmare rapidamente e con facilità suoni di batterie, 1 shot e synth in pattern ritmici e di trasformare tali pattern in canzoni Cominciamo con una rapida spiegazione di alcuni degli elementi chiave: PATTERN VS. CANZONI PATTERN: quando si registra con una drum machine, è spesso più facile dividere una canzone in singoli Pattern più brevi e lavorare su questi ultimi piuttosto che registrare un’intera canzone.
PANORAMICA DEI COMANDI Ora che vi abbiamo introdotto all’infrastruttura dell’XR20, tuffiamoci più in profondità e osserviamo più da vicino alcuni dei comandi. COMANDI GENERALI: 1. LCD – Il display vi aiuta a tenere d’occhio i parametri e le impostazioni di sistema durante l’uso dell’XR20. 2. PAD – I 12 pad servono a produrre suoni sull’XR20. I pad possono indirizzarsi verso 3 tipi diversi di suono: batteria, 1 shot e synth.
5. TAP TEMPO – Si può utilizzare questo pulsante per battere un tempo. L’XR20 farà una media degli intervalli intercorsi tra battiti successivi e deriverà un tempo. Si può inoltre cambiare il tempo tenendo premuto il pulsante TAP TEMPO e servendosi del disco DATAo dei pulsanti INC / DEC. Questo LED lampeggerà ad un ritmo pari al tempo visualizzato nell’angolo inferiore destro dello schermo. 6. A & B – Ogni Pattern è composto da due sub-pattern principali: A & B.
TASTI MODE (MODALITÀ) : 15. PATTERN / CANZONE (SONG) – Questo tasto commuta tra le due modalità sull’XR20. In modalità Pattern si possono suonare, registrare e modificare pattern singoli. I pattern sono brevi (cioè 8 battiti, 16 battiti, ecc.) sequenze ritmiche che vengono unite a creare canzoni. Una Canzone è una sequenza di Pattern. In modalità Song si possono eseguire o programmare i pattern per creare una canzone. La modalità attualmente selezionata verrà indicata sul display. 16.
RIPRODUZIONE DI PATTERN FASE 1 Se la finestra superiore destra del display mostra la scritta SONG, premere il tasto PATTERN / SONG una volta per selezionare la modalità Pattern. FASE 2 Se la finestra superiore destra del display mostra la scritta USER, premere il tasto PRESET / USER una volta fino a quando la scritta USER non scompare: così facendo vengono selezionati i pattern Preset. FASE 3 Premere i tasti INC / DEC o servirsi di DATAper selezionare un pattern.
RIPRODUZIONE DI FILL FASE 1 Iniziare selezionando un Pattern e premendo PLAY. FASE 2 Premere e rilasciare il tasto FILL mentre il pattern A principale viene riprodotto. Si sentirà un fill di batteria che porta direttamente al pattern B associato. FASE 3 Premere nuovamente il tasto FILL. Un fill diverso transiterà dal pattern B tornando al pattern A. FASE 4 Non sempre i fill devono essere pattern di passaggio. Supponiamo che stia suonando un pattern A.
REGISTRAZIONE DI PATTERN PERSONALIZZATI FASE 1 Se la finestra superiore destra del display mostra SONG, premere una volta il tasto PATTERN / SONG per selezionare la modalità Pattern (PATTERN apparirà a display). FASE 2 Se la finestra superiore destra del display non mostra USER, premere una volta il tasto PRESET / USER per selezionare “User Patterns” (USER apparirà nell’angolo superiore destro). FASE 3 Premere i tasti INC / DEC o servirsi di DATAo dei tasti numerici per selezionare un pattern vuoto.
FASE 9 Si sentirà il suono di un metronomo e la linea superiore dello schermo mostrerà il numero di battiti correnti del pattern. Suonare i pad al ritmo del beat. Mentre il pattern effettua il loop, è possibile aggiungere più strati fino ad essere soddisfatti. Va notato che le impostazioni di Quantizzazione e Swing influenzerà il modo in cui il pattern viene registrato.
CARICARE E CREARE DRUM SET L’XR20 è dotato di 100 Drum Set predefiniti (Preset) e di 100 Drum Set modificabili (gruppi di suoni). Dopo aver premuto il tasto DRUM SET, si possono utilizzare i tasti INC / DEC, la rotella DATAo i tasti numerici per selezionare un set diverso (ogni set può avere i propri suoni, intonazioni, volume, panoramica, ecc.). Si possono inoltre modificare singoli suoni di pad all’interno di ciascun kit. Per ogni kit si possono poi scegliere diversi suoni di Synth.
FASE 7 Va notato che i suoni di Batteria e 1 Shot sono raggruppati in ciascun Drum Set. Ciò significa che modificando i suoni di batteria ad un set diverso a pagina 1 del menu Drum Set i suoni 1 Shot cambieranno a loro volta (nonostante suoni individuali di ogni pad possano essere sostituiti liberamente una volta caricato un Drum Set). Si può tuttavia scegliere indipendentemente un diverso set di suoni Synth per il set selezionato.
CREARE E CANCELLARE CANZONI L’XR20 è in grado di ricordare l'ordine in cui vengono selezionati i pattern, quali variazioni vengono selezionate e quando sono stati selezionati fill. La registrazione di queste informazioni nella modalità Song dell’XR20 crea una canzone completa. Iniziare con l’XR20 fermo. FASE 1 Selezionare la modalità Song premendo il tasto PATTERN / SONG fino a quando a display non appare la scritta SONG. FASE 2 A display deve apparire EMPTY SONG.
FASE 6 Una volta finito di creare la sequenza di pattern per la vostra canzone, premere il tasto STOP per interrompere la registrazione. FASE 7 Apparirà la schermata illustrata a sinistra. Da linea superiore indicherà l'ultimo intervallo della canzone (STEP 48 in questo esempio) e da linea inferiore dirà END. Per spostarsi lungo gli intervalli, servirsi dei tasti < PAGE / PAGE >. Ogni fase della sequenza mostrerà il pattern ad essa associato.
CONTNOTE REPEATO INTERRUTTORE A PEDALE Ora che abbiamo delineato le cose fondamentali, analizziamo alcune opzioni per le esibizioni dal vivo servendosi del controllo tramite l'interruttore a pedale. Questo è soprattutto utile se si suona al ritmo di pattern e canzoni sui pad e non si possono utilizzare le mani per schiacciare i tasti. Sono presenti due jack deputati agli interruttori a pedale (Start/Stop e Count/A/B/Fill). Collegare sempre gli interruttori a pedale prima di accendere l'alimentazione.
MANUAL VERSION 1.
www.akaipro.