BDA_C414VPL_D030834_Hex 02/27/2009 10:26 C 414 XLS C 414 XLII BEDIENUNGSANLEITUNG . . . . . . . . . . Bitte vor Inbetriebnahme des Gerätes lesen! USER INSTRUCTIONS . . . . . . . . . . . . . . . Please read the manual before using the equipment! MODE D’EMPLOI . . . . . . . . . . . . . . . . . . . . . Veuillez lire cette notice avant d’utiliser le système! S. 2 p. 17 p. 32 ISTRUZIONI PER L’USO . . . . . . . . . . . . . p. 47 Prima di utilizzare l’apparecchio, leggere il manuale! MODO DE EMPLEO .
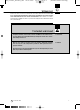
BDA_C414VPL_D030834_Hex 02/27/2009 10:26 Seite 2 (Schwarz/Black Auszug) Inhaltsverzeichnis Seite Willkommen! ............................................................................................................................3 1 Sicherheit und Umwelt......................................................................................................3 1.1 Sicherheit....................................................................................................................3 1.2 Umwelt .
BDA_C414VPL_D030834_Hex 02/27/2009 10:26 Seite 3 (Schwarz/Black Auszug) Willkommen! Vielen Dank, dass Sie sich für ein Produkt aus dem Hause AKG entschieden haben. Bitte lesen Sie die Bedienungsanleitung, insbesondere das Kapitel 1 Sicherheit und Umwelt, aufmerksam durch, bevor Sie das Gerät benützen, und bewahren Sie die Bedienungsanleitung sorgfältig auf, damit Sie jederzeit nachschlagen können.
BDA_C414VPL_D030834_Hex 02/27/2009 10:26 Seite 4 (Schwarz/Black Auszug) 2 Beschreibung 2.
BDA_C414VPL_D030834_Hex 02/27/2009 10:26 Seite 5 (Schwarz/Black Auszug) 2 Beschreibung • Wenn Sie das Mikrofon abschalten (von der Phantomspeisung trennen) und später wieder einschalten (Neuversorgung mit Phantomspeisung), werden die zuletzt gewählten Einstellungen aller drei Wahlschalter automatisch wiederhergestellt. Die jeweils aktuelle Einstellung wird ca.
BDA_C414VPL_D030834_Hex 02/27/2009 10:26 Seite 6 (Schwarz/Black Auszug) 2 Beschreibung 2 Wahlschalter für Vorabschwächung*) Der Wahlschalter 2 an der Rückseite des Mikrofons (siehe Abb. 2) erlaubt, die Aussteuerungsgrenze um 6 dB, 12 dB oder 18 dB hinaufzusetzen, um auch im Nahbereich von Schallquellen verzerrungsfreie Aufnahmen machen zu können.
BDA_C414VPL_D030834_Hex 02/27/2009 10:26 Seite 7 (Schwarz/Black Auszug) 3 Stromversorgung C 414 XLS und C 414 XLII zeichnen sich durch extrem niedriges Eigenrauschen und gleichzeitig hohe Übersteuerungsfestigkeit aus. Um diese strengen technischen Anforderungen zu erfüllen, wurden beide Mikrofone für den ausschließlichen Betrieb mit 48-V-Phantomspeisung nach IEC 61938 ausgelegt. Diese Norm schreibt eine positive Spannung von 48 V an den NF-Leitungen gegen die Kabelabschirmung vor.
BDA_C414VPL_D030834_Hex 02/27/2009 10:26 Seite 8 (Schwarz/Black Auszug) 4 Anwendungshinweise 4.1 Einleitung (C 414 XLII siehe Kapitel 2.4.) 4.2 Tiefenabsenkung Die schaltbare Tiefenabsenkung im Frequenzbereich von 40 bis 160 Hz erlaubt Ihnen, "akustische Störquellen" wie z.B. Luftströmungen von Klimaanlagen o.ä. oder tieffrequente Vibrationen infolge von Bodenschwingungen, Hantierungsgeräuschen usw. wirksam auszublenden, ohne den Klangcharakter des/der aufzunehmenden Instruments/Stimme zu verändern.
BDA_C414VPL_D030834_Hex 02/27/2009 10:26 Seite 9 (Schwarz/Black Auszug) 4 Anwendungshinweise Aufnahmequelle Posaune Horn Tuba Saxophon Querflöte Klarinette Mundharmonika Bass Drum Toms Becken Bongos, Congas C 414 XLS •• •• •• •• •• •• • •• • • • C 414 XLII • •• • •• •• •• •• (Tabelle 2) • • Empfohlen •• Besonders empfohlen Als Einstieg in die "Wissenschaft der Aufnahmetechnik" finden Sie im folgenden einige bewährte Mikrofonaufstellungen. 4.
BDA_C414VPL_D030834_Hex 02/27/2009 10:26 Seite 10 (Schwarz/Black Auszug) 4 Anwendungshinweise 4.6.2 Chor/Begleitchor Für große gemischte Chöre empfehlen wir ein Stereomikrofon sowie je ein Stützmikrofon für Sopran, Alt, Tenor und Bass. In akustisch optimalen Räumen genügt oft ein einziges Stereomikrofon bzw. zwei abgestimmte Monomikrofone. Begleitchor/Variante 1: Falls genügend Spuren vorhanden sind, empfehlen wir, jede Stimme einzeln nacheinander aufzunehmen. Siehe Kapitel 4.6.1 Solostimme. Abb.
BDA_C414VPL_D030834_Hex 02/27/2009 10:26 Seite 11 (Schwarz/Black Auszug) 4 Anwendungshinweise Kontrabass: Richten Sie das Mikrofon aus einer Entfernung von ca. 40 cm auf eines der F-Löcher. Falls der Kontrabass gleichzeitig mit einem Ensemble aufgenommen werden muss, den Abstand verringern und die Richtcharakteristik Hyperniere einsetzen, um Übersprechen anderer Instrumente in das BassMikrofon zu vermeiden. 4.6.4 Kontrabass, Cello Cello/Variante 1: Siehe Kontrabass.
BDA_C414VPL_D030834_Hex 02/27/2009 10:26 Seite 12 (Schwarz/Black Auszug) 4 Anwendungshinweise 4.6.6 Querflöte Wir empfehlen, zwei Mikrofone zu verwenden. Richten Sie Mikrofon 1 schräg von oben auf den Mund des Spielers (wenig Anblasgeräusche), Mikro 2 seitlich auf das Instrument. Abnahme mit nur einem Mikrofon: Wie Mikrofon 1, in ca. 2 m Abstand, 2 bis 2,5 m über dem Fußboden. Abb. 9: Abnahme der Querflöte mit nur einem Mikrofon 4.6.7 Klarinette Richten Sie das Mikrofon auf die letzte untere Klappe.
BDA_C414VPL_D030834_Hex 02/27/2009 10:26 Seite 13 (Schwarz/Black Auszug) 4 Anwendungshinweise Stellen Sie das Mikrofon ca. 30 cm vor dem Instrument, etwas außerhalb der Achse des Schallbechers, auf. Schalten Sie am Mikrofon die Vorabschwächung ein. Der mitgelieferte Windschutz hilft, Blasgeräusche zu reduzieren. a 4.6.9 Trompete/Posaune Abb.
BDA_C414VPL_D030834_Hex 02/27/2009 10:26 Seite 14 (Schwarz/Black Auszug) 4 Anwendungshinweise 4.6.11 E-Gitarre/E-Bass E-Gitarre: Stellen Sie das Mikrofon in einem Abstand von 8-15 cm leicht außerhalb der Mitte der Lautsprechermembran auf. Aktivieren Sie Tiefenabsenkung und Vorabschwächung. Eventuell ein zweites Raummikrofon einsetzen. E-Bass: Wie E-Gitarre. Sie können zusätzlich das direkte Signal vom Line-Ausgang des Bassverstärkers über eine DI-Box zum Mikrofonsignal mischen. Abb. 15: E-Gitarre 4.
BDA_C414VPL_D030834_Hex 02/27/2009 10:26 Seite 15 (Schwarz/Black Auszug) 5 Reinigung • Reinigen Sie die Gehäuseoberfläche des Mikrofons mit einem mit Wasser befeuchteten Tuch. 5.1 Mikrofon • Waschen Sie den Schaumstoff-Windschutz mit Seifenwasser. Der Windschutz ist sofort nach dem Trocknen wieder einsatzbereit. 5.
BDA_C414VPL_D030834_Hex 02/27/2009 10:26 Seite 16 (Schwarz/Black Auszug) 6 Technische Daten Frequenzgang C 414 XLS Polardiagramm C 414 XLS / C 414 XLII Frequenzgang C 414 XLII Kugel Breite Niere Niere Hyperniere Achter 16 C 414 XLS / XLII
BDA_C414VPL_D030834_Hex 02/27/2009 10:26 Seite 17 (Schwarz/Black Auszug) Table of Contents Page Welcome! . . . . . . . . . . . . . . . . . . . . . . . . . . . . . . . . . . . . . . . . . . . . . . . . . . . . . . . . . . . . . . . 18 1 Safety and Environment . . . . . . . . . . . . . . . . . . . . . . . . . . . . . . . . . . . . . . . . . . . . . . . . . . 18 1.1 Safety . . . . . . . . . . . . . . . . . . . . . . . . . . . . . . . . . . . . . . . . . . . . . . . . . . . . . . . . . . . . . 18 1.
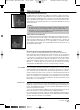
BDA_C414VPL_D030834_Hex L 18 02/27/2009 10:26 Seite 18 (Schwarz/Black Auszug) Welcome! Thank you for purchasing an AKG product. This Manual contains important instructions for setting up and operating your equipment. Please take a few minutes to read the instructions below, specifically section 1 Safety and Environment, carefully before operating the equipment. Please keep the Manual for future reference. Have fun and impress your audience! 1 Safety and Environment 1.
BDA_C414VPL_D030834_Hex 02/27/2009 10:26 Seite 19 (Schwarz/Black Auszug) 2 Description • • • • • • • C 414 XLS or C 414 XLII SA 60 stand adapter H 85 shock mount PF 80 pop screen W 414X foam windscreen Original frequency response trace with serial number and production date code High quality carrying case 2.
BDA_C414VPL_D030834_Hex 02/27/2009 10:26 Seite 20 (Schwarz/Black Auszug) 2 Description • When you switch phantom power to the microphone off and back on later, the currently selected settings of all three selectors will be restored automatically as soon as you switch phantom power back on. All settings are saved in memory about 500 msecs. after you last pressed any of the three selectors. Thus, your latest settings will be available again even if phantom power ahs been interrupted (e.g.
BDA_C414VPL_D030834_Hex 02/27/2009 10:26 Seite 21 (Schwarz/Black Auszug) 2 Description 2 Preattenuation Pad Selector*) Selector 2 on the microphone rear panel (refer to fig. 2) lets you increase the headroom by 6 dB, 12 dB, or 18 dB for distortion-free close-in recording. The preattenuation pads prevent the microphone's output level, particularly at low frequencies, from overloading the miniature transformers used in mixer input stages, etc.
BDA_C414VPL_D030834_Hex 02/27/2009 10:26 Seite 22 (Schwarz/Black Auszug) 3 Powering The C 414 XLS and C 414 XLII provide extremely low self-noise yet high headroom. The only way to meet these strict engineering requirements was to limit the powering options for both microphones to 48 V phantom power to IEC 61938 only. This standard requires a positive voltage of 48 V with reference to the cable shield.
BDA_C414VPL_D030834_Hex 02/27/2009 10:26 Seite 23 (Schwarz/Black Auszug) 4 Using Your Microphone Besides offering high headroom, minimum distortion, as well as temperature and humidity resistant construction, the microphone is suited for a uniquely wide range of applications. The standard version C 414 XLS features a very smooth frequency response and the typical sound of AKG large-diaphragm microphones.
BDA_C414VPL_D030834_Hex 02/27/2009 10:26 Seite 24 (Schwarz/Black Auszug) 4 Using Your Microphone (Table 2) Sound source Clarinet Harmonica Bass drum Toms Cymbals Bongos, congas C 414 XLS •• • •• • • • C 414 XLII •• •• • •• Highly recommended • Recommended 4.6 Hints on Microphone Placement As an introduction to the "secret science of making good recordings", the following sections describe some proven miking techniques. 4.6.1 Lead Vocals • Working distance: 6 to 12 in.
BDA_C414VPL_D030834_Hex 02/27/2009 10:26 Seite 25 (Schwarz/Black Auszug) 4 Using Your Microphone To record large mixed choirs, we recommend using one stereo microphone plus one spot microphone each for the soprano, alto, tenor, and bass sections. In rooms with good acoustics, a single stereo microphone or two matched mono microphones will often do the trick. 4.6.
BDA_C414VPL_D030834_Hex 02/27/2009 10:26 Seite 26 (Schwarz/Black Auszug) 4 Using Your Microphone 4.6.4 Double Bass, Cello Double bass: Align the microphone with one of the f holes from a distance of about 16 inches (40 cm). If you need to record the double bass together with an ensemble, place the microphone closer to the instrument and set the polar pattern to hypercardioid to prevent leakage from other instruments into the bass microphone. Cello/technique 1: Refer to "Double bass" above. Fig.
BDA_C414VPL_D030834_Hex 02/27/2009 10:26 Seite 27 (Schwarz/Black Auszug) 4 Using Your Microphone We recommend using two microphones. Place mic 1 above and to one side of the player (to reduce blowing noise) and align it with the player's mouth, and aim mic 2 at the instrument from the side. 4.6.6 Flute If you prefer to use a single microphone, place the microphone as mic 1 above at a distance of about 7 to 8 1/2 feet (2 to 2.5 m) above the floor. Fig. 9: Using a single microphone to mic up a flute.
BDA_C414VPL_D030834_Hex 02/27/2009 10:27 Seite 28 (Schwarz/Black Auszug) 4 Using Your Microphone 4.6.9 Trumpet, Trombone Fig. 12: Trumpet (a), trombone (b). 4.6.10 Grand and Upright Pianos Place the microphone about 1 foot (30 cm) in front of the instrument, slightly off the bell axis. Switch in one of the preattenuation pads. Using the supplied windscreen will help reduce blowing noise.
BDA_C414VPL_D030834_Hex 02/27/2009 10:27 Seite 29 (Schwarz/Black Auszug) 4 Using Your Microphone Electric guitar: Position the microphone 3 to 6 inches (8 to 15 cm) in front of the speaker, aiming at a point off the speaker diaphragm center. Use the bass cut and a preattenuation pad. You may want to use an additional distant microphone. 4.6.11 Electric Guitar and Bass Electric bass: Use the same technique as for the electric guitar.
BDA_C414VPL_D030834_Hex 02/27/2009 10:27 Seite 30 (Schwarz/Black Auszug) 5 Cleaning 5.1 Microphone • Use a soft cloth moistened with water to clean the surface of the microphone body. 5.2 Windscreen • Wash the foam windscreen in mild sudsy water. Do not use the windscreen before it has dried completely.
BDA_C414VPL_D030834_Hex 02/27/2009 10:27 Seite 31 (Schwarz/Black Auszug) 6 Specifications Frequency Response C 414 XLS Polar Diagram C 414 XLS / C 414 XLII Frequency Response C 414 XLII Omnidirectional Wide Cardioid Cardioid Hypercardioid Figure 8 C 414 XLS / XLII 31
BDA_C414VPL_D030834_Hex 02/27/2009 10:27 Seite 32 (Schwarz/Black Auszug) Sommaire Page Bienvenue ! . . . . . . . . . . . . . . . . . . . . . . . . . . . . . . . . . . . . . . . . . . . . . . . . . . . . . . . . . . . . . . 33 1 Sécurité et environnement . . . . . . . . . . . . . . . . . . . . . . . . . . . . . . . . . . . . . . . . . . . . . . . . 33 1.1 Sécurité . . . . . . . . . . . . . . . . . . . . . . . . . . . . . . . . . . . . . . . . . . . . . . . . . . . . . . . . . . . 33 1.2 Environnement .
BDA_C414VPL_D030834_Hex 02/27/2009 10:27 Seite 33 (Schwarz/Black Auszug) Bienvenue ! Nous vous remercions d’avoir choisi un produit d’AKG. Veuillez lire attentivement le mode d’emploi, tout particulièrement le chapitre 1 Sécurité et environnement, avant d’utiliser l’appareil. Conservez soigneusement le mode d’emploi pour l’avoir toujours sous la main lorsque vous avez besoin de le consulter. Nous espérons que vous aurez beaucoup de satisfaction et de succès avec votre micro.
BDA_C414VPL_D030834_Hex 02/27/2009 10:27 Seite 34 (Schwarz/Black Auszug) 2 Description 2.
BDA_C414VPL_D030834_Hex 02/27/2009 10:27 Seite 35 (Schwarz/Black Auszug) 2 Description • Lorsque vous éteignez le microphone (en coupant l’alimentation fantôme) puis le rallumez ultérieurement (réalimentation avec le courant fantôme), les derniers réglages sélectionnés des trois sélecteurs sont automatiquement restaurés. Le réglage actuel est automatiquement enregistré env.
BDA_C414VPL_D030834_Hex 02/27/2009 10:27 Seite 36 (Schwarz/Black Auszug) 2 Description 2 Sélecteur de pré-atténuation * Le sélecteur 2, placé sur la face arrière du microphone (voir fig. 2) permet d’augmenter le niveau du signal d’entrée de 6 dB, 12 dB ou 18 dB, afin de pouvoir réaliser des prises de son exemptes de distorsion à proximité immédiate d’une source sonore.
BDA_C414VPL_D030834_Hex 02/27/2009 10:27 Seite 37 (Schwarz/Black Auszug) 3 Alimentation Le C 414 XLS et le C 414 XLII se distinguent par un très bas niveau de souffle intrinsèque ainsi que par une grande résistance à la saturation. Afin de satisfaire à ces exigences techniques très sévères, les deux modèles sont conçus pour fonctionner exclusivement avec une alimentation fantôme de 48 V (norme CEI 61938).
BDA_C414VPL_D030834_Hex 02/27/2009 10:27 Seite 38 (Schwarz/Black Auszug) 4 Conseils d’utilisation 4.1 Introduction (C 414 XLII: voir chapitre 2.4.) Outre la grande plage de son niveau de gain et sa construction le mettant à l’abri des variations de température et d’humidité, ce microphone est caractérisé par une polyvalence exceptionnelle. La version standard, le C 414 XLS, affiche une plage de fréquence très équilibrée, avec le son caractéristique des microphones à larges membranes d’AKG.
BDA_C414VPL_D030834_Hex 02/27/2009 10:27 Seite 39 (Schwarz/Black Auszug) 4 Conseils d’utilisation Source sonore Trombone Cor Tuba Saxophone Flûte traversière Clarinette Harmonica Grosse caisse Toms Cymbales Bongos, congas C 414 XLS •• •• •• •• •• •• • •• • • • C 414 XLII • •• • •• •• •• •• • (Tableau 2) •• : particulièrement recommandé • : recommandé En guise d’introduction aux « techniques de l’enregistrement », vous trouverez ci-dessous l’essentiel des règles de positionnement de microphones. 4.
BDA_C414VPL_D030834_Hex 02/27/2009 10:27 Seite 40 (Schwarz/Black Auszug) 4 Conseils d’utilisation 4.6.2 Chorale/choristes Fig. 5 : Choristes avec un seul microphone (variante 3) Dans le cas de chorales mixtes, nous recommandons d’utiliser un microphone stéréophonique auquel on adjoindra un microphone pour chaque voix : sopranos, altos, ténors et basses. Dans les salles où l’acoustique est optimale, un seul microphone stéréo ou deux microphones mono complémentaires sont souvent amplement suffisants.
BDA_C414VPL_D030834_Hex 02/27/2009 10:27 Seite 41 (Schwarz/Black Auszug) 4 Conseils d’utilisation Contrebasse : Placez le microphone à environ 40 cm de l’une des ouïes. Si la contrebasse doit être enregistrée au sein d’un ensemble instrumental, réduisez la distance et sélectionnez la caractéristique de directivité hypercardioïde, pour éviter que d’autres instruments n’interfèrent sur le microphone de la contrebasse. 4.6.4 Contrebasse, violoncelle Violoncelle/variante 1 : Voir la contrebasse.
BDA_C414VPL_D030834_Hex 02/27/2009 10:27 Seite 42 (Schwarz/Black Auszug) 4 Conseils d’utilisation 4.6.6 Flûte traversière Nous recommandons l’utilisation de deux microphones. Placez le microphone 1 au-dessus de la bouche de l’instrumentiste (pour éviter les bruits de souffle) et dirigé vers celle-ci, et dirigez le microphone 2 latéralement vers l’instrument. Prise de son au moyen d’un microphone unique : comme avec le microphone 1, à environ 2 m et à une hauteur de 2 m à 2,5 m au-dessus du sol. Fig.
BDA_C414VPL_D030834_Hex 02/27/2009 10:27 Seite 43 (Schwarz/Black Auszug) 4 Conseils d’utilisation Placez le microphone devant l’instrument, à environ 30 cm et hors de l’axe du pavillon. Sélectionnez la pré-atténuation sur le microphone. La bonnette anti-vent fournie permet de réduire les bruits de souffle. a 4.6.9 Trompette / Trombone Fig.
BDA_C414VPL_D030834_Hex 02/27/2009 10:27 Seite 44 (Schwarz/Black Auszug) 4 Conseils d’utilisation 4.6.11 Guitare électrique / Guitare basse Fig. 15 : Guitare électrique 4.6.12 Batterie Fig. 16 : Batterie Guitare électrique : Placez le microphone à une distance de 8 à 15 cm de la membrane du haut-parleur, légèrement décalé par rapport au centre de celle-ci. Sélectionnez la réduction des basses et la pré-atténuation. Prévoy ez éventuellement un deuxième microphone d’ambiance.
BDA_C414VPL_D030834_Hex 02/27/2009 10:27 Seite 45 (Schwarz/Black Auszug) 5 Nettoyage • Pour nettoyer le micro, utilisez un chiffon légèrement humide, jamais un chiffon mouillé. 5.1 Microphone • Lavez la bonnette anti-vent en mousse à l'eau savonneuse. Une fois sèche, la bonnette anti-vent peut être immédiatement réutilisée. 5.
BDA_C414VPL_D030834_Hex 02/27/2009 10:27 Seite 46 (Schwarz/Black Auszug) 6 Caractéristiques techniques Réponse en fréquence C 414 XLS Diagramme polaire C 414 XLS / C 414 XLII Réponse en fréquence C 414 XLII Omnidirectionnel Cardioïde large Cardioïde Hypercardioïde Huit 46 C 414 XLS / XLII
BDA_C414VPL_D030834_Hex 02/27/2009 10:27 Seite 47 (Schwarz/Black Auszug) Indice Pagina Benvenuto! . . . . . . . . . . . . . . . . . . . . . . . . . . . . . . . . . . . . . . . . . . . . . . . . . . . . . . . . . . . . . . 48 1 Sicurezza ed ambiente . . . . . . . . . . . . . . . . . . . . . . . . . . . . . . . . . . . . . . . . . . . . . . . . . . . 48 1.1 Sicurezza . . . . . . . . . . . . . . . . . . . . . . . . . . . . . . . . . . . . . . . . . . . . . . . . . . . . . . . . . . 48 1.2 Ambiente . . . .
BDA_C414VPL_D030834_Hex L 48 02/27/2009 10:27 Seite 48 (Schwarz/Black Auszug) Benvenuto! Vi ringraziamo di aver scelto un prodotto dell‘AKG. Leggete per favore attentamente le istruzioni per l’uso, in particolare il Capitolo 1 Sicurezza e ambiente, prima di usare l’apparecchio e conservate le istruzioni per l’uso per poterle consultare in caso di necessità. Vi auguriamo buon divertimento e molto successo! 1 Sicurezza ed ambiente 1.
BDA_C414VPL_D030834_Hex 02/27/2009 10:27 Seite 49 (Schwarz/Black Auszug) 2 Descrizione • • • • • • • C 414 XLS o C 414 XLII SA 60: adattatore per supporto H 85: sospensione elastica del microfono PF 80: antipopping W 414X: antisoffio in espanso Curva individuale delle frequenze, provvista di numero di serie e codice data Pregiata valigetta di trasporto 2.
BDA_C414VPL_D030834_Hex 02/27/2009 10:27 Seite 50 (Schwarz/Black Auszug) 2 Descrizione Modo Lock (dispositivo di bloccaggio dei comandi): Per attivare il modo Lock: Avvertenza: Per disattivare il modo Lock: • Quando disinserite il microfono (separandolo dall’alimentazione phantom) e lo riaccendete più tardi (reinserite l'alimentazione phantom), le regolazioni ultimamente selezionate di tutti e tre i selettori vengono automaticamente ripristinate.
BDA_C414VPL_D030834_Hex 02/27/2009 10:27 Seite 51 (Schwarz/Black Auszug) 2 Descrizione 2 Selettore per la preattenuazione*) Il selettore 2 disposto sul lato posteriore del microfono (vedi fig. 2) consente di aumentare il limite di modulazione di 6 dB, 12 dB o di 18 dB, per poter effettuare registrazioni libere da distorsioni anche nelle vicinanze della fonte sonora.
BDA_C414VPL_D030834_Hex 02/27/2009 10:27 Seite 52 (Schwarz/Black Auszug) 3 Alimentazione Il C 414 XLS e il C 414 XLII si contraddistinguono per il rumore proprio estremamente basso e la contestuale elevata resistenza ai sovraccarichi. Per rispettare queste severe esigenze tecniche, ambedue i microfoni sono stati concepiti per l’esclusivo impiego con alimentazione phantom di 48 V secondo IEC 61938. Questa norma prescrive una tensione positiva di 48 V alle linee audio contro la schermatura del cavo.
BDA_C414VPL_D030834_Hex 02/27/2009 10:27 Seite 53 (Schwarz/Black Auszug) 4 Istruzioni per l’impiego Oltre alla larga gamma di modulazione con minime distorsioni e alla costruzione resistente a temperature estreme e all’umidità, il microfono offre possibilità uniche d’impiego universale. La versione standard C 414 XLS ha una risposta in frequenza molto equilibrata, con un carattere sonoro tipico per i microfoni a grande membrana dell’AKG.
BDA_C414VPL_D030834_Hex 02/27/2009 10:27 Seite 54 (Schwarz/Black Auszug) 4 Istruzioni per l’impiego (Tabella 2) Fonte sonora Corno Tuba Sassofono Flauto traverso Clarinetto Armonica a bocca Bass drum Toms Piatti Bongos, congas C 414 XLS •• •• •• •• •• • •• • • • C 414 XLII •• • •• •• •• •• • • • Adattissimo • Adatto 4.
BDA_C414VPL_D030834_Hex 02/27/2009 10:27 Seite 55 (Schwarz/Black Auszug) 4 Istruzioni per l’impiego Per grandi cori misti raccomandiamo un microfono stereo nonché rispettivamente un microfono di supporto per soprano, contralto, tenore e basso. In sale acusticamente ottimali è spesso sufficiente un unico microfono stereo rispettivamente due microfoni mono sintonizzati. 4.6.
BDA_C414VPL_D030834_Hex 02/27/2009 10:27 Seite 56 (Schwarz/Black Auszug) 4 Istruzioni per l’impiego 4.6.4 Contrabbasso, violoncello Contrabbasso: Posizionate il microfono da una distanza di circa 40 cm in modo che sia orientato su una delle effe. Se il contrabbasso deve venir ripreso contemporaneamente ad un complesso, riducete la distanza e impiegate la direttività ipercardioide per evitare il leakage di altri strumenti nel microfono dei bassi. Violoncello/variante 1: Vedi contrabbasso. Fig.
BDA_C414VPL_D030834_Hex 02/27/2009 10:27 Seite 57 (Schwarz/Black Auszug) 4 Istruzioni per l’impiego Raccomandiamo l’uso di due microfoni. Orientate il microfono 1 obliquamente da sopra sulla bocca dello strumentalista (meno rumori da soffio), il microfono 2 lateralmente sullo strumento. 4.6.6 Flauto traverso Ripresa con un microfono solo: come il microfono 1, ad una distanza di circa 2 m, a 2 - 2,5 m sopra il pavimento. Fig. 9: Ripresa del flauto traverso con un microfono solo 4.6.
BDA_C414VPL_D030834_Hex 02/27/2009 10:27 Seite 58 (Schwarz/Black Auszug) 4 Istruzioni per l’impiego 4.6.9 Tromba/trombone Fig. 12: Tromba (a), trombone (b) 4.6.10 Pianoforte a coda/pianoforte verticale Posizionate il microfono ad una distanza di circa 30 cm davanti allo strumento, un po’ fuori dell’asse del padiglione. Inserite sul microfono la preattenuazione. L’antisoffio in dotazione aiuta a ridurre i rumori prodotti dal soffio.
BDA_C414VPL_D030834_Hex 02/27/2009 10:27 Seite 59 (Schwarz/Black Auszug) 4 Istruzioni per l’impiego Chitarra elettrica: Posizionate il microfono ad una distanza di 8-15 cm leggermente fuori del centro della membrana degli altoparlanti. Attivate l’attenuazione dei bassi e la preattenuazione. Usate eventualmente un secondo microfono spaziale. 4.6.11 Chitarra elettrica/ basso elettrico Basso elettrico: Come la chitarra elettrica.
BDA_C414VPL_D030834_Hex 02/27/2009 10:27 Seite 60 (Schwarz/Black Auszug) 5 Pulizia 5.1 Microfono • Pulite la superficie della scatola del microfono con un panno inumidito con acqua. 5.2 Antisoffio • Lavate l’antisoffio in espanso con acqua e sapone. Dopo l’asciugamento l’antisoffio può venir usato subito.
BDA_C414VPL_D030834_Hex 02/27/2009 10:28 Seite 61 (Schwarz/Black Auszug) 6 Dati tecnici Risposta in frequenza C 414 XLS Diagramma polare C 414 XLS / C 414 XLII Risposta in frequenza C 414 XLII Omnidirezionale Cardioide larga Cardioide Ipercardioide Figura di otto C 414 XLS / XLII 61
BDA_C414VPL_D030834_Hex 02/27/2009 10:28 Seite 62 (Schwarz/Black Auszug) Índice Página ¡Bienvenido! . . . . . . . . . . . . . . . . . . . . . . . . . . . . . . . . . . . . . . . . . . . . . . . . . . . . . . . . . . . . . 63 1 Seguridad y medio ambiente . . . . . . . . . . . . . . . . . . . . . . . . . . . . . . . . . . . . . . . . . . . . . . 63 1.1 Seguridad . . . . . . . . . . . . . . . . . . . . . . . . . . . . . . . . . . . . . . . . . . . . . . . . . . . . . . . . . . 63 1.2 Medio ambiente. . . .
BDA_C414VPL_D030834_Hex 02/27/2009 10:28 Seite 63 (Schwarz/Black Auszug) ¡Bienvenido! Lea el modo de empleo detenidamente, en especial el capítulo 1 Seguridad y medio ambiente, antes de utilizar el aparato, y guarde el manual de operación en un lugar a mano donde lo pueda consultar en cualquier momento.
BDA_C414VPL_D030834_Hex 02/27/2009 10:28 Seite 64 (Schwarz/Black Auszug) 2 Descripción 2.
BDA_C414VPL_D030834_Hex 02/27/2009 10:28 Seite 65 (Schwarz/Black Auszug) 2 Descripción • Al desconectar el micrófono (separándolo de la alimentación fantasma) y al conectarlo (la alimentación fantasma) de nuevo posteriormente, se restablecen automáticamente los últimos ajustes seleccionados en los tres conmutadores-selectores. El ajuste actual correspondiente se memoriza automáticamente aprox.
BDA_C414VPL_D030834_Hex 02/27/2009 10:28 Seite 66 (Schwarz/Black Auszug) 2 Descripción 2 Conmutador-selector para la preatenuación*) El conmutador-selector 2 en la cara posterior del micrófono (véase Fig. 2) permite subir el nivel de modulación en 6 dB, 12 dB ó 18 dB para poder hacer grabaciones sin distorsiones también en la proximidad de fuentes sonoras.
BDA_C414VPL_D030834_Hex 02/27/2009 10:28 Seite 67 (Schwarz/Black Auszug) 2 Descripción Los pares de micrófonos C 414 XLS y C 414 XLII ofrecen, de esta forma, la máxima correlación posible a lo largo de la gama de frecuencia integral de transmisión, así como una sensibilidad prácticamente idéntica de los dos micrófonos para lograr grabaciones tridimensionales simplemente impresionantes.
BDA_C414VPL_D030834_Hex 02/27/2009 10:28 Seite 68 (Schwarz/Black Auszug) 4 Indicaciones de aplicación 4.1 Introducción (VC 414 XLII: véase el capítulo 2.4.) Además de la elevada capacidad demodulación, las más mínimas distorsiones y de su construcción a prueba de humedad y de cambios de temperatura, el micrófono ofrece una aplicabilidad universal extraordinaria.
BDA_C414VPL_D030834_Hex 02/27/2009 10:28 Seite 69 (Schwarz/Black Auszug) 4 Indicaciones de aplicación Fuente sonora Trombón Cuerno Tuba Saxofón Flauta travesera Clarinete Armónica (de boca) Bombo Toms Batería, platillos Bongos, congas C 414 XLS •• •• •• •• •• •• • •• • • • C 414 XLII • •• • •• •• •• •• • (Tabla 2) •• Recomendado especialmente • Recomendado A continuación, y a guisa de introducción a la "ciencia de la técnica de grabación", encontrará algunos consejos, avalados por la experiencia, pa
BDA_C414VPL_D030834_Hex 02/27/2009 10:28 Seite 70 (Schwarz/Black Auszug) 4 Indicaciones de aplicación 4.6.2 Coro/coro de acompañamiento Para los grandes coros mixtos recomendamos un micrófono estéreo y sendos micrófonos de apoyo para sopranos, altos, tenores y bajos. En salas de acústica óptima generalmente es suficiente un solo micrófono estéreo o bien dos micrófonos mono sintonizados.
BDA_C414VPL_D030834_Hex 02/27/2009 10:28 Seite 71 (Schwarz/Black Auszug) 4 Indicaciones de aplicación Contrabajo: Oriente el micrófono sobre una de las efes desde una altura de unos 40 cm. Si el contrabajo ha de ser grabado sumultáneamente con un conjunto, debe disminuirse la distancia y utilizarse la característica direccional hipercardioide, para evitar la diafonía de otros instrumentos con el micrófono del bajo. 4.6.4 Contrabajo, violoncelo Violoncelo/Variante 1: Véase Contrabajo.
BDA_C414VPL_D030834_Hex 02/27/2009 10:28 Seite 72 (Schwarz/Black Auszug) 4 Indicaciones de aplicación 4.6.6 Flauta travesera Recomendamos utilizar dos micrófonos. Oriente el micrófono 1 en forma oblicua desde arriba sobre la boca del flautista (poco ruido de soplido) y el micrófono 2 lateralmente sobre el instrumento. Toma con un solo micrófono: igual que con el micrófono 1, a una distancia aproximada de 2 m y a 2 m hasta 2,5 m sobre el suelo. Fig.
BDA_C414VPL_D030834_Hex 02/27/2009 10:28 Seite 73 (Schwarz/Black Auszug) 4 Indicaciones de aplicación Emplace el micrófono a unos 30 cm delante del instrumento algo fuera del eje del pabellón. Conecte la preatenuación en el micrófono. La pantalla antiviento suminstrada ayuda a reducir los ruidos de soplidos. a 4.6.9 Trompeta/trombón Fig. 12: Trompeta (a), trombón (b) b Piano de cola: Oriente uno o dos C 414 en configuración XY, MS ó ORTF sobre las cuerdas del centro desde una altura de 1,5 a 2 m.
BDA_C414VPL_D030834_Hex 02/27/2009 10:28 Seite 74 (Schwarz/Black Auszug) 4 Indicaciones de aplicación 4.6.11 Guitarra eléctrica/bajo eléctrico Guitarra eléctrica: Emplace el micrófono a una distancia de 8 - 15 cm ligeramente alejado del centro del diafragma del altavoz. Ponga en marcha la atenuación de bajos y la preatenuación. De ser necesario, utilice un segundo micrófono ambiental. Bajo eléctrico: Igual que para la guitarra eléctrica.
BDA_C414VPL_D030834_Hex 02/27/2009 10:28 Seite 75 (Schwarz/Black Auszug) 5 Limpieza • Limpie la superficie de la caja del micrófono con un paño humedecido con agua. 5.1 Micrófono • Lave la pantalla antiviento de goma espuma con lejía jabonosa. Inmediatamente después de secarse se puede volver a utilizar la pantalla antiviento. 5.
BDA_C414VPL_D030834_Hex 02/27/2009 10:28 Seite 76 (Schwarz/Black Auszug) 6 Datos técnicos Respuesta de frecuencia C 414 XLS Diagrama polar C 414 XLS / C 414 XLII Respuesta de frecuencia C 414 XLII Omnidireccional Cardioide ancha Cardioide Hipercardioide Figura de ocho 76 C 414 XLS / XLII
BDA_C414VPL_D030834_Hex 02/27/2009 10:28 Seite 77 (Schwarz/Black Auszug) Índice Página Seja Bem-vindo! . . . . . . . . . . . . . . . . . . . . . . . . . . . . . . . . . . . . . . . . . . . . . . . . . . . . . . . . . . 78 1 Segurança e meio ambiente . . . . . . . . . . . . . . . . . . . . . . . . . . . . . . . . . . . . . . . . . . . . . . . 78 1.1 Segurança. . . . . . . . . . . . . . . . . . . . . . . . . . . . . . . . . . . . . . . . . . . . . . . . . . . . . . . . . . 78 1.2 Meio ambiente. . . . . .
BDA_C414VPL_D030834_Hex L 78 02/27/2009 10:28 Seite 78 (Schwarz/Black Auszug) Seja Bem-vindo! Agradecemos a sua preferência por um produto da AKG. Favor ler cuidadosamente este manual, especialmente o Capítulo 1 Segurança e Meio Ambiente, antes de usar o equipamento, e guarde as instruções cuidadosamente para sempre poder consultá-las em caso de aparecerem quaisquer perguntas. Divirta-se e bom trabalho! 1 Segurança e meio ambiente 1.
BDA_C414VPL_D030834_Hex 02/27/2009 10:28 Seite 79 (Schwarz/Black Auszug) 2 Apresentação • • • • • • • C 414 XLS ou C 414 XLII SA 60: adatador de tripé H 85: suspensão elástica para o microfone PF 80: proteção anti-pop W 414X: paravento de borracha esponjosa Curva de freqüência individual, provida de número de série e código de data Mala de transporte de alta qualidade 2.
BDA_C414VPL_D030834_Hex 02/27/2009 10:28 Seite 80 (Schwarz/Black Auszug) 2 Apresentação Lock Mode (bloqueamento de controles): Ativar Lock Mode: Aviso: Desligar o modo Lock : • Quando desligar o microfone (se desconectar o microfone da alimentação fantasma) e ligar novamente mais tarde (reconectando o microfone à alimentação fantasma), os últimos ajustes ativos de todos os três comutadores de seleção serão armazenados no microfone e reativados automaticamente.
BDA_C414VPL_D030834_Hex 02/27/2009 10:28 Seite 81 (Schwarz/Black Auszug) 2 Apresentação 2 Comutador de seleção para pré-atenuação*) O comutador de seleção 2 no lado traseiro do microfone (veja fig. 2) permite aumentar o limite de sobrecarga em 6 dB, 12 dB ou 18 dB, para poder efetuar gravações sem distorções também perto de fontes sonoras.
BDA_C414VPL_D030834_Hex 02/27/2009 10:28 Seite 82 (Schwarz/Black Auszug) 3 Alimentação ! L Importante! 82 O C 414 XLS e o C 414 XLII distinguem-se em virtude do seu baixíssimo ruído próprio e, simultaneamente, por uma alta resistência à sobrecarga. Para corresponder a estas exigências técnicas muito altas, ambos os microfones foram concebidos exclusivamente para o uso com uma alimentação fantasma de 48 V conforme a norma IEC 61938.
BDA_C414VPL_D030834_Hex 02/27/2009 10:28 Seite 83 (Schwarz/Black Auszug) 4 Aplicação Além do elevado limite de sobrecarga, das distorções mínimas, e da construção resistente a todo tipo de temperaturas e umidade, o microfone proporciona o funcionamento ideal para uma grande variedade de aplicações. A versão básica do C 414 XLS possui uma resposta de freqüência muito equilibrada, com um caráter sonoro típico para microfones de membrana grande da AKG.
BDA_C414VPL_D030834_Hex 02/27/2009 10:28 Seite 84 (Schwarz/Black Auszug) 4 Aplicação (Tabela 2) Fonte sonora Trompa Tuba Saxofone Flauta transversa Clarineta Gaita-de-boca Bumbo Toms Pratos Bongós, congas C 414 XLS •• •• •• •• •• • •• • • • C 414 XLII •• • •• •• •• •• • •• muito recomendado • recomendado 4.6 Dicas para o uso do microfone Como introdução à "ciência da técnica de gravação" encontrará em seguida algumas técnicas já bem conhecidas. 4.6.
BDA_C414VPL_D030834_Hex 02/27/2009 10:28 Seite 85 (Schwarz/Black Auszug) 4 Aplicação Para coros mistos recomendamos um microfone estéreo e um microfone de suporte para cada voz de soprano, contralto, tenor e baixo. Em ambientes com acústica ideal muitas vezes é suficiente aplicar um único microfone estéreo ou dois microfones mono sintonizados. 4.6.2 Coro/ coro acompanhante Coro acompanhante/ variante 1: se há pistas suficientes à disposição, recomendamos gravar cada voz uma por uma sucessivamente.
BDA_C414VPL_D030834_Hex 02/27/2009 10:28 Seite 86 (Schwarz/Black Auszug) 4 Aplicação 4.6.4 Contrabaixo, violoncelo Contrabaixo: Direcione o microfone duma distância de aprox. 40 cm para um dos ff. Se o contrabaixo for gravado num conjunto, é preciso diminuir a distância e aplicar a característica hipercardióide para evitar diafonias provocadas por outros instrumentos no microfone do baixo. Violoncelo/variante 1: Veja contrabaixo.
BDA_C414VPL_D030834_Hex 02/27/2009 10:28 Seite 87 (Schwarz/Black Auszug) 4 Aplicação Recomendamos usar dois microfones. Direcione o microfone 1 inclinado de cima para a boca do tocador (poucos ruídos de sopro), direcione o microfone 2 para uma posição lateral em relação ao instrumento. 4.6.6 Flauta transversa Captação com um microfone só: como microfone 1, a uma distância de aprox. 2 m a 2,5 m acima do solo. Fig. 9: gravar a flauta com um só microfone 4.6.
BDA_C414VPL_D030834_Hex 02/27/2009 10:28 Seite 88 (Schwarz/Black Auszug) 4 Aplicação 4.6.9 Trompete/trombone Fig. 12: trompete (a), trombone (b) 4.6.10 Piano de cauda/ piano vertical Posicione o microfone a aprox. 30 cm diante do instrumento, um pouco fora do eixo do pavilhão. Ligue a pré-atenuação no microfone. O paravento ajuda a reduzir os ruídos de sopro. a b Piano de cauda: Direcione um C 414 ou dois C 414 em arranjo XY-, MS ou ORTF duma altura de 1,5 a 2 m para as cordas do centro.
BDA_C414VPL_D030834_Hex 02/27/2009 10:28 Seite 89 (Schwarz/Black Auszug) 4 Aplicação Violão elétrico: Posicione o microfone a uma distância de 8-15 cm, um pouco fora do centro da membrana do alto-falante. Ative a atenuação dos graves e a pré-atenuação. Eventualmente pode usar um microfone de ambiente adicional. 4.6.11 Violão elétrico/ baixo elétrico Baixo elétrico: Como violão elétrico. Pode adicionar o sinal direto da uma saída line do amplificador do baixo através dum box DI ao sinal de microfone.
BDA_C414VPL_D030834_Hex 02/27/2009 10:28 Seite 90 (Schwarz/Black Auszug) 5 Limpeza 5.1 Microfone • Limpe a superfície da carcaça do microfone com um pano molhado em água. 5.2 Paravento • Lave o paravento com água de sabão. Logo após a secagem o paravento poderá ser usado novamente.
BDA_C414VPL_D030834_Hex 02/27/2009 10:29 Seite 91 (Schwarz/Black Auszug) 6 Especificações Resposta de frequência C 414 XLS Diagrama polar C 414 XLS / C 414 XLII Resposta de frequência C 414 XLII Omnidirecional Cardióide largo Cardióide Hipercardióide Bidirecional C 414 XLS / XLII 91
BDA_C414VPL_D030834_Hex 02/27/2009 10:29 Seite 92 (Schwarz/Black Auszug) Mikrofone · Kopfhörer · Drahtlosmikrofone · Drahtloskopfhörer · Kopfsprechgarnituren · Akustische Komponenten Microphones · Headphones · Wireless Microphones · Wireless Headphones · Headsets · Electroacoustical Components Microphones · Casques HiFi · Microphones sans fil · Casques sans fil · Micros-casques · Composants acoustiques Microfoni · Cuffie HiFi · Microfoni senza filo · Cuffie senza filo · Cuffie-microfono · Componenti ac