LED-B13TU19H LED-B13TU22H LED-B13TDU22H LED-B13HU22H LED-B13TU24F LED-B13HU24F LED-B13HU32H LED-B13HU42F
1 PREFACE 3 2 SAFETY PRECAUTIONS 3 3 IN THE CARTON 5 4 FRONT BACK CONNECTIONS OF LED 6 5 6 7 8 BASIC INSTALL ATION REMOTE CONTROL MENU OPERATION DVD OPERATION AV Connection YPbPr Connection HDMI Connection COAX Connection USB Connection 7 7 8 8 9 9 10 10 10 Remote control instructions in TV mode 11 Remote control instructions in DTV / USB mode 12 Remote control instructions in TELETEXT mode 13 Remote control instructions in DVD mode 14 Remote control setup 15 INPUT SOURCE 16
9 TROUBLESHOOTING AND ADVICE 41 10 SPECIFICATIONS 42 2
1.PREFACE Thank you for buying this TV ! Please read this manual thoroughly before operating the TV. Make sure the TV was not damaged in transit. Should the TV is damaged, do no install it and contact your dealer. Check that you have all the accessories according to the model. 2.SAFETY PRECAUTIONS Put the TV on a stable surface. Do not place any material on the TV. Minimum distances 10cm 10cm 20cm 5cm Do not use the TV with fixtures other than those provided or suggested by the manufacturer.
Keep the TV dry and away from humidity. Keep the TV away from heat sources. Unplug the TV before cleaning it. Do not use solvent or liquid to clean the TV. Only clean the TV with a soft and dry cloth. In case of troubleshooting, do not use spare parts other than those suggested by the manufacturer. Using inadequate spare parts can lead to electric shocks, short-circuits fire or other incidents. Unplug the TV during lightening storms or when unused for long periods of time. 1.
3 . IN THE CARTON R.LIS T LED TV SET T.LIST Remote Control 1.5V 1.
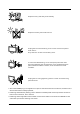
4 . FRONT , BACK , CONNECTIONS OF LED Front View 1 1. OPEN/CLOSE in DVD mode; 2 2. PLAY/PAUSE in DVD mode; VOL+ 3. Press "VOL+" or "VOL-" to increase or decrease VOL- 3 the sound level. CH+ 4. Press "CH+" or "CH-" to scan through channels. 4 CH- 5. Press "MENU" to bring up the main menu on MENU SOURCE 6 6. Press "SOURCE" to select the input source. POWER the screen. 5 7 7. Press " POWER ” button to turn the TV on or off. 9 8 8.
5. BASIC INSTALL ATION Power Cord Connection - Connect the power cord correctly as shown. - Press the POWER button of your LED TV to switch on the LED TV. The power indicator on the front panel lights up in Green or Blue. Antennas Connection VHF ANTENNA UHF ANTENNA OUTDOOR ANTENNA AMPLIFIER INDOOR ANTENNA AMPLIFIER RF IN 75 OHM ANTENNA PLUG POWER PLUG OF ANTENNA AMPLIFIER To ensure good picture and sound, TV antenna system needs to be instalLED.
SCART Connection TV Back USB 1 2 SCART PC AUDIO VGA(PC) Scart cable DVD or VCR Back DVD or VCR Connect the SCART connector to the external video item and the SCART connector on the tv. The SCART lead operates as an Input/Output connection. If the tv does not select the SCART input automatically, select SCART using the SOURCE button on the remote control or TV.
AV Connection TV Back C O A X PHONE YPbPr VIDEO R L CI PORT RF IN Video cable DVD or VCR back DVD or VCR Connect the VIDEO and AUDIO output jack of the DVD or VCR to the VIDEO jacks on the TV set using the RCA cable. Match the jack colors: Video is yellow, Audio left is white, and Audio right is red. Select the AV input source via the SOURCE button on the remote control.
HDMI Connection TV Back USB 1 SCART 2 PC AUDIO VGA(PC) HDMI cable DVD or VCR back DVD or VCR The HDMI input connection enables the digital transfer of audio/video/control signals through one cable only. COAX Connection COAX PHONE YPbPr V IDE O R L RF IN CI PORT Coax Cable SPDIF INPUT Audio Amplifier Back Audio Amplifier Connect to Audio Amplifier device to the COAX output jack on the TV.
6 . REMOTE CONTROL Remote control instructions in TV mode MUTE POWER POWER Turn the LED TV ON or OFF. MUTE Press to mute the sound. Press again or press VOL+ to un-mute the TV. NUMBER BUTTONS Press 0-9 to select a TV channel directly when you are watching TV. The channel change after 2 seconds. 10 PROGRAM +10 LIST DISPLAY INFO ASPECT ZOOM MENU EXIT OK ENTER SLEEP D.SETUP TTX REPEAT SOURCE D.MENU TITLE R.LIST T.LIST D.
Remote control instructions in DTV / USB mode NUMBER BUTTONS Press 0-9 to select a channel. MUTE POWER INFO Press to display the source and channel's information. CH+/CHWhen watching a channel, changes the channel. 10 PROGRAM +10 LIST DISPLAY INFO ASPECT ZOOM MENU EXIT OK ENTER SLEEP D.SETUP TTX REPEAT SOURCE D.MENU TITLE R.LIST T.LIST D.
Remote control instructions in TELETEXT mode MUTE POWER NUMBER BUTTONS Press 0-9 to select a teletext page. 10 PROGRAM +10 LIST DISPLAY INFO CH+/CHPage up and Page down. ASPECT ZOOM MENU EXIT OK ENTER TTX Press to switch between TV and Teletext mode. SLEEP D.SETUP TTX REPEAT SOURCE D.MENU TITLE R.LIST T.LIST D.DISPLAY INDEX HOLD A-B GOTO I/II REVEAL SIZE SUBTITLE EPG FAV AUDIO REC SUBPAGE TV / RADIO COLOR BUTTONS Select 4 Preferred TELETEXT page.
Remote control instructions in DVD mode Note: Please ensure that the TV you have bought with DVD loader, otherwise, all these parts with no effect. NUMBER BUTTONS Numerical buttons for various data. MUTE POWER PROGRAM Program a disc playing in a desired sequence. ZOOM In play state, press ZOOM, the player will zoom in the picture one time. THUMBSTICK( ▲/ ▼/◄ / ►/ OK ENTER ) Allows you to navigate the on-screen menus and adjust the system settings to your preference.
Remote control setup 1. Open the cover. 2. AAA size batteries, When inserting the batteries, make sure correct polarities as per“+”and “-” marks o n the batteries and within the battery compartment . 3. Replace the battery cover. To prevent battery leakage which may result in bodily injury or damage to the remote: 1. Install all batteries correctly, and as marked on the remote control. 2. Do not mix batteries:(OLD and NEW or CARBON and ALKALINE, etc) 3.
7.MENU OPERATION INPUT SOURCE Iuput Source Iuput Source ATV ATV DTV DTV USB USB AV AV VGA VGA YPbPr YPbPr DVD SCART SCART HDMI1 HDMI1 HDMI2 HDMI2 HDMI3 Enter Enter Press SOURCE button to display the input source list; Press ▼ / ▲ or SOURCE button to select the input source you want to watch; Press OK button to enter the input source; Press EXIT button to quit; CHANNEL MENU Press MENU button to display the main menu.
Auto Tuning Press ▼ / ▲ button to select Auto Tuning, then press OK button to start auto search. Tune Type Channel Tuning ATV+DTV ▲ Italy Portugal France Germany Spain ▼ ▲ Other TV DTV Radio Data 1% : : : : 0 programme 0 programme 0 programme 0 programme 67.30mHz (TV) ▼ Please press MENU key to skip Enter Menu DTV Manual Tuning Press ▼/▲ button to select DTV Manual Tuning, then press OK button to enter Sub-menu. DTV Manual Tuning ◄- +► UHF CH 21 NO SIGNAL Bad Freq: 177.
Programme Edit Press ▼ / ▲ button to select Program Edit, then press OK button to enter sub-menu. ► ► Programme Edit 1 C-01 ATV 2 S-42 ATV 3 S-09 ATV 4 S-05 ATV 5 C-11 ATV 6 S-30 ATV 7 S-37 ATV 8 C-26 ATV 9 C-44 ATV 10 C-56 ATV Delete Enter Rename FAV Move Fav Skip Menu ·Use Red button to delete the current channel. ·Use Green button to set the current channel to Rename. ·Use Yellow button and the ▲/▼arrow button to move the current channel.
PICTURE MENU Press MENU button to display the main menu. Press ◄ / ► button to select PICTURE in the main menu, it will highlight the second option. 1. Press ▼ / ▲ button to select the option that you want to adjust in the PICTURE menu. 2. Press OK button to adjust.
SOUND MENU Press MENU button to display the main menu. Press ◄ / ► button to select Sound in the main menu, it will highlight the third option. Sound Mode Standard Treble 50 Bass 50 Balance 0 Auto Volume Surround Sound SOUND Move Off Off SPDIF Mode MENU Return PCM Enter Select EXIT Exit 1. Press ▼ / ▲ button to select the option that you want to adjust in the SOUND menu. 2. Press ◄ / ► button to adjust.
TIME MENU Press MENU button to display the main menu. Press ◄ / ► button to select TIME in the main menu, it will highlight the fourth option. 01/Jan 04:28 Clock Off Time Off On Time Off Time Zone TIME Move MENU GMT+1 Sleep Timer Auto Standby Off OSD Timer 10s Return Enter Select 4H EX IT Exit 1. Press ▼ / ▲ button to select the option that you want to adjust in the TIME menu. 2. Press ◄ / ► button to adjust. Clock Display the current system time.It’s not available.
LOCK MENU Press MENU button to display the main menu. Press ◄ / ► button to select LOCK in the main menu, it will highlight the fifth option. Lock System Off Set Password Block Program LOCK Move MENU Parental Guidance Off Key lock Off Return Enter Select EX IT Exit 1. Press ▼ / ▲ button to select the option that you want to adjust in the LOCK menu. 2. Press ◄ / ► button to adjust.
SETUP MENU Press MENU button to display the main menu. Press ▼ / ▲ button to select Setup in the main menu, it will highlight the sixth option. OSD Language English TTX Language Audio Language West English Subtitle Language English PVR File System Recorder Schedule List Aspect Ratio Blue Screen First Time Installation Reset SETUP Move MENU Return Enter Select 16:9 On EX IT Exit 1. Press ▼/▲ button to select the option that you want to adjust in the SETUP menu. 2. Press ◄/► button to adjust.
Recorder Press MENU button on the remote control to display the main menu; Use ◄/►button to select SETUP, and use ▼/▲ button to select Recorder. Then press OK button enter the sub-menu. Aspect Ratio Press ▼ / ▲ button to select Aspect Ratio, then press OK button to enter sub-menu. Blue Screen Press ▼ / ▲ button to select Blue Screen, then press ◄/► button to select on or off.
Vertical Pos. Press ▼/▲ button to select Vertical Pos. , then press OK Button to enter sub-menu.Press ◄/► button to adjust. Size Press ▼/▲ button to select Size, then press OK button to enter sub-menu.Press ◄/► button to adjust display size. Phase Press ▼/▲ button to select Phase, then press OK button to enter sub-menu.Press ◄/► button to adjust. VGA(PC) Notes: 1. Noise Reduction in PICTURE option is invalid. 2. SOUND menu and description are the same as that for DTV mode. 3.
MEDIA(USB) MENU Note:Before operating MEDIA menu,Plug in USB device,then press SOURCE button to set the Input Source to USB, then press OK button to enter. USB 2.0 Press ◄/► button to select the option you want to adjust in the main MEDIA menu, then press OK button to enter. PHOTO Menu Press ◄/► button to select PHOTO in the main menu, then press OK button to enter. USB 2.0 Press ◄ / ► button to select drive disk you want to watch, then press OK button to enter.
PHOTO 1/1 C:\ Retun music -MSTPVR picture Delete EXIT Exit Press ◄/► button to select the file folder you want to search in the file selecting menu, then press OK button on your remote control to enter sub-menu. Press ◄/► button to select the file you want to delete in the file selecting menu, then press red button On your remote control to delete files. MUSIC Menu Press ◄/► button to select MUSIC in the main menu, then press OK button to enter. USB 2.
MOVIE Menu Press ◄/► button to select MOVIE in the main menu, then press OK button to enter. USB 2.0 Press ◄ / ► button to select drive disk you want to watch, then press OK button to enter. Press ◄ / ► button to select return option to back to the previous menu. MOVIE 1/1 C:\ Retun -MSTPVR music .avl MPEG4_311F_720X5- [3.av] Delete EXIT picture Exit Press EXIT button to return back to the previous menu.
TEXT 1/1 C:\ Retun -MSTPVR music Delete picture EXIT Exit Press EXIT button to return back to the previous menu. When highlighting the option you select,the file information will appear on the right and text will be previewed in the center. Press OK button to view the selected text. PVR MENU Instant Recorder Note:Make sure you have insert the USB device to the TV board before you start to do the recording. Press REC button on your remote control to start record whenever you want to start.
Press ◄/► button to select stop PVR or not. Press ◄/► button to select to play the recorded program during recording. [00:00:20/00:02:13] Play FB Prev. FF Next Pause Stop 14:28 You can press the button on the control bar to play,fastback,fastforward,play previous,play next, pause or stop playing. Note: you can also play the recorded program in the file named ” _MSTPVR” under the MOVIE file in the USB Source.
File System Size PVR File SystemType FAT32 PVR File System Size All SD 104 Mins HD 29 Mins Enter Press ▼/▲ button to select PVR File System Type, then press ◄/► button to select the system type, press OK button to format the disk, a dialog will be displayed as follows: Format disk Format disk Warning ! All data will be lost. Exit► ◄ Start Press ◄ button to start format or press ► button to cancel format and back to the previous menu.
Timeshift Press button to start Timeshift,there will be a control bar as follows: [00:00:20] ( 0001:57:29) S Play FB FF 5 Five Prev. Next Pause Stop 14:28 Before Winter Comes The program will stop when you start timeshift, you can continue watching the program by press the PLAY button whenever youwant to watch it within the acquired timeshift time. You can press the button on the control bar or remote control to play 、fastback 、fastforward 、 play previous 、play next、pause or stop timeshifting.
EPG Menu Press EPG button in the Remote control. PROGRAMME GUIDE 31 May 2007 13:00-15:30 31 May 2007 14:38 Comdey drama starring David Niven .An officer in charge of a displaced persons’camp faces a dilemma when a Russian deserter is ordered back.(1969)[S] 31 May 1 Five 13:30-15:30 Before Winter Comes 2 Five Life 15:30-17:30 Battle of The V.1 3 Five US 17:30-18:00 Five News Followed By Weather Record Display Schedule Remild Move View Next Day Prev Day Enter Record Record programme.
8.DVD Operation Note : please ensure that the TV you have bought bought is with DVD loader, otherwise all this part does not apply. Basic Operation 1. Press Source button on the remote controller to select DVD input source. 2. Press OPEN / CLOSE button to load from into disc tray. Hold the disc without touching either or its surfaces, insert the DVD with the label toward the device’s back panel into the DVD slot on the right side of you TV set.
OSD Language This is used to select the OSD language. ·English ·French ·Spanish · German ·Portuguese - - General Setup Page - ·Italian TV Display 16:9 OSD Lang ENG Screen Saver Last Memory On Off English French Spanish German Portuguese Italian Screen Saver Start the screen saver, the screen saver image will appear when the player stops or the picture is frozen for a few minutes. This saver can keep the screen from being damaged. ·On (Start the screen saver). ·Off (Remove the screen saver).
- - General Setup Page - TV Display 16: 9 OSD Lang ENG Screen Saver Last Memory On Off On Off Audio Setup · Speaker Setup In the “Audio Setup page” press “ ” button to select “Speaker Setup” item, press the “OK ENTER” or “ ” button (play) into the “Speaker Setup Page”. - - Audio Setup Page - Speaker Setup Dual Mono Dynamic Downmix · LT/RT A disc recorded multi channel soundtrack, the output signal will be incorporated to left and right channel.
Dual Mono This is used to select the Stereo, L-MONO, R-MONO and MIX-MONO. - - Audio Setup Page - Speaker Setup Dual Mono Dynamic Stereo L-Mono R-Mono Mix-Mono Dynamic This option is used to set the compression ratio in order to control the sound (Volume) contrast. - - Audio Setup Page - Speaker Setup Dual Mono Dynamic FULL 3/4 1/2 1/4 OFF Preference Setup You must sure no disc in the DVD then you can select Preference Page.
- - Preference Page - TV Type Audio Subtitle Disc Menu Parental Password Default Multi ENG ENG ENG PAL Multi NTSC Audio If a language listed below is recorded on the disc, you can play the sound in such language. If not, the language recorded will be used.
Disc Menu If a language listed below is record on the disc, you can set the Menu to be displayed in such language. If not, the language recorded will be used. ·English ·French ·Spanish ·German ·Portuguese ·Italian - - Preference Page - TV Type Audio Subtitle Disc Menu Parental Password Default Multi ENG ENG ENG English French Spanish German Portuguese Italian Parental When playing disc with parental lock function, you may select an Age Control Grade according to grade of disc and your own preference.
Password User can change the password that is required when the user wants to change the Age Control Grade in the Parental Lock function. NOTE:(Default password is 123456 ) - - Preference Page - TV Type Audio Subtitle Disc Menu Parental Password Default Multi ENG ENG ENG Change Default User can load the original factory setting by choose RESET and press OK button.
9. TROUBLESHOOTING AND ADVICE Please check if you can solve the issue by yourself. Troubleshooting No signal No color shades Control Please check that all cables and cords are correctly plugged in. Adjust the contrast, the color and the brightness . Stain showing on the screen Maybe result from a lighting signal from car, motor, neon light and other electrical devices or appliances.
10.SPECIFICATIONS This manual is only for your reference , any change to the design and specification will not be advised . Mode Screen Size LED-B13TU19H LED-B13TU22H LED-B13HU22H LED-B13TDU22H 18 . 5Inch 21 . 6Inch 21 . 6Inch Display Type TFT LED Resolution(Pixel) 1366 X 768 Aspect Ratio 16:9 21 .
Mode LED-B13TU24F Screen Size 23Inch LED-B13HU24F LED -B13H U32H LED -B13H U42F 31 .
1 PRÉFACE 3 2 PRÉCAUTIONS D’EMPLOI 3 3 DANS LE CARTON 5 4 CONNEXI ONS À L’AVANT ET À L’ARRI ÈRE DE LA TV 6 5 6 7 8 INSTALLATION DE BASE TÉLÉCOMMANDE UTILISATION DU MENU UTILISATION DU DVD Branchement du cordon d'alimentation Branchement des antennes Connexion SCART Connexion VGA(PC) Connexion YPbPr Connexion HDMI Connexion COAX Connexion USB 7 7 8 8 9 9 10 10 10 Utilisation de la télécommande en mode TV Utilisation de la télécommande en mode DTV/USB Utilisation de la télécommande en mo
9 AUTO-DÉPANNAGE ET CONSEILS 41 10 CARACTÉRISTIQUES 42 2
1.PREFACE Nous vous remercions d'avoir acheté ce téléviseur ! Avant toute utilisation, lire le présent manuel dans son intégralité. Vérifier l'état de l'appareil. S'il a été endommagé pendant le transport, ne pas l'installer et contacter votre revendeur. Vérifier que vous avez tous les accessoires conformément au modèle. 2.CONSIGNES DE SECURITE Placer le téléviseur sur une surface stable. Ne placer aucun objet sur le téléviseur.
Maintenir le téléviseur au sec et à l’abri de l’humidité. Maintenir le téléviseur à l’écart des sources de chaleur. Débrancher le téléviseur avant de le nettoyer. Ne pas utiliser de solvant ou de liquide pour nettoyer le téléviseur. Nettoyer uniquement le téléviseur avec un chiffon doux et sec. En cas de dépannage, ne pas utiliser des pièces de rechange autres que celles recommandées par le fabricant.
3. CONTENU DE L'EMBALLAGE Téléviseur LED Télécommande 1.5V 1.
4.CONNEXIONS AVANT ET ARRIÈRE DU TELEVISEUR Vue de face 1 2 OUVRIR /FERMER ; 1. LECTURE /PAUSE ; 2. 3. Press "VOL+" or "VOL-" to increase or decrease the sound level. 4. Appuyer sur “ VOL+ ” ou “ VOL- ” pour VOL+ augmenter ou diminuer le son. VOL- 3 CH+ 4 CHMENU 5 SOURCE 6 POWER 7 9 8 5. Appuyer sur “ MENU ” pour afficher le menu principal. 6. Appuyer sur “ SOURCE ” pour sélectionner la source d'entrée. 7. Appuyer sur la touche “POWER” pour mettre le téléviseur en service ou en mode veille .
5. INSTALLATION DE BASE Branchement du cordon d'alimentation - Brancher le cordon d'alimentation comme indiqué. - Appuyer sur le bouton POWER pour allumer le téléviseur. Le voyant d’alimentation sur le panneau avant s’allume en vert ou bleu.
Connexion SCART USB 1 2 SCART PC AUDIO VGA(PC) Arrière du téléviseur Câble Scart Arrière du lecteur DVD ou du magnétoscope Lecteur DVD ou magnétoscope Raccorder le câble Péritel à l’appareil vidéo externe et au connecteur Péritel sur le téléviseur. Le port Péritel sert de connexion d’entrée-sortie. Si le téléviseur ne sélectionne pas automatiquement l’entrée Péritel, sélectionnez-la à l’aide de la touche SOURCE sur la télécommande ou le téléviseur.
Connexion de l'équipement AV CO A X PHONE YPbPr VIDEO R L RF IN Arrière du téléviseur CI PORT Câble Video Arrière du lecteur DVD ou du magnétoscope Lecteur DVD ou magnétoscope Raccorder les fiches de sortie VIDEO et AUDIO du lecteur DVD ou du magnétoscope aux fiches AV du téléviseur, à l'aide du câble RCA. Bien faire correspondre les couleurs:vidéo, jaune, Audio gauche, blanc, et Audio droit, rouge. Sélectionner la source d'entrée AV à l'aide du bouton SOURCE de la télécommande.
Connexion HDMI USB 1 SCART 2 Arrière du téléviseur PC AUDIO VGA(PC) Câble HDMI Arrière du lecteur DVD ou du magnétoscope Lecteur DVD ou magnétoscope La connexion d’entrée HDMI permet d’effectuer le transfert numérique des signaux audio/video/de commande via un câble uniquement.
6. TELECOMMANDE Instructions d’utilisation de la télécommande en mode TV POWER Pour mettre en marche ou arrêter le téléviseur LED. MUTE Appuyer sur cette touche pour désactiver le son. Appuyer de nouveau sur la touche ou sur VOL+ pour restaurer la sortie du son. TOUCHES NUMERIQUES Appuyer sur les touches 0-9 pour sélectionner une chaîne TV. Le changement de chaîne s'effectue en 2 s. Permet de revenir à la chaîne précédente. LIST Appuyer pour afficher la liste des programmes TV.
Instructions d’utilisation de la télécommande en mode DTV/USB TOUCHES NUMERIQUES Appuyer sur les touches 0-9 pour sélectionner une chaîne. INFO Appuyer pour obtenir des informations sur la source et la chaîne. CH+/CHPermet de changer de chaîne. TOUCHES COULEURS Touches de couleur (respectivement rouge, verte, jaune et bleu) utilisées dans certains sous-menus. T. LIST Pour afficher la Grille des programmes enregistrés. R. LIST Pour afficher la liste des fichiers enregistrés.
Instructions d'utilisation de la télécommande en mode TELETEXTE TOUCHES NUMERIQUES Appuyer sur les touches 0-9 pour sélectionner une page télétexte. CH+/CHChaîne suivante/Chaîne précédente TTX Appuyer sur cette touche pour basculer entre les modes TV et télétexte. TOUCHES COULEURS Pour sélectionner 4 pages télétextes favorites. SUBTITLE Pour afficher les sous-titres. HOLD Arrêt sur la page en cours. SIZE Modifie la taille de l'image. REVEAL Affiche ou masque les sous-titres.
Instructions d’utilisation de la télécommande en mode DVD Note : Vérifier que le téléviseur que vous venez d'acquérir est équipé d'un lecteur DVD. TOUCHES NUMERIQUES Touches numériques utilisées pour sélectionner les données. PROGRAM Programme la lecture d'un disque à l'endroit souhaité. ZOOM En mode de lecture, appuyez sur ZOOM, le joueur effectue un zoom avant dans l'image une seule fois.
Configuration de la télécommande 1. Ouvrir le boîtier. 2 . Piles AAA. Lors de l’insertion des piles, veiller à respecter la polarité correcte conformément aux marques « + » et « _ » sur les piles et dans le compartiment de piles. 3. Remettre en place le couvercle. Pour éviter d'éventuelles fuites des piles, qui peuvent endommager la télécommande, veiller à respecter les consignes suivantes: 1. Insérer les piles comme indiqué sur la télécommande. 2 .
7.
Réglage Auto Appuyer sur la touche ▼/▲ pour sélectionner Réglage Auto, puis sur la touche OK pour lancer la recherche automatique. Tune Type Channel Tuning ATV+DTV ▲ France Belgium Germany Portugal TV DTV Radio Data ▼ ▲ Other Italy 1% : : : : 0 programme 0 programme 0 programme 0 programme 67.30mHz (TV) ▼ Please press MENU key to skip Enter Menu Réglage manuel DTV Appuyer sur la touche ▼/ ▲ pour sélectionner Réglage Manuel DTV, puis sur la touche OK pour entrer dans le sous-menu.
Edition du programme Appuyer sur la touche ▼/▲ pour sélectionner Edition Programme, puis sur la touche OK pour entrer dans le sous-menu. ► ► Programme Edit 1 C-01 ATV 2 S-42 ATV 3 S-09 ATV 4 S-05 ATV 5 C-11 ATV 6 S-30 ATV 7 S-37 ATV 8 C-26 ATV 9 C-44 ATV 10 C-56 ATV Delete Enter Rename FAV Move Fav Skip Menu -Appuyer sur la touche rouge pour supprimer la chaîne actuelle. -Appuyer sur la touche verte pour Renommer la chaîne actuelle.
MENU IMAGE Appuyer sur la touche MENU pour afficher le menu principal. Appuyer sur la touche ◄/► pour sélectionner IMAGE dans le menu principal (la deuxième option s'affiche en surbrillance). 1.Appuyer sur la touche ▼/▲ pour sélectionner l'option que vous souhaitez régler dans le menu IMAGE. 2.Appuyer sur la touche OK pour régler.
MENU SON Appuyer sur la touche MENU pour afficher le menu principal. Appuyer sur la touche ◄/► pour sélectionner Son dans le menu principal (l’option s'affiche en surbrillance). Sound Mode Standard Treble 50 Bass 50 Balance SOUND Move MENU 0 Auto Volume Off Surround Sound Off Return Enter Select EXIT Exit 1.Appuyer sur la touche ▼/▲ pour sélectionner l'option que vous souhaitez régler dans le menu SON. 2.Appuyer sur la touche ◄/► pour régler.
MENU HEURE Appuyer sur la touche MENU pour afficher le menu principal. Appuyer sur la touche ◄/► pour régler l’HEURE dans le menu principal. Cela met en surbrillance la quatrième option. 01/Jan 04:28 Clock Off Time Off On Time Off Time Zone TIME Move MENU GMT+1 Sleep Timer Auto Standby Off OSD Timer 10s Return Enter Select 4H EX IT Exit 1.Appuyer sur la touche ▼/▲ pour sélectionner l'option que vous souhaitez modifier dans le menu HEURE. 2.Appuyer sur la touche ◄/► pour régler.
MENU VERROUILLAGE Appuyer sur la touche MENU pour afficher le menu principal. Appuyer sur la touche ◄/► pour sélectionner VERROUILLAGE dans le menu principal (la cinquième option s'affiche en surbrillance). Lock System Off Set Password Block Program LOCK Move MENU Parental Guidance Off Key lock Off Return Enter Select EX IT Exit 1. Appuyer sur la touche ▼/▲ pour sélectionner l'option que vous souhaitez modifier dans le menu VERROUILLAGE. 2. Appuyer sur la touche ◄/► pour régler.
MENU DE CONFIGURATION Appuyer sur la touche MENU pour afficher le menu principal. Appuyer sur la touche ◄/► pour sélectionner Configuration dans le menu principal (la sixième option s'affiche en surbrillance). OSD Language English TTX Language Audio Language West English Subtitle Language English PVR File System Recorder Schedule List Aspect Ratio Blue Screen First Time Installation Reset SETUP Move MENU Return Enter Select 16:9 On EX IT Exit 1.
Enregistreur Appuyer sur la touche MENU de la télécommande pour afficher le menu principal ; utiliser la touche ◄/► pour sélectionner CONFIGURATION et la touche ◄/► pour sélectionner Enregistreur. Appuyer sur la touche OK pour entrer dans le sous-menu. Format d'écran Appuyer sur la touche ▼/▲ pour sélectionner Format d'écran, puis sur la touche OK pour entrer dans le sous-menu. Ecran Bleu Appuyer sur la touche ◄/► pour sélectionner Ecran Bleu, puis sur la touche ◄/► pour sélectionner Marche ou Arrêt.
Pos. Verticale Appuyer sur la touche ◄/► pour sélectionner Pos. Verticale, puis sur la touche OK pour entrer dans le sous-menu. Appuyer sur la touche ◄/► pour régler. Taille Appuyer sur la touche ◄/► pour sélectionner la Taille, puis sur la touche OK pour entrer dans le sous-menu. Appuyer sur la touche ◄/► pour régler la taille d’affichage. Phase Appuyer sur la touche ▼/▲ pour sélectionner Phase, puis sur la touche OK pour entrer dans le sous-menu. Appuyer sur la touche ◄/► pour régler VGA(PC) Notes : 1.
MENU MEDIA(USB) Remarque:Avant d’utiliser le menu MEDIA, brancher le périphérique USB, puis appuyer sur la touche SOURCE pour configurer l’entrée en USB, et appuyer sur la touche OK pour entrer USB 2.0 Appuyer sur la touche ◄/► pour sélectionner l'option que vous souhaitez régler dans le menu MEDIA, puis sur la touche OK pour entrer. MENU PHOTO Appuyer sur la touche ◄/► pour sélectionner PHOTO dans le menu principal, puis appuyer sur la touche OK pour entrer. USB 2.
PHOTO 1/1 C:\ Retun music -MSTPVR picture Delete EXIT Exit Appuyer sur la touche ◄/► pour sélectionner le dossier dans lequel effectuer la recherche dans le menu de sélection de fichiers puis sur la touche OK de la télécommande pour entrer dans le sous-menu. Appuyer sur la touche ◄/► pour sélectionner le fichier que vous souhaitez supprimer dans le menu de sélection de fichiers, puis appuyer sur la touche rouge de votre télécommande pour le supprimer.
MENU FILM Appuyer sur la touche ◄/► pour sélectionner FILM dans le menu principal, puis sur la touche OK pour entrer. USB 2.0 Appuyer sur la touche ◄/► pour sélectionner le disque que vous souhaitez visualiser, puis sur la touche OK pour entrer. Appuyer sur la touche ◄/► pour sélectionner l'option retour et revenir au menu précédent. MOVIE 1/1 C:\ Retun -MSTPVR music .avl MPEG4_311F_720X5- [3.av] Delete EXIT picture Exit Appuyer sur la touche QUITTER pour revenir au menu précédent.
TEXT 1/1 C:\ Retun -MSTPVR music Delete picture EXIT Exit Appuyer sur la touche QUITTER pour revenir au menu précédent. Lorsque l'option sélectionnée est en surbrillance, les informations du fichier apparaissent à droite de l'écran et le texte est prévisualisé au centre. Appuyer sur la touche OK pour lire le texte sélectionné. MENU MN Enregistrement immédiat Remarque: Vérifier que le périphérique USB est bien inséré dans la carte TV avant de commencer l'enregistrement.
Appuyer sur la touche ◄/► pour sélectionner d’arrêter PVR ou non. Appuyer sur la touche ◄/► pour sélectionner de lire le programme enregistré durant l’enregistrement. [00:00:20/00:02:13] Play FB Prev. FF Next Pause Stop 14:28 Vous pouvez appuyer sur les touches de la barre de commande pour lire, faire défiler en avance et retour rapide, lire le précédent, lire le suivant, passer en mode pause ou arrêter la lecture.
File System Size PVR File SystemType FAT32 PVR File System Size All SD 104 Mins HD 29 Mins Enter Appuyer sur la touche ▼/▲ pour sélectionner Type Système Fichier MN, puis sur la touche ◄/► pour sélectionner le type système ; appuyer sur la touche OK pour formater le disque. Une boîte de dialogue s'ouvre comme illustré ci-dessous : Format disk Format disk Warning ! All data will be lost.
Décalage temporel Appuyer sur la touche comme suit : pour lancer le Décalage temporel ; une barre de commande apparaît [00:00:20] ( 0001:57:29) S Play FB FF 5 Five Prev. Next Pause Stop 14:28 Before Winter Comes Le programme s’arrête puis vous démarrez le décalage temporel ; vous pouvez continuer à lire le programme en appuyant sur la touche LECTURE dès que vous souhaitez le lire dans le décalage temporel défini.
Menu GEP Appuyer sur la touche GEP de la télécommande. PROGRAMME GUIDE 31 May 2007 13:00-15:30 31 May 2007 14:38 Comdey drama starring David Niven .An officer in charge of a displaced persons’camp faces a dilemma when a Russian deserter is ordered back.(1969)[S] 31 May 1 Five 13:30-15:30 Before Winter Comes 2 Five Life 15:30-17:30 Battle of The V.
8. UTILISATION DU DVD Note: s'il vous plaît faire en sorte que le téléviseur que vous avez acheté est acheté avec le chargeur de DVD, autrement toute cette partie ne s'applique pas. Fonctionnement de base 1.Appuyer sur le bouton Source de la télécommande pour sélectionner le canal du DVD. 2.Appuyer sur la touche OPEN / CLOSE pour insérer le disque.
Langue OSD Pour sélectionner la langue. ·English ·French ·Spanish ·German ·Portuguese ·Italian - - General Setup Page - TV Display 16: 9 OSD Lang ENG Screen Saver Last Memory On Off English French Spanish German Portuguese Italian Fond d’écran Lancer le fond d’écran et l’image apparaîtra lorsque le lecteur s’arrête ou lorsque l’image est figée pendant quelques minutes. Ce fond d’écran permet à l’écran de ne pas s’abîmer. · On (Lance le fond d’écran). · Off (Arrête le fond d’écran).
- - General Setup Page - TV Display 16: 9 OSD Lang ENG Screen Saver Last Memory On Off On Off Réglage Audio Réglage des haut-parleurs Dans la page « Page de configuration audio », appuyer sur « ▼ » et sélectionner « Réglage audio », appuyer ensuite sur la touche « OK enter », ou sur la touche Play « ► » dans la « Page de configuration audio ».
Dual Mono Permet de sélectionner la Stéréo, L-MONO, R-MONO et MIX-MONO. - - Audio Setup Page - Speaker Setup Dual Mono Dynamic Stereo L-Mono R-Mono Mix-Mono Dynamique Permet de régler le ratio de compression afin de contrôler les contrastes du son (Volume). - - Audio Setup Page - Speaker Setup Dual Mono Dynamic FULL 3/4 1/2 1/4 OFF Configuration des préférences Assurez-vous qu’il n’y ait aucun disque dans le lecteur DVD avant de sélectionner la page « Préférences ».
- - Preference Page - TV Type Audio Subtitle Disc Menu Parental Password Default Multi ENG ENG ENG PAL Multi NTSC Audio Si l’une des langues ci-dessous est enregistrée sur le disque, vous pourrez écouter le disque dans l’une de ces langues. Sinon, vous ne pourrez l’écouter que dans la ou les langue(s) enregistrée(s).
Menu du disque Si l’une des langues ci-dessous est enregistrée sur le disque, vous pouvez choisir cette langue pour le Menu. Sinon, le Menu sera affiché dans l’une des langues enregistrées sur le disque.
Mot de passe Permet de modifier le mot de passe requis pour changer les paramètres de contrôle d’âge de la fonction Contrôle parental. NOTE : (Le mot de passe par défaut est 123456 ) - - Preference Page - TV Type Audio Subtitle Disc Menu Parental Password Default Multi ENG ENG ENG Change Paramètres par défaut L’utilisateur peut revenir aux paramètres par défaut prévus lors de la fabrication en appuyant sur la touche RESET puis sur OK.
9. AUTO-DÉPANNAGE ET CONSEILS Merci de vérifier si vous pouvez résoudre le problème par vous-même. Problème Absence de signal Absence de couleurs Tâche sur l’écran Image double ou multiple Contrôle Vérifier que tous les câbles sont correctement branchés. Ajuster le contraste, la couleur et la luminosité. Peut provenir du signal lumineux d’une voiture, d’un moteur, d’un néon ou autres appareils ou installations électriques.
10. CARACTÉRISTIQUES Ce manuel est pour référence uniquement, tout changement dans la conception ou les caractéristiques ne sera pas détaillé. Mode Screen Size LED-B13TU19H LED-B13TU22H LED-B13HU22H LED-B13TDU22H 18 . 5Inch 21 . 6Inch 21 . 6Inch Display Type TFT LED Resolution(Pixel) 1366 X 768 Aspect Ratio 16:9 21 .
Mode LED-B13TU24F Taille de l’écran 23Inch LED-B13HU24F LED -B13H U32H LED -B13H U42F 31 .
1 PREÁMBULO 3 2 PRECAUCIONES DE SEGURIDAD 3 3 CONTENIDO DE LA CAJA 5 4 PARTE DELANTERA, TRASERA Y CONEXIONES DEL LED 6 5 6 7 INSTALACIÓN BÁSICA MAN DO A DI STAN CI A MANEJO DEL MENÚ Conexión de AV Conexión de YPbPr Conexión HDMI Conexión COAX Conexión USB 7 7 8 8 9 9 10 10 10 Instrucciones del mando a distancia en modo TV 11 Instrucciones del mando a distancia en modo DTV/USB 12 Conexión del cable de alimentación Conexión de la antena Conexión del SCART Conexión de VGA(PC) Instrucci
9 CONSEJOS Y RESOLUCIÓN DE PROBLEMAS 41 10 ESPECIFICACIONES 42 2
1.PRÓLOGO ¡Gracias por comprar este TV! Lea atentamente este manual antes de utilizar el TV. Asegúrese de que el TV no ha sufrido ningún daño durante el transporte. Si el TV esté averiado, no lo instale y póngase en contacto con el vendedor. Compruebe que tienen todos los accesorios según el modelo. 2.PRECAUCIONES DE SEGURIDAD Ponga el TV sobre una superficie estable. No coloque ningún material encima del TV.
Mantenga el TV seco y alejado de la humedad. Mantenga el TV alejado de fuentes de calor. Desenchufe el TV antes de limpiarlo. No utilice disolvente ni líquido para limpiar el TV. Para limpiar el TV, utilice solamente un paño suave y seco. En caso de que experimente algún problema, no use piezas de repuesto distintas de las recomendadas por el fabricante. El uso de piezas de repuesto inapropiadas puede tener como consecuencia descargas eléctricas, incendios por cortocircuitos u otros incidentes.
3.. CONTENIDO DE LA CAJA R.LIS T LED TV T.LIST Mando a distancia 1.5V 1.
4. PARTE DELA NTE RA, TR ASERA, CONEXIONES DEL TV LE D Vista delantera 1. 1 2 VOL+ VOL- 3 CH+ 4 CHMENU 5 SOURCE 6 POWER 7 9 8 ABRIR/CERRAR in modo DVD; REPRODUCIR/PAUSA en modo DVD; 2. 3. Pulse “VOL+ ” o “VOL- ”para aumentar o reducir el volumen del sonido. 4. Pulse “CH+ ” o “CH- ” para pasar los canales. 5. Pulse "MENU" para presentar el menú principal en la pantalla. 6. Pulse "SOURCE" de nuevo para seleccionar la fuente de entrada. 7. Pulse el botón “POWER” para encender o apagar el TV. 8.
5. INSTALACIÓN BÁSICA Conexión del cable de alimentación - Conectar el cable de alimentación correctamente como se indica. - Pulsar el botón POWER de su TV LED para encenderlo. El indicador de alimentación situado en el panel delantero se enciende de color Verde o Azul.
Conexión de EUROCONECTOR (SCART) TV Volver USB 1 2 PC AUDIO VGA(PC) SCART Cable euroconector DVD o VCR Volver DVD o VCR Conectar el Euroconector (SCART) del dispositivo de vídeo externo en el conector situado en el aparato con un cable EUROCONECTOR. Seleccionar la fuente de entrada SCART (EUROCONECTOR) con el botón SOURCE. Conexión VGA(PC) TV Volver USB 1 2 SCART PC VGA(PC) AUDIO Cable de audio Cable VGA Conectar la salida RGB del PC al conector jack VGA situado en el TV.
Conexión AV TV Volver COAX PHONE YPbPr VIDEO R L RF IN CI PORT Cable de vídeo DVD o vídeo nuevo DVD or VCR Conectar el conector jack VIDEO y AUDIO del DVD o VCR a los conectores jacks AV del TV con el cable RCA. Correspondencia de colores de conectores jack: El Vídeo es Amarillo, el Audio izquierdo es blanco y el Audio derecho es rojo. Seleccionar la fuente de entrada AV con el botón SOURCE (FUENTE) del mando a distancia.
Conexión HDMI TV Volver USB 1 SCART 2 PC AUDIO VGA(PC) Cable HDMI DVD o vídeo nuevo DVD or VCR La conexión de entrada HDMI permite la transferencia de señales de audio/vídeo/control por medio de un cable solamente. Conexión COAX TV Volver COAX PHONE YPbPr R V IDE O L RF IN CI PORT Coax Cable SPDIF INPUT Audio Amplifier Back Audio Amplifier Conectar con dispositivo de audio del amplificador a la salida de COAX en el televisor.
6.MANDO A DISTANCIA Instrucciones del mando a distancia en modo TV MUTE POWER POWER ENCIENDE o APAGA el TV LED. MUTE Pulsar para desactivar el sonido. Pulsar de nuevo o pulsar VOL+ para activar el sonido del TV. BOTONES NUMÉRICOS Pulse 0-9 para seleccionar un canal de TV directamente cuando vea la TV. El canal cambia después de 2 segundos. 10 PROGRAM +10 LIST DISPLAY INFO ASPECT ZOOM MENU EXIT OK ENTER SLEEP D.SETUP TTX REPEAT SOURCE D.MENU TITLE R.LIST T.LIST D.
Instrucciones del mando a distancia en modo DTV/USB BOTONES NUMÉRICOS Pulsar 0-9 para seleccionar un canal. MUTE POWER INFO Pulse para mostrar en la pantalla la fuente y la información del canal. CH+/CHPara cambiar de canal, cuando se está viendo la TV. 10 PROGRAM +10 LIST DISPLAY INFO ASPECT ZOOM MENU EXIT BOTONES DE COLORES Botones de colores (rojo, verde, amarillo y azul r espectivamente) que se utilizan en algunos submenús. T.LIST Press to display the Record Timer Schedule List. R.
Inst rucci on es del mand o a di st anci a en mod o TE LE TE XTO MUTE POWER BOTONES NUMÉRICOS Pulsar 0-9 para seleccionar una página del teletexto. 10 PROGRAM +10 LIST DISPLAY INFO CH+/CHPara avanzar o retroceder páginas. ASPECT ZOOM MENU EXIT OK ENTER TELETEXTO Pulsar para conmutar entre los modos de TV y Teletexto. SLEEP D.SETUP TTX REPEAT SOURCE D.MENU TITLE R.LIST T.LIST D.
Instrucciones del mando a distancia en modo DVD Nota: Asegúrese de que el TV que ha comprado cuenta con cargador de DVD, de lo contrario, todas estas partes no tendrán ningún efecto. BOTONES NUMÉRICOS Botones numéricos para datos diversos. MUTE POWER PROGRAM Para programar la reproducción de un disco en una secuencia deseada. ZOOM Reproduciendo, pulsar ZOOM y el reproductor aumentará la imagen una vez.
Instalación del mando a distancia 1. Abrir la tapa. 2. Pilas de tamaño AAA. Duran te la instalación de las pilas, asegurarse de que se insertan teniendo en cuenta la correspondencia de las marcas de polaridad “+” y “-“ de las pilas y del in terior del compartimento de pilas. 3. Volver a colocar l atapa de las pilas en su lugar. Para evitar que las pilas tengan fugas que pueden causar lesiones corporales o averías en el mando a distancia: 1.
7.
Sintonización automática Pulsar el botón ▼ / ▲ para seleccionar Auto Tuning (Sintonización automática), y a continuación pulsar el botón OK para comenzar la búsqueda automática. Tune Type Channel Tuning ATV+DTV ▲ France Italy Belgium Germany Portugal ▼ ▲ Other TV DTV Radio Data 1% : : : : 0 programme 0 programme 0 programme 0 programme 67.
Edición de programa Pulsar el botón ▼ / ▲ para seleccionar Program Edit (Edición de programa), y a continuación pulsar el botón OK para acceder al Submenú. ► ► Programme Edit 1 C-01 ATV 2 S-42 ATV 3 S-09 ATV 4 S-05 ATV 5 C-11 ATV 6 S-30 ATV 7 S-37 ATV 8 C-26 ATV 9 C-44 ATV 10 C-56 ATV Delete Enter Rename FAV Move Fav Skip Menu Utilizar el botón Rojo para suprimir el canal actual. Utiliza el botón Verde para establecer el canal actual a Renombrar.
MENÚ DE IMAGEN Pulsar el botón MENU para mostrar en pantalla el menú principal. Pulsar el botón ◄ / ► para seleccionar PICTURE (IMAGEN) en el menú principal; resaltará la primera opción. 1. Pulsar el botón ▼ / ▲ para seleccionar la opción que se desea ajustar en el menú PICTURE (IMAGEN). 2. Pulsar el botón OK para ajustar.
MENÚ DE SONIDO Pulsar el botón MENU para mostrar en pantalla el menú principal. Pulsar el botón ◄ / ► para seleccionar Sound (Sonido) en el menú principal; resaltará la primera opción. Sound Mode Standard Treble 50 Bass 50 Balance SOUND Move MENU 0 Auto Volume Off Surround Sound Off Return Enter Select EXIT Exit 1. Pulsar el botón ▼ / ▲ para seleccionar la opción que se desea ajustar en el menú SOUND (SONIDO). 2. Pulsar el botón ◄/► para ajustar.
MENÚ TIEMPO Pulsar el botón MENU para mostrar en pantalla el menú principal. Pulsar el botón ◄ / ► para seleccionar el TIME (TIEMPO) en el menú principal; resaltará la cuarta opción. 01/Jan 04:28 Clock Off Time Off On Time Off Time Zone TIME Move MENU GMT+1 Sleep Timer Auto Standby Off OSD Timer 10s Return Enter Select 4H EX IT Exit 1. Pulsar el botón ▼ / ▲ para seleccionar la opción que se desea ajustar en el menú TIME (TIEMPO). 2. Pulsar el botón ◄/► para ajustar.
MENÚ DE BLOQUEO Pulsar el botón MENU para mostrar en pantalla el menú principal. Pulsar el botón ◄ / ► para seleccionar LOCK (BLOQUEO) en el menú principal; resaltará la uinta opción. Lock System Off Set Password Block Program LOCK Move MENU Parental Guidance Off Key lock Off Return Enter Select EX IT Exit 1. Pulsar el botón ▼ / ▲ para seleccionar la opción que se desea ajustar en el menú LOCK (BLOQUEO). 2. Pulsar el botón ◄/► para ajustar.
MENÚ DE CONFIGURACIÓN Pulsar el botón MENU para mostrar en pantalla el menú principal. Pulsar el botón ◄ / ► para seleccionar Setup (Configuración) en el menú principal; resaltará la sexta opción. OSD Language English TTX Language Audio Language West English Subtitle Language English PVR File System Recorder Schedule List Aspect Ratio Blue Screen First Time Installation Reset SETUP Move MENU Return Enter Select 16:9 On EX IT Exit 1.
Grabadora Pulsar el botón MENU del mando a distancia para mostraren la pantalla el menú principal; usar el botón ◄/► para seleccionar SETUP (CONFIGURAR), y utilizar el botón ▼/▲ para seleccionar Recorder (Grabadora). A continuación pulsar el botón OK para acceder al submenú. Relación de aspecto Pulsar el botón ▼ / ▲ para seleccionar Aspect Ratio (Relación de aspecto), y a continuación pulsar el botón OK para acceder al Submenú.
Vertical Pos Pulsar el botón ▼ / ▲ para seleccionar Vertical Pos.(Posición vertical), y a continuación pulsar el botón OK para acceder al Submenú. Pulsar el botón ◄/► para ajustar. Tamaño Pulsar el botón ▼ / ▲ para seleccionar Size (tamaño), y a continuación pulsar el botón OK para acceder al Submenú. Pulsar el botón ◄/► para ajustar. Fase Pulsar el botón ▼ / ▲ para seleccionar Phase (Fase), y a continuación pulsar el botón OK para acceder al Submenú. Pulsar el botón ◄/► para ajustar. VGA(PC) Notas: 1.
MENÚ DE MEDIOS (USB) Nota: Antes de manejar el menú MEDIA (MEDIOS), conectar el dispositivo USB, y a continuación pulsar el botón SOURCE (FUENTE) para establecer la Fuente de Entrada (Input Source) en USB, y a continuación pulsar el botón OK para acceder. USB 2.0 Pulsar el botón ◄/► para seleccionar la opción que se desea ajustar en el menú principal MDIA (MEDIOS), y a continuación pulsar el botón OK para acceder.
PHOTO 1/1 C:\ Retun music -MSTPVR picture Delete EXIT Exit Pulsar el botón ◄/► para seleccionar la carpeta de ficheros que se desea buscar en el menú de selección de ficheros, y a continuación pulsar el botón OK del mando a distancia para acceder al Submenú. Pulsar el botón ◄/► para seleccionar el fichero que se desea ver en el menú de selección de ficheros, y a continuación pulsar el botón Rojo del mando a distancia para borrar ficheros.
Menú MOVIE (PELÍCULAS) Pulsar el botón ▼ / ▲ para seleccionar MOVIE (PELÍCULAS), y a continuación pulsar el botón OK para acceder. USB 2.0 Pulsar el botón ◄ / ► para seleccionar el disco que se desee buscar, y a continuación pulsar el botón OK para acceder. Pulsar el botón ◄/► para seleccionar la opción Return (Volver) y volver al menú anterior. MOVIE 1/1 C:\ Retun -MSTPVR music .avl MPEG4_311F_720X5- [3.av] Delete EXIT picture Exit Press EXIT button to return back to the previous menu.
TEXT 1/1 C:\ Retun -MSTPVR music Delete picture EXIT Exit Pulsar el botón EXIT (SALIR) para volver al menú anterior. Cuando se resalte la opción seleccionada, la información del fichero aparecerá a la derecha y se ofrecerá una vista previa del texto en el centro. Pulsar el botón OK para ver el texto seleccionado. MENÚ PVR Grabadora instantánea Nota: Asegurarse de que se ha insertado el dispositivo USB en el TV antes de comenzar a grabar.
Pulsar el botón ◄/► para seleccionarparar PVR o no. Pulsar el botón ◄/► para seleccionarreproducir el programa grabado durante la grabación. [00:00:20/00:02:13] Play FB Prev. FF Next Pause Stop 14:28 Se puede pulsar el botón correspondiente de la barra de control para reproducir (Play), rebobinado rápido (FB), avance rápido (FF), reproducir anterior (Prev.), reproducir siguiente (Next), pausa (pause) o detener la reproducción (Stop).
File System Size PVR File SystemType FAT32 PVR File System Size All SD 104 Mins HD 29 Mins Enter Pulsar el botón ▼/▲ para seleccionar PVR File System Type (Tipo de sistema de ficheros PVR), pulsar el botón OK para formatear el disco, y aparecerá un cuadro de diálogo como el siguiente: Format disk Format disk Warning ! All data will be lost. Exit► ◄ Start Pulsar el botón ◄ para comenzar a formatear o pulsar el botón ► para cancelar el formateo y volver al menú anterior.
Dif. de tiempo Pulsar el botón para iniciar Timeshift (Dif. de tiempo), y se mostrará una barra de control como se indica a continuación: [00:00:20] ( 0001:57:29) S Play FB FF 5 Five Prev. Next Pause Stop 14:28 Before Winter Comes El programa se detendrá cuando se inicie Timeshift (Dif. de tiempo); se puede continuar viendo el programa pulsando el botón PLAY (REPRODUCIR) cuando se desee verlo dentro del la diferencia de tiempo obtenida.
Menú EPG Pulsar el botón EPG del mando a distancia. PROGRAMME GUIDE 31 May 2007 13:00-15:30 31 May 2007 14:38 Comdey drama starring David Niven .An officer in charge of a displaced persons’camp faces a dilemma when a Russian deserter is ordered back.(1969)[S] 31 May 1 Five 13:30-15:30 Before Winter Comes 2 Five Life 15:30-17:30 Battle of The V.
8.Manejo del DVD Nota: asegúrese de que el televisor que usted ha comprado es comprado con cargador de DVD, de otro modo toda esta parte no se aplica. Manejo básico 1. Pulsar el botón Source (Fuente) del mando a distancia para seleccionar la fuente de entrada DVD. 2. Pulsar el botón OPEN / CLOSE (ABRIR / CERRAR) para cargar y descargar el disco en la bandeja.
Idioma OSD Se utiliza para seleccionar idioma de OSD. ·English ·French ·Spanish ·German ·Portuguese ·Italian - - General Setup Page - TV Display 16:9 OSD Lang ENG Screen Saver Last Memory On Off English French Spanish German Portuguese Italian Salvapantallas Inicia el salvapantallas; la imagen del salvapantallas aparecerá cuando el reproductor se detenga o la imagen se quede fija durante unos minutos. Este salvapantallas puede evitar que la pantalla se averíe. · On (Act.) (Inicia el salvapantallas).
- - General Setup Page - TV Display 16: 9 OSD Lang ENG Screen Saver Last Memory On Off On Off Configuración de audio Speaker Setup (Configuración de altavoces) En la “Audio Setup Page” (“Página de configuración de audio”), pulsarel botón "" para seleccionar la opción "Speaker Setup" (Configuración de altavoces"), pulsar el botón "OK", "ENTER" ("INTRO") o "" (reproducción) en "Speaker Setup Page" ("Página de configuración de altavoces").
Dual Mono Se utiliza para selecciónar Stereo (Estéreo), L-MONO (MONO-I), R-MONO (MONO-D) y MIXMONO (MEZCLA-MONO). - - Audio Setup Page - Speaker Setup Dual Mono Dynamic Stereo L-Mono R-Mono Mix-Mono Dinámica Esta opción se utiliza para establecer la tasa de compresión para controlar el contraste de sonido (Volumen).
- - Preference Page - TV Type Audio Subtitle Disc Menu Parental Password Default Multi ENG ENG ENG PAL Multi NTSC Audio Si uno de los idiomas relacionados a continuación se ha grabado en el disco, se puede reproducir el sonido en dicho idioma. En caso contrario, se utilizará el idioma grabado.
Menú del disco Si uno de los idiomas relacionados a continuación se ha grabado en el disco, se puede presentar el Menú en dicho idioma. En caso contrario, se utilizará el idioma grabado.
Contraseña El usuario puede cambiar la contraseña que será necesaria cuando éste desee cambiar el Grado de Control de Edad de la función Parental Lock (Bloqueo paterno). NOTA: (La contraseña predeterminada es 123456 ) - - Preference Page - TV Type Audio Subtitle Disc Menu Parental Password Default Multi ENG ENG ENG Change Predeterminado El usuario puede cargar los parámetros originales predeterminados en la fábrica seleccionando RESET (REINICIAR) y pulsando el botón OK.
9. CONSEJOS Y RESOLUCIÓN DE PROBLEMAS Compruebe si puede resolver el problema por usted mismo/a. Resolución de Problemas Control No hay señal Comprobar que todos los cables y cables de alimentación están conectados correctamente. No hay tonos de color Hay manchas en la pantalla magen doble o multiple en la pantalla Ajustar el contraste, el color y el brillo. Puede ser consecuencia de una señal de iluminación de un coche, motor, luz de neón y otros dispositivos eléctricos o electrodomésticos.
10. ESPECIFICACIONES Este manual es solamene para su consulta, cualquier cambio al diseño y especificaciones no será avisado de antemano. Mode Tamaño de la pantalla LED-B13TU19H LED-B13TU22H LED-B13HU22H LED-B13TDU22H 18 . 5 Pulgadas 21 . 6 Pulgadas 21 . 6 Pulgadas Tipo de pantalla TFT LED Resolución (Píxeles) 1366 X 768 Relación de aspect 16:9 21 .
Mode LED-B13TU24F Tamaño de la pantalla 23Pulgadas LED-B13HU24F LED -B13H U32H LED -B13H U42F 23Pulgadas 31.
1 PREFÁCIO 3 2 PRECAU ÇÕ ES DE SEGU RAN ÇA 3 3 INA EMBALAGEM 5 4 LIGAÇÕES DIANTEIRAS E TRASEIRAS DO LED 6 Ligação USB 7 7 8 8 9 9 10 10 10 Instruções de controlo remoto em modo TV 11 Instruções de controlo remoto em modo DTV/USB 12 Instruções de controlo remoto em modo TELETEXTO 13 Instruções de controlo remoto em modo DVD 14 Configuração de controlo remoto 15 FONTE DE ENTRADA MENU DE CANAIS MENU DE IMAGEM MENU DE SOM MENU DE HORA MENU DE BLOQUEIO MENU PVR MENU EPG 16 16 19 20 21 2
9 RESOLUÇÃO DE PROBLEMAS E ACONSELHAMENTO 41 10 ESPECIFICAÇÕES 42 2
1. PREFÁCIO Obrigado por adquirir este televisor! Leia cuidadosamente este manual antes de utilizar o televisor. Certifique-se de que o televisor não ficou danificado durante o transporte. Caso o televisor esteja danificado, não o instale e contacte o seu revendedor. Verifique que possui todos os acessórios relativos ao modelo. 2. PRECAUÇÕES DE SEGURANÇA Coloque o televisor sobre uma superfície estável. Não coloque nenhum objecto sobre o televisor.
Mantenha o televisor seco e afastado da humidade. Mantenha o televisor afastado de fontes de calor. Desligue o televisor da corrente eléctrica antes de o limpar. Não utilize solventes nem líquidos para limpar o televisor. Limpe o televisor apenas com um pano macio e seco. Em caso de resolução de problemas, não use peças sobresselentes que não as sugeridas pelo fabricante. A utilização de peças sobresselentes inadequadas pode provocar choques eléctricos, curto-circuitos, incêndios ou outros incidentes.
3. 3 . NA EMBALAGEM R.LIS T TELEVISOR LED T.LIST Comando à distância 1.5V 1.
4. 4 . LIGAÇÕES DIANTEIRAS E TRASEIRAS DO LED Vista Frontal 1 2 VOL+ VOL- 3 CH+ 4 CHMENU 5 SOURCE 6 POWER 7 9 8 ABRIR/FECHAR em modo DVD; 1. PLAY/PAUSA em modo DVD; 2. 3. Prima “ VOL+ ” ou “ VOL- ” para aumentar ou diminuir o nível de som. 4. Prima “ CH+ ” ou “ CH- ” para percorrer os canais. 5. Prima “ MENU ” para colocar o menu principal no ecrã. 6. Prima “ SOURCE ” para seleccionar a fonte de entrada. 7. Prima o botão “ POWER” para ligar ou desligar o televisor. 8.
5. INSTALAÇÃO BÁSICA Ligação do Cabo de Alimentação - Ligue correctamente o cabo de alimentação, como mostrado. - Prima o botão POWER do seu televisor LED para ligar o LED. O indicador de alimentação no painel dianteiro acende a Verde ou Azul. Ligação de Antenas VHF ANTENNA UHF ANTENNA OUTDOOR ANTENNA AMPLIFIER INDOOR ANTENNA AMPLIFIER RF IN 75 OHM ANTENNA PLUG POWER PLUG OF ANTENNA AMPLIFIER Para garantir uma boa imagem e som, o sistema de antena do televisor tem de ser instalLED.
Ligação SCART TV Back USB 1 2 SCART PC AUDIO VGA(PC) Scart cable DVD or VCR Back DVD or VCR Ligue o conector SCART do dispositivo externo de vídeo ao conector SCART do televisor utilizan do um cabo SCART. Seleccione a fonte de entrada SCART usando o botão SOURCE (Fonte). Ligação VGA (PC) TV Back USB 1 2 SCART PC VGA(PC) AUDIO Audio Cable Ligue a saída RGB do PC à tomada VGA do televisor. Ligue a saída ÁUDIO do PC à tomada ÁUDIO PC do televisor.
Ligação AV TV Back COAX PHONE YPbPr VIDEO R L RF IN CI PORT Video cable DVD or VCR back DVD or VCR Ligue a tomada de saída VÍDEO e ÁUDIO do DVD ou Videogravador às entradas AV do televisor utilizando o cabo RCA. Respeite as cores das entradas: A entrada de Vídeo é a amarela, a de Áudio esquerda é a branca e a Áudio direito é a vermelha. Seleccione a fonte de entrada AV através do botão SOURCE (fonte) no comando à distância.
Ligação HDMI TV Back USB 1 PC AUDIO VGA(PC) SCART 2 HDMI cable DVD or VCR back DVD or VCR A ligação de entrada HDMI permite a transferência digital de sinais de áudio/vídeo/controlo através de um único cabo. Ligação COAX TV Back COAXX PHONE YPbPr COA V IDE O R L RF IN CI PORT Coax Cable SPDIF INPUT Audio Amplifier Back Audio Amplifier Conectar-se a dispositivo de áudio do amplificador à tomada de saída COAX na TV.
6. COMANDO À DISTÂNCIA Instruções de controlo remoto em modo TV MUTE POWER 10 PROGRAM +10 POWER Liga ou Desliga o Televisor LED. MUTE Prima para silenciar o som. Prima novamente ou prima VOL+ para anular o silenciamento do televisor. BOTÕES NUMÉRICOS Prima 0-9 para seleccionar um canal de TV directamente quando está a ver televisão. O canal muda ao fim de 2 segundos. LIST DISPLAY INFO ASPECT ZOOM MENU EXIT OK ENTER SLEEP D.SETUP TTX REPEAT SOURCE D.MENU TITLE R.LIST T.LIST D.
Instruções de controlo remoto em modo DTV/USB BOTÕES NUMÉRICOS Prima 0-9 para seleccionar um canal. MUTE POWER INFO Prima para apresentar a fonte e a informação dos canais. CH+/CHQuando está a ver um canal de televisão, permite mudar de canal. 10 PROGRAM +10 LIST DISPLAY INFO ASPECT ZOOM MENU EXIT OK ENTER SLEEP D.SETUP TTX REPEAT SOURCE D.MENU TITLE R.LIST T.LIST D.
Instruções de controlo remo to em mo do TELETEXTO MUTE POWER BOTÕES NUMÉRICOS Prima 0-9 para seleccionar uma página de teletexto. 10 PROGRAM +10 LIST DISPLAY INFO CH+/CHPágina para cima e Página para baixo. ASPECT ZOOM MENU EXIT OK ENTER SLEEP D.SETUP TTX REPEAT SOURCE D.MENU TITLE R.LIST T.LIST D.DISPLAY INDEX HOLD A-B GOTO I/II REVEAL SIZE SUBTITLE EPG FAV AUDIO REC SUBPAGE TV / RADIO TTX Prima para alternar entre modo TV e modo Teletexto.
Instruções de controlo remoto em modo DVD Nota: Certifique-se de que o Televisor que adquiriu possui leitor de DVD; caso contrário, todas estas funções ficam sem efeito. BOTÕES NUMÉRICOS Botões numéricos para vários dados. MUTE POWER PROGRAM Programa a reprodução de um disco na sequência pretendida. ZOOM Em estado de reprodução, prima ZOOM; o leitor irá fazer zoom da imagem uma vez.
Configuração de controlo remoto 1. Abra a tampa. 2. Pilhas formato AAA. Quando inserir as pilhas, certifique-se de que respeita as polaridades seguindo as marcas “+” e “-”das pilhas e do compartimento de pilhas. 3. Volte a colocar a tampa do compartimento das pilhas. Para evitar fugas das pilhas, que podem resultar em ferimentos corporais ou danos no comando à distância: 1. Instale as pilhas correctamente e como indicado no comando à distância. 2.
7. FUNCIONAMENTO DO MENU FONTE DE ENTRADA Iuput Source Iuput Source ATV ATV DTV DTV USB USB AV AV VGA VGA YPbPr YPbPr DVD SCART SCART HDMI1 HDMI1 HDMI2 HDMI2 HDMI3 Enter Enter Prima o botão SOURCE para visualizar a lista de fonte de entrada; Prima ▼ / ▲ ou o botão SOURCE para seleccionar a fonte de entrada que pretende ver; Prima o botão OK para entrar na fonte de entrada; Prima o botão EXIT para sair; MENU DE CANAIS Prima o botão MENU para visualizar o menu principal.
Sintonia Automática Prima o botão ▼ / ▲ para seleccionar Sintonia Automática; depois prima OK para iniciar a procura automática. Tune Type Channel Tuning ATV+DTV ▲ Italy Portugal France Poland Spain ▼ ▲ Other TV DTV Radio Data 1% : : : : 0 0 0 0 programme programme programme programme 67.30mHz (TV) ▼ Please press MENU key to skip Enter Menu Sintonia Manual DTV Prima o botão ▼ / ▲ para seleccionar Sintonia Manual DTV; depois prima OK para entrar no Submenu.
Edição de Programas Prima o botão ▼ / ▲ para seleccionar Edição de Programas; depois prima OK para entrar no submenu. ► ► Programme Edit 1 C- 01 ATV 2 S- 42 ATV 3 S- 09 ATV 4 S- 05 ATV 5 C- 11 ATV 6 S- 30 ATV 7 S- 37 ATV 8 C- 26 ATV 9 C- 44 ATV 10 C-56 ATV Delete Enter Rename FAV Move Fav Skip Menu ·Use o botão Vermelho para eliminar o canal actual. ·Use o botão Verde para definir o canal actual para Renomear. ·Use o botão Amarelo e as setas ▲/▼para mover o canal actual.
PICTURE MENU Prima o botão MENU para visualizar o menu principal. Prima o botão ◄ / ► para seleccionar PICTURE (IMAGEM) no menu principal. A segunda opção será destacada. 1. Prima o botão ▼ / ▲ para seleccionar a opção que pretende ajustar no menu PICTURE (IMAGEM). 2. Prima OK para ajustar.
SOUND MENU Prima o botão MENU para visualizar o menu principal. Prima o botão ◄ / ► para seleccionar Som no menu principal. A terceira opção será destacada. Sound Mode Standard Treble 50 Bass 50 Balance SOUND Move MENU 0 Auto Volume Off Surround Sound Off Return Enter Select EXIT Exit 1. Prima o botão ▼ / ▲ para seleccionar a opção que pretende ajustar no menu SOM. 2. Prima o botão ◄/► para regular.
TIME MENU Prima o botão MENU para visualizar o menu principal. Prima o botão ◄ / ► para seleccionar TIME (Hora) no menu principal. A quarta opção será destacada. 01/Jan 04:28 Clock Off Time Off On Time Off Time Zone GMT+1 Sleep Timer TIME Move MENU Off Auto Standby 4H OSD Timer 10s Return Enter Select EX IT Exit 1. Prima o botão ▼ / ▲ para seleccionar a opção que pretende ajustar no menu TIME (Hora). 2. Prima o botão ◄/► para regular. Clock (Relógio) Mostra o actual sistema horário.
LOCK MENU Prima o botão MENU para visualizar o menu principal. Prima o botão ◄ / ► para seleccionar LOCK (Bloquear) no menu principal. A quinta opção será destacada. Lock System Off Set Password Block Program LOCK Move MENU Parental Guidance Off Key lock Off Return Enter Select EX IT Exit 1. Prima o botão ▼ / ▲ para seleccionar a opção que pretende ajustar no menu LOCK (Bloquear). 2. Prima o botão ◄/► para regular.
MENU DE CONFIGURAÇÃO Prima o botão MENU para visualizar o menu principal. Prima o botão ▼ / ▲ para seleccionar Setup (Configuração) no menu principal. A sexta opção será destacada. OSD Language English TTX Language Audio Language West English Subtitle Language English PVR File System Recorder Schedule List Aspect Ratio Blue Screen First Time Installation Reset SETUP Move MENU Return Enter Select 16:9 On EX IT Exit 1.
Gravador Prima o botão MENU do comando à distância para visualizar o menu principal; Use o botão ◄/►para seleccionar SETUP (Configuração), e o botão ▼/▲ para seleccionar Gravador. De seguida, prima para entrar no submenu. relação de aspecto Prima o botão ▼ / ▲ para seleccionar Aspect Ratio (relação de aspecto); depois prima OK para entrar no submenu. Ecrã azul Prima o botão ▼ / ▲ para seleccionar Blue Screen (Ecrã Azul); depois prima ◄/►para seleccionar On ou Off.
Auto Adjust (Ajuste Automático) Prima o botão ▼ / ▲ para seleccionar Ajuste Automático; depois prima OK para iniciar o ajuste automático. Horizontal Pos. (Posicionamento Horizontal) Prima o botão ▼ / ▲ para seleccionar Posicionamento Horizontal; depois prima OK para entrar no submenu. Prima o botão◄/► para regular. Vertical Pos. (Posicionamento Vertical) Prima o botão ▼ / ▲ para seleccionar Posicionamento Vertical; depois prima OK para entrar no submenu. Prima o botão◄/► para regular.
MENU MÉDIA (USB) Nota: Antes de utilizar o menu MEDIA, ligue o dispositivo USB; depois prima o botão SOURCE (Fonte) para definir a Fonte de Entrada para USB. Depois prima Ok para entrar. USB 2.0 Prima o botão ◄/► para seleccionar a opção que pretende ajustar no menu principal MEDIA; depois prima o botão OK para entrar. Menu FOTOGRAFIA Prima o botão ▼ / ▲ para seleccionar PHOTO (Fotografia) no menu principal; depois prima OK para entrar. USB 2.
PHOTO C: \ 1/ 1 Retun -MSTPVR music picture Delete EXIT Exit Prima o botão ◄/► para seleccionar a pasta de ficheiros que pretende encontrar no menu de selecção de ficheiro; depois prima Ok no seu comando à distância para entrar no submenu. Prima o botão ◄/► para seleccionar o ficheiro que pretende eliminar no menu de selecção de ficheiro; depois prima o botão vermelho do seu comando para eliminar os ficheiros.
Menu MOVIE (FILMES) Prima o botão ◄/► para seleccionar MOVIE (FILMES) no menu principal; depois prima Ok para entrar. USB 2.0 Prima o botão ◄/► para seleccionar a unidade de disco que pretende visualizar; depois prima Ok para entrar. Prima o botão ◄/► para seleccionar a opção de regressar ao menu anterior. MOVIE 1/1 C:\ Retun -MSTPVR music .avl MPEG4_311F_720X5- [3.av] Delete EXIT picture Exit Prima o botão EXIT (Sair) para regressar ao menu anterior.
TEXT 1/1 C:\ Retun -MSTPVR music Delete picture EXIT Exit Prima o botão EXIT (Sair) para regressar ao menu anterior. Quando for destacada a opção que seleccionou, a informação do ficheiro irá surgir à direita e será apresentada uma pré-visualização do texto ao centro. Prima o botão OK para visualizar o texto seleccionado. MENU PVR Gravador Instantâneo Nota: Certifique-se de que inseriu o dispositivo USB na placa de TV antes de iniciar a gravação.
Prima o botão ▼/▲ para seleccionar parar PVR ou não. Prima o botão ▼/▲ para seleccionar reproduzir o programa gravado durante a gravação. [00:00:20/00:02:13] Play FB Prev. FF Next Pause Stop 14: 28 Pode premir o botão na barra de controlo para reprodução, recuo rápido, avanço rápido, reproduzir anterior, reproduzir seguinte, pausa ou parar a reprodução. Nota: Pode igualmente reproduzir o programa gravado no ficheiro denominado ” _MSTPVR” por baixo do ficheiro MOVIE (Filmes) na Fonte USB.
File System Size PVR File SystemType FAT32 PVR File System Size All SD 104 Mins HD 29 Mins Enter Prima o botão ▼/▲ para seleccionar PVR File System Type (Tipo de Sistema de Ficheiros PVR); depois prima o botão ◄/► para seleccionar o tipo de sistema. Prima o botão OK para formatar o disco; irá surgir uma caixa de diálogo como a que se segue: Format disk Format disk Warning ! All data will be lost.
Timeshift Primao botão para iniciar o Timeshift. Surgirá uma barra de controlo como a que segue: [00:00:20] ( 0001:57:29) S Play FB FF 5 Five Prev. Next Pause Stop 14: 28 Before Winter Comes The program will stop when you start timeshift, you can continue watching the program by press the PLAY button whenever youwant to watch it within the acquired timeshift time.
MENU EPG Prima o botão EPG do comando à distância. PROGRAMME GUIDE 31 May 2007 13:00-15:30 31 May 2007 14:38 Comdey drama starring David Niven .An officer in charge of a displaced persons’camp faces a dilemma when a Russian deserter is ordered back.(1969)[S] 31 May 1 Five 13:30-15:30 Before Winter Comes 2 Five Life 15:30-17:30 Battle of The V.
8.Funcionamento do DVD Nota: certifique-se que a TV que você comprou é comprado com o carregador de DVD, caso contrário toda essa parte não se aplica. Funcionamento Básico 1. Prima o botão Source do comando à distância para seleccionar a fonte de entrada DVD. 2. Prima o botão OPEN / CLOSE (Abrir /Fechar) para carregar a partir da bandeja de discos. Segure o disco sem tocar em nenhuma das faces.
idioma do texto no ecrã É usado para seleccionar o idioma OSD: ·English ·French ·Spanish ·German ·Portuguese ·Italian - - General Setup Page - TV Display 16:9 OSD Lang ENG Screen Saver Last Memory On Off English French Spanish German Portuguese Italian Protecção de Ecrã Inicie o screen saver (protecção de ecrã). A protecção de ecrã surgirá quando o leitor pára ou a imagem é imobilizada durante alguns minutos. Esta protecção pode proteger o ecrã de danos. · On (Iniciar screen saver).
- - General Setup Page - TV Display 16: 9 OSD Lang ENG Screen Saver Last Memory On Off On Off Configuração de Áudio Configuração de Áudio Em “Audio Setup Page” prima o botão“▼” para seleccionar o item “Speaker Setup”; prima “OK ENTER” Ou o botão “►” (play) em “Speaker Setup Page”. - - Audio Setup Page - Speaker Setup Dual Mono Dynamic Redução de canais · LT/RT Uma faixa multicanal gravada em disco; o sinal de saída será incorporado no canal esquerdo e direito.
Monofonia Dupla É usada para seleccionar o Stereo (estereofonia), L-MONO (monofonia, canal esquerdo), R-MONO (monofonia, canal direito) e MIX-MONO (monofonia, mistura de canais). - - Audio Setup Page - Speaker Setup Dual Mono Dynamic Stereo L- Mono R-Mono Mix- Mono Dinâmico Esta opção é usada para definir a taxa de compressão de forma a controlar o contraste de som (Volume).
- - Preference Page - TV Type Audio Subtitle Disc Menu Parental Password Default Multi ENG ENG ENG PAL Multi NTSC Áudio Se o disco é gravado num dos idiomas listados abaixo, pode reproduzir o som nesse idioma. Não sendo esse o caso, será usado o idioma gravado.
Menu Disco Se o disco é gravado num dos idiomas listados abaixo, pode definir para que o Menu seja apresentado nesse idioma. Não sendo esse o caso, será usado o idioma gravado.
Palavra-passe O utilizador pode alterar a palavra-passe solicitada quando o utilizador pretende alterar o Grau de Controlo de Idade na função Bloqueio Parental. NOTA: (A palavra-passe predefinida é 123456). - - Preference Page - TV Type Audio Subtitle Disc Menu Parental Password Default Multi ENG ENG ENG Change Pré-definições O utilizador pode carregar as definições originais de fábrica escolhendo RESET e premindo o botão OK.
9. RESOLUÇÃO DE PROBLEMAS E ACONSELHAMENTO Veja, por favor, se consegue solucionar o problema por si só. Resolução de Problemas Ausência de sinal Comando Verifique se todos os cabos e fios estão correctamente ligados. Sem tons de cor Ajuste o contraste, a cor e a luminosidade. Manchas no ecrã Talvez seja consequência de um sinal luminoso de automóvel, motor, luzes de néon e outros dispositivos eléctricos ou electrodomésticos.
10. ESPECIFICAÇÕES Este manual é apenas para sua referência, qualquer alteração do projeto e as especificações não será avisado. Mode Tamanho do Ecrã LED-B13TU19H LED-B13TU22H LED-B13HU22H LED-B13TDU22H 18 . 5Inch 21 . 6Inch 21 . 6Inch Tipo de Ecrã TFT LED Resolução (Pixels) 1366 X 768 Formato de Exibição 16:9 21 .
Mode LED-B13TU24F Tamanho do Ecrã 23Inch LED-B13HU24F LED -B13H U32H LED -B13H U42F 31 .
1 PREFAZIONE 3 2 PRECAUZIONI DI SICUREZZA 3 3 CONTENUTO DEL LA CONFEZIONE 5 4 COLLEGAMENTI FRONTALI E POSTERIORI DEL CTELEVI SOR E LED 6 Collegamento del cavo di alimentazione Collegamento delle antenne Collegamento USB 7 7 8 8 9 9 10 10 10 Istruzioni del telecomando in modalità TV 11 Istruzioni del telecomando in modalità DTV/USB 12 Istruzioni del telecomando in modalità Televideo 13 Istruzioni del telecomando in modalità DVD 14 Impostazione del telecomando 15 INPUT SOURCE Menu can
9 10 RISOLUZIONE DEI PROBLEMI E CONSIGLI 41 SPECIFICHE 42 2
1. PREFAZIONE Grazie per l'acquisto di questo televisore. Leggere attentamente il presente manuale prima di mettere in funzione il televisore. Assicurarsi che l'apparecchio non abbia subito danni durante il trasporto. Nel caso in cui il televisore risulti danneggiato, non proseguire con l'installazione e contattare il proprio rivenditore. Assicurarsi che tutti gli accessori corrispondano a quelli in dotazione con il modello. 2.PRECAUZIONI DI SICUREZZA Posizionare il televisore su una superficie stabile.
Tenere il televisore all'asciutto e al riparo dall'umidità. Non tenere l'apparecchio in prossimità di fonti di calore. Scollegare il televisore prima di procedere alla pulizia. Non utilizzare solventi o detergenti liquidi. Pulire il televisore soltanto con un panno morbido e asciutto. In caso di problemi, non utilizzare pezzi di ricambio diversi da quelli suggeriti dal produttore. L'utilizzo di pezzi di ricambio non adeguati potrebbe causare folgorazioni, corto circuiti o altri incidenti.
3 . CONTENUTO DELLA CONFEZIONE R.LIS T TV LED T.LIST Telecomando 1.5V 1.
4 . COLLEGAMENTI ANTERIORI E POSTERIORI DEL TELEVISORE LED Vista anteriore 1 2 VOL+ VOL- 3 CH+ 4 CHMENU 5 SOURCE 6 POWER 7 9 8 1. APERTURA/CHIUSURA in modalià DVD. 2. RIPRODUZIONE/PAUSA in modalità DVD. 3. Premere “VOL+” o “VOL-”per aumentare o diminuire il livello dell'audio. 4. Premere “CH+” o “ CH- ” per cambiare canale. 5. Premere "MENU" per visualizzare il menu principale sullo schermo. 6. Premere "SOURCE" per selezionare la sorgente in entrata. 7.
5. INSTALLAZIONE DI BASE Collegamento del cavo di alimentazione - Collegare il cavo di alimentazione come indicato. - Premere il tasto POWER sul televisore LED per accenderlo. La spia di accensione sul pannello anteriore si illumina in verde o blu.
Collegamento SCART TV Back USB 1 2 SCART PC AUDIO VGA(PC) Scart cable DVD or VCR Back DVD or VCR Collegare la presa SCART sull'apparecchio video esterno a tale presa sul pannello, utilizzando un cavo SCART: selezionare la sorgente SCART in entrata mediante il tasto SOURCE: Collegamento VGA(PC) TV Back USB 1 2 SCART PC VGA(PC) AUDIO Audio Cable Collegare l'uscita RGB del PC alla presa VGA del televisore. Collegare l'uscita audio del PC alla presa PC AUDIO del televisore.
Collegamento AV TV Back COAX PHONE YPbPr VIDEO R L RF IN CI PORT Video cable DVD or VCR back DVD or VCR Collegare l'uscita VIDEO e AUDIO del lettore DVD o del VCR alle prese A/V del televisore, utilizzando il cavo RCA. Accertarsi che i colori delle prese corrispondano: giallo per il video, bianco per l'audio di sinistra e rosso per l'audio di destra. Selezionare la sorgente A/V in entrata tramite il tasto SOURCE sul telecomando.
Collegamento HDMI TV Back USB 1 PC AUDIO VGA(PC) SCART 2 HDMI cable DVD or VCR back DVD or VCR Il collegamento dell'ingresso HDMI abilita il trasferimento digitale di segnali audio/video/ telecomando mediante un unico cavo. Collegamento COAX TV Back CO A X PHONE YPbPr VIDEO R L RF IN CI PORT Coax Cable SPDIF INPUT Audio Amplifier Back Audio Amplifier Connettersi al dispositivo un amplificatore audio al jack di uscita COAX sul televisore.
6 . TELECOMANDO Istruzioni del telecomando in modalità TV MUTE POWER POWER Consente di accendere o spegnere il televisore. MUTE Premere per disattivare l'audio. Premere nuovamente o premere VOL+ per ripristinare l'audio. TASTI NUMERICI Premere i tasti da 0 a 9 per selezionare direttamente un canale a televisore acceso. Il canale viene cambiato dopo 2 secondi. 10 PROGRAM +10 LIST DISPLAY INFO ASPECT ZOOM MENU EXIT OK ENTER SLEEP D.SETUP TTX REPEAT SOURCE D.MENU TITLE R.LIST T.LIST D.
Istruzioni del telecomando in modalità DTV/USB TASTI NUMERICI Premere i tasti da 0 a 9 per selezionare un canale. MUTE POWER INFO Premere per visualizzare il segnale e le informazioni sul canale. CH+/CHDurante la visualizzazione di un canale, consente di cambiare canale. 10 PROGRAM +10 LIST DISPLAY INFO ASPECT ZOOM MENU EXIT TASTI COLORATI Tasti colorati (rispettivamente rosso, verde, giallo e blu) utilizzati in alcuni sottomenu. T.
Istruzioni del telecomando in modalità Televideo MUTE POWER TASTI NUMERICI Premere i tasti da 0 a 9 per selezionare una pagina del televideo. 10 PROGRAM +10 LIST DISPLAY INFO Canalesu/Canale giù Pagina su e pagina giù. ASPECT ZOOM MENU EXIT OK ENTER SLEEP D.SETUP TTX REPEAT SOURCE D.MENU TITLE R.LIST T.LIST D.DISPLAY INDEX HOLD A-B GOTO I/II REVEAL SIZE SUBTITLE EPG FAV AUDIO REC SUBPAGE TV / RADIO Televideo Premere per alternare tra modalità TV e Televideo.
Istruzioni del telecomando in modalità DVD Nota: Assicurarsi che il televisore acquistato abbia il loader DVD, in caso contrario queste procedure non saranno attive. MUTE POWER TASTI NUMERICI Tasti numerici per inserimento di diversi dati. PROGRAM Consente di programmare la riproduzione di un disco nella sequenza desiderata. ZOOM In modalità riproduzione, premendo ZOOM il lettore ingrandirà una volta l'immagine.
Impostazioni del telecomando 1. Aprire il coperchio. 2. Inserire le batterie di tipo AAA. Durante tale operazione, assicurarsi della polarità corretta in base ai contrassegni “+” e “-“ sulle batterie e all'interno del vano batterie. 3. Chiudere il coperchio del vano batterie. Per impedire la fuoriuscita di liquidi dalle batterie, che possono provocare irritazioni o danneggiare il telecomando, attenersi alle seguenti istruzioni: 1. Installare correttamente le batterie, come indicato sul telecomando. 2.
7.FUNZIONAMENTO DEL MENU Sorgente in entrata Iuput Source Iuput Source ATV ATV DTV DTV USB USB AV AV VGA VGA YPbPr YPbPr DVD SCART SCART HDMI1 HDMI1 HDMI2 HDMI2 HDMI3 Enter Enter Premere il tasto SOURCE per visualizzare l'elenco delle sorgenti in entrata. Premere i tasti ▼ / ▲ o il tasto SOURCE per selezionare la sorgente in entrata che si desidera visualizzare, quindi premere il tasto OK per accedervi. Premere il tasto EXIT per uscire.
Sintonizzazione automatica Premere il tasto ▼ / ▲ per selezionare Auto Tuning e premere il tasto OK per avviare la ricerca automatica. Tune Type Channel Tuning ATV+DTV ▲ France Italy Belgium Germany Portugal ▼ ▲ Other TV DTV Radio Data 1% : : : : 0 programme 0 programme 0 programme 0 programme 67.30mHz (TV) ▼ Please press MENU key to skip Enter Menu Sintonizzazione manuale DTV Premere il tasto ▼ / ▲ per selezionare DTV Manual Tuning e premere il tasto OK per accedere al sottomenu.
Modifica programma Premere il tasto ▼ / ▲ per selezionare Program Edit, quindi premere il tasto OK per accedere al sottomenu. ► ► Programme Edit 1 C-01 ATV 2 S-42 ATV 3 S-09 ATV 4 S-05 ATV 5 C-11 ATV 6 S-30 ATV 7 S-37 ATV 8 C-26 ATV 9 C-44 ATV 10 C-56 ATV Delete Enter Rename FAV Move Fav Skip Menu ·Premere il tasto rosso per eliminare il canale corrente. ·Premere il tasto verde per rinominare il canale corrente.
IMMAGINE Premere il tasto MENU per visualizzare il menu principale. Premere i tasti ◄ / ► per selezionare PICTURE nel menu principale. Verrà evidenziata la seconda opzione. 1. Premere i tasti ▼ / ▲ per selezionare l'opzione che si desidera regolare nel menu PICTURE. 2. Premere il tasto OK per confermare l'operazione.
MENU AUDIO Premere il tasto MENU per visualizzare il menu principale. Premere i tasti ◄ / ► per selezionare Sound nel menu principale. Verrà evidenziata la terza opzione. Sound Mode Standard Treble 50 Bass 50 Balance SOUND Move MENU 0 Auto Volume Off Surround Sound Off Return Enter Select EXIT Exit 1. Premere i tasti ▼ / ▲ per selezionare l'opzione che si desidera regolare nel menu SOUND. 2. Premere il tasto ◄/► per confermare l'operazione.
Menu orario Premere il tasto MENU per visualizzare il menu principale. Premere il tasto ◄ / ► per selezionare TIME nel menu principale. Verrà evidenziata la quarta opzione. 01/Jan 04:28 Clock Off Time Off On Time Off Time Zone TIME Move MENU GMT+1 Sleep Timer Auto Standby Off OSD Timer 10s Return Enter Select 4H EX IT Exit 1. Premere il tasto ▼ / ▲ per selezionare l'opzione che si desidera regolare nel menu TIME. 2. Premere il tasto ◄/► per confermare l'operazione.
Menu blocco Premere il tasto MENU per visualizzare il menu principale. Premere i tasti ◄ / ► per selezionare LOCK nel menu principale. Verrà evidenziata la quinta opzione. Lock System Off Set Password Block Program LOCK Move MENU Parental Guidance Off Key lock Off Return Enter Select EX IT Exit 1. Premere il tasto ▼ / ▲ per selezionare l'opzione che si desidera regolare nel menu LOCK. 2. Premere il tasto ◄/► per confermare l'operazione.
Menu configurazione Premere il tasto MENU per visualizzare il menu principale. Premere i tasti ▼ / ▲ per selezionare Setup nel menu principale. Verrà evidenziata la sesta opzione. OSD Language English TTX Language Audio Language West English Subtitle Language English PVR File System Recorder Schedule List Aspect Ratio Blue Screen First Time Installation Reset SETUP Move MENU Return Enter Select 16:9 On EX IT Exit 1.
Registratore Premere il tasto MENU sul telecomando per visualizzare il menu principale. Utilizzare il tasto ◄/► per selezionare SETUP e il tasto▼/▲ per selezionare Recorder. Quindi premere il tasto OK per accedere al sottomenu. Formato immagine Premere il tasto ▼ / ▲ per selezionare Aspect Ratio, quindi premere il tasto OK per accedere al sottomenu. Schermo Blu Premere il tasto ▼ / ▲ per selezionare Blue Screen, quindi premere il tasto ◄/► per selezionare On o Off.
Posizione Verticale Premere il tasto ▼ / ▲ per selezionare Vertical Pos., quindi premere il tasto OK per accedere al sottomenu. Premere il tasto ◄/► per confermare l'operazione. Dimensione Premere il tasto ▼ / ▲ per selezionare Size, quindi premere il tasto OK per accedere al sottomenu. Premere il tasto ◄/► per regolare la dimensione del display. Fase Premere il tasto ▼ / ▲ per selezionare Phase, quindi premere il tasto OK per accedere al sottomenu. Premere il tasto ◄/► per confermare l'operazione.
MENU LETTORE (USB) Nota: prima di accedere al menu MEDIA, inserire il dispositivo USB, quindi premere il tasto SOURCE per impostare la sorgente in entrata su tale dispositivo e premere il tasto OK per confermare. USB 2.0 Premere i tasti ◄ / ► per selezionare l'opzione che si desidera regolare nel menu MEDIA, quindi premere il tasto OK per confermare l'operazione. Foto Premere il tasto ◄/► per selezionare PHOTO nel menu principale, quindi premere il tasto OK per confermare l'operazione. USB 2.
PHOTO 1/1 C:\ Retun music -MSTPVR picture Delete EXIT Exit Premere il tasto ◄/► per selezionare la cartella del file da cercare nel menu di selezione dei file, quindi premere il tasto OK sul telecomando per accedere al sottomenu. Premere il tasto ◄/► per selezionare il file da cancellare nel menu di selezione dei file, quindi premere il tasto rosso sul telecomando per confermare l'operazione.
Menu video Premere il tasto ◄/► per selezionare MOVIE nel menu principale, quindi premere il tasto OK per confermare l'operazione. USB 2.0 Premere il tasto◄/► per selezionare l'unità disco che si desidera visualizzare, quindi premere il tasto OK per confermare l'operazione. Premere il tasto ◄/► per tornare al menu precedente. MOVIE 1/1 C:\ Retun -MSTPVR music .avl MPEG4_311F_720X5- [3.av] Delete EXIT picture Exit Premere il tasto EXIT per tornare al menu precedente.
TEXT 1/1 C:\ Retun -MSTPVR music Delete picture EXIT Exit Premere il tasto EXIT per tornare al menu precedente. Quando l'opzione selezionata risulta evidenziata, sulla destra compariranno le informazioni del file, mentre il testo sarà visualizzato in anteprima nella parte centrale. Premere il tasto OK per visualizzare il testo selezionato. Menu PVR Registratore istantaneo Nota: prima di avviare la registrazione, assicurarsi che il dispositivo USB sia inserito nel televisore.
Premere il tasto ◄/► per selezionare per arrestare o non arrestare il PVR. Premere il tasto ◄/► per selezionare per riprodurre il programma registrato. [00:00:20/00:02:13] Play FB Prev. FF Next Pause Stop 14:28 È possibile premere il tasto sulla barra di comando per avviare una riproduzione, un arretramento rapido o avanzamento rapido, riprodurre la parte precedente o successiva, mettere in pausa o arrestare la riproduzione.
File System Size PVR File SystemType FAT32 PVR File System Size All SD 104 Mins HD 29 Mins Enter Premere il tasto ▼/▲ per selezionare PVR File System Type, quindi premere il tasto ◄/► per selezionare il tipo di sistema e il tasto OK per formattare il disco. Comparirà la seguente finestra di dialogo: Format disk Format disk Warning ! All data will be lost. Exit► ◄ Start Premere il tasto ◄ per avviare la formattazione o ► per annullarla e tornare al menu precedente.
Differita Premere il tasto per avviare Timeshift. Comparirà la seguente barra di comando: [00:00:20] ( 0001:57:29) S Play FB FF 5 Five Prev. Next Pause Stop 14:28 Before Winter Comes Il programma si arresterà in caso di avvio di Timeshift e sarà possibile continuare a visualizzare il programma premendo il tasto PLAY se si desidera vederlo in modalità differita.
Menu EPG Premere il tasto EPG sul telecomando. PROGRAMME GUIDE 31 May 2007 13:00-15:30 31 May 2007 14:38 Comdey drama starring David Niven .An officer in charge of a displaced persons’camp faces a dilemma when a Russian deserter is ordered back.(1969)[S] 31 May 1 Five 13:30-15:30 Before Winter Comes 2 Five Life 15:30-17:30 Battle of The V.
8. Funzionamento del lettore DVD Nota: assicuratevi che il televisore che avete comprato è comprato con caricatore DVD, altrimenti tutta questa parte non si applica. Operazioni di base 1. Premere il tasto Source sul telecomando per selezionare la sorgente di ingresso DVD. 2. Premere il tasto OPEN/CLOSE per aprire il vano del disco.
Lingua OSD Tale funzione consente di selezionare la lingua OSD. ·English ·French ·Spanish ·German ·Portuguese - - General Setup Page - ·Italian TV Display 16:9 OSD Lang ENG Screen Saver Last Memory On Off English French Spanish German Portuguese Italian Screen Saver Abilitando lo screen saver, l'immagine scelta per tale funzione comparirà quando la riproduzione viene interrotta o l'immagine viene congelata per alcuni minuti. Questa funzione consente di evitare danni allo schermo.
- - General Setup Page - TV Display 16: 9 OSD Lang ENG Screen Saver Last Memory On Off On Off Configurazione audio · Configurazione dell'altoparlante In “Audio Setup page” premere “ ”il tasto “ per selezionare la voce “Speaker Setup” e premere il tasto “OK ENTER” o “ ” (riproduzione) in “Speaker Setup Page” (Pagina di configurazione dell'altoparlante).
Dual Mono Questa funzione consente di selezionare le uscite Stereo, L-MONO, R-MONO e MIX-MONO. - - Audio Setup Page - Speaker Setup Dual Mono Dynamic Stereo L-Mono R-Mono Mix-Mono Dinamico Questa opzione consente di impostare il rapporto di compressione per regolare il contrasto dell' audio (volume). - - Audio Setup Page - Speaker Setup Dual Mono Dynamic FULL 3/4 1/2 1/4 OFF Configurazione preferenze Assicurarsi che nel lettore non vi siano dischi, quindi selezionare Preference Page.
- - Preference Page - TV Type Audio Subtitle Disc Menu Parental Password Default Multi ENG ENG ENG PAL Multi NTSC Audio Se una lingua tra quelle elencate di seguito è registrata sul disco, è possibile riprodurre l'audio in tale lingua. In caso contrario, sarà utilizzata la lingua registrata.
Disc Menu (Menu disco) Se una lingua tra quelle elencate di seguito è registrata sul disco, è possibile impostare il Menu ·English ·French ·Spanish ·German ·Portuguese ·Italian - - Preference Page - TV Type Audio Subtitle Disc Menu Parental Password Default Multi ENG ENG ENG English French Spanish German Portuguese Italian Controllo genitori Quando si attiva tale funzione durante la riproduzione di un disco, è possibile selezionare un Age Control Grade (Livello controllo contenuti in base all'età) a sec
Password È possibile modificare la password richiesta quando si desidera modificare la funzione Age Control Grade nella funzione Parental Lock. NOTA: la password di default è 123456. - - Preference Page - TV Type Audio Subtitle Disc Menu Parental Password Default Multi ENG ENG ENG Change Default È possibile tornare alle impostazioni di fabbrica scegliendo RESET e premendo il tasto OK.
9. RISOLUZIONE DEI PROBLEMI E CONSIGLI Verificare se è possibile risolvere autonomamente il problema. Risoluzione dei problemi Nessun segnale Scarsa qualità delle gradazioni di colore Macchie sullo schermo Immagine doppia o multipla “Effetto neve” sullo schermo Azione Verificare che tutti i cavi siano inseriti correttamente. Regolare il contrasto, il colore e la luminosità.
10. SPECIFICHE Il presente manuale serve solo come riferimento e il produttore non è tenuto a comunicare eventuali modifiche al design e ai dati tecnici. Mode Dimensioni schermo LED-B13TU19H LED-B13TU22H LED-B13HU22H LED-B13TDU22H 18 . 5Inch 21 . 6Inch 21 .
Mode LED-B13TU24F Dimensioni schermo 23Inch LED-B13HU24F LED -B13H U32H LED -B13H U42F 31 .