00 Cover_back_KC.fm 1 ページ 2008年1月15日 火曜日 午後8時34分 HDD/DVD Recorder Operating Instructions Should this product require service in Canada, please contact a Pioneer Canadian Authorized Dealer to locate the nearest Pioneer Authorized Service Company in Canada. Alternatively, please contact the Customer Satisfaction Department at the following address: Pioneer Electronics of Canada, Inc.
DVR660HK_KC_EN.book 2 ページ 2008年2月7日 木曜日 午後2時34分 Thank you for buying this Pioneer product. Please read through these operating instructions so you will know how to operate your model properly. After you have finished reading the instructions, put them away in a safe place for future reference.
DVR660HK_KC_EN.
DVR660HK_KC_EN.book 4 ページ 2008年2月7日 木曜日 午後2時34分 We Want You Listening For A Lifetime Selecting fine audio equipment such as the unit you’ve just purchased is only the start of your musical enjoyment. Now it’s time to consider how you can maximize the fun and excitement your equipment offers. This manufacturer and the Electronic Industries Association’s Consumer Electronics Group want you to get the most out of your equipment by playing it at a safe level.
DVR660HK_KC_EN.book 5 ページ 2008年2月7日 木曜日 午後2時34分 Contents 01 Before you start 05 Recording What’s in the box . . . . . . . . . . . . . . . . . . . 7 Putting the batteries in the remote control. . . . . . . . . . . . . . . . . . . . . . . . . . . . 7 Using the remote control. . . . . . . . . . . . . . 7 Disc/content format playback compatibility . . . . . . . . . . . . . . . . . . . . . . . 8 About the internal hard disk drive . . . . . . 13 Symbols used in this manual . . . . . . . . .
DVR660HK_KC_EN.book 6 ページ 2008年2月7日 木曜日 午後2時34分 01 07 Playing and recording from a DV/HDD camcorder 13 Copying files from a PC (Connect PC) Playing from a DV camcorder . . . . . . . . . 63 Recording from a DV camcorder . . . . . . . 63 About DV. . . . . . . . . . . . . . . . . . . . . . . . . 65 Copying from an HDD camcorder . . . . . . 66 Connecting the PC . . . . . . . . . . . . . . . . 102 Copying WMA/MP3 files. . . . . . . . . . . . 104 Copying MPEG-4 AAC, JPEG and DivX files . . . . . . . . . .
DVR660HK_KC_EN.
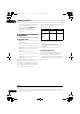
DVR660HK_KC_EN.book 01 8 ページ 2008年2月7日 木曜日 午後2時34分 Before you start • You can control this recorder using the remote sensor of another Pioneer component via the CONTROL IN jack on the rear panel. See Rear panel connections on page 15 for more information. Disc/content format playback compatibility The following table shows older Pioneer DVD recorders’ limited compatibility with DVD-RW ver. 1.2 discs.
DVR660HK_KC_EN.book 9 ページ 2008年2月7日 木曜日 午後2時34分 Before you start 01 HDD/DVD Recording and playback compatibility This recorder can play and record all widely-used DVD disc types, and additionally provides HDD functionality. The table below shows some specific compatibility differences between the different disc types.
DVR660HK_KC_EN.book 01 10 ページ 2008年2月7日 DVD-R DL (Dual-Layer) and DVD+R DL (Double-Layer) discs contain two recordable layers on a single side, giving about 1.8 times the recording capacity of a conventional single-layer disc. This unit can record to both DVD-R DL and DVD+R DL discs. • If you intend to play DVD-R DL (Video mode) or DVD+R DL discs recorded on this unit on other DVD recorders/players, you must finalize them. (Note that some DVD recorders/players may not play even finalized DL discs.
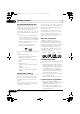
DVR660HK_KC_EN.book 11 ページ 2008年2月7日 木曜日 午後2時34分 Before you start • Sampling rates (MP3/WMA): 32 kHz, 44.1 kHz or 48 kHz • Sampling rates (MPEG-4 AAC1): 22.05 kHz, 24 kHz, 32 kHz, 44.
DVR660HK_KC_EN.book 01 12 ページ 2008年2月7日 DivX® VOD content DivX In order to play DivX VOD (video on demand) content on this recorder, you first need to register the recorder with your DivX VOD content provider. You do this by generating a DivX VOD registration code, which you submit to your provider. Some DivX VOD content may only be playable a fixed number of times.
DVR660HK_KC_EN.book 13 ページ 2008年2月7日 木曜日 午後2時34分 Before you start DTS Manufactured under license under U.S. Patent #: 5,451,942 & other U.S. and worldwide patents issued & pending. DTS and DTS Digital Out are registered trademarks and the DTS logos and Symbol are trademarks of DTS, Inc. © 1996-2007 DTS, Inc. All Rights Reserved. About the internal hard disk drive The internal hard disk drive (HDD) is a fragile piece of equipment.
DVR660HK_KC_EN.book 01 14 ページ 2008年2月7日 木曜日 午後2時34分 Before you start Symbols used in this manual The following icons are provided to help you quickly identify which instructions you need for which kind of disc. HDD HDD DVD Any type of DVD disc (recordable or playback only), finalized or not. DVD-Video Commercially produced DVD, finalized Video mode DVD-R/-RW.
DVR660HK_KC_EN.book 15 ページ 2008年2月7日 木曜日 午後2時34分 Connections 02 Chapter 2 Connections Rear panel connections 1 2 3 4 5 6 DVR-660H-K ANTENNA IN AUDIO R R AUDIO INPUT 3 VIDEO L L VIDEO COAXIAL OUTPUT 2 S-VIDEO S-VIDEO LAN(10/100) CONTROL HDMI OUT DIGITAL OUT AC IN IN OUT INPUT 1/AUTO START REC 7 Y PB PR COMPONENT VIDEO OUT 8 OUTPUT 1 9 10 1 ANTENNA IN (RF IN)/OUT Connect your TV antenna to the ANTENNA IN (RF IN) jack.
DVR660HK_KC_EN.book 02 16 ページ 2008年2月7日 Connections Front panel connections On the front panel there is a flip-down cover that hides more connections. Left side: DV IN 1 USB 2 3 1 DV IN A DV input i.LINK connector, suitable for connecting a DV camcorder. 2 USB port (Type A) USB port for connecting an HDD camcorder, digital camera, keyboard or other USB device. 3 USB port (Type B) USB port for connecting a PictBridgecompatible printer or PC.
DVR660HK_KC_EN.book 17 ページ 2008年2月7日 木曜日 午後2時34分 Connections 02 Easy connections The setup described here is a basic configuration that allows you to record TV programmes on both this recorder and your VCR. When watching recordings from this recorder, set your TV to input 1; switch to input 2 to watch a video playing in the VCR. Important • This recorder is equipped with copy protection technology.
DVR660HK_KC_EN.book 18 ページ 2008年2月7日 Using other types of video output 1 Connecting using an S-video output S-video carries the picture as separate colour and luminance (brightness) signals. This recorder has standard (composite), Svideo and component video outputs. The main difference between them is the quality of the picture. S-video delivers a better picture than composite video, while component video gives better picture quality still.
DVR660HK_KC_EN.book 19 ページ 2008年2月7日 木曜日 午後2時34分 Connections 02 Connecting to a cable box or satellite receiver (1) ANTENNA IN (RF IN) If you are using a cable box or satellite receiver with only a few scrambled channels, follow the setup on this page1. If many or all the channels are scrambled, we recommend using the setup on the following page. Using the setup on this page you can: • Watch one channel while recording another.
DVR660HK_KC_EN.book 02 20 ページ 2008年2月7日 木曜日 午後2時34分 Connections Connecting to a cable box or satellite receiver (2) 1 Antenna/cable TV wall outlet If many or all the channels you receive by cable or satellite are scrambled, we recommend using this setup.1 From antenna output Using the setup on this page you can: • Record any channel by selecting it on the cable box/satellite receiver. • Do not connect this recorder ‘through’ your VCR, satellite receiver or cable box.
DVR660HK_KC_EN.book 21 ページ 2008年2月7日 木曜日 午後2時34分 Connections 02 Connecting to an AV amplifier/receiver To enjoy multichannel surround sound you need to connect this recorder to an AV amp/ receiver using the digital coaxial output. In addition to the digital connection, we recommend also connecting using the stereo analog connection. You’ll probably also want to connect a video output to your AV amp/receiver.
DVR660HK_KC_EN.book 02 22 ページ 2008年2月7日 If you have an HDMI or DVI-equipped1 monitor or display2, you can connect it to this recorder using an HDMI cable3 (not supplied). The HDMI connector outputs uncompressed digital video, as well as almost every kind of digital audio. 1 Use an HDMI cable to connect the HDMI OUT connector on this recorder to an HDMI connector on an HDMI-compatible display.
02 Connecting _Up.fm 23 ページ 2008年2月7日 木曜日 午後5時54分 Connections plus standard to multi-channel surroundsound audio. HDMI features include uncompressed digital video, a bandwidth of up to five gigabits per second (Dual Link), one connector (instead of several cables and connectors), and communication between the AV source and AV devices such as DTVs. HDMI, the HDMI logo and High-Definition Multimedia Interface are trademarks or registered trademarks of HDMI Licensing LLC.
DVR660HK_KC_EN.book 02 24 ページ 2008年2月7日 木曜日 午後2時34分 Connections Connecting other AV sources • This jack is for connection to DV equipment only. It is not compatible with digital satellite receivers or D-VHS video decks.
DVR660HK_KC_EN.book 25 ページ 2008年2月7日 木曜日 午後2時34分 Connections • When connecting a PC to this unit, make sure the power is turned off on both the PC and this unit when you connect them via USB. • We recommend connecting USB devices when this recorder is switched off (in standby). • We recommend USB cables 2 meters in length or shorter. Connecting an HDD camcorder On the recorder’s HDD, video files can only be copied with the signal format shown below.
DVR660HK_KC_EN.book 02 26 ページ 2008年2月7日 木曜日 午後2時34分 Connections Connect PC with this device, your PC must run either the Windows XP Home Edition (SP2), Windows XP Professional (SP2) or Windows Vista Home Premium operating system and be able to run Windows Media Player 11. Even if your PC can run Windows Media Player 11, we cannot guarantee that it will function properly with this device. For more details see the ‘Help’ section of Windows Media Player 11.
DVR660HK_KC_EN.book 27 ページ 2008年2月7日 木曜日 午後2時34分 Controls and displays 03 Chapter 3 Controls and displays Front panel 1 2 3 4 5 6 7 STANDBY/ON DV IN DVD INPUT 2 12 1 HDD indicator Lights when the hard disk (HDD) is selected. 2 HDD/DVD Press to switch between HDD and DVD for recording and playback. 3 DVD indicator Lights when the DVD drive is selected. 4 Disc tray 5 PC VIDEO (page 85) Press to play DivX files you have not yet viewed.
DVR660HK_KC_EN.book 28 ページ 2008年2月7日 木曜日 午後2時34分 Controls and displays 03 Display 1 2 3 4 5 6 PM L R 10 9 8 1 Lights during playback; blinks when playback is paused. 2 Lights when copying. P 7 6 Recording quality indicators (page 37) XP Lights when the recording mode is set to XP (high quality). 3 Lights during recording; blinks when recording is paused. SP Lights when the recording mode is set to SP (standard play).
03 Controls_and_Displays.fm 29 ページ 2008年2月7日 木曜日 午後6時23分 Controls and displays 03 Remote control STANDBY/ON SUBTITLE (page 60) Press to display/change the subtitles included in multilingual DVD-Video discs. OPEN/CLOSE 1 14 ANGLE (page 61) Press to switch camera angles on discs with multi-angle scenes. TV CONTROL 2 INPUT SELECT CH AUDIO SUBTITLE VOL ANGLE DISPLAY 3 4 ABC DEF GHI JKL MNO PQRS TUV WXYZ DISPLAY (page 61) Displays/changes the on-screen information displays.
DVR660HK_KC_EN.book 30 ページ 2008年2月7日 MUSIC (page 91) Press to play music files in random order. PHOTO (page 96) Press to play JPEG files in random order. 8 DISC NAVIGATOR (pages 56, 68)/ TOP MENU (page 53) Press to display the Disc Navigator screen, or the top menu if a DVD-Video or finalized DVD-R/-RW (Video) disc is loaded. 9 /// and ENTER Used to navigate all on-screen displays. Press ENTER to select the currently highlighted option.
DVR660HK_KC_EN.book 31 ページ 2008年2月7日 木曜日 午後2時34分 Getting started 04 Chapter 4 Getting started Switching on and setting up When you switch the recorder on for the first time, you can make several basic settings using the Setup Navigator feature. This takes you through setting the clock, the internal TV tuner and the video output. • If you don’t want to use the Setup Navigator, press to select Cancel, then press ENTER to exit the Setup Navigator.
DVR660HK_KC_EN.book 32 ページ 2008年2月7日 木曜日 午後2時34分 Getting started 04 Set ‘Clock Set CH‘ to the channel preset number that broadcasts a time signal, then move the cursor down to ‘Start’ and press ENTER. Set the date (month/day/year) and time, then press ENTER to make all the settings.
DVR660HK_KC_EN.book 33 ページ 2008年2月7日 Getting started 木曜日 午後2時34分 04 ENTER 10 Select ‘Finish Setup’ to exit the Setup Navigator, or ‘Go Back’ if you want to start again. k Setting Se t up is c om ple t e ! Line System er Save F inis h Se t up p Navigator Go Ba c k That completes basic setup using the Setup Navigator. • If there are blank channels with no station, you can set these to skip using the manual channel setting. See Manual CH Setting on page 113.
DVR660HK_KC_EN.book 05 34 ページ 2008年2月7日 木曜日 午後2時34分 Recording Chapter 5 Recording About DVD recording This recorder can record to DVD-R, DVD-RW, DVD+R, DVD+RW, DVD-RAM, DVD-R DL and DVD+R DL media. DVD-R and DVD-RW discs can be initialized for Video mode or VR mode recording. Each has its advantages, and it depends on what you want to do with the recording which mode you choose.
DVR660HK_KC_EN.book 35 ページ 2008年2月7日 木曜日 午後2時34分 Recording • See also Disc/content format playback compatibility on page 8 for detailed disc compatibility information.
DVR660HK_KC_EN.book 05 36 ページ 2008年2月7日 Audio output Audio setting Left (L) Right (R) MONO L+R L+R STEREO L R L+R SAP SAP Restrictions on video recording You cannot record copy-protected video using this recorder. Copy-protected video includes DVD-Video discs and some satellite broadcasts. If copy-protected material is encountered during a recording, recording will pause automatically and an error message will be displayed on-screen.
DVR660HK_KC_EN.book 37 ページ 2008年2月7日 木曜日 午後2時34分 Recording 05 Changing cable channels When a cable box is connected, you can use the remote to change cable channels (up to 999). If your cable box is connected to the RF antenna input on this recorder: CHANNEL • Use or Change the cable channel. In this case, you can’t change the channel of the built-in tuner.
DVR660HK_KC_EN.book 05 38 ページ 2008年2月7日 Basic recording from the TV DVD (VR) DVD (Video) DVD+R DVD+RW DVD-RAM HDD Basic recording from the TV involves just setting the channel to record, choosing whether to record to the HDD or a DVD and selecting the recording quality. HDD DVD 1 Select the HDD or DVD for recording. • If you’re recording to DVD, load a recordable disc (if you load a new blank DVD-RW or DVD+RW disc, the recorder takes a short while to initialize the disc).
DVR660HK_KC_EN.book 39 ページ 2008年2月7日 木曜日 午後2時34分 Recording into standby if no other operation is being performed. • To cancel the set recording time, press REC. • If you want to pause recording at any time1, press PAUSE. Press again to restart the recording (If recording to the HDD, DVD-RAM or DVD-R/-RW (VR mode), a new chapter is started after recording restarts). STOP REC 6 Press to stop recording.
DVR660HK_KC_EN.book 40 ページ 2008年2月7日 木曜日 午後2時34分 Recording 05 • Approximately two minutes before a timer recording is set to start, the recorder will go into timer recording standby. In timer recording standby you cannot use some functions. • The maximum length for timer recordings made to the HDD is 24 hours. However, because one title (HDD) is limited to 12 hours, recordings over 12 hours will be spread over two titles.
DVR660HK_KC_EN.book 41 ページ 2008年2月7日 木曜日 午後2時34分 Recording 05 As you move the cursor around the grid, an arrow stretches from the start time to the current cursor position, representing the length of the recording. A recording of up to six hours can be set. 8 ENTER Set the end time. 9 Select ‘Yes’ to set the timer recording and exit, or ‘No’ to go back to the Easy Timer Recording screen.
DVR660HK_KC_EN.book 05 42 ページ 2008年2月7日 木曜日 午後2時34分 Recording Note that the recording is always made to the HDD. If you want to record to a DVD disc, you’ll need to switch on the power and use the full VCR Plus+ programme screen. This screen shows all the timer programmes currently set.
DVR660HK_KC_EN.book 43 ページ 2008年2月7日 木曜日 午後2時34分 Recording 3 Enter the timer recording settings. Use the / buttons to select a field; use the / buttons to change the value. • CH – Choose a channel (2 to 69 for antenna channels; 1 to 125 for cable, excluding skip channels), or one of the external inputs from which to record. • Date – Choose a date up to one month in advance, or select a daily or weekly programme.
DVR660HK_KC_EN.book 05 44 ページ 2008年2月7日 • If you set a DVD timer recording but there is no recordable DVD disc loaded, or the disc loaded doesn’t have enough free space for the complete recording, Recovery is shown. In this case (unless you load a suitable disc before the recording actually starts), the recorder will use the HDD for recording. (The message Can’t Rec will appear if there are already 999 titles on the HDD or if there is not enough free space on the HDD for recording.
DVR660HK_KC_EN.book 45 ページ 2008年2月7日 木曜日 午後2時34分 Recording Cancelling or extending the timer REC 1 Press and hold for three seconds during a timer recording. Recording continues, but the timer indicator disappears from the front panel display indicating that the timer has been cancelled. REC 2 Press repeatedly to extend recording in 30 minute blocks. Programming a new end time You can edit the end time of a timer recording you have previously set.
DVR660HK_KC_EN.book 05 46 ページ 2008年2月7日 木曜日 午後2時34分 Recording • What happens when two or more timer programmes overlap? Basically, the programme with the earlier recording start time has priority. However, the recorder will start recording the programme with the later start time after the earlier programme is finished. If schedule to record two programmes have the same times (but different channels, for example), then only one of the two programmes will be recorded.
DVR660HK_KC_EN.book 47 ページ 2008年2月7日 木曜日 午後2時34分 Recording 05 • To watch video coming in via the DV input (front panel), select DV/HDD-Cam > DV Video Playback from the Home Menu (see also Playing from a DV camcorder on page 63). 3 Important • It takes a little while for this recorder to switch on and start recording after detecting a signal. Please bear this in mind when setting the timer. REC MODE Set the recording quality.
DVR660HK_KC_EN.book 05 48 ページ 2008年2月7日 • To cancel Auto Start Recording, press STANDBY/ON while the recorder is in standby. The AUTO indicator goes off. • To cancel Auto Start Recording once recording has already started, press REC for three seconds (this cancels Auto Start Recording, but recording continues), then F STOP REC to stop recording. • You can also stop recording by pressing F STOP REC then selecting Yes to confirm.
06 Recording.fm 49 ページ 2008年2月14日 木曜日 午後5時27分 Recording 05 • DVD-R DL (Video mode) discs and DVD+R DL discs must be finalized in order to play in other recorders/players. Note however that some recorders/ players will not play even finalized duallayer discs. when you play the disc. There are a number of different styles of title menu to choose from to suit the content of the disc.
DVR660HK_KC_EN.book 05 50 ページ 2008年2月7日 木曜日 午後2時34分 Recording 6 The recorder will now start finalizing the disc. During finalization: • If the finalization process of a DVD-R/ -RW disc is going to take more than around four minutes, you can press ENTER to cancel. Around four minutes before completion, the option to cancel disappears. • You can’t cancel the finalization of a DVD+R/+RW disc.
DVR660HK_KC_EN.book 51 ページ 2008年2月7日 Recording 木曜日 午後2時34分 05 DVD-RW Auto Initialize DVD-RW • Default setting: VR Mode Initialization mode is automatically carried out when you insert a blank DVD-RW. You must set the desired initialization mode before inserting a disc. HOME MENU 1 Display the Home Menu. ENTER 2 Select ‘Setup’ > ‘Disc Setup’. ENTER 3 Select ‘Basic’>’DVD-RW Auto Init.’, then ‘VR Mode’ or ‘Video Mode’.
DVR660HK_KC_EN.book 06 52 ページ 2008年2月7日 木曜日 午後2時34分 Playback Chapter 6 Playback Introduction Most of the features described in this chapter make use of on-screen displays. Navigate these using the cursor buttons and ENTER. To go back one level from any screen, use the RETURN button. Remember also that the button guide at the bottom of every screen shows which buttons do what.
DVR660HK_KC_EN.book 53 ページ 2008年2月7日 木曜日 午後2時34分 Playback 06 Playing DVD discs While paused, press and hold to start slow-motion playback. Press repeatedly to change the playback speed. While paused, press to advance a single frame in either direction. The table below shows the basic playback controls for DVD-Video, and recordable DVD discs. Press to start playback. If RESUME is displayed onscreen, playback starts from the place last stopped. PLAY STOP PAUSE Press to stop playback.
DVR660HK_KC_EN.book 06 54 ページ 2008年2月7日 木曜日 午後2時34分 Playback During playback, enter a title number then press ENTER to skip directly to that title. Press CLEAR to clear a number entry and start again. ENTER CM BACK CM SKIP (Commercial back/skip) Each press skips backward/forward progressively up to a maximum of two hours in either direction. Playing Video CDs The table below shows the basic playback controls for Video CDs. Some discs feature Playback Control (PBC for short) menus.
DVR660HK_KC_EN.book 55 ページ 2008年2月7日 木曜日 午後2時34分 Playback CM BACK CM SKIP Video CD in non-PBC mode only: (Commercial back/skip) Each press skips backward/forward progressively up to a maximum of two hours in either direction. 06 Playing DivX video files The table below shows the basic playback controls for DivX video files. While paused, press and hold to start slow-motion playback. Press repeatedly to change the playback speed (forward only).
DVR660HK_KC_EN.book 56 ページ 2008年2月7日 木曜日 午後2時34分 Playback 06 Using the Disc Navigator to browse the contents of a disc Use the Disc Navigator to browse the contents of a disc and start playback. Using the Disc Navigator with recordable discs and the HDD DVD-R DVD-RW DVD+R DVD+RW DVD-RAM HDD You can use the Disc Navigator to browse and edit video on recordable DVDs and the HDD, and to view information on titles. See also Editing on page 67 for more on editing recordable discs.
DVR660HK_KC_EN.book 57 ページ 2008年2月7日 木曜日 午後2時34分 Playback 06 • For instructions on playing Audio CD and WMA/MP3/MPEG-4 AAC discs, see Playing and copying music (Jukebox) on page 88. Using the Disc Navigator with playback-only discs DVD-Video Video CD 1 DVD Scanning discs Select DVD. ALL HOME MENU 2 Display the Home Menu. You can scan discs at various speeds, forwards or backwards.1 ENTER 3 Select ‘Disc Navigator’.
DVR660HK_KC_EN.book 58 ページ 2008年2月7日 木曜日 午後2時34分 Playback 06 • Select Play Mode from the command menu for Audio CDs or WMA/MP3/ MPEG-4 AAC files by pressing in the Jukebox (see Playing music from the Jukebox on page 90). • With DivX files, Play Mode can only be selected during playback. 3 Press repeatedly to change the slow motion speed. One of four slow motion play speeds can be selected during playback. The current playback speed is indicated onscreen. PLAY 4 Resume normal playback.
DVR660HK_KC_EN.book 59 ページ 2008年2月7日 木曜日 午後2時34分 Playback A-B Repeat DVD HDD CD Video CD DivX The A-B Repeat function allows you to specify two points (A and B) within a track or title that form a loop which is played over and over.1 06 programme play to repeat the tracks/ chapters in the programme list (see Programme play below).2 ENTER • Select ‘Repeat’ from the Play Mode menu, then choose a repeat play mode. Play Mode ENTER 1 During playback, select ‘A-B Repeat’ from the Play Mode menu.
DVR660HK_KC_EN.book 06 60 ページ 2008年2月7日 木曜日 午後2時34分 Playback After pressing ENTER to add the title/ chapter/album/track, the step number automatically moves down one. • To insert a step into the programme list, highlight the step number where you want to insert another step, then select a chapter/title/album/track as usual. After pressing ENTER, all the subsequent steps move down one. • To delete a step from the programme list, highlight the step you want to delete, then press CLEAR.
DVR660HK_KC_EN.book 61 ページ 2008年2月7日 木曜日 午後2時34分 Playback 06 Check the disc packaging for details of the soundtrack options. CD Video CD WMA/MP3 MPEG-4 AAC Stereo – Stereo (default) AUDIO • Change the audio soundtrack. The current audio language is shown onscreen and in the front panel display. • The sound may drop out for a few seconds when switching soundtracks. • Some discs feature both Dolby Digital and DTS soundtracks. There is no analog audio output when DTS is selected.
DVR660HK_KC_EN.book 06 62 ページ 2008年2月7日 Press DISPLAY once to see the HDD and removable disc (DVD, etc.) activity. Use the HDD and DVD button to switch between the two kinds of display. The example displays below show highspeed copying from HDD to DVD, and HDD chase playback.
DVR660HK_KC_EN.book 63 ページ 2008年2月7日 木曜日 午後2時34分 Playing and recording from a DV/HDD camcorder 07 Chapter 7 Playing and recording from a DV/HDD camcorder You can also play back and record video from a DV camcorder connected to the DV IN jack on the front panel of this recorder. It is also possible to connect an HDD camcorder to the recorder’s USB port and copy the images of the HDD camcorder to the recorder.
DVR660HK_KC_EN.book 64 ページ 2008年2月7日 木曜日 Playing and recording from a DV/HDD camcorder 07 Important • Some camcorders cannot be controlled using this recorder’s remote. • For best results when recording from a DV camcorder to this recorder, we recommend cueing the camcorder to the place you want to start recording from and setting the camcorder to play-pause. 8 • Check also that the Audio In settings for External Audio and Dual Mono Recording are as you want them (see Audio In on page 114).
DVR660HK_KC_EN.book 65 ページ 2008年2月7日 木曜日 午後2時34分 Playing and recording from a DV/HDD camcorder 3 From the Initial Setup menu, check that the DV audio input is setup as you require. See DV Input on page 115 for more on this. • Check also that the Audio In settings for External Audio and Dual Mono Recording are as you want them (see Audio In on page 114). HOME MENU 4 Display the Home Menu. ENTER 5 Select ‘DV/HDD-Cam’ > ‘DV Auto Copy’.
DVR660HK_KC_EN.book 66 ページ 2008年2月7日 木曜日 午後2時34分 Playing and recording from a DV/HDD camcorder 07 • Audio input to the DV IN jack should be 32 kHz or 48 kHz (not 44.1 kHz). • Picture disturbance in the recording may occur if the source component pauses playback or plays an unrecorded section of tape, or if the power fails in the source component, or the DV cable is disconnected. • The DV IN jack is an input only. There is no output functionality. ENTER 5 Select ‘Yes’ to confirm or ‘No’ to cancel.
DVR660HK_KC_EN.book 67 ページ 2008年2月7日 木曜日 午後2時34分 Editing 08 Chapter 8 Editing Editing options The table below shows which commands you can use with the HDD and different disc types.
DVR660HK_KC_EN.book 68 ページ 2008年2月7日 木曜日 午後2時34分 Editing 08 The Disc Navigator screen • If you are editing a DVD-R/-RW (VR mode) or DVD-RAM disc you can display the Play List by selecting Play List from the view options panel (press , then select Play List from the view options, then Play List). The Disc Navigator screen is where you can edit video content on unfinalized Video mode and DVD-R/-RW (VR mode) discs, DVD+R/ +RW and DVD-RAM, as well as video content on the hard disk drive.
DVR660HK_KC_EN.book 69 ページ 2008年2月7日 木曜日 午後2時34分 Editing 08 Create ENTER DVD (VR) DVD-RAM Play List only Use this function to create a Play List and add titles to it. Before you can use this command, make sure that the Play List is switched on in the view options panel on the left. 2 Select ‘Play’ from the command menu panel. Playback of the title you selected starts.
DVR660HK_KC_EN.book 08 70 ページ 2008年2月7日 木曜日 午後2時34分 Editing Title Name ENTER DVD (Video) DVD (VR) DVD+R DVD+RW DVD-RAM HDD You can give titles new names of up to 64 characters long for VR mode, DVD-RAM and HDD recordings, and up to 40 characters for Video mode recordings and DVD+R/+RW discs. 4 Select ‘OK’ to enter the name and return to the main Disc Navigator screen. • To return to the main Disc Navigator screen without saving changes to the title name, press RETURN.
DVR660HK_KC_EN.book 71 ページ 2008年2月7日 木曜日 午後2時34分 Editing 08 Using a USB keyboard to enter a name Using a USB keyboard connected to this recorder makes entering names very quick and convenient.1 When in USB keyboard input mode, a USB icon ( ) appears in the lower-left of the screen.2 Other than the standard alpha-numeric keys, use the following keys when entering names: The thumbnail setting screen appears and the playback starts from the beginning of the title.
DVR660HK_KC_EN.book 08 72 ページ 2008年2月7日 木曜日 午後2時34分 Editing Divide 3 edit. ENTER HDD only: Select the type of HDD DVD (VR) DVD-RAM Play List only Use this command to divide a title into two. Note that once divided, the two new HDD titles cannot be recombined into one again. HDD/DVD RECORDER Please select the type of editing. Video Mode Compatible Editing is recommended for compatibility with high-speed copying. 1 divide.
DVR660HK_KC_EN.book 73 ページ 2008年2月7日 木曜日 午後2時34分 Editing 08 Chapter Edit DVD (VR) DVD-RAM HDD When editing a VR mode DVD or video on the HDD you can edit individual chapters within a title, with commands for erasing, combining and dividing. 1 Highlight the title that contains the chapters you want to edit. ENTER 2 Select ‘Edit’ > ‘Chapter Edit’ from the command menu panel.
DVR660HK_KC_EN.book 74 ページ 2008年2月7日 木曜日 午後2時34分 Editing 08 Set Genre ENTER HDD Use this command to assign a genre to a title. 1 Highlight the title you want to assign a genre to. ENTER 2 Select ‘Edit’ > ‘Set Genre’ from the command menu panel. 3 ENTER 2 Select ‘Edit’ > ‘Lock’ from the command menu panel. An unlocked title will become locked; a locked title will be unlocked. Locked titles are shown in the Disc Navigator with a padlock icon.
DVR660HK_KC_EN.book 75 ページ 2008年2月7日 木曜日 午後2時34分 Editing 08 ENTER 2 Select ‘Edit’ > ‘Combine’ from the command menu panel. ENTER 2 Select one of the userdefinable genre names. Disc Navigator (HDD) ENTER 3 Select another title to combine with the first. This title will be appended to the first title selected. 12/03 SUN 11:00PM 12/03 Sun 7:00PM 11:00PM 4ch 11/29Mon 2ch SPSP 2 12/03 SUN 8:00PM 12/03 Sun 8:00PM 9ch SP Play List 2h00m(1.
DVR660HK_KC_EN.book 08 76 ページ 2008年2月7日 ENTER Disc Navigator (HDD) 101 Multi-Mode 10 Titles 12/03 SUN 11:00PM 4ch SP Erase 12/03 Sun 11:00PM 4ch SP Lock 2h00m(1.0G) 4 Titles Unlock 9 Change Genre 12/03 SUN 8:00PM 9ch SP 12/03 Sun 8:00PM 9ch SP 8 Single Mode 12/02 SAT 10:00PM 7ch SP 12/02 Sat 10:00PM 7ch SP 7 11/29 WED 7:00PM 2ch SP 11/29 Wed 7:00PM 2ch SP Recent first 2h00m(1.0G) All Genres HDD SP Remain 30h30m 1h00m(1.0G) 1h00m(1.
DVR660HK_KC_EN.book 77 ページ 2008年2月7日 木曜日 午後2時34分 Copying and backup 09 Chapter 9 Copying and backup Introduction Restrictions on copying Use the copying features of this recorder to: Commercial DVD-Video discs are protected using Copy Guard. These discs cannot be copied to the HDD. • Back up important recordings stored on the HDD to a DVD. • Make a DVD copy of a recording on the HDD to play in another player. • Transfer video from a DVD to the HDD for editing.
DVR660HK_KC_EN.book 09 78 ページ 2008年2月7日 * See also Copyright on page 77. The One Touch Copy feature copies the currently playing or selected (in the Disc Navigator) HDD title to DVD, or DVD title to HDD. The whole title is copied, regardless of where in the title you start the copy. HDD to DVD copies are made in the same recording mode. When copying DVD to HDD, the copy is made in whatever recording mode is currently set. Make sure that a recordable DVD disc is loaded when trying to copy from the HDD.
DVR660HK_KC_EN.book 79 ページ 2008年2月7日 木曜日 午後2時34分 Copying and backup 09 loaded); however, the steps are slightly different. • If you want to use a DVD-RW (VR mode) disc for the copy, make sure it is initialized before you start. • Titles recorded in MN1 to MN6, SEP, SLP or EP mode cannot be copied to DVD+R/ +RW using One Touch Copy. Copying to the HDD • The maximum title length for copying is 12 hours.
DVR660HK_KC_EN.book 09 80 ページ 2008年2月7日 木曜日 午後2時34分 Copying and backup Depending on the title1, high-speed copying may not be possible to DVDs. 6 panel. Display the command menu 8 ENTER Select a title to edit.
DVR660HK_KC_EN.book 81 ページ 2008年2月7日 木曜日 午後2時34分 Copying and backup 09 • Set Thumbnail – Set the thumbnail frame for a title (see Set Thumbnail on page 71). • Recording Mode – Set the picture quality of the copy (see Recording Mode on page 82). • Dual Mono Audio – Set how dual mono audio should be copied when copying from HDD to DVD-R/-RW (Video mode) and DVD+R/+RW (see Dual Mono Audio on page 83). • Cancel – Exit the menu. Repeat this step for as many titles you have that need editing. 9 panel.
DVR660HK_KC_EN.book 82 ページ 2008年2月7日 木曜日 午後2時34分 Copying and backup 09 HOME MENU ENTER 1 Display the Home Menu. ENTER 2 HDD’. 3 Select ‘Copy’ > ‘DVD/CD 7 Select ‘Next’ from the command menu panel to proceed to the copy options screen. • Select Recording Mode if you want to change the recording quality (see Recording Mode below). ENTER Select a Copy List type. • Selecting Create New Copy List will erase any Copy List already stored in the recorder.
DVR660HK_KC_EN.book 83 ページ 2008年2月7日 木曜日 午後2時34分 Copying and backup When you change the recording mode setting, you can see how much disc space it will require. If this is more than is available, it shows up in red and you won’t be able to start copying. In this case, either change the recording quality, or press RETURN to go back to the Copy List screen and erase one or more titles from the Copy List. 09 4 Load the disc you want to make a backup of.
DVR660HK_KC_EN.book 09 84 ページ 2008年2月7日 Disc Back-up Write back-up data from Hard Disk Drive. The disc contents will be overwritten. OK to start? Start Cancel • To see the progress of the backup, press DISPLAY. • You can cancel the backup process by pressing ONE TOUCH COPY for more than one second. However, this will make the disc unusable (although if you are using a DVD-RW or DVD+RW disc you can re-initialize it in order to make it usable again — see Initializing recordable DVD discs on page 50.
DVR660HK_KC_EN.book 85 ページ 2008年2月7日 木曜日 午後2時34分 Playing and copying DivX files (PC VIDEO) 10 Chapter 10 Playing and copying DivX files (PC VIDEO) • Press SUBTITLE or ANGLE to change the page. The PC VIDEO function is used to play DivX files recorded on the HDD, DVD, or CD-R/ -RW/-ROM disc. DivX files stored on a DVD or CD-R/-RW/-ROM disc or USB device can be copied to the HDD. PC VIDEO (HDD) Folder Playing DivX files HOME MENU 1 2 HDD Display the Home Menu.
DVR660HK_KC_EN.book 86 ページ 2008年2月7日 木曜日 午後2時34分 Playing and copying DivX files (PC VIDEO) 10 • Copy VIDEO FILE from a USB Device – Copies DivX files from a USB device onto the HDD. • For a description of operations during playback, see Playing DivX video files on page 55. Changing the display style of the PC VIDEO 1 Display the view options panel. 4 Display the command menu panel. • To copy from a USB device, proceed to step 6.
DVR660HK_KC_EN.book 87 ページ 2008年2月7日 木曜日 午後2時34分 Playing and copying DivX files (PC VIDEO) 10 Editing files on the HDD Erasing a title or folder 1 Select the title or folder you want to erase. • Erasing a folder will erase all the titles contained in it.1 Please be careful! ENTER 2 Select ‘Erase’ from the command menu panel. ENTER 3 Select ‘Yes’ to confirm or ‘No’ to cancel. • You can also erase a title or folder by pressing CLEAR when the title or folder is highlighted. Press ENTER to confirm.
DVR660HK_KC_EN.book 88 ページ 2008年2月7日 木曜日 午後2時34分 Playing and copying music (Jukebox) 11 Chapter 11 Playing and copying music (Jukebox) The Jukebox feature allows you to use the recorder’s HDD to store and playback music from your CDs. WMA/MP3/MPEG-4 AAC1 files recorded on CD-R/-RW/-ROM discs, DVDs or USB devices can also be copied to the HDD. Copying music to the HDD The first step is to copy some music to the HDD. CD audio, WMA, MP3 and MPEG-4 AAC1 files are copied at high speed.
DVR660HK_KC_EN.book 89 ページ 2008年2月7日 木曜日 午後2時34分 Playing and copying music (Jukebox) ENTER 6 Select ‘Edit’ > ‘Copy all to HDD’. On pressing ENTER all tracks (or files) on the DVD/CD or the USB device are copied to the HDD. • When a folder of WMA/MP3/ MPEG-4 AAC1 files is selected, you can copy only the files contained in the folder by using ’Copy to HDD’. • You can also copy tracks (or files) by selecting ’Copy’ > ‘DVD/CD HDD’ > ‘CD’ or ‘MUSIC FILE’ from the Home Menu.
DVR660HK_KC_EN.book 90 ページ 2008年2月7日 木曜日 午後2時34分 Playing and copying music (Jukebox) 11 • GUI displays may show the Gracenote database as ‘Database’. Searching titles again If the titles are not properly displayed, use the following procedure to search for titles again from the Gracenote database on the recorder or on the Internet. 1 Load the CD. HOME MENU 2 Display the Home Menu. titles on that Audio CD (see About the automatic display of titles on page 89).
DVR660HK_KC_EN.book 91 ページ 2008年2月7日 木曜日 午後2時34分 Playing and copying music (Jukebox) 7 8 11 • Repeat Track – Repeats the track being played back. • Repeat Off – Cancels repeat playback. Display the command menu. ENTER Select ‘Play’ from the menu. • For a description of operations during playback, see Playing Audio CDs and WMA/MP3/MPEG-4 AAC discs on page 54. Playing music files on the HDD in random order The files can easily be played in random order simply by pressing the MUSIC button.
DVR660HK_KC_EN.book 92 ページ 2008年2月7日 木曜日 午後2時34分 Playing and copying music (Jukebox) 11 ENTER 4 Select ‘Play’ from the command menu panel. Changing the display style of the Jukebox HDD CD WMA/MP3 MPEG-4 AAC 1 Display the view options panel. ENTER 2 Select a view option. • Data Format CD – Displays the Audio CD’s tracks. MUSIC FILE – Displays the folders/tracks of the WMA/MP3/MPEG-4 AAC1 files. ENTER 1 Select an artist/album you want to change the display for.
DVR660HK_KC_EN.book 93 ページ 2008年2月7日 木曜日 午後2時34分 Playing and copying music (Jukebox) ENTER 5 Select an artist/album you want to copy the selected album/track to. Select New Artist or New Album if you want to create a new artist/album. The name of an artist/album becomes A_number/ A_number_F_number. 11 • Play List name – Enter a name of up to 12 characters for the Play List. See Title Name on page 70 for how to enter names. ENTER 6 Select ‘Yes’ to confirm or ‘No’ to cancel.
DVR660HK_KC_EN.book 94 ページ 2008年2月7日 木曜日 午後2時34分 Playing and copying photos (PhotoViewer) 12 Chapter 12 Playing and copying photos (PhotoViewer) From the PhotoViewer you can view JPEG photos and picture files stored on the HDD, DVD or CD-R/-RW/-ROM, or on a USBequipped digital camera.1 You can also import files and save them to the recorder’s HDD or a DVD-R/-RW disc. • From the Folder Information column, you can change thumbnails via the / buttons. • Press PREV or NEXT to change the page.
DVR660HK_KC_EN.book 95 ページ 2008年2月7日 木曜日 午後2時34分 Playing and copying photos (PhotoViewer) • Press PREV or NEXT to change the page. • You can change folders via the / buttons. 1 Display the view options panel. The view options panel • If you encounter a disc that will not play, check that the disc and file formats are compatible with this recorder (see JPEG file compatibility and PC-created disc compatibility on page 12).
DVR660HK_KC_EN.book 96 ページ 2008年2月7日 木曜日 午後2時34分 Playing and copying photos (PhotoViewer) 12 Zooming an image 3 panel. Display the command menu The command menu panel PhotoViewer (HDD) Folder2 File 12 Files HDD Remain 100.
DVR660HK_KC_EN.book 97 ページ 2008年2月7日 木曜日 午後2時34分 Playing and copying photos (PhotoViewer) Creating photo movies Use this procedure to create photo movies combining the photos and music recorded on the HDD. Photo movies are stored on the HDD as video titles and can be copied to DVDs. Important • Created video titles should be used only personally, without distributing them to others. 12 etc.). Normal (OFF) - Photos are displayed on the entire screen and switch.
DVR660HK_KC_EN.book 98 ページ 2008年2月7日 木曜日 午後2時34分 Playing and copying photos (PhotoViewer) 12 2 Select a file to import. • To import multiple files, use the MultiMode; see Selecting multiple files or folders below. An orange check mark box () is shown by the item you selected. A blue check mark box () appears on the folder select screen when files from that folder are selected. Multi-Mode PhotoViewer (HDD) Select Folder ENTER 3 Select ‘Copy to HDD’ from the command menu panel.
DVR660HK_KC_EN.book 99 ページ 2008年2月7日 木曜日 午後2時34分 Playing and copying photos (PhotoViewer) • After backing up the pictures in your digital camera to DVD, we recommend verifying that they have been recorded properly before deleting anything from the camera. 1 Load a blank (or unrecorded Video mode) DVD-R or DVD-RW disc. HOME MENU 2 Display the Home Menu. ENTER 3 Select ‘PhotoViewer’ > ‘Copy Files from a Digital Camera’. ENTER 4 Select ‘Yes’ to confirm or ‘No’ to cancel.
DVR660HK_KC_EN.book 100 ページ 2008年2月7日 木曜日 午後2時34分 Playing and copying photos (PhotoViewer) 12 • There can be up to 999 folders on the HDD. Erasing a file or folder • Copying a folder will copy all the files contained in it. • To copy multiple files or folders, use the Multi-Mode; see Selecting multiple files or folders on page 98. ENTER 1 Select the file(s) or folder(s) you want to erase. • To erase multiple files or folders, use the Multi-Mode; see Selecting multiple files or folders on page 98.
DVR660HK_KC_EN.book 101 ページ 2008年2月7日 木曜日 午後2時34分 Playing and copying photos (PhotoViewer) PhotoViewer (HDD) Folder2 File 12 Files HDD Remain 100.
DVR660HK_KC_EN.book 102 ページ 2008年2月7日 木曜日 午後2時34分 Copying files from a PC (Connect PC) 13 Chapter 13 Copying files from a PC (Connect PC) When the recorder is connected to a PC using the Ethernet or USB port, WMA/MP3/ MPEG-4 AAC1, JPEG and DivX files stored on the PC can be copied onto the recorder’s HDD. Use Windows Explorer or Windows Media Player 11, depending on the type of file copied. The driver must be installed on the PC when first connecting it to the recorder using a LAN cable.
DVR660HK_KC_EN.book 103 ページ 2008年2月7日 木曜日 午後2時34分 Copying files from a PC (Connect PC) A confirmation message asking you whether or not you want to install the driver may appear. (The confirmation message may be minimized and flash on the task bar. In this case click it to display the message.) The driver is installed when ‘Continue’ is pressed. 13 If no actions are carried out for 20 minutes or if the Ethernet connection is disconnected, the import screen is automatically closed.
DVR660HK_KC_EN.book 13 104 ページ 2008年2月7日 木曜日 午後2時34分 Copying files from a PC (Connect PC) ENTER 4 Select ‘Yes’ to confirm or ‘No’ to cancel. Operating the PC, click ‘’ on the window in step 1 to close it. This begins the synchronization process. When finished, the message ‘Synchronized to Device’ is displayed in Windows Media Player 11. 5 Verify that the import screen is displayed on the device. If no actions are carried out for 20 minutes, the import screen is automatically closed.
DVR660HK_KC_EN.book 105 ページ 2008年2月7日 木曜日 午後2時34分 Copying files from a PC (Connect PC) •If no actions are carried out for 20 minutes after copying, the import screen on this device is automatically closed. Note • When using the sync function of Windows Media Player 11, music, artist and album folders are created as follows: Root Music Artist 1 Album 1 music1.mp3 music2.mp3 Artist 2 Album 2 music1.wma Album 1 music1.mp3 • With Windows Media Player 11, the above music folder is not displayed.
DVR660HK_KC_EN.book 13 106 ページ 2008年2月7日 木曜日 午後2時34分 Copying files from a PC (Connect PC) The screen shown below is displayed on the recorder. Progress Bar Connect PC • JPEG files can only be copied with the folder structure shown below. It is not possible to place JPEG files directly into the Picture folder. Also, it is not possible to create more folders under folders you have created. Copying 00001 Folders 000003 Files ( 000 error ) Pictures ( 000 error ) Folder 1 photo1.jpg photo2.
DVR660HK_KC_EN.book 107 ページ 2008年2月7日 木曜日 午後2時34分 The Disc Setup menu 14 Chapter 14 The Disc Setup menu From the Disc Setup menu you can name discs, lock the contents to prevent accidental recording and erasure, initialize and finalize discs. The Disc Setup menu is accessed from the Home Menu. Basic settings Lock Disc DVD (VR) DVD-RAM • Default setting: Off Locking the disc will prevent accidental recording, editing or erasing of the disc.
DVR660HK_KC_EN.book 14 108 ページ 2008年2月7日 木曜日 午後2時34分 The Disc Setup menu Initialize settings Undo Finalize DVD-RW DVD-R DVD-RW DVD+RW DVD-RAM You can initialize a recordable DVD-R/-RW disc for either VR mode or Video mode recording. The first time you load a new DVD-RW disc, it will be automatically initialized for recording according to the DVD-RW Auto Init. setting in the Disc Setup menu (see page 51).
DVR660HK_KC_EN.book 109 ページ 2008年2月7日 The Disc Setup menu 木曜日 午後2時34分 14 HOME MENU 1 2 Display the Home Menu. ENTER Select ‘Setup’ > ‘Disc Setup’. ENTER Select ‘Optimize HDD’ then 3 ‘Start’. Disc Setup Optimize HDD Basic Start Initialize Finalize Optimize HDD A progress bar indicates how long there is left to go. If no actions are carried out for more than 20 minutes after the optimization process is completed, the unit turns itself off.
DVR660HK_KC_EN.book 110 ページ 2008年2月7日 木曜日 午後2時34分 The Video Adjust menu 15 Chapter 15 The Video Adjust menu Using the Video Adjust menu you can set up the picture quality for the built-in tuner and external inputs, for disc playback, and for recording. • Memory3 – user preset 3 You can press DISPLAY to see the individual settings for the current preset (Tuner, VCR or DTV/LDP).
DVR660HK_KC_EN.book 111 ページ 2008年2月7日 木曜日 午後2時34分 The Video Adjust menu • YNR – Adjusts the amount of noise reduction (NR) applied to the Y (brightness) component. • CNR – Adjusts the amount of noise reduction (NR) applied to the C (colour) component. • Detail – Adjusts how sharp edges appear. • White AGC – Turn on for automatic white level adjustment. • White Level – Adjusts the intensity of white. • Black Level – Adjusts the intensity of black.
DVR660HK_KC_EN.book 15 112 ページ 2008年2月7日 木曜日 The Video Adjust menu • Black Setup – Corrects the standard reference black level. Black Setup is ineffective for HDMI output. • Gamma Correction – Adjusts the brightness of darker images. Gamma Correction is ineffective for HDMI output. • Hue – Adjusts overall balance between red and green. Hue is ineffective for HDMI output. • Chroma Level – Adjusts how rich the colours appear. Chroma Level is ineffective for HDMI output.
DVR660HK_KC_EN.book 113 ページ 2008年2月7日 木曜日 午後2時34分 The Initial Setup menu 16 Chapter 16 The Initial Setup menu Using the Initial Setup menu The Initial Setup menu is where you can set various recorder options for sound, picture, language and so on. Some settings can only be changed when the recorder is stopped. During playback and recording these settings are grayed out in the Initial Setup menu. Except for the Setup Navigator, menu screens are exited automatically after 20 minutes of inactivity.
DVR660HK_KC_EN.book 16 114 ページ 2008年2月7日 木曜日 午後2時34分 The Initial Setup menu Setting Options Explanation VCR Plus+ CH Setting Next Screen Guide channels are used by the VCR Plus+ system so that the channel number specified in the VCR Plus+ programming numbers can be guaranteed to correspond to the correct station. Look in your TV guide to see which channel numbers should be assigned to which guide channels. • Use the / buttons to change the guide channel for setting.
DVR660HK_KC_EN.book 115 ページ 2008年2月7日 木曜日 午後2時34分 The Initial Setup menu Setting Options Explanation DV Input Stereo 1 • Select to use the ‘live’ audio track (recorded during the video shoot) from a camcorder that supports two stereo audio tracks. Stereo 2 Select to use the overdubbed audio track from a camcorder that supports two stereo audio tracks. Mix Select one of the three settings to use a mix of the two stereo audio tracks.
DVR660HK_KC_EN.book 16 116 ページ 2008年2月7日 木曜日 午後2時34分 The Initial Setup menu Setting Options Explanation Audio Language English • Sets the default audio language for DVD-Video playback to English. French Sets the default audio language for DVD-Video playback to French. Other Select to set the default audio language to something other than the ones listed. See Selecting other languages for language options on page 123. Discs do not necessarily have audio in your selected language.
DVR660HK_KC_EN.book 117 ページ 2008年2月7日 木曜日 午後2時34分 The Initial Setup menu Setting Options Explanation Subtitle Display On • Select to have discs display subtitles according to your Subtitle Language and Auto Language preferences. Off Select to switch off subtitle display. Assist Subtitle Select to display special additional assistive subtitles, where available. 16 Some discs may override these settings.
DVR660HK_KC_EN.book 16 118 ページ 2008年2月7日 木曜日 午後2時34分 The Initial Setup menu Setting Options Explanation Auto Chapter (DVD+R/+RW) No Separation Automatic chapter marking is switched off. 10 minutes • When recording in DVD+R/+RW, chapter markers are inserted every 10 minutes. 15 minutes Chapter markers are inserted every 15 minutes. This settings applies to recording or real-time copying to DVD+R/+RW discs. HDD Recording Format Video Mode Off Recordings made to the HDD are made in VR mode.
DVR660HK_KC_EN.book 119 ページ 2008年2月7日 木曜日 午後2時34分 The Initial Setup menu Setting Options Explanation Parental Lock Set Password In order to change the parental lock level or change the country/area code, set the password using this option. From the following screen, enter a four-digit number that will be your password. Change Password In order to change the password, first enter your existing password and then a new one from the following screen.
17 Initial_Settings.fm 16 120 ページ 2008年2月7日 木曜日 午後5時55分 The Initial Setup menu Setting Options Explanation Colour RGB (0–255) Use if colours are weak and black appears to ‘float’ on the RGB (16–235) setting. RGB (16–235) Use this setting if colours appear overly rich and the black too deep on the RGB (0–255) setting. YCbCr 4:2:2 The video signal is output as a YCbCr 4:2:2 component signal. This is the standard setting for HDMI-compatible devices.
DVR660HK_KC_EN.book 121 ページ 2008年2月7日 木曜日 午後2時34分 The Initial Setup menu Setting Options 16 Explanation Network (DVR-660H-K only) IP Config. Next Screen Set Auto Set IP Address to On. If there is a DHCP (Dynamic Host Configuration Protocol) server on the local area network (LAN), this recorder will automatically be allocated an IP address. If you’re using a broadband router or broadband modem that has a DHCP server function, select On. The IP address will automatically be determined.
DVR660HK_KC_EN.book 16 122 ページ 2008年2月7日 木曜日 午後2時34分 The Initial Setup menu Setting Options Explanation Front Panel Display On • The time is shown in the front panel display when the recorder is in standby. Off The front panel display is switched off in standby. Remote Control Mode Recorder 1–3 If you are using more than one recorder in the same room, (default: set them to different IDs.
17 Initial_Settings.fm 123 ページ 2008年2月7日 木曜日 午後6時36分 The Initial Setup menu Selecting other languages for language options ENTER 1 Select ‘Other’ from the language list. This option appears in the settings for DVD Menu Language, Audio Language, and Subtitle Language. 2 ENTER Select the language you want.
DVR660HK_KC_EN.book 124 ページ 2008年2月7日 木曜日 午後2時34分 Additional information 17 Chapter 17 Additional information Setting up the remote to control your TV You can use the supplied remote to control your TV. To be able to use this feature you first have to program the remote with a maker code from the table below. 1 Press and hold down the CLEAR button, then enter the maker code for your TV. See the table below for the list of maker codes.
DVR660HK_KC_EN.
DVR660HK_KC_EN.book 17 126 ページ 2008年2月7日 木曜日 午後2時34分 Additional information Minimum copying times The table below shows the minimum HDD to DVD copying time for one hour of video. Please note that not all discs are compatible with high-speed copying.1 Check with the disc manufacturer for compatibility. Rec mode DVD disc type SEP SLP EP LP SP XP 10 h 8h 6h 4h 2h 1h DVD-R/1x DVD-RW/1x 1x 6 mins. 7.5 mins. 10 mins. 15 mins. 30 mins. 60 mins. DVD-RW/2x DVD-R DL DVD-RAM/2x 2x 3 mins.
DVR660HK_KC_EN.book 127 ページ 2008年2月7日 木曜日 午後2時34分 Additional information 17 Manual recording modes The table below shows the approximate recording times for different DVD types in each manual recording mode, as well as the standard recording mode equivalents. For recording time on the HDD, see Specifications on page 142.
DVR660HK_KC_EN.book 17 128 ページ 2008年2月7日 木曜日 午後2時34分 Additional information • Levels separated by a bold line show where there is a noticeable change in picture quality. • Audio recording in all manual recording modes is in Dolby Digital 2 ch format, except for LPCM mode, which is in Linear PCM format. • See also Recording on page 34. Troubleshooting Incorrect operation is often mistaken for trouble and malfunction.
DVR660HK_KC_EN.book 129 ページ 2008年2月7日 木曜日 午後2時34分 Additional information Problem Remedy No picture • Check that everything is connected properly (page 15). • Check that the connected TV and/or the AV amp/receiver is set to the correct input. • Make sure the disc format is NTSC. • The recorder may be set to progressive scan with an incompatible TV. Reset to interlace by pressing and holding the front panel (Stop) button then pressing OPEN/CLOSE.
DVR660HK_KC_EN.book 17 130 ページ 2008年2月7日 木曜日 午後2時34分 Additional information Problem Remedy Can’t play a disc recorded using this recorder on another player • If the disc was recorded in DVD-R/-RW (Video mode) or DVD+R, make sure that it’s finalized (page 49). • Some players will not play recordable DVD discs, even when recorded in DVD-R/-RW (Video mode) or DVD+R and finalized. • If the disc was recorded in VR mode, the other player must be specifically RW compatible in order to play it (page 8).
DVR660HK_KC_EN.book 131 ページ 2008年2月7日 木曜日 午後2時34分 Additional information Problem 17 Remedy Front panel display • The child lock is on; turn off in order to use the recorder (page 45). shows ‘LOCKED’ when a button is pressed Can’t use One Touch Copy (HDD to DVD) • Make sure that there is a recordable DVD-R/-RW loaded with some free space for recording and fewer than 99 titles already on the disc. Also make sure that for a DVD-R/-RW (Video mode) or a DVD+R, the disc isn’t finalized.
DVR660HK_KC_EN.book 17 132 ページ 2008年2月7日 木曜日 午後2時34分 Additional information HDMI Problem Remedy The connected HDMI or DVI device does not display any picture (and the front panel HDMI indicator does not light) • Try disconnecting then reconnecting the HDMI cable (while the power of both components is on). • Try switching the power of the HDMI/DVI device off then back on. • Try switching off the HDMI/DVI device and this recorder.
DVR660HK_KC_EN.book 133 ページ 2008年2月7日 木曜日 午後2時34分 Additional information Problem 17 Remedy HDMI Control does not • Verify that the HDMI cable is firmly connected (page 22). respond • Check whether HDMI Control is set to On for this unit and the device connected to this unit. For more information, refer to the operating instructions of your Flat Panel TV or AV system. • Depending on the type of Flat Panel TV, some HDMI input terminals do not support the HDMI Control function.
DVR660HK_KC_EN.book 17 134 ページ 2008年2月7日 木曜日 午後2時34分 Additional information Network (DVR-660H-K only) Problem Remedy Cannot connect to network • Turn this unit’s power off and on again. • Check that the LAN cable is properly connected. • Check that the router’s power is turned on. The Connect PC function does not work properly with an Ethernet connection • Check that the IP address is properly set.
DVR660HK_KC_EN.book 135 ページ 2008年2月7日 木曜日 午後2時34分 Additional information 17 On-screen displays The table below shows a list of error messages that you may encounter when using the recorder and an explanation of their meaning. Message Explanation/Action • Initializing disc. Please wait a moment. When you load a blank DVD-RW or DVD+RW disc, the recorder automatically initializes it. • Incompatible region number.
DVR660HK_KC_EN.book 17 136 En 136 ページ 2008年2月7日 木曜日 午後2時34分 Additional information Message Explanation/Action • Repairing disc. • Repairing the HDD. During recording, the power was cut. This display appears when the power is restored. • Could not repair the disc. The recorder was unable to repair the disc after a power cut. The contents of the recording will be lost. • Overheating has stopped operation. Press DISPLAY to clear message.
18 Additional_Information.fm 137 ページ 2008年2月22日 金曜日 午後8時44分 Additional information 17 Message Explanation/Action • Could not operate the DV camcorder. This recorder was not able to operate the DV camcorder. • The DV camcorder is not set for playback. Please select playback mode on the DV camcorder. The camcorder is in camera mode. Switch it to playback mode. • The printer is not ready or is not connected. Please check the printer.
DVR660HK_KC_EN.
DVR660HK_KC_EN.book 139 ページ 2008年2月7日 木曜日 午後2時34分 Additional information 17 Screen sizes and disc formats When viewing on a standard TV or monitor Screen format of disc Setting Appearance 16:9 4:3 (Letter Box) The programme is shown in widescreen with black bars at the top and bottom of the screen. 4:3 (Pan & Scan) The sides of the programme are cropped so that the picture fills the whole screen. 4:3 (Letter Box) 4:3 (Pan & Scan) The programme is presented correctly on either setting.
DVR660HK_KC_EN.book 17 140 ページ 2008年2月7日 木曜日 午後2時34分 Additional information Handling discs Damaged discs When holding discs of any type, take care not to leave fingerprints, dirt or scratches on the disc surface. Hold the disc by its edge or by the center hole and edge. Discs spin at high speed inside the recorder. If you can see that a disc is cracked, chipped, warped, or otherwise damaged, don’t risk using it; you could end up damaging the recorder.
DVR660HK_KC_EN.book 141 ページ 2008年2月7日 木曜日 午後2時34分 Additional information 17 Hints on installation Moving the recorder We want you to enjoy using this unit for years to come, so please bear in mind the following points when choosing a suitable location for it: If you need to move the recorder, first remove the disc, if loaded, and close the disc tray. Next, press STANDBY/ON to switch the power to standby, checking that the POWER OFF indication in the display goes off. Wait at least two minutes.
DVR660HK_KC_EN.book 17 142 ページ 2008年2月7日 General Power requirements . . . . . . . . . . . . . . . . . .120 V, 60 Hz Power consumption DVR-660H-K . . . . . . . . . . . . . . . . . . . . . . . . . . . . .48 W DVR-560H-K/DVR-460H-K . . . . . . . . . . . . . . . . . .46 W Power consumption in standby mode. . . . . . . . 0.67 W (Front panel display: off) Weight DVR-660H-K . . . . . . . . . . . . . . . . . . 4.4 kg (9 lb. 7 oz.) DVR-560H-K/DVR-460H-K . . . . . . . 4.3 kg (9 lb. 5 oz.) Dimensions . . . . . . .
DVR660HK_KC_EN.book 143 ページ 2008年2月7日 Additional information 木曜日 午後2時34分 17 Input/Output VHF/UHF antenna input/output terminal . . . . . . . . . . . . VHF/UHF set 75 Ω (F-shape connector) Video input Input1, 3 (rear), Input 2(front) Input level . . . . . . . . . . . . . . . . . . . . . . . . 1 Vp-p (75 Ω) Jacks RCA jacks Video output. . . . . . . . . . . . . . . . . . . . . . . . . Output 1, 2 Output level . . . . . . . . . . . . . . . . . . . . . .
DVR660HK_KC_EN.book 17 144 ページ 2008年2月7日 En 午後2時34分 Additional information Music recognition technology and related data are provided by Gracenote®. Gracenote is the industry standard in music recognition technology and related content delivery. For more information, please visit www.gracenote.com. CD and music-related data from Gracenote, Inc., copyright © 2000-2007 Gracenote. Gracenote Software, copyright © 2000-2007 Gracenote. This product and service may practice one or more of the following U.S.
00 Cover_back_KC.fm 1 ページ 2008年1月15日 火曜日 午後8時34分 HDD/DVD Recorder Operating Instructions Should this product require service in Canada, please contact a Pioneer Canadian Authorized Dealer to locate the nearest Pioneer Authorized Service Company in Canada. Alternatively, please contact the Customer Satisfaction Department at the following address: Pioneer Electronics of Canada, Inc.