
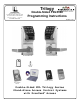
Programming instructions


5
Lock Design Overview
Why Use Software inside a Lock?
With ordinary door locks, the need to make physical copies of metal keys and distributing them can be a
huge organizational and financial task -- and what will you do if someone causes a security breach by los-
ing their key?
The answer lies in the advantage of SOFTWARE. Software (also called "firmware") is not "hard" or "fixed"
like hardware is. Software is "soft" -- flexible and changeable to your needs. Software exists inside your
Alarm Lock™ series lock, and can be programmed (and re-programmed again and again) to suit your
changing requirements. No more metal keys to distribute...instead, distribute User Codes -- and delete
them from the lock software when needed. (A User Code is the software equivalent of a metal key--it is a
series of numbers the User enters into the door lock keypad to unlock the lock).
Preparing to Program your Lock
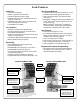
The keypad contains 12 buttons, numbers 1 through 9 plus zero, a star button (:) and a special "AL"
button (
;). These 12 buttons are all you need to program your lock. In addition to using the keypad to
manually program your lock, you can also program your lock using a computer program named DL-
Windows. Using DL-Windows is not required--although it does make programming faster and easier. This
manual will show you how to program your lock manually, without DL-Windows. (For more information
about DL-Windows, see User Guide OI237).
Programming your lock begins after you unpack it from the box -- there is a specific procedure outlined in
the "Quick Start" (page 12) in which you "wake up" the lock to prepare it for programming. This "Quick
Start" procedure shows you all the steps required to get your lock to start working. To begin programming,
you must first enter something called "Program Mode".
What is Program Mode?
Most technical people find working with "hardware" easy--they use tools to make fixes or changes to hard-
ware. But with the software inside the lock, you enact changes (you "interface") using the keypad. The
software has only two "modes"--"Normal Mode" and "Program Mode". When you want to make changes to
the lock program (such as adding User Codes), you enter "Program Mode". When you finish programming
and wish to put the lock into use, you exit Program Mode to enter "Normal Mode".
You enter Program Mode using the keypad by pressing the Master Code of the lock that was set at the
factory. This Master Code is basically a secret passcode that allows you to enter Program Mode. But
since all locks are identical and leave the factory with the same Master Code, the factory Master Code is
therefore not very secret--and should be changed to your own personal Master Code. This way, only YOU
can enter Program Mode and make changes to your lock's programming.
Once the new Master Code is set , then you can continue with the Quick Start procedure and set the
weekday, date and time. After this, you can start entering User Codes for people to use. All changes to
the lock are organized by their Function Number. Want to change the date? Use Function Number 38.
Want to add a User Code? Use Function Number 2. There are 99 Functions in total, some that you will
use often, and others that you may never need.
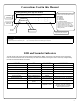
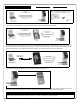
Notice that when you program your lock, programming tends to follow a consistent 5-step pattern:
(1) Enter Program Mode (2) Press
; followed by the Function # (3) Press ; and enter data (4)
Press
: to end your programming (5) Exit Program Mode.
Turn the page and learn about the special terminology used with your lock. Once that is clear, use the
Quick Start procedure on page 12 to help you get up and running.