
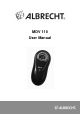
User manual

7
4.2 Voice-activated recording (DC)
1. Bring the “VOX” switch to the DC position then power the device on. The green LED
will light up which means that the device entered the standby mode.
2. Now the camera will start to record as soon as it detects a sound of 65 decibel or
louder. Then the LED will switch from green steady to blue flashing. The recording
will stop and return to the standby mode when the camera hasn´t detected sounds
with 65 decibel or above for about 2 minutes. If you bring the “VOX” switch into
“DSC” position while recording the video is saved to the memory card and the
recording is stopped.
4.3 Out of memory notification
As soon as the camera runs out of memory the green LED will always stay on. Please
switch the camera off, insert an empty memory card and turn the camera back on to record
some more videos.
4.4 Connecting the camera to the PC
Please connect the camera to the USB port of your computer with the supplied USB cable.
The LED will light up red. Now bring the “VOX” switch to the “DSC” position and turn the
camera on. The LED will switch from red to green and your computer will detect a
“removable disk”. On this disk you will find the folders DCIM\100DSCIM which contains your
video files. Before unplugging the camera from your computer turn the camera off or use
the mobile device management in the taskbar to remove the storage safely. Now you can
unplug the camera.
Note:
1. It may take some time before your computer will detect the removable disk. The time
may differ due to different computer configurations. Please don´t press any buttons
during this time, otherwise this could have an effect on the recognition of the camera.
If there is no reaction after about 1 minute please try to plug it in again, or make sure
that there are no problems with your operating system, driver, USB port or USB
cable.
4.5 Setting the time
Please connect the camera to the PC like it is described in chapter 3. Now copy the file
time.txt from the CD to the main folder of the camera. Then you have to edit the file with
your desired time and date. Please do not change the format of the file otherwise the
camera will not recognize the time and date properly. When you have edited the file, save