
Operation Manual


6
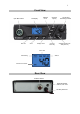
Installation of the Radio
You can either operate your ALBRECHT AE 6199 in the car or at home as a base station.
For installation as a mobile station in the car, a mounting bracket is enclosed. Mount the set
in such a way that it is not exposed to direct sunlight if possible, as this would lead to an
increase in the temperature and can decrease the (set’s) working life. The set should also
not be installed near a heater. Mount the set in such a way that it is exposed to as little
vibration as possible.
The mounting bracket should be attached to the dashboard, the tunnel slot or to any other
suitable place using the enclosed tapping screws. Do not install the set in a place where it
could cause injuries in the case of an accident (be careful to ensure free leg movement).
Take care not to damage any underlying wires during installation!
Then insert the radio into the mounting bracket. Secure the set with the large knurled screws
(using the enclosed washers) firmly at the required angle.
Also mount the microphone hanger using the enclosed screws in an easily-accessible place.
In order to prevent interference to the vehicle electronics from transmission in the vehicle,
please make sure to take any mounting instructions from the vehicle manufacturer for radios
and antennas into account.
Please note: European directives allow the car or truck manufacturers to decide, where, or
even whether or not private radio transceivers may be operated in their cars, this is also
valid for antenna installations. Please install Your mobile CB station only in accordance to
car manufacturer’s installation instructions.
Power Supply
Your AE 6199 receives power from the 2 pin fixed power cable.
The red and black wires in the cable are for the power supply. The cable has a looped-in
fuse. Any new installed radio starts (may depend on the country of sales) on CH 9 AM in the
German country setting (80/40), when it will be connected for the first time to 12 V power.
You can choose from two methods when connecting to the power supply (red and black):
Example 1
The radio should be able to be switched on and off at any time using the volume /
on/off switch. The radio always keeps the last used settings in memory.
Connect up the red to the positive pole on the vehicle battery (or elsewhere in the
vehicle’s electrical system with permanent plus) or to a 12 volt power unit.
Connect up the black wire to the negative pole on the vehicle battery or the power
unit or to a well-conductive part of the car body. (Not all body ground positions are
good for radio communication- in most cases the battery Minus is the best
connecting position)
Example 2
The set should be automatically be switched on and off with the ignition switch of
the car. The radio will keep always the last used settings in memory, even at longer
power disconnection.