
Replacement Part List


www.ALEKOPRODUCTS.com
9
NOW YOU CAN REMOVE SAFETY BANDS FROM THE ARMS.
If the square bar can’t be inserted into the wall brackets due to misalignment you should slightly
loosen the wall brackets' nuts and then try again.
Don’t forget to tighten the nuts after the installation.
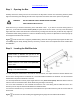
Step 6: Changing the Drop Angle (Optional)
IT’S HIGHLY RECOMMENDED TO PERFORM THIS STEP WITH A HELPER. FAILURE TO DO SO
MAY RESULT IN UNWANTED COMPLICATION DURING THE ADJUSTMENT.
If you are not satisfied with the drop angle of your awning when it’s fully extended you may refer to the steps bellow
to perform an adjustment.
6.1. Extend the awning completely so the inside bolts on
each support arm bracket are accessible.
6.2. Have a helper with a level, supporting the front bar of
the awning.
6.3. Loosen the locking nuts on both arm brackets but do
not remove them.
6.4. Let the helper set the awning to the desired angle
and use the level to make the front bar horizontal.
6.5. Tighten the locking nuts.
6.6. Make sure the safety bolt is touching the locking bolt.
It should be tight enough to support the structure in
case of a locking mechanism failure.
Figure 6 shows the side view of the arm bracket
WARNING:
RAISING THE FRONT BAR WILL INCREASE THE RISK OF RAIN WATER
COLLECTING ON TOP OF THE FABRIC.
WARNING:
TO PREVENT THE AWNING FROM COLLAPSING DUE TO RAIN WATER
LOAD, YOU MUST CLOSE THE AWNING WHEN UNATTENDED. FAILURE TO
DO SO MAY RESULT IN SEVERE AWNING DAMAGE.
If you have any questions about this installation or you need spare parts, please contact your dealer.