
Installation Guide
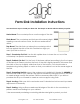

Farm Sink Installation Instructions
You have three ways to install your farm sink. First step is to decide which method you prefer.
Under-Mount: The countertop flows over the edge of the sink.
Flush-Mount: The countertop and sink are at the same height
creating a smooth surface. Note, the silicone sealer will be
visible.
Top-Mount: The sink sticks out above the countertop which
buts up against the side of the sink. Decide how high you
want your sink to stick out.
Step 1: Countertop Cut-Out. Use the sink upside down to trace the cut out of the
countertop. Use precise measurements.
Step 2: Cabinet Cut-Out. Cut the front of the base cabinet according to the front apron
of the farm sink. Please note that the front of the sink is slightly tapered. This means that
the width of the top is slightly wider than that of the bottom. You should make a
template using heavy paper or carton so that your cabinet is cut at the same angle as
the sink.
Step 3: Supporting the Sink. Mount the undermount installation kit (Model #: ABUMSB) to
the inner side walls of your cabinet. We then recommend putting plywood on the rods
to create a large smooth flat surface. Drill the necessary drain holes. If you did not
purchase the kit you will need to create a custom support using 2x4's.
Step 4: Leveling. Slide your sink in and make sure it is leveled on bottom and top. Make
adjustments if necessary.
Step 5: Sealing. Using a silicone sealer seal all edges of the sink to the countertop to
prevent water from leaking into your cabinet.
* We recommend purchasing a matching stainless steel grid to protect your sink.
Los Angeles, CA Tel: 323-732-4045 www.alfibrand.com