USER GUIDE Publication AP4147
Limited One Year Warranty This product has been manufactured in the UK by ALLEN & HEATH and is warranted to be free from defects in materials or workmanship for period of one year from the date of purchase by the original owner. To ensure a high level of performance and reliability for which this equipment has been designed and manufactured, read this User Guide before operating.
Important Safety Instructions WARNINGS - Read the following before proceeding : CAUTION ATTENTION: RISQUE DE CHOC ELECTRIQUE – NE PAS OUVRIR Read instructions: Retain these safety and operating instructions for future reference. Adhere to all warnings printed here and on the console. Follow the operating instructions printed in this User Guide. Do not remove covers: Operate the console with its covers correctly fitted.
Important Mains plug wiring instructions. The console is supplied with a moulded mains plug fitted to the AC mains power lead. Follow the instructions below if the mains plug has to be replaced.
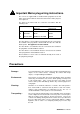
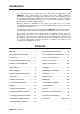
Introduction This user guide presents a quick reference to the function and application of the XONE:464. We recommend that you read this fully before starting. Included is information on installing, connecting and operating the console, panel drawings, system block diagram and technical specification. For further information on the basic principles of audio system engineering, please refer to one of the specialist publications available from bookshops and audio equipment dealers.
MIX 2 L OUT L 2 1 INSERT R MIX 1 L OUT R R MIX2 R MIX1 L M STEREO INPUTS L INSERT 10 9 RIAA MONO INPUTS 8 7 6 IN A L IN A L IN A L IN A L IN A L IN A L R R R R R R L OUT OUT OUT R R AUX 6 XLR OUT 1 2 3 IN B L IN B L/M R AUX 5 AUX 4 IN B L/M R AUX 3 AUX 2 R IN B L/M IN B L/M R AUX 1 TIP + RING - 3 2 1 INSERT INSERT INSERT IN IN IN IN 4 3 2 1 DIR OUT 4 DIR OUT 3 DIR OUT 2 DIR OUT 1 IN B L R LINE IN/OUT +OUT - OUT 4 INSERT 5 RI
Welcome to the XONE:464 The Allen & Heath XONE:464 presents a unique concept in combining a professional live sound mixer with a serious DJ performance tool in a dedicated club format. And, above all, it features sound quality second to none. XONE:464 has been designed and constructed using the same rigorous standards we apply to our large format professional consoles used and respected by top engineers throughout the world. We have had great fun designing this new range.
Specifications 0dBu = 0.775 Volts rms 0dBV = 1 Volt rms +4dBu = 1.23V rms -10dBV = 316mV rms Maximum output level XLR +26dBu into >2k ohm load TRS jack +21dBu into >2k ohm load RCA phono +15dBu into >10k ohm load Channels +21dB Mix to output +23dB Turn on 9dB before clipping MIX1 / MONITOR Peak reading 12 led 3 colour +0/-1dB 20Hz to 40kHz < 0.
XFADE Y XFADE X MIX 2 AUX 1-6 CUE M CUE LR MIX 1 BLOCK DIAGRAM SYS-LINK CONNECTION SL TIP= + L/MONO INPUT MONO INPUTS x4 4 BAND EQ INPUT TIP= + PEAK + - TO MONITOR PAN ON MIX1 MIX2 0dBu TIP= + R INPUT FADER MF1 AUX MIX MF2 TIP= SEND INSERT BALANCED -10dBV +4dBu OPTION MIX2 LO-CUT FILTER -30dBu LEVEL CUE HF GAIN PAD BALANCED EXT INPUT DISABLE +48V 2= + MIX1 PHANTOM 48V SL AUX SENDS 1-6 AUX OUT TIP= + RING= RETURN LF POST-EQ POST-ON PRE-EQ PRE-ON TIP= + DIRECT O
Quick Start We recommend that you read through all sections of this User Guide before starting. However, we provide these notes so that you can plug up and experiment with sounds from your XONE:464 immediately if you prefer to read the full guide later. Please note that you should first read and understand the Important Safety Instructions printed at the beginning of this guide. This simple procedure requires a microphone, CD player and headphones.
Check the sound using the Cue system. With the music playing press the large CUE switch. The switch itself and the master section CUE led light to show that the cue monitor is active. The channel signal is now sent to the headphones. Slowly turn up the headphones level control until you hear the music at comfortable volume. Avoid listening to loud headphones levels for long periods as this may damage your hearing.
Adding VCF filter effects. Each side of the crossfader includes a stereo Voltage Controlled Filter which presents the DJ with a unique set of live performance tools to create subtle or startling tonal effects. With the signal assigned to the Y side of the crossfader, and the crossfader moved fully to the right, the music is routed to Mix1 and should be heard on the headphones. Press the Y FILTER ON switch to route the signal through the analogue filter section.
Installing the Console The XONE Series features the Allen & Heath Quick Change Connector (QCC) system. The rear connector pod may be hinged and locked into either of two positions. Rear connectors allow desktop operation with the control panel sloped at a convenient 15 degrees. Underside connectors allow 19" rack mounting in a compact 10U space. The connector position can be easily changed at any time to fit your application.
Connecting Mains Power TO REDUCE THE RISK OF FIRE OR ELECTRIC SHOCK DO NOT EXPOSE THIS APPARATUS TO RAIN OR MOISTURE. WARNING - THIS APPARATUS MUST BE EARTHED. SUPPLY VOLTAGE RANGE: CAUTION AC MAINS IN ~ 100 - 240V ~ 47-63Hz ~ 30W MAX OFF ON AVIS: RISQUE DE CHOC ELECTRIQUE - NE PAS OUVRIR. FUSE 100 - 240V~ T500mA 250V 20mm WARNING: FOR CONTINUED PROTECTION AGAINST RISK OF FIRE REPLACE FUSE WITH SAME TYPE AND RATING ATTENTION: REMPLACER LE FUSIBLE AVEC UN DES MEMES CARACTERISTIQUES.
Plugging Up The System The XONE:464 uses professional grade 3 pin XLR, 1/4" TRS jack and RCA PHONO sockets. To ensure best performance, we recommend that you use high quality audio cables and connectors, and take time to check for reliable and accurate cable assembly. It is well known that most audio system failures are due to faulty interconnecting leads. The following mating plugs may be used to connect audio signals to the console: All input and output XLR connectors are 3 wire differentially balanced.
Connecting the Mono Channel 4 INSERT IN 4 DIR OUT 4 MIC 4 +48V INPUT The input provides both an XLR and a TRS jack connector. The XLR is normalled through the jack connector. This means that plugging in a jack overrides the XLR source. Plug a microphone into the XLR socket leaving the jack unplugged. Plug a line level source into the jack socket and select the front panel PAD switch. For line level sources on XLR plug into the XLR leaving the jack unplugged and select PAD.
Connecting the Stereo Channel 10 9 RIAA IN A L IN A L R R IN B L R IN B L/M R INPUT A This provides a pair of RCA phono sockets for connection to stereo sources. Channels 5,6,9,and 10 provide RIAA equalisation for magnetic cartridges to connect up to 4 turntables (record decks). Make sure the turntables are correctly earthed by connecting their earth straps to the console chassis earth terminal.
Connecting Mix1 and Mix2 Outputs MIX 2 MIX L L OUT 2 1 R INSERT R R MIX2 1 L OUT INSERT R L MIX1 L M L OUT OUT OUT R R INSERT Both MIX1 and MIX2 provide insert points for left and right channels. You do not need to plug anything into the insert socket for normal operation. It is a break point that lets you plug in an external signal processor such as a limiter or equaliser if required. Plugging in a jack breaks the signal path after the buss mix amp and before the master fader.
Connecting the Headphones and Local Monitor L LOCAL MONITOR TIP = L RING = R R LOCAL (BOOTH) MONITOR OUTPUTS A pair of 3 pole TRS jack sockets provide left and right outputs from the console local monitor system. These are impedance balanced and can be connected to balanced or unbalanced equipment as shown above. Nominal operating level is –2dBu but gain is available to drive +4dBu if required. Independent control is provided for the local and the headphones monitor systems.
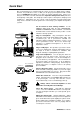
Mono Input Channel PAD Affects both the XLR (if no TRS jack is plugged in) and the TRS jack input to attenuate the input signal by 30dB. Press PAD when plugging in line level sources, or when the signal is too high with the GAIN control turned down. GAIN Adjusts the input sensitivity to match the connected source to the console 0dB operating level. This provides a wide 70dB range with continuous adjustment for signals from –60dBu to –20dBu with PAD switched off, and – 30dBu to +10dBu with PAD on.
AUXILIARY SENDS These controls route the channel signal to the AUX 1 to 6 mix. These are independent from the main mix and can therefore provide additional outputs for monitors, effects, cleanfeed, zone, recording feeds etc. AUX LEVEL Adjusts the level of the channel signal in each mix. Turn fully anticlockwise to turn the signal off, fully clockwise for a maximum +6dB boost. The normal ‘0’ position is marked. Each of the 6 aux mixes has its own dedicated channel level control.
Stereo Input Channel AUXILIARY SENDS This section is positioned at the top of the stereo channel to be out of the way of the live performance controls. The controls route the stereo channel signal to the AUX 1 to 6 mix. These are independent from the main mix and can therefore provide additional outputs for monitors, effects, cleanfeed, zone, recording feeds etc. AUX LEVEL Adjusts the level of the channel signal in each mix.
EQUALISER The EQ on a DJ mixer provides a very different function to that on any other mixing console. As most music sources are pre-recorded corrective EQ as found on the microphone channels is not required. Instead, the EQ is used by the DJ to creatively shape the sound during live performance. It is important that a wide range of control is available without danger of signal overload during over-zealous performance. The XONE:464 stereo equaliser is a unique 4 band asymmetric design.
Crossfader The crossfader is the one feature that instantly sets the DJ mixer apart from a conventional mixer. It is applied to the stereo (music) channels and lets you smoothly fade from one track into another using a single fader. It is also used as a creative performance tool to layer or interact between two sounds when cut or scratch mixing . It is fully assignable and can be easily replaced if it becomes damaged or worn through exceptional mechanical operation.
Replacing the Crossfader The crossfader on a DJ mixer is heavily used and can suffer considerable wear and tear. The audio design using VCAs prevents clicks and scratchiness as the fader wears. However, the movement can become mechanically stiff or sloppy in time, or become ingrained with dirt and the fader may need replacement. The XONE:464 crossfader is removable and can easily be replaced in a few minutes.
VCF Filters The XONE:464 is unique in being the first DJ mixer to include an analogue voltage controlled filter (VCF) section. These filters provide live performance tools far more powerful than any equaliser or kill switch. They produce the same warm analog resonant frequency sweeping sound as made popular by well known classic analogue synthesisers, but using the latest high performance technology for quiet, stable operation.
FILTER TYPE SELECT The filters are ‘state variable’. This means that they provide three simultaneous filter types, high-pass, band-pass and low-pass. Three large illuminated switches select which type is active. You can press any combination together to create different response types such as ‘notch’ and an interesting ‘all-pass’ effect. The switches are ‘soft switched’ for live performance, meaning that the audio signal is ramped between filter states to prevent audible clicks.
External Input An external input is provided in addition to the mono and stereo channels. Use this either as another input to the mix or as an external monitor source only. INPUTS A pair of ¼” TRS jacks accepts a line level stereo or mono source. For stereo sources plug into the L and R inputs. For mono sources plug into the L input only leaving the R input unplugged. In this case the mono signal is normalled through the R input socket.
Master Mix The XONE:464 provides two independent stereo mix outputs, Mix1 and Mix2. The mono channels can be routed to either or both outputs. The stereo channels route to Mix1 only, either direct or through the crossfader. However, Mix1 can be routed to Mix2 as the music feed to the main music + mics mix if required. Both outputs provide master fader control, inserts, metering, balanced XLR main outputs, and RCA phono secondary outputs, ideal for recording the performance.
Console Monitor System The XONE:464 provides extensive console monitoring facilities. Every signal can be checked individually or within any mix. Two systems are provided, headphones and local monitor. The local monitor typically feeds the DJ booth speaker system. The Cue system lets you quickly check channel signals, correctly set the gain, and cue tracks ready to bring into the mix. Facilities such as Mono and Split-Cue switching are well suited to the way the professional DJ works.
MONITOR SOURCE SELECTOR An 8 way switch bank is used to select which signal is heard in the headphones, local monitor and displayed on the meters. This defaults to post-fader Mix2 signal with all switches up. Press the required switch to monitor Mix1, Aux 1 to 6, or Ext in. CUE automatically overrides the selected source. Press a related pair of Aux switches to monitor them in stereo, for example Aux 5 on left, Aux 6 on right. Press a single AUX switch to check it in mono.
DANCE FLOOR 32 XONE:464 User Guide
The Club Application The XONE:464 build quality, versatility and number of inputs and outputs make it ideal for high performance professional club installation. Hybrid application The console provides facilities for dance/DJ and live/cabaret mixing. As a ‘house’ mixer it would be expected to alternate between house DJ, performance DJs, live acts, cabaret, karaoke, background music, and so on. The following example is just one of many possibilities, each dependent on the particular application.
Options The XONE:464 is designed to offer the utmost flexibility to satisfy your application without modification. However, the following internal link options are provided to allow customisation to satisfy the more specialist applications. Further information and details are printed in the XONE:464 Service Manual or available from Allen & Heath. This work requires access to the internal assemblies and resoldering of circuit card links and should be carried out by competent technical personnel only.
Tips and Troubleshooting For your safety do not remove the EARTH (ground) connection in the power lead of the console or connected equipment. ☺ Have your MAINS SYSTEM checked by a qualified electrician. If the earthing is solid to start with you are less likely to experience problems. ☺ Use high grade AUDIO CABLES and check them for reliable connection. It is well known that many audio system problems are due to faulty cables and connectors.
XONE:464 CUE SHEET Photocopy and use to log your console settings