
Installation Guide


4
INSTALLATION INSTRUCTIONS
PREPARATION
Before beginning assembly of product, make sure all parts are present. Compare parts with
package contents list and hardware contents list. If any part is missing or damaged, do not attempt
to assemble the product.
Estimated Installation Time: 45 minutes (24 hours for silicone caulk to dry).
Tools Required for Installation (not included): Phillips screwdriver, utility knife or scissors, silicone
caulk, power drill with drill bit, measuring tape, level
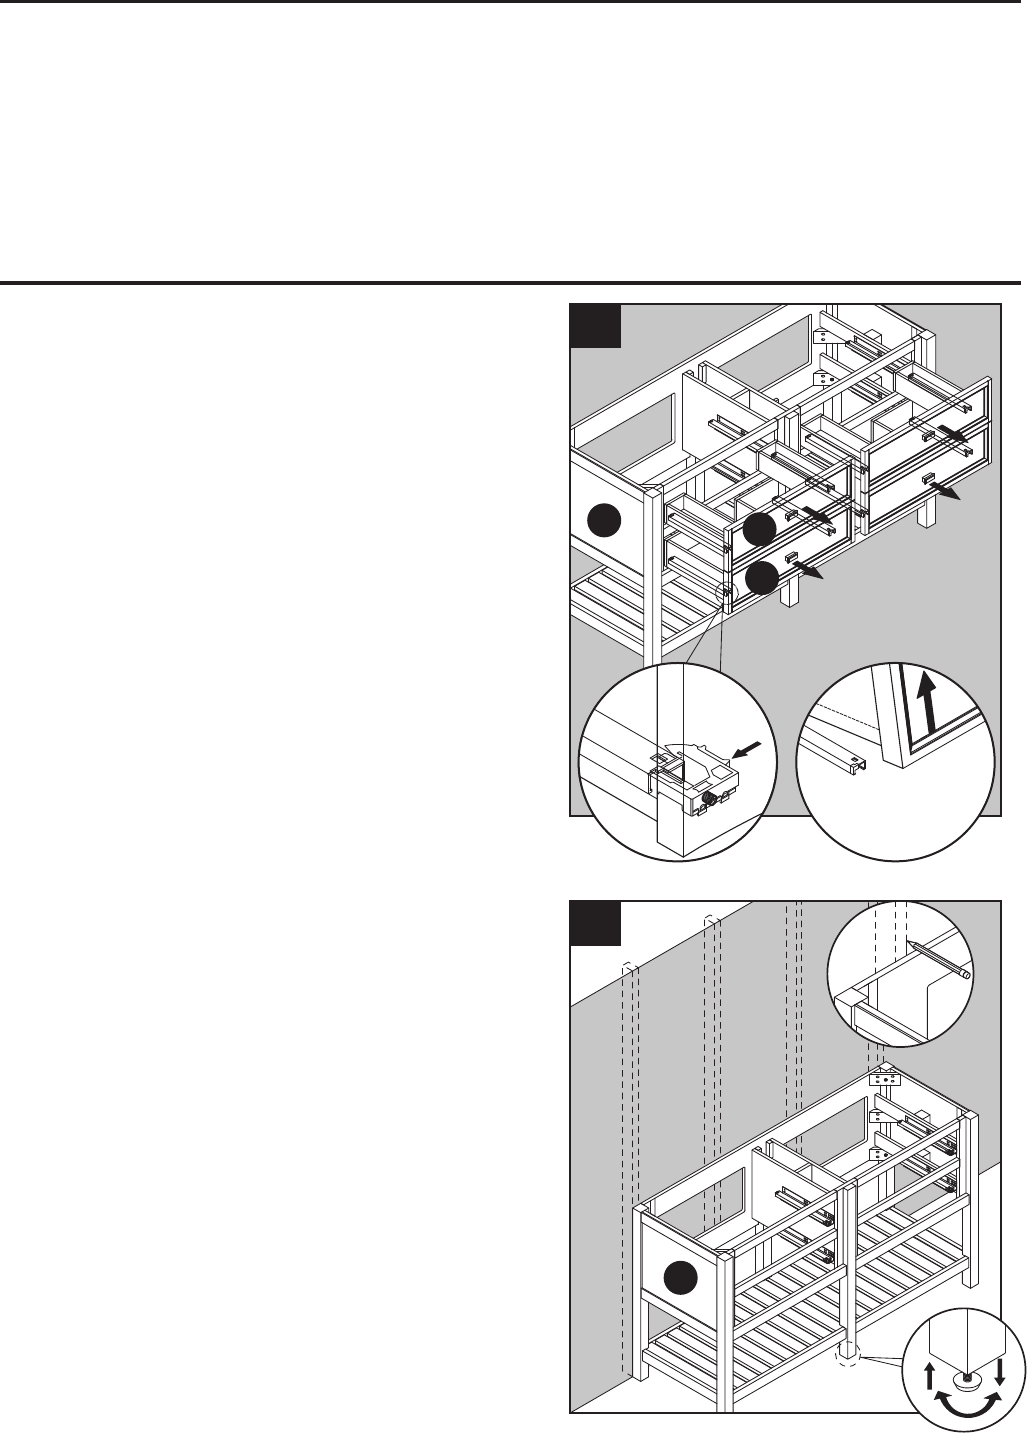
1. To remove drawers (E,F) from vanity base
(A), fully extend drawers and locate the plastic
levers on left and right sides of the metal glide
tracks. Push the plastic levers, on both sides,
at the same time, This will disengage the
drawer box from the glides. Gently lift up on
the drawer to remove it from the glide tracks.
Set aside as these will be re-installed.
2. Clean area where the vanity (A) will be
permanently located prior to beginning
installation, ensuring the vanity (A) will not
interfere with any water supply and drain lines
once mounted.
Locate wall studs and mark locations. With the
help of another adult, place completed Vanity
Cabinet Assembly in its final location. Adjust
the height of the Vanity Cabinet (A) by
twisting the adjustable leveler foot pins on the
bottom of each leg. Twist clockwise to
decrease height or twist counter-clockwise to
increase vanity height.
Note: The vanity (A) is preassembled for easy
installation purpose. But the assembly might
become loss and unstable after transportation.
Please use the allen wrench (JJ) (Included in the
hardware bag) to tighten all the bolts on the
inside of the legs and shelf before mounting it to
the wall.
F
E
A
1
1
2
A
2