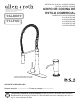
Item # 2610191, 2916845, 2916846, 2610192, 2916843, 2916844 ALLEN + ROTH and logo design are trademarks or registered trademarks of LF, LLC. All rights reserved. TALBERT COMMERCIAL STYLE KITCHEN FAUCET TILTON MODEL 21-K151HCORB-AR 21-K151HCSS-AR 21-K151HCMB-AR 21-K152HCSS-AR 21-K152HCCP-AR 21-K152HCMB-AR Español p. 9 Various items are styled differently than the line drawing.
PACKAGE CONTENTS A B C D PART A B DESCRIPTION Faucet body Deckplate QUANTITY 1 1 PART C D DESCRIPTION QUANTITY Gasket 1 Soap dispenser assembly 1 Due to constant design and quality improvements, the product inside may look slightly different from the picture. HARDWARE CONTENTS (not shown actual size) AA BB CC DD EE FF Rubber Washer Metal Washer Locking Nut Rubber Gasket Mounting Nut Qty. 1 Qty. 1 Qty. 1 Qty. 2 (21-K151HC series) Qty. 1 Qty. 1 Qty.
SAFETY INFORMATION Please read and understand this entire manual before attempting to assemble, operate or install the product. CAUTION • If you solder the joints during installation of the faucet, the seats, cartridges, and washers must be removed before using a flame or the warranty will be voided on these parts. • Cover the sink drain to avoid losing parts. WARNING • Protect your eyes with safety glasses when cutting or soldering water supply lines. • When making water line connections, HAND TIGHTEN.
INSTALLATION INSTRUCTIONS 1. Shut off the water at the supply valves under the sink or at the main water supply. Disconnect the supply lines. Remove the existing faucet from the sink. 1 Clean and dry the surface area where the new faucet will be mounted. 2. To install with the optional deckplate for a 3-hole sink, skip to Step 3. 2 Insert the integrated water supply lines (2.1) and shank (2.2) on the faucet body (A) through the mounting hole in the sink (2.3). Skip to Step 4. A 2.2 2.1 2.3 3.
INSTALLATION INSTRUCTIONS (Continued) 4. From underneath the sink, secure the faucet body (A) to the sink using the rubber washer (AA), metal washer (BB), and locking nut (CC). Tighten using the hex bolts (DD). Check the position of the faucet and hand tighten until the faucet is securely mounted. NOTE: It is helpful to have a second person hold the faucet in place while tightening the hex bolts (DD). 4 Hardware Used A AA Rubber Washer x1 BB Metal Washer x1 AA BB CC DD CC DD 5.
INSTALLATION INSTRUCTIONS (Continued) 7. To install the optional soap dispenser, unscrew the top of the soap dispenser (D) from the plastic soap bottle and remove the mounting nut (FF) and rubber gasket (EE). From above the sink, insert the top of the soap dispenser into the fourth hole opening in the sink. From underneath the sink, place the rubber gasket (EE) onto the shank (7.1) on the soap dispenser (D) and then thread the mounting nut (FF) onto the shank (7.
TROUBLESHOOTING (Continued) PROBLEM POSSIBLE CAUSE SOLUTION Water does not completely shut off. Rubber valve seat is dirty, stuck, or broken. 1. Shut off the water supply. 2. Remove the handle from the faucet body. Loosen the bonnet by turning it counterclockwise. Lift out the cartridge assembly. 3. Inspect the rubber valve seat in the faucet body. If there is debris or brass scrap on the surface of the seat, remove it.
REPLACEMENT PARTS For replacement parts, call our customer service department at 1-866-439-9800, 8 a.m. - 8 p.m., EST, Monday - Sunday.
ARTÍCULO # 2610191, 2916845, 2916846, 2610192, 2916843, 2916844 ALLEN + ROTH y el diseño del logo son marcas comerciales o marcas registradas de LF, LLC. Todos los derechos reservados. TALBERT TILTON Grifo de cocina de estilo comercial MODELOS 21-K151HCORB-AR 21-K151HCSS-AR 21-K151HCMB-AR 21-K152HCSS-AR 21-K152HCCP-AR 21-K152HCMB-AR Varios artículos tienen un estilo diferente al del plano de líneas.
CONTENIDO DEL PAQUETE A B C D PARTE A B DESCRIPCIÓN Cuerpo del grifo Escudo de bocallave CANTIDAD 1 1 PARTE C D DESCRIPCIÓN Empaque Dispensador de jabón CANTIDAD 1 1 Debido a las constantes mejoras de diseño y calidad, es posible que el producto en el interior se vea ligeramente diferente de la imagen. ADITAMENTOS (no se muestran en tamaño real) AA BB CC DD EE FF Arandela de goma Arandela de metal Tuerca de bloqueo Empaque de goma Tuerca de montaje Cant. 1 Cant. 1 Cant. 1 Cant.
INFORMACIÓN DE SEGURIDAD Lea y comprenda completamente este manual antes de intentar ensamblar, usar o instalar el producto. PRECAUCIÓN • Si suelda las juntas durante la instalación del grifo, se deben retirar los asientos, los cartuchos y las arandelas antes de usar la llama. De lo contrario, se anulará la garantía de dichas piezas. • Cubra el desagüe para evitar que se pierdan piezas. ADVERTENCIA • Proteja los ojos con gafas de seguridad al cortar o soldar las líneas de entrada de agua.
INSTRUCCIONES DE INSTALACIÓN 1. Cierre la válvula de entrada de agua debajo del lavamanos o el suministro de agua principal. Desconecte las líneas de entrada. Retire el grifo existente del lavamanos. 1 Limpie y seque el área superficial donde se colocará el nuevo grifo. 2. Para instalar con la placa de cubierta opcional para un lavamanos de 3 orificios, diríjase al paso 3. 2 Inserte las líneas de entrada de agua (2.1) y el vástago (2.
INSTRUCCIONES DE INSTALACIÓN (Continuación) 4. Desde debajo del lavamanos, asegure el cuerpo del grifo (A) al lavamanos con la arandela de goma (AA), la arandela de metal (BB) y la contratuerca (CC). Apriete con los pernos hexagonales (DD). Verifique la posición del grifo y apriete a mano hasta que el grifo esté instalado de forma segura. NOTA: es útil que una segunda persona sostenga el grifo en su lugar mientras aprieta los pernos hexagonales (DD).
INSTRUCCIONES DE INSTALACIÓN (Continuación) 7. Para instalar el dispensador de jabón opcional, desenrosque la parte superior del dispensador de jabón (D) de la botella de jabón de plástico y retire la tuerca de montaje (FF) y el empaque de goma (EE). Desde arriba del lavamanos, inserte la parte superior del dispensador de jabón en la abertura del cuarto orificio del lavamanos. Desde debajo del lavamanos, coloque el empaque de goma (EE) en el vástago (7.
SOLUCIÓN DE PROBLEMAS (Continuación) PROBLEMA CAUSA POSIBLE SOLUCIÓN El paso de agua no se cierra completamente. El alojamiento de la válvula de goma está sucio, atascado o roto. 1. Cierre el suministro de agua. 2. Retire la manija del cuerpo del grifo. Afloje el bonete girándolo en dirección contraria a las manecillas del reloj. Levante el ensamblaje del cartucho. 3. Inspeccione el alojamiento de la válvula de goma del cuerpo del grifo.
PIEZAS DE REPUESTO Para obtener piezas de repuesto, llame a nuestro Departamento de Servicio al Cliente al 1-866-439-9800, de lunes a domingo de 8 a.m. a 8 p.m., hora estándar del Este.