
User manual

18
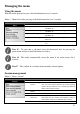
Connect the reader to a PC
This section is meant to describe how to connect the reader to a smartphone or to a personal
computer (PC). The device can connect in 3 ways: a wired USB connection, a wired RS-232
connection, or by a wireless Bluetooth® connection.
Using USB interface
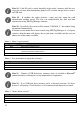
The USB port allows the device to send and receive data via a USB connection.
To establish a USB connection, simply connect the reader to a PC with the data-power cable.
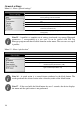
1
Remove the protective cap covering the reader’s cable
connector, and guards the reader against foreign material
contamination.
Install the data-power cable by engaging it into the connector
and rotating the lock-ring.
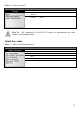
2
Plug the USB extension into a USB port on your computer.
Note 29 – Once the USB cable is connected, the reader is automatically powered
on and it will remain activated until the cable is disconnected. The reader will be
able to read a tag if a sufficiently charged battery is inserted. With a depleted
battery, the reader will not be able to read a tag, but will remain on and can only
communicate with computer.
Note 30: The reader cannot read tags if there is no battery and no external power
supply. Therefore it is not possible to read an ear tag although the other functions
are fully active.
Note 31 – Install the PC software provided on the CD-ROM first in order to pre-
install USB drivers for the reader. When you will connect the reader, Windows
will automatically find the driver and install the reader properly.
Using serial interface
The serial port allows the device to send and receive data via an RS-232 connection.
To establish a RS-232 connection, simply connect the reader with a PC or a PDA with the
data-power cable.