for your topload washer Inside . . . Safety Information . . . . 3 Operation . . . . . . . . . . . . 6 Clothing Care . . . . . . . . . 15 Maintenance. . . . . . . . . . 23 Troubleshooting. . . . . . . 25 Para bajar una copia de estas instrucciones en español, visite www.comlaundry.com. Part No. 201959 www.comlaundry.
WA R N I N G For your safety and to reduce the risk of fire or an explosion, do not store or use gasoline or other flammable vapors and liquids in the vicinity of this or any other appliance.
Safety Information Explanation of Safety Messages NOTE: The word “NOTE” is used to communicate installation, operation, maintenance or servicing information that is important but not hazard related. Throughout this manual and on machine decals, you will find precautionary statements (“DANGER,” “WARNING,” and “CAUTION”) followed by specific instructions. These precautions are intended for the personal safety of the operator, user, servicer, and those maintaining the machine.
5. Under certain conditions, hydrogen gas may be produced in a hot water system that has not been used for two weeks or more. HYDROGEN GAS IS EXPLOSIVE. If the hot water system has not been used for such a period, before using a washing machine or combination washer-dryer, turn on all hot water faucets and let the water flow from each for several minutes. This will release any accumulated hydrogen gas. THE GAS IS FLAMMABLE. DO NOT SMOKE OR USE AN OPEN FLAME DURING THIS TIME. 15.
23. If the washer’s volume or type of sound changes from what is normally heard, call an authorized service agent immediately to prevent possible damage to other components. NOTE: The WARNING and Important Safety Instructions appearing in this manual are not meant to cover all possible conditions and situations that may occur. Observe and be aware of other labels and precautions that are located on the machine. They are intended to provide instructions for safe use of the machine.
Operation Before Washing Prepare Wash Load Empty Pockets and Cuffs Make sure all pockets are empty and turn them inside out. One bobby pin, metal or plastic toy, nail or sharp object in a load can catch laundry and cause tears. Facial tissue left in a pocket will produce extreme “lint”. A crayon or lipstick in a wash load may cause stains that cannot be removed. Roll down cuffs and shake out grass, sand and gravel. TLW1990N TLW1990N Mend Rips and Tears 3.
• When washing very large items, do not fill washtub as full as with other loads. WA R N I N G Water Level Do not wash or dry items soiled with vegetable or cooking oils. Some oils may remain after washing and may cause the fabric to catch on fire by itself. • The water level in your washer should fit the size of your wash load. Small loads will use lower water levels. There must be enough water in the washtub to allow items to move and turn over freely.
Wash Temperature Energy Hot Water You can save energy when washing by following a few guidelines: Hot water will give the best results of cleaning and sanitizing, but it is not suitable for all items. It is best for sturdy whites and colorfast items, heavily soiled items and diapers. 1. Heating water accounts for the greatest energy expense when washing. Save on heating water by using warm or cold washes as well as cold rinses. Warm Water 2. Wash full loads, but do not overload.
Operating Your Washer Delicate Cycle Wash delicate items usually washed by hand on this cycle. A full tub of water is recommended (even for small loads) to allow the delicate items to move freely through the water. More water helps reduce fabric wear, wrinkling, and provides for a clean wash. WA R N I N G To reduce the risk of fire, electric shock, serious injury or death to persons, read the Safety Information section before operating your washer.
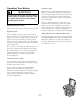
To Wash Clothes 3. Add clothes loosely into the washtub. IMPORTANT: Before using your new washer, make sure the washer cord is plugged into a 120 Volt electrical outlet that has the proper grounding and polarity. Make sure the washer hoses are connected to the hot and cold water faucets, and that the faucets are turned on. Be sure the drain hose is not kinked and is inserted into a drain. Refer to the INSTALLATION INSTRUCTIONS for details of proper washer installation. TLW1996N TLW1996N 4.
7. Select the cycle according to the type of fabric being washed. Push the timer knob in and turn clockwise to the desired cycle and wash time. 5. Set WASH/RINSE temperatures. 8. Pull the timer knob out to start the water fill. Agitation will begin when the water reaches the level you selected. NOTE: Lid must be closed for agitation and spin to start. The washer will stop (pause) shortly before the wash and rinse spins. Do not turn the timer through these pauses. They are part of the cycle.
Timer Manual Soaking Although the washer cycles are automatic, the timer may be reset to lengthen, shorten or repeat a portion of a cycle. Set the timer knob in the center of the word “RINSE” (this prevents the washer from spinning without first filling with water). Place the soaking product and clothes load in the washtub. Pull timer knob to start washer fill. After fill is completed and agitation has started, (lid must be closed) push the timer knob in. This will stop the washer.
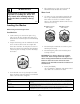
Optional Features Fabric Softener Dispenser Bleach Dispenser To Use Dispenser The bleach dispenser is located in the left front corner, under the lid. After the clothes are loaded into the washtub and before the start of the WASH cycle, pour the proper amount of liquid fabric softener into the bottle measuring cap (refer to bottle directions). Pour into dispenser. Use liquid bleach in the dispenser. Powdered bleach must not be used in the dispenser. Add powdered bleach to the wash water.
To Clean the Dispenser Use Tips Remove the dispenser housing from agitator by squeezing the lower part of the dispenser, pulling directly upward and at the same time tilting slightly. This will expose the dispenser cup, which is also removable, for cleaning (refer to illustration). Both housing and cup can be soaked in hot soapy water and rinsed clean. The funnel shape in top of agitator also needs to be cleaned. The hole and the slots in the two rings will require using a small brush for proper cleaning.
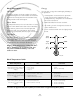
Clothing Care Clothing Care Labels DRY The symbols below appear on many clothing care labels. Following the instructions on each label will help ensure the best laundry results.
Washing Special Items NOTE: Always Follow Manufacturer’s Care Label Instructions Bedding • • • • Use warm wash temperature. Use PERMANENT PRESS cycle. Pretreat heavily soiled areas before washing. When washing an electric blanket, protect the plug by stitching the edge of the blanket over the plug. Only dry in dryer if manufacturer says it can be done. Diapers • Rinse out diapers immediately in cold water and soak in a diaper pail with a small amount of detergent or enzyme presoak. Soak before washing.
Sweaters of Manufactured Fibers • • • • Follow directions for comparable knits. Button sweaters and turn inside out. Stretch to shape after washing. Avoid pulling when wet. Wool Items • Unless labeled “machine washable,” wash by hand. Permanent Press • Wash often. Permanent press clothes tend to look clean even when they should be washed. Do not wash with lint-shedding loads. Pretreat grease stains and oily areas. Use the PERMANENT PRESS cycle, hot or warm water, cold rinse and sufficient detergent.
Problem Excessive Lint Wrinkling Cause Solution Improper Sorting Fabrics which shed lint cannot be washed with fabrics that receive lint. Insufficient Detergent / Non-phosphate Detergent Use enough detergent so lint remains suspended in water and flushed out. Mixing Fabric Types Knits and Permanent Press attract lint. Wash these only with similar items. Use fabric softener in rinse water. Improper Sorting Heavy items like towels should not be washed with light items like nightgowns.
Laundry Aids Bleach Alternatives Use • • Fabric Softeners • • Comments In some cases, mild bleaching may be accomplished using white vinegar, hydrogen peroxide or lemon juice as a pretreater. An oxygen bleach may be used in the wash cycle. • Always test to be sure that the product will not damage fabric by applying to a small part of the fabric that is not easily seen. Use to soften clothes and remove static electricity from permanent press knits and other fabrics of manufactured fibers.
Stain Treatment Blood Treat stain immediately. Soak 30 minutes or more in cold water. Rub detergent into stain. If stain persists, place a small amount of household ammonia on the stain and rub again with detergent. If safe for fabric, wash in hot water and chlorine bleach if traces of the stain persist. Candle Wax Rub with ice and scrape off excess wax. Place stain between paper towels and press with warm iron.
Stain Treatment Grease, Oil Place face down on paper towel and sponge with a pretreat product. Dampen stain with water and rub with bar soap or detergent. Wash in hot water (if safe for fabric). Ink Saturate the stain with hair spray or place the fabric face down on paper towel and sponge with rubbing alcohol (refer to WARNING on page 19). Rinse. If traces of the stain remain, rub detergent into the dampened stain and wash. Some inks may be impossible to remove.
Stain Treatment Scorching Wash using hot water and chlorine bleach (if safe for fabric). Fabrics can be damaged by being scorched. If this has happened, you may not be able to remove the marks. Shoe Polish Rub dampened stain with detergent. Wash in hot water and chlorine bleach if safe for fabric. Soft Drinks Rinse stain with cold water immediately. Wash in warm water and chlorine bleach, if safe for fabric. Soy Sauce Rinse with cold water. Apply a pretreat product. Wash as usual.
Maintenance Cold Weather Care Replacing Hoses • If the washer is delivered on a cold day (below freezing), or is stored in an unheated room or area during the cold months, do not attempt to operate it until the washer has had a chance to warm up. • Hoses and other natural parts deteriorate after extended use. Hoses may develop cracks, blisters or material wear from the temperature and constant high pressure they are subjected to.
Reinstallation of Shipping Materials • After the shipping brace has been installed in the lid opening, tilt washer back enough to access base opening. You must install the shipping brace and shipping plug any time the washer is moved. • Insert shipping plug into base opening and, using the palm of your hand, push shipping plug into washer until it snaps into shipping plug opening. Shipping Brace • The shipping brace in the lid opening should be saved and reinstalled whenever the washer is moved.
Troubleshooting Try these troubleshooting tips before making a service call. You may save time and money! Washer Symptom Won’t Fill Possible Cause / Solution • • • • • • • • • Make sure power cord is plugged all the way into the electrical outlet. Make sure hot and cold water faucets are turned on. Make sure that the fill hoses are not kinked or twisted. Pull timer knob out to start washer. Make sure that the controls are properly set. Make sure that the last spin has been completed.
Washer Symptom Water Leaks Possible Cause / Solution • • • • • Check that fill hoses are properly installed on the faucets and the washer’s water mixing valve. Replace the fill hoses every five years. Make sure drain receptacle is not clogged. Check house plumbing. Laundry load may be oversudsing or overloaded. Use less detergent (or low-sudsing detergent) and proper load sizes. Is Noisy • • Wash load may be unbalanced. Open lid and redistribute the load. Make sure washer is level.
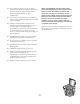
Contact Information If service is required, contact the nearest Factory Authorized Service Center. To find the nearest service center, visit us online at www.comlaundry.com. When contacting us about your washer, PLEASE GIVE THE MODEL AND SERIAL NUMBERS. The model and serial numbers are located on the nameplate. The nameplate will be in the location shown. Please include a copy of your bill of sale and any service receipts you have.