
User's Manual


Installation and Safety Guide
11
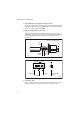
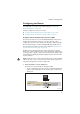
Firmly press the PSU until the faceplate engages, or nearly engages, the
chassis.
5. Secure the power supply unit.
Use a Phillips #2 screwdriver to tighten the two captive Phillips screws on
the faceplate of the PSU.
Applying Power to the Power Supply
Before applying power to a PSU:
■ gather the necessary tools and equipment
■ read the section “Using an AT-PWR03 Power Supply (PSU)” on page 9
Warning Ensure that the power cable is not live before starting.
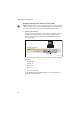
For an AT-PWR03 AC power supply
To apply power to the PSU, plug the provided AC power cord into the power
inlet on the faceplate of the PSU. Secure the power cord by clipping the cord
into the retaining clip. Then connect the power cord to the main power supply.
For an AT-PWR03 DC power supply
Only suitably trained and qualified personnel should connect a DC power supply.
For centralised DC power connection, the router should be installed in
restricted access areas only (such as dedicated equipment rooms or
equipment closets). In the United States and Canada, ensure the PSU is installed
in accordance with Articles 110-16, 110-17, and 110-18 of the National
Electrical Code, ANSI/NAPA 70.
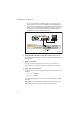
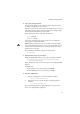
Captive screw
Captive screw
PSU (DC)
Top of Router
PSU Insert