
User's Manual


Stand-alone Switch Installation Guide for 8100L and 8100S Series Switches
63
Choosing a Site for the Switch
Observe these requirements when planning the installation of the switch.
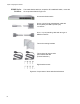
If you plan to install the switch in an equipment rack, the rack
should be safely secured so that it will not tip over. Devices in a
rack should be installed starting at the bottom, with the heavier
devices near the bottom of the rack.
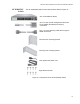
If you plan to install the switch on a table, the table should be level
and stable.
The power outlet should be located near the switch and be easily
accessible.
The site should allow for easy access to the ports on the front of
the switch, so that you can easily connect and disconnect cables,
and view the port LEDs.
The site should allow for adequate air flow around the unit and
through the cooling vents on the front and rear panels. (The
ventilation direction in units that have a cooling fan is from front to
back, with the fan on the back panel drawing the air out of the unit.)
The site should not expose the switch to moisture or water.
The site should be a dust-free environment.
The site should include dedicated power circuits or power
conditioners to supply reliable electrical power to the network
devices.
The site should not be a wiring or utility box because the switch will
overheat and fail from inadequate airflow.
Warning
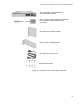
Stand-alone switches should not be stacked on top of one another
on a table or desktop because that could present a personal safety
hazard if you need to move or replace switches.