
User's Manual


Chapter 5: Assigning the Stack ID Numbers and Cabling the Stacking Ports
86
4. Type Y to change the switch’s ID number and reset the unit, or N to
cancel the procedure.
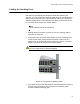
5. Wait for the switch to initialize its management software and
afterwards examine the Stack ID LED again to confirm that it’s
displaying the correct stack ID number for the switch. For example, if
in step 3 you assigned the switch the ID number 2, then the stack ID
LED should be displaying the number 2.
6. Disconnect the AC power cord from the switch and the power source.
7. Return to “Powering on a Switch” on page 80 to verify and set the
stack ID number of the next switch in the stack. If there are no further
switches, go to “Cabling the Stacking Ports” on page 87.