AT-FS211 AT-FS212 AT-FS212/1 AT-FS212/2 AT-FS212/3 AT-FS212/4 AT-FS214 AT-FS215 AT-FS216 AT-FS217 Wall-Mountable Fast Ethernet Switches Installation Guide PN 613-50226-00 Rev C
Copyright 2002 Allied Telesyn, Inc.. 960 Stewart Drive, Suite B, Sunnyvale CA 94085 USA All rights reserved. No part of this publication may be reproduced without prior written permission from Allied Telesyn, Inc. Ethernet is a registered trademark of Xerox Corporation. All other product names, company names, logos or other designations mentioned herein are trademarks or registered trademarks of their respective owners. Allied Telesyn, Inc.
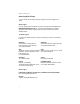
Electrical Safety and Emission Compliance Statement Standards: This product meets the following standards. U.S. Federal Communications Commission Declaration Of Conformity Manufacture Name: Allied Telesyn, Inc.
Electrical Safety and Emission Compliance Statement RFI Emission EN55022 Class B ! 1 Warning: In a domestic environment this product may cause radio interference in which case the user may be required to take adequate measures. ! 2 Immunity EN55024 ! 3 Warning: This product requires shielded cables to comply with emission and immunity standards. If it is used with unshielded cables, the user may be required to take measures to correct the interference problem at their own expense.
AT-FS21x and AT-FS212/x Series Installation Guide Importante: El Apéndice B contiene mensajes de seguridad traducidos para la instalación de este equipo. Cuando vea el símbolo !, vaya al Apéndice B para ver el mensaje de seguridad traducido a su idioma. Obs! Bilaga B innehåller översatta säkerhetsmeddelanden avseende installationen av denna utrustning. När du ser !, skall du gå till Bilaga B för att läsa det översatta säkerhetsmeddelandet på ditt språk.
Table of Contents Electrical Safety and Emission Compliance Statement ......................iii Welcome to Allied Telesyn .......................................................................... ix Where to Find Web-based Guides .................................................................... ix Document Conventions ..................................................................................... ix Contacting Allied Telesyn ........................................................................
Table of Contents Appendix A Technical Specifications ............................................................................ 17 Physical ............................................................................................................. 17 Environmental .................................................................................................. 17 Electrical and Mechanical Specifications ........................................................ 17 Electrical Rating ....................
Welcome to Allied Telesyn This installation guide contains instructions on how to wall-mount the AT-FS21x and AT-FS212/x Series Fast Ethernet Switches and how to connect the units to your network. Where to Find Web-based Guides The Allied Telesyn web site at www.alliedtelesyn.com offers you an easy way to access the most recent documentation, software, and technical information for all of our products. For product guides, select “Support & Services” from our web site.
Welcome to Allied Telesyn Contacting Allied Telesyn You can contact Allied Teleysn technical support online or by telephone or e-mail. Online Support You can request technical support online by accessing the Knowledge Base at http://kb.alliedtelesyn.com. You can use the Knowledge Base to submit questions to our technical support staff and review answers to previously asked questions.
AT-FS21x and AT-FS212/x Series Installation Guide Returning Products Products for return or repair must first be assigned a Return Materials Authorization (RMA) number. A product sent to Allied Telesyn without a RMA number will be returned to the sender at the sender’s expense.
Welcome to Allied Telesyn For Sales or Corporate Information You can contact Allied Telesyn for sales or corporate information at the location below: Allied Telesyn, Inc. 19800 North Creek Parkway, Suite 200 Bothell, WA 98011 Tel: 1 (425) 487-8880 Fax: 1 (425) 489-9191 Tell Us What You Think If you have any comments or suggestions on how we might improve this or other Allied Telesyn documents, please fill out the General Enquiry Form online. This form can be accessed by selecting “Contact Us” from www.
Chapter 1 Overview The AT-FS21x and AT-FS212/x Series Fast Ethernet Switches feature the following models: ❑ AT-FS211 ❑ AT-FS212/4 ❑ AT-FS212 ❑ AT-FS214 ❑ AT-FS212/1 ❑ AT-FS215 ❑ AT-FS212/2 ❑ AT-FS216 ❑ AT-FS212/3 ❑ AT-FS217 These switches are designed to interconnect LAN devices and subnetworks over large distances. These dual-port switches can also improve the performance of your network by dividing it into smaller, more manageable segments.
Overview These switches are easy to install and do not require software configuration or management. Figure 1 illustrates an AT-FS21x Series Switch. Mounting Bracket Screws LEDs itc rnet Sw FS2he14 ATFast Et h PWR FX TX 10Base-T/ X 100Base-T 3.3 VDC Cable Hook 10/100Base-TX Port DC Connector Figure 1 AT-FS21x Series Switch (Model AT-FS214) Table 1 lists the operating distances for the AT-FS21x and AT-FS212/x Series Switches.
AT-FS21x and AT-FS212/x Series Installation Guide Key Features The switches have the following key features: ❑ LEDs for unit and port status ❑ Wall-mountable chassis ❑ Auto MDI/MDI-X ❑ External AC/DC power adapters (North America, Continental, or Europe) ❑ Full- or half-duplex mode operation on the twisted pair port ❑ Full-duplex operation on the fiber optic port ❑ FJ, LC, MT-RJ, SC, ST, or VF-45 fiber optic connector ❑ Data packet forwarding and filtering at full wire speed ❑ Store and f
Overview Status LEDs Table 2 lists the switch LEDs. Table 2 AT-FS21x and AT-FS212/x Series Switch LEDs LED Color Description PWR Green Power is applied. FX Green A link has been established on the fiber optic port Blinking Activity has been detected on the fiber optic port. Green A link has been established on the twisted pair port Blinking Activity has been detected on the twisted pair port. Green The twisted pair port is operating at 100 Mbps.
AT-FS21x and AT-FS212/x Series Installation Guide Functional Description Frame Processing The switches support store and forward switching at Fast Ethernet full-wire speed in 10 or 100 Mbps, half- or full-duplex mode. Packets entering each port are stored in buffers. After the full packet is received, it is forwarded or discarded depending on its destination address and error status.
Overview Network Topologies Figure 2 illustrates a topology using one AT-FS214 switch to interconnect two small networks of stackable hubs. Network 1 has an AT-FH812u with an AT-FH807u switching module connected to the 100Base-FX port on the AT-FS214. Network 2 has an AT-3624TR hub connected to the 10/100Base-TX port on the AT-FS214.
Chapter 2 Installing the Switch Verifying the Package Contents Make sure the following items are included in your package. If any item is missing or damaged, contact your Allied Telesyn sales representative for assistance.
Installing the Switch ❑ Refer to the following tables for the cabling specifications for the 10/ 100Base-TX and 100Base-FX ports.
AT-FS21x and AT-FS212/x Series Installation Guide Note Refer to page 18 for additional fiber optic port specifications. Selecting a Site Be sure to observe the following requirements when choosing a site for your switch. ❑ Select a site that is dust-free and moisture-free. ❑ Be sure that the site will allow you to easily access the fiber optic and twisted pair cables and the power cord. ❑ Use dedicated power circuits or power conditioners to supply reliable power to the device.
Installing the Switch Caution Power cord is used as a disconnection device: To de-energize equipment, disconnect the power cord. ! 12 Caution Pluggable Equipment: The socket outlet should be installed near the equipment and should be easily accessible. ! 13 Caution Air vents: The air vents must not be blocked on the unit and must have free access to the room ambient air for cooling. ! 14 Caution Operating Temperature: This product is designed for a maximum ambient temperature of 40°C.
AT-FS21x and AT-FS212/x Series Installation Guide 3. Gently slide the bracket off the switch. See Figure 4. Figure 4 Sliding the Wall-mounting Bracket off the Switch Note For drywall installation, drill two 3/16-inch holes, insert the plastic anchors and tap flush. 4. Position the wall-mounting bracket on the wall and, using two Phillips-head screws (provided), secure the bracket to the wall. See Figure 5.
Installing the Switch Note The switch can be mounted either vertically or horizontally. 5. Using the flanges under the fiber optic port as a guide, slide the switch into the mounting bracket. Refer to Figure 6. Flange Flange AT-FS214 Fas t Ethernet Switch FX PWR TX LK/AT 100M Figure 6 Sliding the Switch Over the Wall-mounting Bracket 6. Secure the switch to the wall-mounting bracket using the screws removed in Step 2. 7.
AT-FS21x and AT-FS212/x Series Installation Guide b. Plug the AC power cord to a power outlet. Note To prevent the DC power cable from being inadvertently pulled out of the switch, use the cable tie supplied with the unit to secure the DC power cable to the cable hook located next to the DC connector. 9. Verify that the PWR LED on the switch is green. If the LED is OFF, refer to “Troubleshooting” on page 15. 10. Remove the dust cover from the 100Base-FX fiber optic port and connect the fiber optic cable.
Chapter 3 Troubleshooting Follow the guidelines below to test and troubleshoot the installation in the event a problem occurs. If the PWR LED is OFF, do the following: ❑ Make sure that the power adapter is securely connected to a power source and the DC power cord on the adapter is securely connected to the DC power connector on the switch. ❑ Verify that the power outlet has power by connecting another device to it. ❑ Try connecting the switch to another power source.
Troubleshooting ❑ Check to be sure that the end-node connected to the port is operating at 100 Mbps. ❑ Make sure that the fiber optic port on the end-node is operating in full-duplex mode. ❑ Make sure that the cable connected to the fiber optic receiver port on the switch is connected to the transmitter port on the remote end-node and that the fiber optic transmitter port on the switch is connected to the receiver port on the end-node.
Appendix A Technical Specifications Physical Dimensions: 90 mm x 24 mm x 70 mm (3.54 in x 0.94 in x 2.76 in) Weight: 0.23 kg (0.5 lbs) Environmental Operating: 0° to 40° C (32° F to 104° F) Storage: -20° to 80° C (-4° F to 176° F) Relative Humidity Operating and Storage: 5% to 80% (non-condensing) Operating and Storage Altitude: Up to 3,048 meters (10,000 feet) Electrical and Mechanical Specifications Standard: CE Compliant IEEE 802.3, IEEE 802.
Technical Specifications Electrical Rating Input Supply Voltage 3.3 V DC Minimum Current Rating 1.5A Maximum Power Consumption 6W Fiber Optic Port Specifications The following tables list the specifications for the 100Base-FX fiber optic port. Table 5 Fiber Optic Transmitter Fiber Type1 Fiber Optic Diameter Optical Frequency AT-FS211 AT-FS212 AT-FS214 AT-FS215 AT-FS216 AT-FS217 MMF 50/125 MMF AT-FS212/1 Model Launch Power2 Maximum Average Minimum 1310 nm -14.0 -20.3 -22.5 62.
AT-FS21x and AT-FS212/x Series Installation Guide Table 6 Fiber Optic Receiver Receiver Sensitivity Fiber Type1 Fiber Optic Diameter Optical Frequency AT-FS211 AT-FS212 AT-FS214 AT-FS215 AT-FS216 AT-FS217 MMF 50/125 MMF AT-FS212/1 Model Minimum Typical Sensitivity Saturation 1310 nm -31.8 -34.5 -14.0 62.5/125 1310 nm -31.8 -34.5 -14.0 SMF 9/125 1310 nm -31.0 -31.0 -8.0 AT-FS212/2 SMF 9/125 1310 nm -35.0 -38.0 0.0 AT-FS212/3 SMF 9/125 1310 nm -37.0 -37.0 -3.
Technical Specifications Table 8 Fiber Optic Loss Specification (Benchmarks) Fiber Optic Diameter Optical Frequency Typical Loss Factor Worst Case Loss Factor Bandwidth Multimode Fiber 50/125 1310 nm 1.00 db/km 1.50 db/km 400 62.5/125 1310 nm 1.00 db/km 1.5 db/km 500 Single-mode 9/125 nm 1310 nm 0.40 db/km 1.00 db/km N/A 9/125 nm 1550 nm 0.30 db/km 0.75 db/km N/A Fiber Type Pinout Assignments Figure 7 shows the pin assignments of the RJ-45 connector.
Appendix B Translated Safety and Emission Information Important: This appendix contains multiple-language translations for the safety statements in this guide. Wichtig: Dieser Anhang enthält Übersetzungen der in diesem Handbuch enthaltenen Sicherheitshinweise in mehreren Sprachen. Vigtigt: Dette tillæg indeholder oversættelser i flere sprog af sikkerhedsadvarslerne i denne håndbog. Belangrijk: Deze appendix bevat vertalingen in meerdere talen van de veiligheidsopmerkingen in deze gids.
Translated Safety and Emission Information Standards: This product meets the following standards. U.S. Federal Communications Commission Declaration Of Conformity Manufacture Name: Allied Telesyn, Inc.
AT-FS21x and AT-FS212/x Series Installation Guide !8 Warning Do not stare into the Laser beam. At time of installation, the Fiber Optic Lasers comply with FDA Radiation Performance Standard 21CFR Subchapter J, applicable at date of manufacture. !9 Electrical Notices Warning: ELECTRIC SHOCK HAZARD To prevent ELECTRIC shock, do not remove the cover. No userserviceable parts inside. This unit contains HAZARDOUS VOLTAGES and should only be opened by a trained and qualified technician.
Translated Safety and Emission Information Sicherheit !7 Warnung Laserprodukt der Klasse 1. !8 Warnung Nicht direkt in den Strahl blicken. !9 Achtung: GEFÄHRLICHE SPANNUNG Das Gehäuse nicht öffnen. Das Gerät enthält keine vom Benutzer wartbaren Teile. Das Gerät steht unter Hochspannung und darf nur von qualifiziertem technischem Personal geöffnet werden. Vor Anschluß der LAN-Kabel, Gerät vom Netz trennen.
AT-FS21x and AT-FS212/x Series Installation Guide !9 Elektriske Forholdsregler Advarsel: RISIKO FOR ELEKTRISK STØD For at forebygge ELEKTRISK stød, undlad at åbne apparatet. Der er ingen indre dele, der kan repareres af brugeren. Denne enhed indeholder LIVSFARLIGE STRØMSPÆNDINGER og bør kun åbnes af en uddannet og kvalificeret tekniker. For at undgå risiko for ELEKTRISK STØD, afbrydes den elektriske strøm til produktet, før LAN-kablerne monteres eller afmonteres.
Translated Safety and Emission Information !9 Elektriske Forholdsregler Advarsel: RISIKO FOR ELEKTRISK STØD For at forebygge ELEKTRISK stød, undlad at åbne apparatet. Der er ingen indre dele, der kan repareres af brugeren. Denne enhed indeholder LIVSFARLIGE STRØMSPÆNDINGER og bør kun åbnes af en uddannet og kvalificeret tekniker. For at undgå risiko for ELEKTRISK STØD, afbrydes den elektriske strøm til produktet, før LAN-kablerne monteres eller afmonteres.
AT-FS21x and AT-FS212/x Series Installation Guide !9 Information Sur Les Risques Électriques Avertissement: DANGER D’ÉLECTROCUTION Pour éviter toute ÉLECTROCUTION, ne pas ôter le revêtement protecteur du matériel. Ce matériel ne contient aucun élément réparable par l’utilisateur. Il comprend des TENSIONS DANGEREUSES et ne doit être ouvert que par un technicien dûment qualifié. Pour éviter tout risque d’ÉLECTROCUTION, débrancher le matériel avant de connecter ou de déconnecter les câbles LAN.
Translated Safety and Emission Information !9 Sähköön Liittyviä Huomautuksia Varoitus: SÄHKÖISKUVAARA Estääksesi SÄHKÖISKUN älä poista kantta. Sisällä ei ole käyttäjän huollettavissa olevia osia. Tämä laite sisältää VAARALLISIA JÄNNITTEITÄ ja sen voi avata vain koulutettu ja pätevä teknikko. Välttääksesi SÄHKÖISKUN mahdollisuuden katkaise sähkövirta tuotteeseen ennen kuin liität tai irrotat paikallisverkon (LAN) kaapelit.
AT-FS21x and AT-FS212/x Series Installation Guide !9 Avvertenze Elettriche Attenzione: PERICOLO DI SCOSSE ELETTRICHE Per evitare SCOSSE ELETTRICHE non asportare il coperchio. Le componenti interne non sono riparabili dall’utente. Questa unità ha TENSIONI PERICOLOSE e va aperta solamente da un tecnico specializzato e qualificato. Per evitare ogni possibilità di SCOSSE ELETTRICHE, interrompere l’alimentazione del dispositivo prima di collegare o staccare i cavi LAN.
Translated Safety and Emission Information ! 10 Dette er et “KLASSE 1 LED PRODUKT” ! 11 Fare For Lynnedslag Fare: ARBEID IKKE på utstyr eller KABLER i TORDENVÆR. ! 12 Forsiktig: STRØMLEDNINGEN BRUKES TIL Å FRAKOBLE UTSTYRET. FOR Å DEAKTIVISERE UTSTYRET, må strømforsyningen kobles fra. ! 13 Utstyr for stikkontakt. Stikkontakten skal monteres i nærheten av utstyret og skal være lett tilgjengelig.
AT-FS21x and AT-FS212/x Series Installation Guide ! 12 Cuidado: O cabo de alimentação é utilizado como um dispositivo de desconexão. Para deseletrificar o equipamento, desconecte o cabo de alimentação. ! 13 Equipamento de ligação, a tomada eléctrica deve estar instalada perto do equipamento e ser de fácil acesso." ! 14 Cuidado: As aberturas de ventilação não devem ser bloqueadas e devem ter acesso livre ao ar ambiente para arrefecimento adequado do aparelho.
Translated Safety and Emission Information ! 14 Atencion: Las aberturas para ventilación no deberán bloquearse y deberán tener acceso libre al aire ambiental de la sala para su enfriamiento. ! 15 La energía para el dispositivo central o "hub" debe provenir únicamente del adaptador. Europe - EU Utilizar un adaptador de corriente alterna autorizado TÜV de 3.3 voltios de corriente continua y 1.5 miliamperios.
AT-FS21x and AT-FS212/x Series Installation Guide ! 16 Driftstemperatur: Denna produkt är konstruerad för rumstemperatur ej överstigande 40 grader Celsius. ! 17 Alla Länder: Installera produkten i enlighet med lokala och statliga bestämmelser för elektrisk utrustning.