AT-FS232 AT-FS232/1 AT-FS232/2 AT-FS232/3 AT-FS232/4 Bridging Converters Installation Guide PN 613-50358-00 Rev B
Copyright 2003 Allied Telesyn, Inc. 960 Stewart Drive, Suite B, Sunnyvale, CA 94085, USA All rights reserved. No part of this publication may be reproduced without prior written permission from Allied Telesyn, Inc. Ethernet is a registered trademark of Xerox Corporation. All other product names, company names, logos or other designations mentioned herein are trademarks or registered trademarks of their respective owners. Allied Telesyn, Inc.
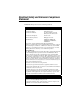
Electrical Safety and Emission Compliance Statement Standards: This product meets the following standards. U.S. Federal Communications Commission Declaration Of Conformity Manufacturer Name: Allied Telesyn, Inc.
Electrical Safety and Emission Compliance Statement RFI Emission FCC Class B, EN55022 Class B, VCCI Class B, C-TICK 1 Warning: In a domestic environment this product may cause radio interference in which case the user may be required to take adequate measures. 2 Immunity 3 EN55024 Warning: This product requires shielded cables to comply with emission and immunity standards.
AT-FS232 and AT-FS232/x Series Installation Guide Importante: El Apéndice B contiene mensajes de seguridad traducidos para la instalación de este equipo. Cuando vea el símbolo , vaya al Apéndice B para ver el mensaje de seguridad traducido a su idioma. Obs! Bilaga B innehåller översatta säkerhetsmeddelanden avseende installationen av denna utrustning. När du ser , skall du gå till Bilaga B för att läsa det översatta säkerhetsmeddelandet på ditt språk.
Table of Contents Electrical Safety and Emission Compliance Statement ...................... iii Table of Contents ......................................................................................... vii Welcome to Allied Telesyn .......................................................................... ix Where to Find Web-based Guides ................................................................... ix Document Conventions ...........................................................................
Table of Contents Chapter 2 Installing the Bridging Converter ........................................................... 15 Verifying Package Contents ............................................................................ 15 Planning the Installation ................................................................................ 16 Selecting a Site ......................................................................................... 18 Reviewing Safety Guidelines ...............................
Welcome to Allied Telesyn This guide contains instructions on how to install the AT-FS232 and AT-FS232/x Series Bridging Converters. Where to Find Web-based Guides The Allied Telesyn web site at www.alliedtelesyn.com offers you an easy way to access the most recent documentation, software, and technical information for all of our products. For product guides, select “Support & Services” from our web site.
Welcome to Allied Telesyn Contacting Allied Telesyn This section provides Allied Telesyn contact information for technical support as well as sales or corporate information. Online Support You can request technical support online by accessing the Allied Telesyn Knowledge Base from the following web site: http://kb.alliedtelesyn.com. You can use the Knowledge Base to submit questions to our technical support staff and review answers to previously asked questions.
Chapter 1 Overview The AT-FS232 and AT-FS232/x Series Bridging Converters include the following models: ❑ AT-FS232 ❑ AT-FS232/3 ❑ AT-FS232/1 ❑ AT-FS232/4 ❑ AT-FS232/2 The AT-FS232 and AT-FS232/x Series Bridging Converters are designed to extend the distance of your network by converting Fast Ethernet data between twisted pair cabling and fiber optic cabling.
Overview Figure 1 illustrates the front panel of the AT-FS232 Bridging Converter. Figure 1 AT-FS232 Front Panel Figure 2 illustrates a front panel of an AT-FS232/x Series Bridging Converter. SINGLE MODE Figure 2 AT-FS232/x Series Front Panel (AT-FS232/1 Model) The back panel of the AT-FS232 and AT-FS232/x Series Bridging Converters features a DC power connector and DIP switches for manually configuring the ports.
AT-FS232 and AT-FS232/x Series Installation Guide Figure 3 illustrates the back panel of the AT-FS232 and AT-FS232/x Series Bridging Converters with a 12VDC power connector. PORT 2 1 2 2 1 12 V D C 2 3 4 SPEED DUPLEX AUTO (Mbps) MODE NEG 10 100 HALF FULL OFF ON Figure 3 Back Panel of the AT-FS232 and AT-FS232/x Series Bridging Converters (12VDC Power Connector) Figure 4 illustrates the back panel of the AT-FS232 and AT-FS232/x Series Bridging Converters with a 12-50VDC, 3-prong power connector.
Overview Table 1 lists the maximum operating distances for the bridging converters. Table 1 Maximum Operating Distances 100Base-FX Model 10Base-T/100Base-TX Connector Maximum Operating Distance1 Connector Maximum Operating Distance2 AT-FS232 SC 2 km (1.24 mi) RJ-45 100 m (328 ft) AT-FS232/1 SC 15 km (9.3 mi) RJ-45 100 m (328 ft) AT-FS232/2 SC 40 km (24.8 mi) RJ-45 100 m (328 ft) AT-FS232/3 SC 70 km (43.4 mi) RJ-45 100 m (328 ft) AT-FS232/4 SC 90 km (55.
AT-FS232 and AT-FS232/x Series Installation Guide External Power Supply 12VDC Power Supply The 12VDC-version bridging converters come with the AC/DC power adapter illustrated in Figure 5. This is an approved safety compliant AC power adapter for the 100 and 240V AC versions with an unregulated output of 12VDC. Figure 5 AC/DC Power Adapter for the 12VDC Version Bridging Converter 12-50VDC Power Supply Figure 6 illustrates the power connector included with the 12-50VDC-version bridging converter.
Overview Key Features The AT-FS232 and AT-FS232/x Series Bridging Converters have the following features: 6 ❑ LEDs for unit and port status ❑ Auto MDI/MDI-X ❑ Mode selection button that toggles between Link Test, MissingLink , and Smart MissingLink ❑ DIP switches for configuring the ports ❑ Half- or full-duplex operation on both ports ❑ RJ-45 twisted pair connector ❑ SC fiber optic connector ❑ Data packet forwarding and filtering at full wire speed (10 Mbps to 100 Mbps and 100 Mbps to 100
AT-FS232 and AT-FS232/x Series Installation Guide Status LEDs Table 2 defines the LEDs for the AT-FS232 and AT-FS232/x Series Bridging Converters. Table 2 Status LEDs LED Color Description PWR Green Power is applied to the unit. AUTO NEG Green Auto-negotiation on the twisted pair port is enabled. OFF Auto-negotiation on the twisted pair port is disabled. Green The twisted pair port is operating at 100 Mbps. OFF The twisted pair port is operating at 10 Mbps.
Overview Twisted Pair Port The AT-FS232 and AT-FS232/x Series Bridging Converters have one 10Base-T/100Base-TX twisted pair port. The twisted pair port features a RJ-45 connector. Port Speed The twisted pair port is compliant with the 10Base-T and 100Base-TX standards and is capable of either 10 Mbps or 100 Mbps operation. You can set the port speed manually or, since the port is IEEE 802.3u Auto-Negotiation compliant, you can let the bridging converter set the port speed automatically.
AT-FS232 and AT-FS232/x Series Installation Guide Auto MDI/MDI-X An RJ-45 twisted pair port on a 10 Mbps or 100 Mbps Ethernet network device can have one of two possible wiring configurations: MDI or MDI-X. The RJ-45 port on a PC, router, or bridge is typically wired as MDI, while the twisted pair port on a bridging converter or hub is usually MDI-X. When the twisted pair port on the AT-FS232 and AT-FS232/x Series converters is set to Auto-Negotiation, the port features automatic MDI/MDIX.
Overview Mode Selection Button Link Test The link test is a fast and easy way for you to test the connections between the bridging converter ports and the end-nodes that are connected to the ports. If a network problem occurs, you can perform a link test to determine which port is experiencing a problem, and so be able to focus your troubleshooting efforts on the cable and end-node where the problem resides. To perform a link test, toggle the Mode Selection button until the LT LED is green.
AT-FS232 and AT-FS232/x Series Installation Guide Note MissingLink and Smart MissingLink are disabled when you perform a link test. Consequently, to ensure that MissingLink or Smart MissingLink is enabled on the bridging converter, always set the Mode Selection button so that the ML or SML LED is green during normal network operations. Smart MissingLink The Smart MissingLink feature performs exactly the same function as MissingLink with one additional feature.
Overview DIP Switches The DIP switches are used to manually configure the operating characteristics of the ports, such as port speed, duplex mode, and Auto-Negotiation. For the 100Base-FX fiber optic port, you can manually set the duplex mode to either half- or full-duplex. On the 10Base-T/100Base-TX twisted pair port, you can manually set the speed of the port to either 10 Mbps or 100 Mbps, set the duplex mode to either half- or full-duplex, and enable or disable Auto-Negotiation.
AT-FS232 and AT-FS232/x Series Installation Guide The bridging converter will discard CRC errors, misaligned, runt, and underoversized packets. When the packet has dribble bits at the end, the bridging converter will truncate to octet boundary and check for a good FCS before forwarding. Network Topologies Figure 7 illustrates a standalone topology using one AT-FS232 Bridging Converter to interconnect two small networks.
Overview Figure 7 illustrates a back-to-back topology using two AT-FS232 Bridging Converters to interconnect two small networks. ❑ Network 1 has an AT-8024GB switch connected to the 10Base-T/ 100Base-TX port on the first AT-FS232 Converter. ❑ Network 2 has an AT-8024 switch connected to the 10Base-T/100BaseTX port on the second AT-FS232 Converter.
Chapter 2 Installing the Bridging Converter This chapter explains how to install the AT-FS232 and AT-FS232/x Series Bridging Converters. These bridging converters can be installed on a desktop or in an AT-MCR12 chassis. Verifying Package Contents Make sure the following items are included in your package. If any item is missing or damaged, contact your Allied Telesyn sales representative for assistance.
Installing the Bridging Converter Planning the Installation Be sure to observe the following guidelines when planning the installation of your bridging converter. ❑ The end-node connected to the 100Base-FX fiber optic port must be able to operate at 100 Mbps. ❑ The end-node connected to the 10Base-T/100Base-TX twisted pair port can operate at either 10 Mbps or 100 Mbps.
AT-FS232 and AT-FS232/x Series Installation Guide Refer to Table 4 for the cabling specifications for the fiber optic port when operating in full-duplex mode. Table 4 100Base-FX Fiber Optic Cabling Specifications (Full-duplex) Maximum Operating Distance1 Maximum Allowable Loss Budget 50/125 or 62.5/ 125 micron multimode 2 km (1.24 mi) 13 dB at 1310 nm AT-FS232/1 9/125 micron single-mode 15 km (9.3 mi) 13 dB at 1310 nm AT-FS232/2 9/125 micron single-mode 40 km (24.
Installing the Bridging Converter Refer to Table 5 for the cabling specifications for the fiber optic port when operating in half-duplex mode.
AT-FS232 and AT-FS232/x Series Installation Guide Reviewing Safety Guidelines Please review the following safety guidelines before you begin to install the bridging converter. Laser Class 1 laser device. 7 Laser Do not stare into the laser beam. 8 Warning Electric Shock Hazard: To prevent electric shock, do not remove the cover. There are no user-serviceable parts inside. The unit contains hazardous voltages and should only be opened by a trained and qualified technician.
Installing the Bridging Converter Installing the Bridging Converter To install an AT-FS232 or AT-FS232/x Series Bridging Converter, perform the following procedures: 1. Remove all equipment from the package and store the packaging material in a safe place. Note Do not remove the dust cover from the fiber optic port until you are ready to connect the fiber optic cable. Dust contamination can adversely impact the operating performance of the port and the bridging converter. 2.
AT-FS232 and AT-FS232/x Series Installation Guide Table 6 DIP Switch Settings DIP Switch Port Number Setting 1 Speed (Mbps) Up 2 2 1 3 2 4 2 Duplex Mode Duplex Mode Auto Neg Position Description The twisted pair port operates at 10 Mbps. Down The twisted pair port operates at 100 Mbps. Up The fiber optic port operates in half-duplex mode. Down The fiber optic port operates in full-duplex mode. Up The twisted pair port operates in half-duplex mode.
Installing the Bridging Converter 4. If you are installing the bridging converter in an AT-MCR12 chassis, refer to the AT-MCR12 Chassis Installation Guide from our web site for instructions on how to install the bridging converter in the chassis, then proceed to Step 7. Note A 12-50VDC bridging converter cannot be installed in an AT-MCR12 chassis. 5. Place the bridging converter on a secure, level surface, leaving ample space around the bridging converter for ventilation. 6.
AT-FS232 and AT-FS232/x Series Installation Guide ❑ SC ports consist of two separate connectors, as shown in Figure 10. Each connects to a separate fiber strand. One is for receiving data and the other is for transmitting data. When connecting a fiber optic cable to a SC port, be sure that the receiver fiber connector is connected to the transmitter connector on the remote end-node, and the transmitter fiber connector is connected to the receiver connector on the remote node.
Installing the Bridging Converter Connecting a 12VDC Powered Unit To apply power to a 12VDC version bridging converter, perform the following steps: Note The power adapter is not used if you install the bridging converter in an AT-MCR12 chassis. 1. Plug one end of the DC power cord to the power receptacle connector labelled 12VDC on the back panel of the bridging converter, as shown in Figure 11.
AT-FS232 and AT-FS232/x Series Installation Guide Wiring and Connecting a 12-50VDC Powered Unit To wire a 12-50VDC powered unit, perform the following step: 1. Before wiring the bridging converter, review the following Warning statements: Warning Only trained and qualified personnel are allowed to install or to replace this equipment. Warning For 12-50VDC power connection, install this equipment only in a Restricted Access Area. 2.
Installing the Bridging Converter 3. Plug the power connector to the 12-50VDC receptacle connector in the rear of the converter, as shown in Figure 13. PORT 2 1 2 2 1 2 3 4 SPEED DUPLEX AUTO (Mbps) MODE NEG 12-50VDC 10 100 HALF FULL OFF ON Figure 13 Connecting the Power Connector to the 12-50VDC Version Model Note UL recognized wires of 22-gauge minimum should be provided by the installer. 4.
AT-FS232 and AT-FS232/x Series Installation Guide Warning When installing this equipment, always ensure that the frame ground connection is installed first and disconnected last. 16 PORT 2 1 2 2 1 2 3 4 SPEED DUPLEX AUTO (Mbps) MODE NEG 12-50VDC 10 100 HALF FULL OFF ON Figure 15 Connecting the Stripped Wire 6. Connect the negative feed wire to the terminal block marked (-). 7. Connect the positive feed wire to the terminal block marked (+). 8.
Installing the Bridging Converter 9. Secure the power supply cable in the Restricted Access Area using multiple cable ties to minimize the chance of the connections being disturbed by casual contact with the wiring. Warning "Safety Hazard"- Check to see if there are any exposed copper strands coming from the installed wires. When this installation is done correctly there should be no exposed copper wire strands extending from the terminal block.
AT-FS232 and AT-FS232/x Series Installation Guide Warranty Registration When you finish installing the product, you should register your product by completing the enclosed warranty card and sending it in.
Chapter 3 Troubleshooting Follow the guidelines below to test and troubleshoot the installation in the event a problem occurs. Note If you change the speed or duplex mode of a port on the bridging converter using the DIP switches, you must power OFF and then power ON the unit to activate the change.
Troubleshooting ❑ If the twisted pair port is set to Auto-Negotiation, the end node connected to the port should also be using Auto-Negotiation. If the end node is not using Auto-Negotiation and has a fixed duplex mode of fullduplex, a duplex mode mismatch will result. To resolve this, you must disable Auto-Negotiation on the port and adjust the speed and duplex setting manually using the DIP switches. For further information on this, refer to “Duplex Mode” on page 8.
AT-FS232 and AT-FS232/x Series Installation Guide If you are still experiencing problems after testing and troubleshooting the installation, contact Allied Telesyn Technical Support for assistance. Refer to “Contacting Allied Telesyn” on page x or visit our web site at www.alliedtelesyn.com for support information.
Appendix A Technical Specifications Physical Dimensions: WxDxH 10.5 cm x 9.5 cm x 2.5 cm (4.12 in x 3.75 in x 1.0 in) Weight: 294 g (10.
Technical Specifications Agency Certifications Safety Conforms to all standards normally supported by Allied Telesyn products including safety standards UL60950 (cULus), EN60950, EN60825 (TUV) CE Compliant Standard IEEE 802.3, IEEE 802.
AT-FS232 and AT-FS232/x Series Installation Guide Fiber Optic Port Specifications Table 7 through Table 10 list the specifications for the fiber optic port. Table 7 Fiber Optic Transmitter Launch Power (dBm)2 Fiber Type1 Fiber Optic Diameter (microns) Optical Wavelength MMF 50/125 MMF AT-FS232/1 Model Max. Avg. Min. 1310 nm -14.0 -20.3 -22.5 62.5/125 1310 nm -14.0 -16.8 -19.0 SMF 9/125 1310 nm -8.0 -11.5 -15.0 AT-FS232/2 SMF 9/125 1310 nm 0.0 -3.0 -5.
Technical Specifications Table 9 Fiber Optic Datalink Model Fiber Type1 Minimum Minimum Power/Link Operating Distance2 Budget Maximum Operating Distance3 AT-FS232 50/125 MMF 13.0 dB 0 2 km (1.25 mi) 62.5/125 MMF 16.8 dB 0 2 km (1.25 mi) AT-FS232/1 9/125 SMF 16.0 dB 0 15 km (9.4 mi) AT-FS232/2 9/125 SMF 30.0 dB 0 40 km (25 mi) AT-FS232/3 9/125 SMF 34.0 dB 15 km (9.4 mi) 70 km (43.4 mi) AT-FS232/4 9/125 SMF 37.0 dB 40 km (24.8 mi) 90 km (55.8 mi) 1.
AT-FS232 and AT-FS232/x Series Installation Guide Pinout Assignments Figure 17 shows the pin assignments of the RJ-45 connector. 8 1 8 1 Figure 17 RJ-45 Pin Assignments Table 11 lists the 10Base-T/100Base-TX connector pins and their signals when the port is operating in either MDI or MDI-X configuration.
Appendix B Translated Safety and Emission Information Important: This appendix contains multiple-language translations for the safety statements in this guide. Wichtig: Dieser Anhang enthält Übersetzungen der in diesem Handbuch enthaltenen Sicherheitshinweise in mehreren Sprachen. Vigtigt: Dette tillæg indeholder oversættelser i flere sprog af sikkerhedsadvarslerne i denne håndbog. Belangrijk : Deze appendix bevat vertalingen in meerdere talen van de veiligheidsopmerkingen in deze gids.
Translated Safety and Emission Information Standards: This product meets the following standards: U.S. Federal Communications Commission Declaration Of Conformity Manufacturer Name: Allied Telesyn, Inc.
AT-FS232 and AT-FS232/x Series Installation Guide Standards: This product meets the following standards: 1 RFI Emission FCC Class B, EN55022 Class B, VCCI Class B, C-TICK 2 Warning: In a domestic environment this product may cause radio interference in which case the user may be required to take adequate measures. 3 Immunity 4 Warning: This product requires shielded cables to comply with emission and immunity standards.
Translated Safety and Emission Information 19 44 Caution: “Safety Hazard” Check to see if there are any exposed copper strands coming from the installed wire. When this installation is done correctly there should be no exposed copper wire strands extending from the terminal block. Any exposed wiring can conduct harmful levels of electricity to persons touching the wires.
AT-FS232 and AT-FS232/x Series Installation Guide Normen: Dieses Produkt erfüllt die Anforderungen der nachfolgenden Normen. 1 Hochfrequenzstörung FCC Klasse B, EN55022 Klasse B, VCCI Klasse B, C-TICK 2 Warnung: Bei Verwendung zu Hause kann dieses Produkt Funkstörungen hervorrufen. In diesem Fall müßte der Anwender angemessene Gegenmaßnahmen ergreifen.
Translated Safety and Emission Information 19 46 Vorsight: “Sicherheitsrisiko” Prüfen Sie, daß aus dem installierten Draht keine freiliegenden Kupferlitzen herausragen. Bei korrekter Installation sollten aus dem Anschlußklemmblock keine freiliegenden Kupferlitzen vorstehen. Freiliegende Kabel führen genug Spannung, um Personen zu gefährden, die diese Drähte berühren.
AT-FS232 and AT-FS232/x Series Installation Guide Standarder: Dette produkt tilfredsstiller de følgende standarder. 1 Radiofrekvens forstyrrelsesemission FCC Klasse B, EN55022 Klasse B, VCCI Klasse B, C-TICK 2 Advarsel: I et hjemligt miljø kunne dette produkt forårsage radio forstyrrelse. Bliver det tilfældet, påkræves brugeren muligvis at tage tilstrækkelige foranstaltninger.
Translated Safety and Emission Information 19 48 Forsiktig: “Fare” Se omhyggeligt efter om der stikker blanke kobbertråde ud fra klemmeforbindelserne. Ved korrekt montering er det ikke tilfældet. Enhver afisoleret leder kan lede farlig strømstyrke til personer, som kommer til at røre ved dem.
AT-FS232 and AT-FS232/x Series Installation Guide Eisen: Dit product voldoet aan de volgende eisen. 1 RFI Emissie FCC Klasse B, EN55022 Klasse B, VCCI Klasse B, C-TICK 2 Waarschuwing: Binnenshuis kan dit product radiostoring veroorzaken, in welk geval de gebruiker verplicht kan worden om gepaste maatregelen te nemen. 3 Immuniteit 4 Waarschuwing: Om te voldoen aan de emissie- en immuniteitsnormen dient dit apparaat te zijn voorzien van afgeschermde kabels.
Translated Safety and Emission Information 19 50 Let Op: “Veiligheidsrisico” Controleer of er bij de aangesloten bedrading geen koper blootligt. Als de installatie juist is uitgevoerd, is er bij het aansluitblok geen koperdraad zichtbaar. Blootliggende bedrading kan schadelijke elektriciteitsniveaus geleiden naar personen die met de draden in aanraking komen.
AT-FS232 and AT-FS232/x Series Installation Guide Normes: Ce produit est conforme aux normes de suivantes. 1 Emission d'interférences radioélectriques FCC Classe B, EN55022 Classe B, VCCI Classe B, C-TICK 2 Mise En Garde: Dans un environnement domestique, ce produit peut provoquer des interférences radioélectriques. Auquel cas, l'utilisateur devra prendre les mesures adéquates.
Translated Safety and Emission Information 52 18 Mise En Garde: Lors de l’installation de cet équipement, vérifiez toujours que la connexion de terre du châssis est installée en premier et débranchée en dernier. 19 Attention: “Risque de sécurité” Vérifiez qu’aucun fil de cuivre dénudé ne sort du câble installé. Lorsque cette installation est effectuée correctement, aucun fil de cuivre ne devrait dépasser du bornier.
AT-FS232 and AT-FS232/x Series Installation Guide Standardit: Tämä tuote on seuraavien standardien mukainen. 1 Radioaaltojen häirintä FCC Luokka B, EN55022 Luokka B, VCCI Luokka B, C-TICK 2 Varoitus: Kotiolosuhteissa tämä laite voi aiheuttaa radioaaltojen häiröitä, missä tapauksessa laitteen käyttäjän on mahdollisesti ryhdyttävä tarpeellisiin toimenpiteisiin. 3 Kestävyys 4 Varoitus: Tämä tuote vaatii suojattuja kaapeleita toimiakseen emissio- ja häiriönsietostandardien mukaisesti.
Translated Safety and Emission Information 19 54 Huomio: Turvallisuusriski Tarkista, ettei asennetusta johtimesta näy paljaita kuparisäikeitä. Kun asennus suoritetaan oikein, riviliittimestä ei pitäisi näkyä paljaita kuparijohdinsäikeitä. Paljaat johtimet voivat aiheuttaa sähköiskuvaaran, jos niihin kosketaan.
AT-FS232 and AT-FS232/x Series Installation Guide Standard: Questo prodotto è conforme ai seguenti standard. 1 Emissione RFI (interferenza di radiofrequenza) FCC Classe B, EN55022 Classe B, VCCI Classe B, C-TICK 2 Avvertenza: in ambiente domestico questo prodotto potrebbe causare radio interferenza. In questo caso potrebbe richiedersi all'utente di prendere gli adeguati provvedimenti.
Translated Safety and Emission Information 56 18 Avvertenza: Quando si installa questo apparecchio, accertarsi sempre che il collegamento a massa del telaio sia sempre il primo ad essere effettuato e l’ultimo ad essere scollegato. 19 Attenzione: “Pericolo!” Controllare che il filo installato non abbia trefoli in rame esposti. Se l’installazione è stata effettuata in modo corretto, non vi deve protrudere dalla morsettiere alcun trefolo in rame esposto.
AT-FS232 and AT-FS232/x Series Installation Guide Sikkerhetsnormer: Dette produktet tilfredsstiller følgende sikkerhetsnormer. 1 RFI stråling FCC Klasse B, EN55022 Klasse B, VCCI Klasse B, C-TICK 2 Advarsel: Hvis dette produktet benyttes til privat bruk, kan produktet forårsake radioforstyrrelse. Hvis dette skjer, må brukeren ta de nødvendige forholdsregler. 3 Immunitet 4 Advarsel: Dette produktet må brukes med vernede kabler for å tilfredsstille emisjons- og fritakelsesstandarder.
Translated Safety and Emission Information 19 58 Forsiktig: “Sikkerhetsfare” Kontroller om uisolerte koppertråder stikker ut av den monterte ledningen. Hvis monteringen er riktig utført, skal det ikke finnes uisolerte kobbertråder som stikker ut fra rekkeklemmen. Uisolerte ledninger kan lede skadelige mengder strøm til personer som berører ledningene.
AT-FS232 and AT-FS232/x Series Installation Guide Padrões: Este produto atende aos seguintes padrões. 1 Emissão De Interferência De Radiofrequência FCC Classe B, EN55022 Classe B, VCCI Classe B, C-TICK 2 Aviso: Num ambiente doméstico este produto pode causar interferência na radiorrecepção e, neste caso, pode ser necessário que o utente tome as medidas adequadas.
Translated Safety and Emission Information 19 60 Atenção: “Perigo” Verifique se há algum fio de cobre exposto a sair do fio instalado. Quando esta instalação é feita correctamente não deve haver qualquer fio de cobre exposto a sair do terminal. Qualquer fio exposto pode conduzir níveis perigosos de electricidade para a pessoa que toque nos fios.
AT-FS232 and AT-FS232/x Series Installation Guide Estándares: Este producto cumple con los siguientes estándares. 1 Emisión RFI FCC Clase B, EN55022 Clase B, VCCI Clase B, C-TICK 2 Advertencia: en un entorno doméstico, este producto puede causar radiointerferencias, en cuyo caso, puede requerirse del usuario que tome las medidas que sean convenientes al respecto. 3 Inmunidad 4 Advertencia: Este producto exige cables protectores para ajustarse a las normas de emisión e inmunidad.
Translated Safety and Emission Information 19 62 Cuidado: “Riesgo de seguridad” Cerciórese de que no haya hilos de cobre pelados que salgan del alambre instalado. Cuando dicha instalación se realiza correctamente, los hilos de cobre pelados no deben salir del bloque terminal. Todo alambre pelado puede conducir niveles de electricidad nocivos a la persona que lo toca.
AT-FS232 and AT-FS232/x Series Installation Guide Standarder: Denna produkt uppfyller följande standarder. 1 Radiostörning FCC Klass B, EN55022 Klass B, VCCI Klass B, C-TICK 2 Varning: Denna produkt kan ge upphov till radiostörningar i hemmet, vilket kan tvinga användaren till att vidtaga erforderliga åtgärder. 3 Immunitet 4 Varning: Denna produkt kräver skärmade kablar för att uppfylla standardkraven för emission och immunitet.