
Manual


Table Of Contents
- Contents
- Figures
- Tables
- Preface
- Section I
- Basic Operations
- Chapter 1
- Starting a Web Browser Management Session
- Chapter 2
- Basic Switch Parameters
- Configuring the Switch’s Name, Location, and Contact
- Changing the Manager and Operator Passwords
- Setting the System Date and Time
- Rebooting a Switch
- Pinging a Remote System
- Returning the AT-S63 Management Software to the Factory Default Values
- Displaying the IP Address of the Local Interface
- Displaying System Information
- Chapter 3
- Enhanced Stacking
- Chapter 4
- SNMPv1 and SNMPv2c
- Chapter 5
- Port Parameters
- Chapter 6
- MAC Address Table
- Chapter 7
- Static Port Trunks
- Chapter 8
- Port Mirroring
- Section II
- Advanced Operations
- Chapter 9
- File System
- Chapter 10
- File Downloads and Uploads
- Chapter 11
- Event Logs and Syslog Servers
- Chapter 12
- Classifiers
- Chapter 13
- Access Control Lists
- Chapter 14
- Class of Service
- Chapter 15
- Quality of Service
- Chapter 16
- Denial of Service Defense
- Chapter 17
- IGMP Snooping
- Section III
- SNMPv3
- Chapter 18
- SNMPv3
- Configuring the SNMPv3 Protocol
- Enabling or Disabling SNMP Management
- Configuring the SNMPv3 User Table
- Configuring the SNMPv3 View Table
- Configuring the SNMPv3 Access Table
- Configuring the SNMPv3 SecurityToGroup Table
- Configuring the SNMPv3 Notify Table
- Configuring the SNMPv3 Target Address Table
- Configuring the SNMPv3 Target Parameters Table
- Configuring the SNMPv3 Community Table
- Displaying SNMPv3 Tables
- Section IV
- Spanning Tree Protocols
- Chapter 19
- Spanning Tree and Rapid Spanning Tree Protocols
- Chapter 20
- Multiple Spanning Tree Protocol
- Section V
- Virtual LANs
- Chapter 21
- Port-based and Tagged VLANs
- Chapter 22
- GARP VLAN Registration Protocol
- Section VI
- Port Security
- Chapter 23
- MAC Address-based Port Security
- Chapter 24
- 802.1x Port-based Network Access Control
- Section VII
- Management Security
- Chapter 25
- Encryption Keys, PKI, and SSL
- Chapter 26
- Secure Shell (SSH)
- Chapter 27
- TACACS+ and RADIUS Protocols
- Chapter 28
- Management Access Control List
- Index
AT-S63 Management Software Web Browser Interface User’s Guide
Section II: Advanced Operations 145
Modifying the
Event Log Full
Action
This procedure explains how to control what an event log does after it has
stored its maximum number of events. You have two options. The first is to
have the switch delete the oldest entries in the log as it adds new entries.
The second is to have the switch stop adding entries, so as to preserve the
existing log contents.
Note
The switch continues to send events to syslog servers even when
the logs are full.
To configure the event log full action, do the following procedure:
1. From the home page, select Configuration.
2. From the Configuration menu, select the System option.
3. Select the Event Log tab.
The Event log tab is shown in Figure 37 on page 139.
4. Under Current Log Outputs, select Output 0, Permanent, to configure
the log stored in permanent memory, or Output 1, Temporary, to
configure the log in temporary memory.
5. Click Modify.
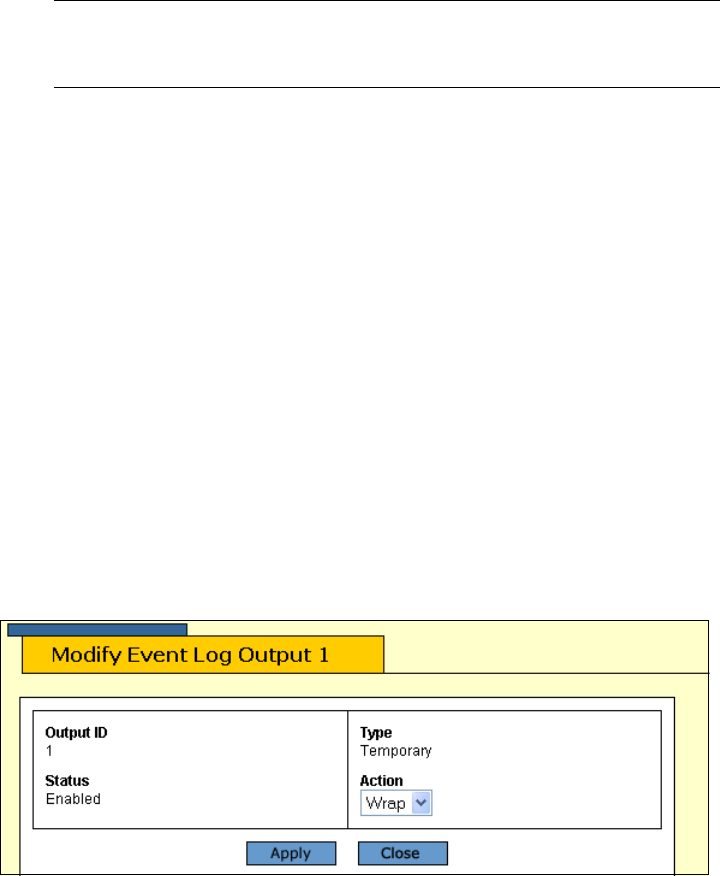
The Modify Event Log Output window is displayed. The window for the
temporary memory log is shown in Figure 40.
Figure 40. Modifying Event Log Output 1 Window
6. Using the Action pull-down menu, select one of the following:
Wrap
The log deletes the oldest entries as it adds new entries after reaching
its maximum storage capacity.
Halt
The log stops adding new entries.