Intelligent CableUPS® Technical Manual XM3-HP Series Effective: October 2013
Power Alpha Technologies ®
Technical Manual 017-882-B0-001, Rev. C2 Effective Date: October 2013 Copyright 2013 Alpha Technologies, Inc. NOTE: Photographs contained in this manual are for illustrative purposes only. These photographs may not match your installation. NOTE: Operator is cautioned to review the drawings and illustrations contained in this manual before proceeding. If there are questions regarding the safe operation of this powering system, please contact Alpha Technologies or your nearest Alpha representative.
Table of Contents Safety Notes.......................................................................................................................................................................................... 9 Safety Precautions................................................................................................................................................................................ 9 Battery Safety Notes............................................................................
Table of Contents 2.2.9 Local Verification of DOCSIS Transponder................................................................................................................ 51 2.2.10 Web Interface............................................................................................................................................................. 52 2.2.10.1 Local Web Server Access.......................................................................................................................
Table of Contents 4.4.6 Periodic Maintenance Tasks..................................................................................................................................... 100 4.4.6.1 Remote Status Monitoring................................................................................................................................... 100 4.4.6.2 On-Site Battery Preventive Maintenance.............................................................................................................
Figures Fig. 2-13, Removing Inverter Module and Output Voltage Terminal Location........................................................................... 42 Fig. 2-14, Voltage Wire Position ............................................................................................................................................... 42 Fig. 2-15, Front Panel Fastener Locations ...............................................................................................................................
Tables Table 1-1, Low Battery Cutoff (EOD)......................................................................................................................................... 18 Table 1-2, Charger Modes of Operation.................................................................................................................................... 18 Table 1-3, Duration of Load.................................................................................................................................
Safety Notes Review the drawings and illustrations contained in this manual before proceeding. If there are any questions regarding the safe installation or operation of the system, contact Alpha Technologies or the nearest Alpha representative. Save this document for future reference. To reduce the risk of injury or death and to ensure the continued safe operation of this product, the following symbols have been placed throughout this manual. Where these symbols appear, use extra care and attention.
Battery Safety Notes Any gelled or liquid emissions from a valve-regulated lead-acid (VRLA) battery contains diluted sulfuric acid, which is harmful to the skin and eyes. Emissions are electrolytic and are electrically conductive and corrosive. To avoid injury: • Always wear eye protection, rubber gloves, and a protective vest when working near batteries. To avoid battery contact, remove all metallic objects, (such as rings or watches), from your person. • Batteries produce explosive gases.
Utility Power Connection Notes NOTE: Alpha enclosures are engineered to properly vent the Power Supply. The Power Supplies have been investigated by regulatory authorities for use in various Alpha enclosures. If you are using a non-Alpha enclosure, it is your responsibility to ensure your combination conforms to your local regulatory requirements and the Power Supply remains within its environmental specifications.
Utility Power Connection Notes, continued To Utility LI (Black) Copper Ground Wire #8 AWG (Minimum) Neutral (White) Breaker Neutral Bus Grounding Point Made to Enclosure Wall To Enclosure Receptacle LI (Black) Typical 120VAC Service Entrance Wiring Neutral (White) LI (Black) Ground (Green) Typical 120 VAC 20A Receptacle Wiring, 5-20R (P/N 531-006-19) LI (Black) L2 (Red) Ground (Green) Typical 240 VAC 20A Receptacle Wiring, 6-15R (P/N 531-004-19) 12 LI (Black) L2 (Red) Ground (Green) Typical
Utility Power Connection Notes, continued Proper 240VAC 15A service requires the installation site be: • Equipped with a 240VAC duplex receptacle to provide power to the Power Supply and peripheral equipment. • Have a NEMA 6-15R receptacle that is protected by a single, 2-pole, common trip 15A circuit breaker inside the service entrance. • Checked to NEC/CEC Code or with your local regulatory authority to verify proper wire AWG (suggested wire gauge is 14AWG).
Grounding and Earth Connection Notes In order to provide a ready, reliable source of backup power, it is necessary to connect the Power Supply to an effective grounding and Earthing system. This not only provides for the safety of the service personnel responsible for its operation and maintenance, but also facilitates the proper operation and protection of the equipment within the network.
Grounding and Earth Connection Notes, continued Communications Grounding For systems using an embedded transponder, the grounding connection is typically made either through a separate chassis ground block bonded to the enclosure or by means of the internal mounting hardware which bonds the transponder through the CableUPS. Please refer to the appropriate communications product manual for installation procedures.
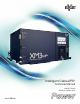
1.0 Introduction 1.1 Alpha XM3-HP Intelligent CableUPS® Fig. 1-1, Alpha XM3-HP Intelligent CableUPS The Intelligent CableUPS® powers signal processing equipment in cable television and broadband LAN distribution systems. The transformer module provides a critical load with current-limited regulated AC power that is free of spikes, surges, sags and noise.
1.0 Introduction, continued 1.2 Theory of Operation 1.2.1 AC (Line) Operation During AC Line operation, utility power is routed into the primary winding of the ferroresonant transformer through the contacts of the transfer isolation relay. Simultaneously, in the inverter, power is directed to the rectifier circuitry providing power for the control circuitry. The bidirectional inverter also serves as a battery charger during line operation.
1.0 Introduction, continued 1.2 Theory of Operation, continued 1.2.2 Standby Operation, continued • When set to Individual Battery Voltage Mode, if individual battery voltage is lost, the unit automatically reverts back to Battery String Voltage Mode and "Low Battery Cutoff” (EOD) will revert back to default value based on battery type. HP Batteries GXL Batteries OTHER Batteries Fixed Fixed Fixed String Low Battery Cutoff (EOD) 30.6 VDC (1.70 V/C) 31.5 VDC (1.75 V/C) 31.5 VDC (1.
1.0 Introduction, continued 1.2 Theory of Operation, continued 1.2.3 Charger Modes of Operation, continued The Alpha XM3-HP uses a three-stage (other), four-stage (AlphaCell GXL), or five-stage (AlphaCell HP) temperature compensated battery charger as determined by the type of battery used in the system. During AC line operation, the inverter winding on the ferroresonant transformer feeds the charger circuit which provides the appropriate charge voltages to the batteries.
1.0 Introduction, continued 1.2 Theory of Operation, continued 1.2.3 Charger Modes of Operation, continued 4-Stage Battery Charger (BULK/ACCEPT/REFRESH/FLOAT): This preset value is applied to AlphaCell GXL batteries when selected in the Smart Display Menu. A 30-minute REFRESH charge is added, after BULK and ACCEPT states, before dropping down to FLOAT state, when the batteries are discharged more than 30% and it has been more than 30 days since the last REFRESH charge.
1.0 Introduction, continued 1.2 Theory of Operation, continued 1.2.3 Charger Modes of Operation, continued 5-Stage Battery Charger (BULK/ACCEPT/REFRESH/FLOAT/REST): This preset value is applied to AlphaCell HP batteries when selected in the Smart Display Menu. REST: Charger is turned off (if ENABLED) and leaves the batteries without external voltage applied on the battery.
1.0 Introduction, continued 1.2 Theory of Operation, continued 1.2.4 Output Voltage Modes of Operation The XM3-HP can be configured to Fine or Coarse Mode of operation for Output Voltage Regulation via the Power Configuration Menu (see Section 3.3.1, Power Information and Configuration). Fine Mode: In Fine Mode the power supply will maintain the tightest output voltage regulation possible, +1/‑2.5% for 89V or +1.5/-3.5% for 63V.
1.0 Introduction, continued 1.3 Alpha XM3-HP CableUPS® Layout The Intelligent CableUPS is comprised of the following: Transformer module, which acts as a stand-alone line conditioner. The transformer module contains a ferroresonant transformer, ferroresonant capacitor, line isolation relay, Power Distribution Board, EMC Filter board and the optional AlphaDOC (PIM) board, Smart AlphaGuard (SAG) and Alpha APPS card. NOTE: The option cards require an Inverter Module installed in order to be functional.
1.0 Introduction, continued 1.3 Alpha XM3-HP CableUPS Layout, continued 1.3.2 Front Panel Indicators Circuit boards for the optional Smart AlphaGuard (SAG), Alpha APPS card and the two-output AlphaDOC (PIM) are located behind the removable front panel. Smart AlphaGuard (SAG): Enables the XM3 to gather battery voltage data for up four battery strings (A through D). Its Charge Management Technology applies excess charge current to batteries as needed to maintain balanced voltages throughout the string.
1.0 Introduction, continued 1.3 Alpha XM3-HP CableUPS Layout, continued 1.3.3 AlphaDOC (PIM) The optional AlphaDOC adds a second isolated output to the Power Supply. It provides programmable current limits for two output channels and protects system components by shutting down the load during overcurrent and short circuit conditions.
1.0 Introduction, continued 1.3 Alpha XM3-HP CableUPS Layout, continued 1.3.3 AlphaDOC (PIM), continued 1.3.3.1 Installing the AlphaDOC NOTE: Only qualified personnel should install the AlphaDOC. To install the AlphaDOC you must completely shut down the Power Supply. To maintain output to the load, consider using either the APP9015S or APP9022S Service Power Supply during installation.
1.0 Introduction, continued 1.3 Alpha XM3-HP CableUPS Layout, continued 1.3.3 AlphaDOC (PIM), continued 1.3.3.1 Installing the AlphaDOC, continued NOTE: For XM3-910HP and XM3-615CE-HP models, a 5-position terminal block is included, see Fig. 1-10. Fig. 1-10, 5-Position Output Voltage Terminal Block 1.3.3.
1.0 Introduction, continued 1.3 Alpha XM3-HP CableUPS Layout, continued 1.3.4 Smart AlphaGuard The Smart AlphaGuard (SAG) is an optional device that maximizes battery life. The SAG enables the XM3-HP system to gather individual battery voltages and balance the batteries. A description of the SAG's operation and features follows. 1.3.4.1 Theory of Operation The Smart AlphaGuard (SAG) communicates directly with the XM3.
1.0 Introduction, continued 1.3 Alpha XM3-HP CableUPS Layout, continued 1.3.4 Smart AlphaGuard, continued 1.3.4.2 Connections The connection from the embedded SAG to the battery strings are made with one of the orderable wire kits. Kits for one, two, three, or four stings are available. Kits are also available that mate to the external AlphaGuard wire kit. The SAG wire kit consists of a string 36V positive and a string negative that are common for all strings.
1.0 Introduction, continued 1.3 Alpha XM3-HP CableUPS Layout, continued 1.3.4 Smart AlphaGuard, continued 1.3.4.2 Connections, continued Multiple battery strings A system with multiple strings must use String A as the first string, B as the second, C as the third and D as the fourth.
1.0 Introduction, continued 1.3 Alpha XM3-HP CableUPS Layout, continued 1.3.4 Smart AlphaGuard, continued 1.3.4.3 Alarms The alarms are available through the LEDs and through the status monitoring card. Definitions – SAG Alarms via Class Information Base (CIB) Miswired – PS Minor The SAG will verify a string is correctly wired before it will add it to the list of battery strings to balance. If it detects the wires are reversed or only one battery is connected, the alarm will activate.
1.0 Introduction, continued 1.3 Alpha XM3-HP CableUPS Layout, continued 1.3.4 Smart AlphaGuard, continued 1.3.4.4 LEDs The LEDs provide visual indications of the current state of the SAG and any alarms that are present.
1.0 Introduction, continued 1.3 Alpha XM3-HP CableUPS Layout, continued 1.3.4 Smart AlphaGuard, continued 1.3.4.5 Troubleshooting High delta mean alarm during charging A high delta mean alarm during charging is usually seen when one battery has either higher or lower capacity than the other two batteries. This may be seen on initial install of unbalanced batteries. Verify that the alarm clears within 7 days. Otherwise, investigate the batteries.
1.0 Introduction, continued 1.3 Alpha XM3-HP CableUPS Layout, continued 1.3.5 Inverter Module Overview 1 Smart Display: All operational functions, system testing, programmable items and alarms are available via the Smart Display panel on the front of the Power Supply. 2 Softkeys: Provide access to the various menus and submenus within the Alpha XM3-HP. 3 Output LED: Indicates output state of the Alpha XM3-HP. 4 Alarm LED: Indicates Alarm condition. 5 Self Test button: Initiates Self Test.
1.0 Introduction, continued 1.3 Alpha XM3-HP CableUPS Layout, continued 1.3.6 Optional DOCSIS Status Monitoring Modules The Power Supply supports several Alpha communication modules which may be ordered factory-installed or as a user-installed field upgrade (for full installation instructions refer to the communication module technical manual). The AlphaNet DSM3 and IDH4 Series Embedded DOCSIS Transponders allow monitoring of Alpha power supplies through existing cable network infrastructure.
1.0 Introduction, continued 1.3 Alpha XM3-HP CableUPS Layout, continued Optional DOCSIS Status Monitoring Modules, continued 1.0 Introduction 1.3.6 AlphaNet DPM or IDH4L AlphaNet DSM3x or IDH4x AlphaNet DSM3 or IDH4 Fig. 1-15, AlphaNet Series Communications Modules Status Monitoring Features AlphaNet DSM Series AlphaNet IDH4 Series DPM DSM3 DSM3x IDH4L IDH4 IDH4x DOCSIS 2.
2.0 Installation 2.1 Installation Procedure The Alpha XM3-HP CableUPS can be shelf-mounted within a variety of Alpha enclosures and secured with an internal tamper-resistant security screw kit. The installer must read and follow all safety instructions starting on page 9 and the preliminary inspection below prior to installation of the Power Supply. CAUTION! Read the Safety Precautions, Utility Power Connection Notes and Grounding Connection Notes (pages 9-15) before installing the Power Supply. 2.1.
2.0 Installation, continued 2.1 Installation Procedure, continued 2.1.2 Internal Security Screw Kit Installation, continued Kit Includes: A. 3/4" x 1/4" Aluminum Spacer, p/n 640-174-10 B. 1-1/2" SS Flat Washer, p/n 633-015-12 C. 5/16-18 X 1" SS Security Screw, p/n 647-189-12 (*) – Customer may supply their own tamper resistant/ security fastener. If so, do not use kit supplied screw. Not Included: D. Alpha 01 Security Screw Key, p/n 647-188-10 A B C D Figure 2-1, Required Materials 2.
2.0 Installation, continued 2.2 XM3-HP Start-Up Procedure 2.2.
2.0 Installation, continued 2.2 XM3-HP Start-Up Procedure, continued 2.2.2 Battery Installation Options and Wiring Diagram Load batteries into cabinet with the positive terminals (+) facing forward. Battery strings are lettered A through D; batteries are numbered 1 through 3, from right to left.
2.0 Installation, continued 2.2 XM3-HP Start-Up Procedure, continued 2.2.2 Battery Installation Options and Wiring Diagram, continued 2.2.2.1 Threaded Insert Terminals CAUTION! Threaded insert terminals require the use of 3/4" (19mm) bolts. The use of 1" (25.4mm) bolts will seriously damage the battery. The only exception is the terminal with the large spacer for the in-line fuse link. Apply NO-OX grease on all exposed connections. Torque all nuts and bolts to 110in-lbs (12.43N-m).
2.0 Installation, continued 2.2 XM3-HP Start-Up Procedure, continued 2.2.3 120/240V Configuration Procedure, continued 3. Connect the correct power cord to the Power Supply (see Fig. 2-11) 4. Upon start up, the Input Voltage Setting screen will appear. Select correct voltage to proceed (see Section 3.3, Smart Display Menus). The Input Voltage Setting screen displays for five minutes before reverting to the previous settings.
2.0 Installation, continued 2.2 XM3-HP Start-Up Procedure, continued 2.2.5 Optional Smart AlphaGuard and Alpha APPS Installation WARNING! Remove all sources of power to unit before performing the following procedure. Tools required: #2 Phillips screwdriver Procedure: 1. Remove the three fasteners securing the front panel (see Fig. 2-15). A B 2.0 2. With the front panel open, install the APPS card by pressing it firmly onto the standoff (A) and fastening the 6-32 screw (B) (see Fig. 2-16).
2.0 Installation, continued 2.2 XM3-HP Start-Up Procedure, continued 2.2.5 Optional Smart AlphaGuard and Alpha APPS Installation, continued Procedure: 7. Connect the SPI (16) to the AlphaDOC Dual Output Connector (10) (see Fig. 2-18). 16 5 8. Connect the SAG Harness to the SAG Connection (5) (see Fig. 2-18). 10 Fig. 2-18, SPI, AlphaDOC and SAG Harness Connections 2.2.
2.0 Installation, continued 2.2.6 Optional N+1 Configurations, continued The N+1 ports are used in redundant system configurations where multiple power supplies are housed in a single enclosure. In the event of a power supply failure, a redundant power supply (with an optional DOC with N+1 board installed) is automatically switched into service with approximately a 8ms delay. This feature is part of the DOC with N+1 option.
2.0 Installation, continued 2.2 XM3-HP Start-Up Procedure, continued 2.2.7 Communications DOCSIS Status Monitoring, continued 2.2.7.1 DOCSIS Status Monitor Front Panel Connections 1. Connect Battery Sense Wire Harness to the A/B, C/D connection points (14) on the transponder. The connection (14) is not required for individual battery monitoring if the Smart AlphaGuard option is deployed.
2.0 Installation, continued 2.2 XM3-HP Start-Up Procedure, continued 2.2.7 Communications DOCSIS Status Monitoring, continued 2.2.7.
2.0 Installation, continued 2.2 XM3-HP Start-Up Procedure, continued 2.2.8 Power Module Configuration and Installation Procedure NOTE: Before applying power, verify Power Supply rating is matched to AC input utility. Verify a low-resistance ground is installed in accordance with your local electrical regulatory authority. CAUTION! Batteries are an important part of the Power Supply.
2.0 Installation, continued 2.2 XM3-HP Start-Up Procedure, continued 2.2.8 Power Module Configuration and Installation Procedure, continued 1 XM3-918-HP 90V/0.4A **ACTIVE ALARM** OK PWR PM BATT ALM COMM 1 OK APPS 2 OUTPUT LED (green) 2 ALARM LED (red) Condition Output Alarm Normal On Off Minor Flash Off Major Flash Flash Output Off Off Flash Fig. 2-24, Active Alarm Table 16.
2.0 Installation, continued 2.2 XM3-HP Start-Up Procedure, continued 2.2.8 Power Module Configuration and Installation Procedure, continued 21. Once the unit is running on line voltage, perform a Self Test by pressing and holding the test button for 1-2 seconds with a pen (or similar object). Wait for Self Test completion before proceeding (see Section 3.1.1, Self Test Operation). NOTE: If the unit is operating from batteries, the Self Test will not initiate. Check input breaker and input line cord. 22.
2.0 Installation, continued 2.2 XM3-HP Start-Up Procedure, continued 2.2.9 Local Verification of DOCSIS Transponder To confirm successful hardware installation before leaving the installation site, verify network connectivity and correct hardware interconnection. The DS and REG LEDs on the front of the DSM3 Series should be ON solid green. This indicates successful registration with the headend.
2.0 Installation, continued 2.2 XM3-HP Start-Up Procedure, continued 2.2.10 Web Interface Overview The DSM3 Series Power Supply transponder provides an embedded Web server interface to allow operations personnel the ability to connect locally or remotely via TCP/IP over Ethernet with a laptop/computer to verify the status of common data points and to configure various operating parameters. 2.2.10.
2.0 Installation, continued 2.2 XM3-HP Start-Up Procedure, continued 2.2.10 Web Interface, continued 2.2.10.1 Local Web Server Access, continued NOTE: If you are unable to view the home page of the DSM3 Series using IP address 192.168.100.1, the network configuration on the computer that is being used to connect to the DSM3 Series transponder may require a temporary static IP address to be configured.
2.0 Installation, continued 2.2 XM3-HP Start-Up Procedure, continued 2.2.10 Web Interface, continued 2.2.10.1 Local Web Server Access, continued Use the following procedure to configure a static IP address on a laptop or computer with the Windows 7 operating system: 1. Click the Start button (lower left button on most Windows® computers). 2. When the window pops up, click Control Panel (usually about half the way down the second column). 3. Click Network and Sharing Center. 4. Click Local Area Connection.
2.0 Installation, continued 2.2 XM3-HP Start-Up Procedure, continued 2.2.11 Remote Web Server Access To remotely access the DSM3 Series transponder Web server utilizing a Web browser, use the following procedure: NOTE: For Web server (HTTP) access, port 80 must not be blocked. 1. Connect the laptop or computer’s network interface port to the company’s Ethernet network. 2. Open a Web browser. 3. Enter the DSM3 Series' DHCP designated IP address (e.g., 192.168.1.124) into the Web browser’s address field.
2.0 Installation, continued 2.2 XM3-HP Start-Up Procedure, continued 2.2.12 Navigating the Web Page Once the Web page has been successfully accessed, the operator is able to select a link on the header bar and the page specific to the topic will open enabling real-time data to be observed. See Fig. 2-35 for DSM3 Series navigation bar items.
2.0 Installation, continued 2.2 XM3-HP Start-Up Procedure, continued 2.2.12 Navigating the Web Page, continued 2.2.12.1 Web Interface Security Levels Within the DSM3 Series transponder are two levels of function-specific security. General operations are set at Level 1 and configuration-related functions are set at Level 2. Default User Name and Security Passwords are shown in Table 2-2. Function Value 1.3.6.1.4.1.4413.2.2.2.1.1.3.3.0 Level 1 User Name Alpha 1.3.6.1.4.1.4413.2.2.2.1.1.3.4.
2.0 Installation, continued 2.2 XM3-HP Start-Up Procedure, continued 2.2.13 Verifying Communication Parameters Installation Click the General menu of the web page to display common communication settings and values. The System Name, System Location, System Contact and Common Logical ID may be entered via the General Web page, see Figure 2-36. Click the Set button to update the change once the values have been entered. Refer to Section 2.2.12.
2.0 Installation, continued 2.2 XM3-HP Start-Up Procedure, continued 2.2.14 Verifying Power Supply and Battery Parameters Installation Click the General menu to access Power Supply and individual battery voltage values. Important parameters such as current alarm status, inverter status and tamper status can be quickly verified on this page. Additional Power Supply parameters can be viewed and configured on the Power Supply page located in the Advanced Configuration menu, see Figure 2-38. Fig.
3.0 Operation 3.1 Start-Up and Test 3.1.1 Self Test Operation 1. The Power Supply should be operating correctly with no alarms present. Use the Smart Display to verify Normal and Communication Information. Verify Test Duration setting in the Power Config menu screen. 2. Press the Self Test button on the Inverter Module to start Self Test. The test will run for a preset time (5-180 minutes, set in the Power Config Menu). Self Test can also be entered by setting Self Test to ON in the Power Config Menu.
3.0 Operation, continued 3.2 Using the Smart Display All operational functions, system testing, menus and alarms are available via the illuminated Smart Display. Display functions are accessible by following the indicated prompts above the four softkeys. Descriptions of the menu functions are as follows: Menu Function (from OPERATION NORMAL Screen) PWR (Power) Pressing the softkey below PWR once opens the Power Infornation and Configuration Menu.
3.0 Operation, continued 3.3 Smart Display Menus While in the OPERATION NORMAL display, the following menu prompts are displayed when the respective softkey is pressed. NOTE: For the XM3-918D-HP, the Input Voltage Settings screen will appear. Correct voltage must be set in order to exit this screen (see Fig. 3-3). XM3-918-HP 90V/0.4A OPERATION NORMAL 3.
3.0 Operation, continued 3.3 Smart Display Menus, continued 3.3.1 Power Information and Configuration Pressing the PWR (Power) softkey while in the OPERATION NORMAL screen opens the Power Info Menu display (the first letter of the top line will blink indicating it is the active line; shown in orange). Pressing ENTR from this screen opens the PWR CNFG Menu. Cycling through each menu item and following the prompts on the lower line will enable the user to configure the parameters shown in the menu.
3.0 Operation, continued 3.3 Smart Display Menus, continued 3.3.2 Battery Information and Configuration The top line of the display is affected by pressing a softkey. In this case, pressing Enter will open the BATTERY INFO/BATTERYCONFIG Menu enabling the operator to set values for the following parameters. Individual Battery Volts Menu XM3-918-HP 90V/0.
3.0 Operation, continued 3.3 Smart Display Menus, continued 3.3.3 Communication Information and Configuration Pressing the COMM softkey while in the OPERATION NORMAL screen opens the following display (the first letter of the top line will blink indicating it is the active line). COMM - FAULT COMM - GENERAL COMM - EXTENDED ENTR ESC COMM-FAULT COMM-FAULT RF POWER LEVEL FAULT Operation The top line of the display is affected by pressing a softkey. Pressing Enter will open the COMM-FAULT Menu.
3.0 Operation, continued 3.3 Smart Display Menus, continued 3.3.3 COMM Menus, continued Pressing the down arrow softkey to move COMM-EXTENDED (the first letter of the top line will blink indicating it is the active line) to the top line and press ENTR to open the COMMEXTENDED menu. COMM - EXTENDED COMM - DIAGNOSTICS COMM - GENERAL ENTR ESC COMM-EXTENDED Operation Pressing Enter opens the COMM-EXTENDED menu enabling the operator to view values for the following parameters.
3.0 Operation, continued 3.3 Smart Display Menus, continued 3.3.3 COMM Menus, continued Pressing the down arrow softkey to move COMM-DIAGNOSTICS (the first letter of the top line will blink indicating it is the active line) to the top line and press ENTR to open the COMMDIAGNOSTICS menu. COMM - DIAGNOSTICS COMM - GENERAL COMM - EXTENDED ENTR ESC Operation COMM-DIAGNOSTICS Pressing Enter opens the COMM-DIAGNOSTICS menu enabling the operator to view values for the following parameters.
3.0 Operation, continued 3.3 Smart Display Menus, continued 3.3.4 Alpha Applications Information and Configuration NOTE: If the optional APPS card is not installed, NO APPS will appear on the Smart Display, and the values shown under the “APPS OPTION” line of the Smart Display are hidden. Pressing the OK APPS softkey while in OPERATION NORMAL screen opens the APPS TECH ID screen.
3.0 Operation, continued 3.4 AlphaAPPs Overview The AlphaAPPs (applications) card is an optional coprocessor card for the XM3 Power Supply. It operates as an independent computing system gathering telemetry from the Power Supply, batteries and the environment. The embedded Alpha APP Operating System and Flash File System provides the customer with an expandable platform for future software applications. As new applications are developed, they can be downloaded over the Power Supply cable modem interface.
3.0 Operation, continued 3.4 AlphaAPPs Overview, continued 3.4.1 Display Structure, continued Main APP Menu Screen: The main menu screen can scroll up or down using the arrow softkeys. The flashing character (shown in orange) denotes which sub-menu will be selected when ENTR is pressed. XM3-915-HP 90V/0.4A OPERATION NORMAL AlphaAPP ENTER TECH ID: OK PWR ENTR OK BATT OK COMM OK APPS V1.05.0 0 ADJUST VALUE Press ENTR softkey to bypass TECH ID entry and open the APPS main menu.
3.0 Operation, continued 3.4 AlphaAPPs Overview, continued 3.4.2 Applications There are currently six applications: 1. Configuration Logging 2. Alarm Event Logging 3. Battery Information Logging 4. Utility Performance 5. Battery Health 6. Battery Run Time Configuration Log Screen: AlphaAPP CONFIG HISTORY APPS CONFIG ESC Operation ENTR Press ENTR to access the CONFIG HISTORY screen. The “CL” indicates that this is a Configuration Log record, and the time stamp shows when the record was created.
3.0 Operation, continued 3.4 AlphaAPPs Overview, continued 3.4.2 Applications, continued Event Logging App: The APP card has a 768 record event log. This log does roll-over when the maximum size has been reached. When the roll-over occurs, the oldest 64 records are erased to make room for new records. Once a roll-over has occurred, the number of records available will be between 704 and 768. See Table 3-3 for a list of Events and Alarms that are logged. 3.
3.0 Operation, continued 3.4 AlphaAPPs Overview, continued 3.4.2 Applications, continued Battery Logging App: This application allows the operator to manually enter the battery manufacture dates and their conductance (Mhos) values. 1. To enter the battery manufacture dates, press the BATT softkey on the XM3 main menu. 2. Next select the BATT CONFIG sub-menu. 3. Scroll the screen using the arrow keys until BATT DATES appears at the top of the screen.
3.0 Operation, continued 3.4 AlphaAPPs Overview, continued 3.4.2 Applications, continued Entering Battery Mhos: To enter the battery MHOS reading, press the BATT softkey on the XM3 main menu. Next select the BATT CONFIG sub-menu. Scroll the screen using the arrow keys until BATT MHOS appears at the top of the screen. Press the ENTR softkey. The APP card will now take over control of the display and show a list of installed batteries. Use the softkeys to select the appropriate battery.
3.0 Operation, continued 3.4 AlphaAPPs Overview, continued 3.4.2 Applications, continued Battery Log Screen: Press ENTR to access the BATTERY HISTORY screen: The top three lines of the display scroll up and down using the arrow softkeys. The “BL” in line one indicates the Battery Log. Also in line one is the date and time the record was created. AlphaAPP BATTERY HISTORY V1.05.
3.0 Operation, continued 3.4 AlphaAPPs Overview, continued 3.4.2 Applications, continued Utility Performance App: This application monitors the AC line input to the XM3 Power Supply. It detects, displays and logs four types of AC fault conditions: 1. Outage – If the AC input is below a factory set threshold, an outage condition is recorded. 2. Sag – If the AC input exists but is below a factory set threshold, a line sag condition is recorded. 3.
3.0 Operation, continued 3.4 AlphaAPPs Overview, continued 3.4.2 Applications, continued OUTAGE IN PROGRESS START TIME DURATION 23:52 12M 13S OUTAGE 24 HR HISTORY EVENTS 2 AVG 2M MIN 1M MAX 3M ESC ESC If no Outage is in Progress If Outage is in Progress OUTAGE LOG DATE/TIME/DURATION 99M MIN 1M ESC ENTR = 2 MAX 3M ESC Operation 03/19/11 22:35 OUTAGE TOTAL HISTORY EVENTS 2 The top line of the Utility Performance sub-menu does not scroll.
3.0 Operation, continued 3.4 AlphaAPPs Overview, continued 3.4.2 Applications, continued Battery Health App: The battery health application uses several factors in determining the remaining life of the batteries. Battery Manufacture date, install date, battery type, and other environmental conditions are key inputs to this algorithm. AlphaAPP BATTERY HEALTH V1.05.
3.0 Operation, continued 3.4 AlphaAPPs Overview, continued 3.4.2 Applications, continued Battery Run Time App: The battery run time app dynamically computes the amount of standby time remaining in the batteries. It uses the existing capacity of the batteries, the AC load, the power factor and other environmental parameters. AlphaAPP BATTERY EST RUNTIME V1.05.0 BATTERY HISTORY ENTR ESC The computed value is sent to the headend automatically.
3.0 Operation, continued 3.5 Active Alarms Two LEDs on the Inverter Module indicate the condition and status of the Intelligent CableUPS. 1 The green Output LED, when lit, indicates the Power Supply is functioning normally and supplying output AC to the load. A flashing output LED indicates that an alarm has been detected. If the Output LED is off, the output is off. 2 The red Alarm LED flashes to indicate a major alarm has been detected. This state clears when the alarm is no longer present.
3.0 Operation, continued 3.5 Active Alarms, continued 3.5.1 Menu Structure/Navigation (from Active Alarms Screen) Sample alarm screens are shown for PWR, BATT, and COMM menus. Pressing the ENTR softkey in any of these screens will open the diagnostics screen for the alarm condition shown on the 3rd line of the screen. The alarm condition will advance to the top of the screen and the second line will scroll through a listing of probable causes.
3.0 Operation, continued 3.5 Active Alarms, continued 3.5.2 PWR Alarms The Alpha XM3-HP CableUPS detects alarms and displays the type of active alarm in the Smart Display screen and the severity of alarm (e.g., Major/Minor) by means of the Inverter Module LEDs (see Table 3-4). Alarm type Alarm Category SELF TEST FAIL Major LINE ISOLATION 3.0 Operation Active Alarm 82 Standby Disabled Probable Cause of Alarm Corrective action PWR Output voltage failed or batteries less than 1.
3.0 Operation, continued 3.5 Active Alarms, continued 3.5.3 BATT Alarms The Alpha XM3-HP CableUPS detects battery alarms and displays the type of active alarm in the Smart Display screen and the severity of alarm (e.g., Major/Minor) by means of the Inverter Module LEDs. Alarm Category Major BATT Probable Cause of Alarm Corrective action Standby Disabled Detected the absence of batteries (alarm inactive when battery capacity or number of battery strings is set to 0). 1. Check Batt Breaker 2.
3.0 Operation, continued 3.5 Active Alarms, continued 3.5.4 COMM Alarms The Alpha XM3-HP CableUPS detects communication alarms and displays the type of active alarm in the Smart Display screen and the severity of alarm (e.g., Major/Minor) by means of the Inverter Module LEDs. Active Alarm Alarm type Alarm Category Minor COMM RF POWER LVL FAULT SEE GENERAL MENU Probable Cause of Alarm Corrective action RF receive and/or transmit power levels are outside of optimal thresholds 1.
3.0 Operation, continued 3.6 Smart Display Glossary, continued Charger Mode: The mode of the battery charger which may be one of the following: OFF, TEST, BULK, ACCEPT, REFRESH, FLOAT, REST. Charger Temperature Compensation: Battery charger temperature compensation control. Programming this parameter to “0.0” disables temperature compensation. It is factory set for AlphaCell batteries (5mV/cell).
3.0 Operation, continued 3.6 Smart Display Glossary, continued Frequency Range Limit (setting may be increased when powering with AC Generator): AC input voltage frequency range limit. This limit establishes the acceptable input frequency range outside of which standby operation is initiated. Heater Mat Installed: If a battery heater mat is installed, this value can be programmed to Yes. The information is then available for the headend. IM ################: The serial number of the XM3 Inverter Module.
3.0 Operation, continued 3.6 Smart Display Glossary, continued Percent Load: The percentage of the output current versus the rated output current. Power Supply Priority Level: The operator may select the Power Supply priority level in context of its deployed location in the cable network. This setting is a reference for the customers only and does not affect the Power Supply performance. The settings are Normal (default), High, or Critical.
3.7 Automatic Performance Test Automatic Self Test: An automatic Self Test is periodically performed to verify the state of the batteries and the inverter circuitry. The automatic test feature has several programmable parameters that determine the frequency and duration of automatic tests. A running test may be halted manually by pressing the TEST button a second time. The automatic test feature is on by default. To turn auto-test off, change Test Interval to 0 days in the POWER CONFIG Menu.
3.0 Operation, continued 3.8 Providing Power via Portable Generator or Inverter In the event of an extended utility failure, an external AC or DC power source can provide backup power to the system. This backup power enables the Power Supply to continue charging the batteries ensuring uninterrupted service to the network. Follow the documentation and connection procedures listed below. 3.8.1 DC Powering The AlphaGen Portable Generator provides a convenient method of providing backup DC power.
3.0 Operation, continued 3.8 Providing Power via Portable Generator or Inverter, continued 3.8.2 AC Powering, continued 4. After the generator is properly grounded, unplug the Power Supply from the convenience outlet inside the enclosure and plug the Power Supply input cable into the generator output. Use an outdoor rated approved extension cord. Recommend min 12 AWG for 120V, 14AWG for 240V installations. 5. Start and operate the generator according to the generator operation manual. 6.
3.0 Operation, continued 3.9 Resumption of Utility Power WARNING! Use caution when disconnecting and reconnecting a generator to utility power. Dangerous voltages are present. CAUTION! Exercise care to ensure that both powering systems are not connected at the same time or damage to the Power Supply and the generator may result. 1. Before turning on the AC voltage input breaker, use a voltmeter to verify the input voltage is within specifications. 2.
4.0 Maintenance 4.1 Safety Precautions • Only qualified personnel should service the Power Supply. • Verify the voltage requirements of the equipment to be protected (load), the AC input voltage to the Power Supply (line) and the output voltage of the system prior to installation. • Equip the utility service panel with a properly rated circuit breaker for use with this Power Supply. • When connecting the load, DO NOT exceed the output rating of the Power Supply.
4.0 Maintenance, continued 4.3 Power Supply System Maintenance 4.3.1 Preparing for Maintenance The Power Supply system should be remotely monitored and physically inspected periodically. If the system has an automatic monitoring system to gather the electrical and environmental data, the remote checks should consist of evaluating the recorded data and visiting any site that does not meet the specifications listed in the detailed procedures below.
4.0 Maintenance, continued 4.3 Power Supply System Maintenance, continued 4.3.2 Periodic Maintenance Tasks, continued 4.3.2.2 On-Site Power Supply Preventive Maintenance, continued 3. Power Supply component inspection a. Before physical inspection of the Power Supply, verify normal operation on the XM3 Smart Display. Clear all Active Alarms before proceeding. b. Check physical condition of Power Supply; remove any dust or debris built up in or around openings. c.
4.0 Maintenance, continued 4.3 Power Supply System Maintenance, continued 4.3.2 Periodic Maintenance Tasks, continued 4.3.2.2 On-Site Power Supply Preventive Maintenance, continued 4. Inspect Inverter Module CAUTION! ALWAYS switch the battery breaker off before removing or installing the Inverter Module assembly. NOTE: Whenever the battery breaker is turned off or the batteries are not connected, the CableUPS automatically reports a No Battery alarm. This is a built in safety feature.
4.0 Maintenance, continued 4.4 Battery Maintenance WARNING! Lead-acid batteries contain dangerous voltages, currents, and corrosive material. Battery installation, maintenance, service, and replacement must only be performed by authorized personnel. 4.0 Maintenance 4.4.1 96 Battery Notes • Always refer to the battery manufacturer’s recommendation for selecting correct FLOAT, ACCEPT and REFRESH charge voltages and REST Mode setting. Failure to do so can damage the batteries.
4.0 Maintenance, continued 4.4 Battery Maintenance, continued 4.4.2 Battery Maintenance Guidelines Signs of battery cracking, leaking or swelling. The battery should be replaced immediately by authorized personnel using a battery of the identical type and rating (match conductance, voltages, and date codes as specified in this document). • Signs of battery cable damage. Battery cable should be replaced immediately by authorized personnel using replacement parts specified by vendor.
4.0 Maintenance, continued 4.4 Battery Maintenance, continued 4.4.3 Disposal, Recycling and Storage Instructions, continued During storage please note: • The self-discharge rate is related to ambient temperature. The lower the temperature, the less the discharge. Batteries should be stored in a clean, ventilated, and dry location with an ambient temperature of 32ºF to 68ºF (0ºC to 20ºC). • It is important to track open circuit voltage which is related to the density of the electrolyte.
4.0 Maintenance, continued 4.4 Battery Maintenance, continued 4.4.4 Capacity The actual capacity is related to the utilization ratio of the active positive and negative materials within the battery. The utilization ratio is influenced by the depth of discharge, the structure of the battery, and the manufacturing technology. During normal usage, the factors that influence the actual capacity are discharge rate, depth of discharge, end voltage, and temperature.
4.0 Maintenance, continued 4.4 Battery Maintenance, continued 4.4.6 Periodic Maintenance Tasks 4.4.6.
4.0 Maintenance, continued 4.4 Battery Maintenance, continued 4.4.6 Periodic Maintenance Tasks, continued 4.4.6.2 On-Site Battery Preventive Maintenance Required Equipment • True RMS Volt Meter with DC Amp Clamp • Midtronics Conductance Battery Tester Remote Status Monitoring Procedure Site Visit Battery String Float Current >0.5A Yes Maintenance Ensure Power Supply is in Float Mode Record Information on Site Visit Record No Disconnect Batteries 4.
4.0 Maintenance, continued 4.4 Battery Maintenance, continued 4.4.6 Periodic Maintenance Tasks, continued 4.4.6.2 On-Site Battery Preventive Maintenance, continued Procedure 1. Verify the Power Supply is in FLOAT mode. 2. Use the DC Amp clamp to measure and record each individual battery string’s float current. 3. If the individual string float current is greater than 0.5 amps, replace the battery string. Measure and record the individual battery conductance and voltage on the Site Visit Record. 4.
4.0 Maintenance, continued 4.4 Battery Maintenance, continued 4.4.6 Periodic Maintenance Tasks, continued 4.4.6.2 On-Site Battery Preventive Maintenance, continued Model Number Parameter 220 GOLD-HP 220GXL 195 GOLD-HP 195GXL Terminal Type Threaded Insert Threaded Insert Threaded Insert Threaded Insert Bolt Size 1/4"-20 UNC Bolt 1/4"-20 UNC Bolt 1/4"-20 UNC Bolt 10-32 UNC Bolt Annual Retorque Inch-Pounds / N•m 110In-lb / 12.4N•m 110In-lb / 12.4N•m 110In-lb / 12.4N•m 110In-lb / 12.
4.0 Maintenance, continued 4.4 Battery Maintenance, continued 4.4.7 Battery Refurbishment Plan Battery Refurbishment Plan Batteries Returned from Site. Measure and document 24 hour Open Circuit Voltage (OCV). (Must occur within 24 hours of removal from charger) No Measure Conductance Does battery meet the minimum conductance values per Table 4-2? Yes Maintenance Measure Battery Voltage No Measure Battery Voltage Does battery meet the minimum of 12.6 Volts for the 24 hour OCV? Yes 4.
4.0 Maintenance, continued 4.4 Battery Maintenance, continued 4.4.8 Battery Evaluation Procedures for AlphaCell Batteries To help identify batteries approaching end of life in an operating power system, the following test should be performed at each maintenance interval. For accuracy, tests must be performed on fully charged batteries. Conductance/Impedance Test – Measure the conductance of each battery.
4.0 Maintenance, continued 4.0 Maintenance, continued 4.5 XM3-HP System Preventive Maintenance Log 4.
5.0 Shut Down The Alpha XM3-HP CableUPS contains more than one live circuit. During an emergency, utility power can be disconnected at the service entrance or main electrical panel to protect emergency personnel. However, power is still present at the output. To prevent the possibility of injury to service or emergency personnel, always follow this procedure to safely shutdown the Power Supply. Emergency Shutdown Procedure: Switch Battery Breaker OFF.
Specifications (Alpha XM3-HP CableUPS North American Models) North American Models: 908HP 910HP 915HP 918HP 918D-HP Nominal AC Input Voltage 120VAC 120VAC 120VAC, 240VAC 120VAC, 240VAC 120VAC, 240VAC Nominal Input Frequency 60Hz 60Hz 60Hz 60Hz 60Hz Input Frequency Tolerance (%) ±3 ±3 ±3 ±3 ±3 Input Voltage Operating Range Tolerance (%) -25 / +15 -25 / +15 -25 / +15 -25 / +15 -20 / +15 Input Voltage Range (VAC) 90-138 90-138 90-138, 173-276 90-138, 173-276 96-138, 192-276
Specifications, continued (Alpha XM3-HP CableUPS International Models) International Models: Parameters Nominal AC Input Voltage (VAC) Nominal Input Frequency (Hz) Input Frequency Tolerance (%) Input Voltage Operating Range Tolerance (%) Output Voltage (VAC) Output Voltage Regulation Maximum Rated Output Current (Amps) Maximum Output Power (VA) Line Mode Efficiency (%) Standby Efficiency (%) Bulk Charger Current (Amps @ 80% Load & Nom line) Battery Voltage (VDC) 915M-HP 915P-HP 910E-HP 915E-HP 615CE-HP
Safety and EMC Compliance The Alpha XM3-HP CableUPS is certified over a wide range of North American and International safety and EMC specifications as indicated below. Model Input VAC Safety Certification EMI/EMC XM3-908/910/915HP 110-127V 60Hz UL/CSA 60950-1, UL 1778, CSA 107.3 BSMI (for 908/915) FCC CFR47 Part 15 Class A, ICES-003, BSMI XM3-918HP/918D-HP 120V 60Hz / 240V 60Hz (918D-HP only) UL/CSA 60950-1, UL 1778, CSA 107.
Optional Surge Protector - (plugged into upper receptacle of parallel-wired outlet) Replaceable Primary Power Supply Overvoltage protection 017-882-B0-001 Rev. C2 (10/2013) 3 1 4 Earth Ground (Enclosure) 1 2 3 EMI Filter Board TAP RELAY 2 TAP RELAY 1 Relay Control Transformer Chassis Ground 63 Vac 89 Vac Inverter Appendix (+) AC Output Connectors Output 1B Output 1A (-) Battery CB AC Line Detector and Control Logic Circuits Fig.
Battery Spacer Clips Convection airflow battery cooling relies on proper spacing of batteries installed in the enclosure. Consistent spacing is achieved by the use of Alpha's Battery Spacer clips. These easy-to-install clips snap over the tops of AlphaCell batteries allowing for optimal airflow. For domestic applications, use one battery clip per 36V battery string for optimal spacing. For international applications, use two clips per 36V battery string.
System Options These options can be factory installed or upgraded in the field by the user: Local and Remote Indicator (LRI) The red LRI lamp is located on the outside of pole-mount enclosures. Using this simple form of status monitoring operators can check the operational status of the Power Supply without having to climb the pole and open the enclosure. During normal AC line operation, the LRI remains off. The LRI comes on only when the Power Supply is running in standby mode.
Alpha Technologies Inc. 3767 Alpha Way Bellingham, WA 98226 United States Tel: +1 360 647 2360 Fax: +1 360 671 4936 Alpha Technologies Ltd. 7700 Riverfront Gate Burnaby, BC V5J 5M4 Canada Tel: +1 604 436 5900 Fax: +1 604 436 1233 Toll Free: +1 800 667 8743 Alpha TEK ooo Khokhlovskiy Pereulok 16 Stroenie 1, Office 403 Moscow, 109028 Russia Tel: +7 495 916 1854 Fax: +7 495 916 1349 Alpha Technologies Europe Ltd.